
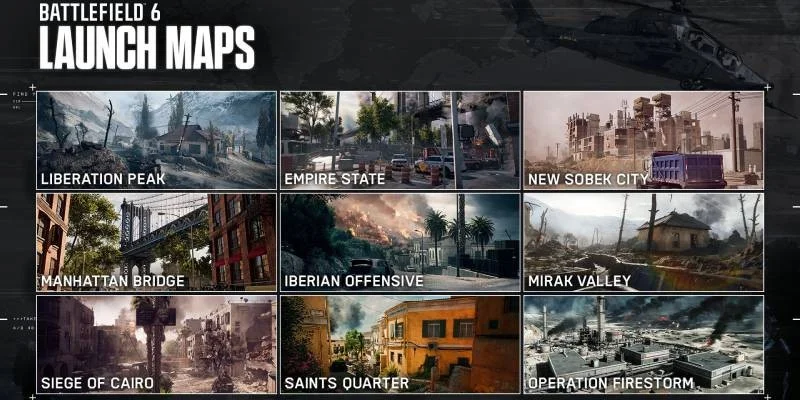
Battlefield 6 returns to modern warfare with nine maps spread across four global theaters. Each battlefield features unique combat zones designed for different game modes, from close-quarters infantry fights to massive combined arms battles. This guide covers every launch map, their strategic elements, and the best approaches for different playstyles.
How Battlefield 6's Maps Work
Battlefield 6 takes a smarter approach to map design with hand-crafted Combat Zones that change based on your game mode. Each map adapts its playable area and vehicle availability depending on whether you're playing Conquest, Breakthrough, Rush, Team Deathmatch, Squad Deathmatch, Domination, King of the Hill, or the new Escalation mode. This means every map feels purposefully built for each mode instead of awkwardly scaled down.
The nine launch maps span five major locations: Brooklyn, the Cairo region, Gibraltar, Tajikistan, and one remastered classic. Each location offers distinct environments that directly impact how battles play out and what tactics work best.
New York Theater: Urban Warfare in Brooklyn
Empire State - Pure Infantry Combat
Empire State strips out all vehicles and focuses entirely on foot soldier combat in Brooklyn's streets. This map is all about infantry positioning and building control.
How to Win: Success comes down to controlling key buildings and understanding vertical positioning. Since there's no vehicle threat, you can focus entirely on infantry tactics. Learn the building layouts and always have multiple escape routes planned. The dense urban environment can trap you fast if you're not careful.
SMGs and shotguns dominate here, but don't sleep on assault rifles for longer sight lines between buildings. Engineers become less important without vehicles, so consider running more medics and support classes.
Manhattan Bridge - Mixed Urban Combat
Manhattan Bridge brings vehicles back to Brooklyn, creating a more complex battlefield where you need to worry about both infantry and armor threats.
How to Win: You'll need to balance infantry positioning with vehicle awareness. Helicopters change everything here, making anti-air capabilities crucial for ground teams. The destruction system means important buildings can disappear mid-fight, so don't get too attached to any single position.
Ground vehicles work best when supported by infantry, while helicopter pilots can dominate if the enemy team doesn't coordinate their anti-air response. For infantry players, always keep one eye on the sky and know where the nearest cover is.
Egyptian Theater: Desert and Urban Combat
Siege of Cairo - Tank vs Infantry Warfare
Set in central Cairo's neighborhoods, this map creates intense urban combat where tanks and infantry must work together closely. The narrow streets make tanks powerful but vulnerable.
- Excellent infantry-armor cooperation gameplay
- Multiple building entry points
- Natural chokepoints for tactical play
- Great for learning urban combat
- Limited vehicle escape routes
- Easy to get trapped in narrow alleys
- Requires constant communication
- Vulnerable to RPG ambushes
How to Win: Tanks become sitting ducks without infantry support in these narrow streets. If you're in armor, stick close to friendly infantry and use buildings for cover. As infantry, anti-tank loadouts are essential, but you'll also need gear for close-quarters building fights.
Available in Conquest, Deathmatch, and Breakthrough modes. Conquest spreads the action across different districts, while Breakthrough creates focused chokepoints where teamwork matters most.
New Sobek City - Combined Arms Desert Fighting
Located on Cairo's outskirts, this map mixes construction zones with open desert terrain. You'll get the full combined arms experience here.
Optimal Combat Flow
Infantry holds construction areas while armor provides breakthrough power and helicopters offer reconnaissance and close air support.
How to Win: Infantry holds the construction areas while armor provides breakthrough power and helicopters offer reconnaissance and close air support. Success requires coordination across all domains.
The construction yard creates semi-urban fighting while the desert areas let vehicles really stretch their legs. Learn to transition between close-quarters construction combat and open-field vehicle warfare depending on where the action moves.
Gibraltar Theater: Mediterranean Coastal Combat
Iberian Offensive - Urban Tactical Fighting
Set in Gibraltar's coastal areas, this map focuses on tactical positioning and urban maneuvering with limited vehicle support.
| Vehicle Type | Availability | Tactical Role |
|---|---|---|
| Light Vehicles | Yes | Quick transport and flanking |
| Main Battle Tanks | Yes | Area control and fire support |
| Aircraft | No | Not available |
How to Win: The vehicle-urban combination creates opportunities for both mobile and defensive tactics. You can establish strong defensive positions while maintaining the ability to launch quick vehicle-supported attacks on objectives.
Available for Deathmatch and Domination modes. The grid layout makes navigation easier than other urban maps, but you still need to understand the key chokepoints and alternative routes.
Saints Quarter - Close-Quarters Infantry Fighting
Located in Gibraltar's historic Old Town, Saints Quarter delivers intense close-range combat in a highly destructible environment.

How to Win: The destruction system lets you create new doorways, eliminate cover, and completely change the battlefield mid-fight. Successful players adapt to the changing environment and use destruction as a tactical tool.
Combat distances heavily favor close-range weapons. Master your SMG and shotgun skills, and learn how to use environmental destruction for tactical advantage rather than just blowing things up randomly.
Tajikistan Theater: Mountain Warfare
Liberation Peak - Full Combined Arms Combat
Set in Tajikistan's mountains, Liberation Peak offers the most diverse combined arms experience in the launch lineup. This is where all vehicle types come together.
Performance at Different Difficulty Levels
How to Win: Liberation Peak is currently the only map with jet access, making it crucial for air superiority gameplay. Success requires coordination between infantry holding positions, armor providing mobile fire support, helicopters offering close air support, and jets maintaining air dominance.
Available for Conquest, Breakthrough, and Domination. Each mode emphasizes different aspects of the mountain environment.
For pilots, the mountain terrain offers excellent cover for helicopter operations and creates interesting engagement opportunities for jet combat.
Classic Battlefield Experience
Operation Firestorm - Remastered All-Out Warfare
This beloved Battlefield 3 map returns with modern updates while keeping its reputation as the ultimate combined arms experience.
Represents traditional Battlefield philosophy where every combat element works together in perfect combined arms harmony.
How to Win: Operation Firestorm represents traditional Battlefield philosophy where every combat element works together. Infantry secures and holds key positions while vehicles provide mobility, fire support, and area control.
For players wanting the classic Battlefield experience, this delivers the most complete tactical environment. You'll need to understand traditional combined arms principles and coordination between different roles and vehicle types.
Tajikistan Extended Operations
Mirak Valley - Maximum Scale Warfare
The largest map at launch, Mirak Valley provides the ultimate Battlefield 6 combined arms experience with every vehicle type available.
Mirak Valley Strategy
Secure key strongpoints and establish vehicle spawns. Air superiority becomes crucial early to protect ground operations.
Push for map control using combined arms. Infantry secures trenches while armor and air support coordinate breakthrough attempts.
Focus on objective control and denying enemy reinforcement routes. Use the trench network for protected movement during final pushes.
How to Win: Mirak Valley's size and vehicle diversity create the most complex tactical environment in Battlefield 6. You'll need to understand large-scale battlefield coordination while maintaining individual combat effectiveness.
Despite the vehicle emphasis, infantry remains crucial through the trench network. These underground positions provide concealed movement and protected firing positions, but you need constant awareness of threats from multiple directions including air attacks.
Choosing Maps by Game Mode
Best Maps by Mode
| Game Mode | Recommended Maps | Key Features | Skill Level |
|---|---|---|---|
| Conquest | Liberation Peak, Siege of Cairo | Combined arms coordination | Intermediate |
| Breakthrough | Liberation Peak, Siege of Cairo | Vertical assault/defense | Advanced |
| Infantry Only | Empire State, Saints Quarter | Pure close-quarters combat | Beginner |
| Vehicle Heavy | Operation Firestorm, Mirak Valley | Large-scale combined arms | Expert |
Best Conquest Maps
- Liberation Peak: Combined arms coordination across elevation changes
- Siege of Cairo: Urban control point management with armor support
- Iberian Offensive: Urban positioning with limited vehicle integration
Best Breakthrough Maps
- Liberation Peak: Vertical assault/defense across mountain terrain
- Siege of Cairo: Urban breakthrough requiring infantry-armor coordination
Pure Infantry Maps
- Empire State: Complete infantry focus in urban environment
- Saints Quarter: Close-quarters combat with destructible elements
Vehicle-Heavy Maps
- Operation Firestorm: Classic large-scale vehicle warfare
- Mirak Valley: Maximum scale combined arms combat
- Liberation Peak: Air superiority combined with ground operations
Map Recommendations by Skill Level
Best Maps for Different Skill Levels
Beginner-Friendly
- Siege of Cairo: Limited vehicle types reduce complexity while keeping combined arms elements
- Iberian Offensive: Predictable urban layout with moderate vehicle integration
- Saints Quarter: Pure infantry combat without vehicle complications
Intermediate Complexity
- Manhattan Bridge: Urban combat with helicopter integration
- New Sobek City: Mixed terrain combined arms without air superiority complications
- Empire State: Urban infantry combat with environmental destruction
Advanced Combined Arms
- Liberation Peak: Full combined arms with air superiority elements
- Operation Firestorm: Classic large-scale coordination requirements
- Mirak Valley: Maximum complexity across all combat domains
Beta Insights and Player Feedback
Beta testing revealed some clear standouts among the maps. Liberation Peak consistently gets praise for its combined arms balance and diverse engagement opportunities. The integration of air vehicles with ground combat creates engaging scenarios without any single domain overwhelming the others.
Siege of Cairo works well as an urban combat training ground, providing intense infantry-armor interactions without air threat complexity. This makes it accessible for players learning urban combat principles.
Iberian Offensive offers moderate complexity that's good for players transitioning between pure infantry and combined arms gameplay, though it lacks distinctive characteristics compared to other urban environments.

Battlefield 6's nine launch maps deliver a solid foundation for the return to modern warfare. Whether you're diving into close-quarters Brooklyn street fights or commanding jets over Tajikistan's mountains, each map brings something different to the table.
The standout has to be Liberation Peak with its full combined arms experience and jet combat. Operation Firestorm brings back that classic Battlefield feeling, while maps like Empire State and Saints Quarter give pure infantry players their own playgrounds. Even the urban vehicle maps like Manhattan Bridge and Siege of Cairo create interesting tactical puzzles.
With the open beta giving players a taste of what's coming, it's clear DICE has focused on creating maps that actually feel different from each other rather than just reskinning the same formula. That's exactly what Battlefield needed after some of the franchise's recent struggles with map design.