
Why Your Controller Setup Actually Matters
Your controller configuration in Battlefield 6 can make the difference between frustrating deaths and satisfying kills. The game gives you tons of customization options, and getting them right means you'll move better, aim faster, and control vehicles without constantly crashing into trees.
This guide covers everything you need to know about setting up your controller for maximum performance. We'll walk through the must-have settings and explain why they work.
Finding the Controller Settings
Jump into the main menu and look for the cog icon at the top of your screen. Click it to open Settings, then select Controller from the left side menu.
You'll see a picture of your current controller layout with two main options: "Edit Presets" and "Edit Settings." Both are important, but we'll tackle presets first.
Setting Up Your Controller Presets
Understanding the Preset System
Battlefield 6 has six different controller schemes you can tweak through the preset editor. You can reassign buttons for each action, dive into individual keybind changes, or apply different setups for various situations.
Why Alternate Makes Sense
The Alternate preset swaps some key buttons around in smart ways:
- Melee gets moved to B/Circle. This feels more natural and matches what most shooters do.
- Crouch/Prone goes to the right joystick in the Soldier scheme. You can drop shot or slide without taking your thumbs off the sticks.
- Most FPS players already use this setup, so if you're coming from other games, it'll feel familiar right away.
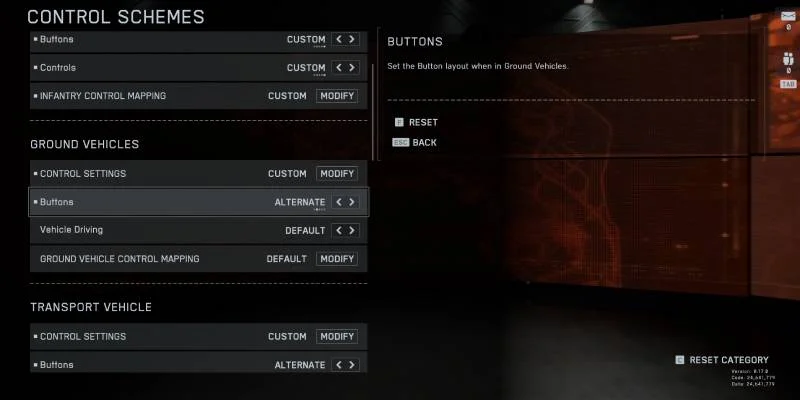
Vehicles Need This Setup Even More
The Alternate preset becomes crucial when you hop in vehicles:
For ground vehicles and aircraft, the left joystick switches from forward/backward movement to turn/yaw controls. This makes flying helicopters and jets way less frustrating. You'll crash less and actually enjoy piloting instead of fighting the controls.
You can stick with default for infantry combat if you really want to, but don't switch back for vehicles and aircraft. Trust me on this one.
Dialing In Your Control Settings
After you've got your presets sorted, click "Edit Settings" to access the detailed options. Head to "Control Settings" in the Infantry section first, since this covers how your character moves, aims, and shoots.
Getting Your Aim Right
| Setting | Recommended Value | Why This Works |
|---|---|---|
| Infantry Aim Sensitivity | 30-40 | Responsive aiming without going crazy |
| Field of View | 105-110 | Better peripheral vision and awareness |
| Zoom Sensitivity Coefficient | 177.8 | Consistent sensitivity across scopes |
| Infantry Aim Assist | 100 | Maximum help for controller players |
| Infantry Aim Assist Slowdown | 100 | Full sensitivity reduction near targets |
| Infantry Aim Assist Zoom Snap | 50 | Moderate auto-aim when scoping |
Additional Aim Settings
- Soldier Aim Input Curve: Standard - Stick with Standard unless you've played other Battlefield games extensively
- Stick Input Acceleration Presets: Standard - Keeps things predictable across all your stick movements
- Aiming Left/Right Acceleration: 60 - Balanced horizontal movement for smooth target tracking
Movement Settings That Work
Sprint gives you more control but requires more inputs. Autosprint is easier on your hands but takes away some precision. Pick based on whether you prefer control or comfort.
Advanced Movement Options
- Crouch Toggle Sprint: Stand - Determines what happens when you let go of crouch while sprinting
- Vault Over Sprint: On - Automatically vaults over low obstacles while sprinting
- Slide: Leave empty - Prevents accidental slides that can get you killed
- Crouch Slide: All - Lets you slide from any crouched position
- Double Tap Crouch For Sprint Slide: On - Advanced movement technique for experienced players
Zoom and Scoping Options
Additional zoom settings:
- Zoom: Personal preference - Set this however feels comfortable to you
- Steady Scope: Click Left Joystick - Assigns breath holding to left stick click
- Infantry Zoom Aim Sensitivity: 80 - Keeps scoped aiming responsive without being twitchy
- 1.25x Zoom Aim Sensitivity: 80 - Same sensitivity for low-magnification optics
Other Important Settings
- Interact & Reload: Prioritize Interact - Stops you from accidentally reloading when trying to revive teammates
- Skip Revive: Hold - You have to hold the button to skip being revived
- Request Revive: Hold - Hold to ask for help from teammates
- Mount Breakout: Instant - Get off mounted weapons quickly when you need to move
- Interacts: Off - Reduces screen clutter from interaction prompts
The other control sections (Ground Vehicles, Transport Vehicles, Aircraft) are mostly fine at their defaults, but feel free to browse through them and adjust anything that feels off.
Fine-Tuning Your Controller Hardware
Scroll down to the "Other" section in the Control Schemes menu and select "Controller Tuning." These hardware-level adjustments can make a huge difference in how responsive your controller feels.
Vibration Settings
- Better aim precision
- No disruption during firefights
- Competitive advantage
- Consistent controller feel
- More immersive experience
- Feedback for actions
- Enhanced campaign feel
- Traditional gaming experience
Recommendation: Turn vibration off for competitive play. Vibration can throw off your aim during intense firefights. Only keep it on if you really enjoy the feedback.
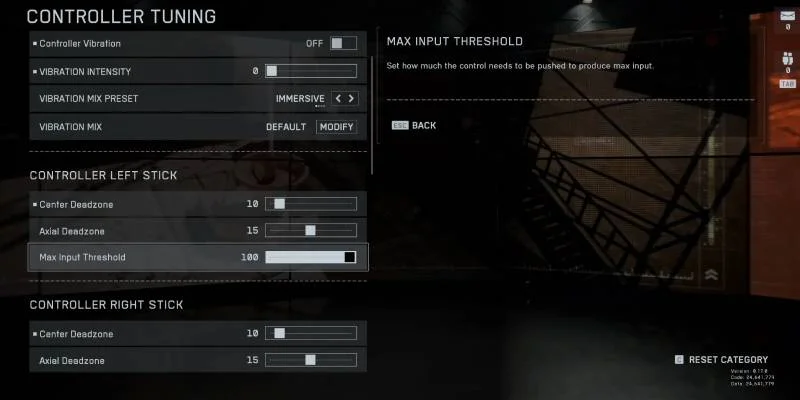
Left Stick Setup
| Setting | Value | Purpose |
|---|---|---|
| Center Deadzone | 5 | Start here and bump up if controller has stick drift |
| Axial Deadzone | 10 | Prevents weird diagonal movement issues |
| Max Input Threshold | 80 | Gives you more controlled character movement |
Right Stick Setup
| Setting | Value | Purpose |
|---|---|---|
| Center Deadzone | 5 | Start at 5 and increase if you get stick drift |
| Axial Deadzone | 10 | Makes sure diagonal aiming works properly |
| Max Input Threshold | 100 | Full sensitivity for maximum precision and speed |
Trigger Configuration
- LT Deadzone: 0
- LT Max Input Threshold: 100
- RT Deadzone: 0
- RT Max Input Threshold: 100
Zero dead zones on both triggers for instant response. This is crucial for quick aim-down-sights and immediate firing.
Advanced Features
The menu also has Gyro and Flick settings. Leave these alone unless you actually plan to use gyroscopic aiming or flick techniques. For normal controller play, the defaults work fine.
How to Set Everything Up
- Set your presets first - Get that Default/Alternate combination locked in
- Move to Infantry Control Settings - Input all the recommended values
- Finish with Controller Tuning - Set up your deadzones and trigger response
- Test in practice matches - Jump into some games to see how everything feels
- Make small adjustments - Tweak sensitivity or deadzones based on your experience
When to Adjust These Settings
These settings work great for most players, but you might need to make some changes:
- Sensitivity values can go higher or lower within the suggested ranges depending on your playstyle
- Deadzone settings might need to increase over time as your controller gets more wear
- Aim assist can be lowered if you want more manual control
What to Expect
With these settings dialed in, you should notice:
- More consistent aiming across different situations
- Way better vehicle handling, especially aircraft
- Less input lag and fewer dead zones
- Overall snappier response in all game modes
Keeping Your Settings Current
Your controller setup isn't set-and-forget. You'll want to revisit these settings when:
- Your controller starts developing stick drift
- Game updates change how things feel
- You get better and want different sensitivity levels
- The community discovers new techniques or configurations
Check back on your settings every few weeks and make small adjustments. A well-tuned controller setup will keep paying dividends throughout your entire Battlefield 6 experience.