
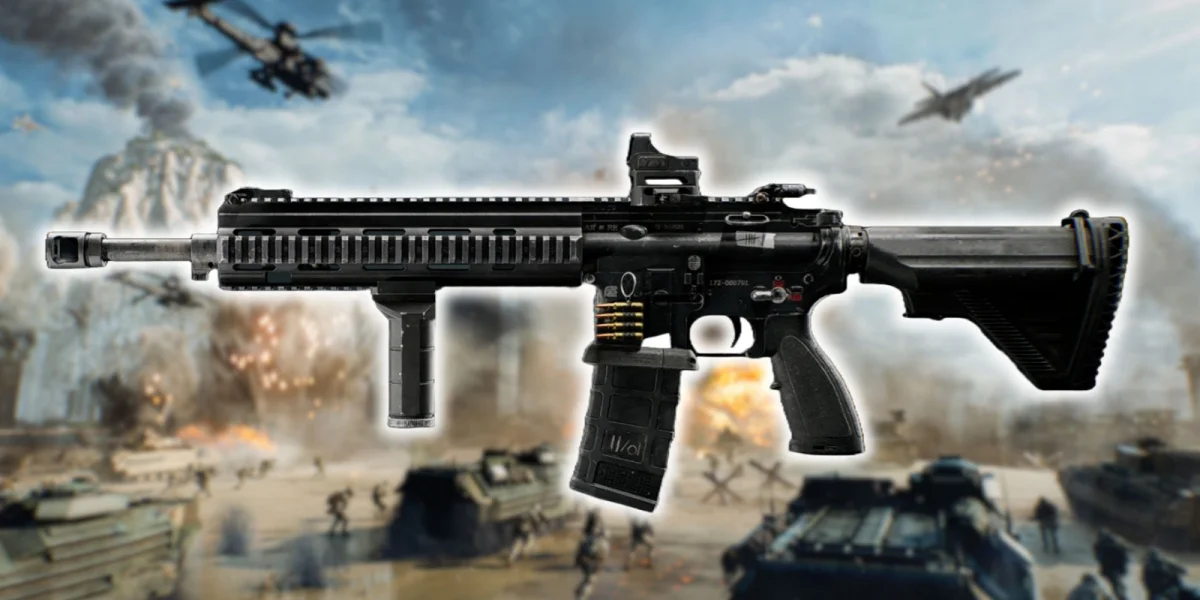
The DRS-IAR is one of the most talked-about weapons in Battlefield 6, and it earns the reputation. It sits in a unique spot between an LMG and an assault rifle, offering a mix of stopping power, fire rate, and flexibility that most weapons can't match. Out of the box it can feel underwhelming, since the default attachments do almost nothing to control its kick or play to its strengths. Build it right, though, and the DRS-IAR starts dominating at multiple ranges.
This guide covers the base stats, the damage profile, why synthetic tips are so central to this weapon, and five distinct build paths ranging from a flexible suppressed setup to a dedicated semi auto DMR configuration. There's no single best build, and what works best depends on your playstyle. The goal is to help you understand each option and find the one that fits.
DRS-IAR Base Stats
Here's what you're working with before any attachments.
| Stat | Value |
|---|---|
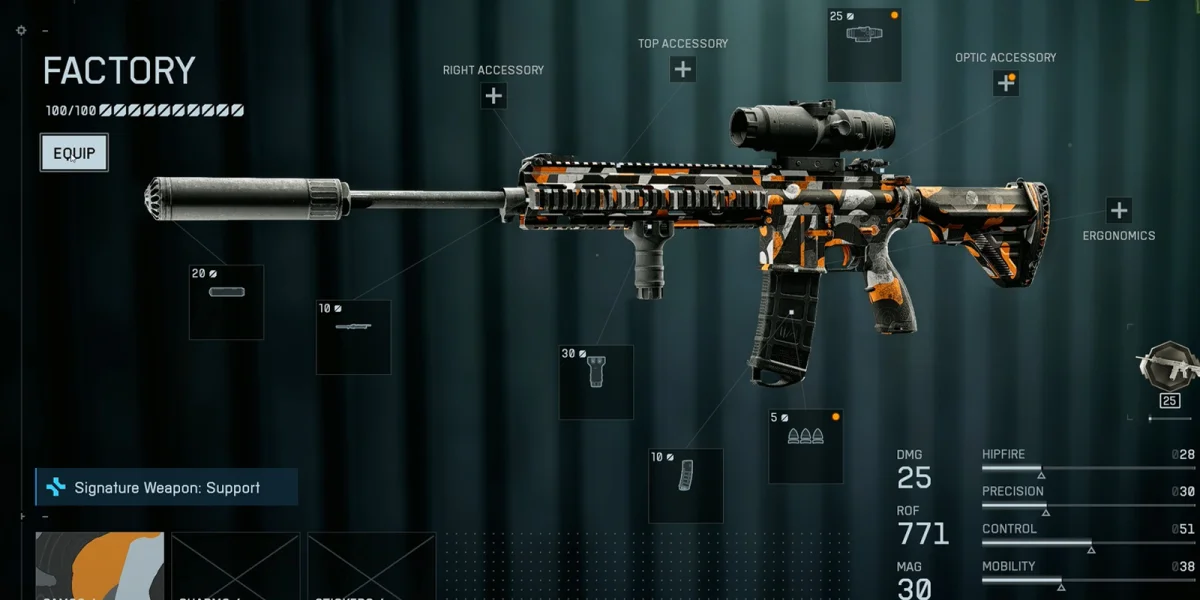
| Damage | 25 (body) |
| Rate of Fire | 771 RPM |
| Magazine | 30 rounds |
| ADS Speed | 367 ms |
| Reload Speed | 2.467 seconds |
| Muzzle Velocity | 720 m/s |
| Headshot Multiplier | x1.34 |
| Hipfire | 46 |
| Precision | 29 |
| Control | 46 |
| Mobility | 40 |
The 367 ms base ADS speed is on the slower side, a reminder that this is technically an LMG. The right barrel and underbarrel combination can push that down to 250 ms, putting the DRS-IAR in assault rifle territory for handling. That transformation is one of the weapon's defining features.
Damage Model
The DRS-IAR uses a three zone damage drop-off structure, which gives it a real edge over weapons that bleed damage steadily across distance. Because damage holds within defined brackets, it's more reliable at medium range than most of its competition.
Damage Zones
| Zone | Range | Body Damage | Shots to Kill |
|---|---|---|---|
| Zone 1 - Close Range | 0 to 21 meters | 25 | 4 body shots |
| Zone 2 - Mid Range | 21 to 75 meters | 20 | 5 body shots |
| Zone 3 - Long Range | 75+ meters | 17 | 6 body shots |
The mid range window from 21 to 75 meters is where the DRS-IAR really shines. That's a large bracket of consistent 20-damage hits, making it competitive against weapons that are purpose built for medium distances.
Time to Kill (TTK)
TTK in Battlefield 6 is based on bullets that land, not on whether they're headshots or body shots.
| Bullets to Kill | TTK |
|---|---|
| 3 bullets | 155 ms |
| 4 bullets | 233 ms |
| 5 bullets | 311 ms |
| 6 bullets | 389 ms |
A 155 ms three bullet TTK is extremely fast. At 771 RPM the DRS-IAR cycles those three rounds quickly, and as covered below, this gets even nastier when synthetic tips are in the mix. The DRS-IAR shares this 25 base damage profile with the QBZ-192 and the PW5A3, but it fires faster than either of them, which is exactly why the synthetic tip interaction hits so hard.
Why Synthetic Tips Are Worth It
Synthetic tips deal increased damage to the head. On most weapons, the benefit is incremental. On the DRS-IAR, the combination of 771 RPM, 25 base damage, and the headshot multiplier adds up to something specific: a three shot headshot kill out to 75 meters.
Close Range (0 to 21 meters) with Synthetic Tips
At close range, a headshot deals 44 damage. You're still looking at a three shot kill, but the extra head damage makes cleanup easier since the extra damage pushes well past the kill threshold even at point blank range.
Mid Range (21 to 75 meters) with Synthetic Tips
This is where the DRS-IAR performs at its ceiling. The three headshot kill stays active all the way out to 75 meters. Dropping someone at 60 or 70 meters in three shots at 155 ms TTK is about as fast as infantry combat gets in this game.
Beyond 75 Meters with Synthetic Tips
Past 75 meters, the three shot headshot kill falls off. You can still beat the base six shot body kill with mixed combinations, though. Three headshots and one body gets you a four bullet kill, and two headshots and three bodies brings it to five. Burst firing at this range is the right call regardless.
The Consistency Requirement
Synthetic tips are expensive in attachment points, which means other attachments need to do less heavy lifting. The DRS-IAR handles this well because its recoil traits let it accept synthetic tips without much supporting infrastructure. Two things to understand about how it behaves:
- The weapon tends to climb toward the top right.
- The first three bullets group closely together.
Those tightly grouped first three shots are what make synthetic tips so effective. You're not gambling on a spray. You're relying on the weapon's natural tendency to keep early rounds on target, and a small correction toward the bottom left is usually all the input required.
Attachment Overview
The DRS-IAR has one of the widest attachment selections in the game. Here's a breakdown of each category.
- Flash Hider: Reduces flash intensity and fully hides enemy spotting while firing. No recoil modification.
- 5-Point Brake: Cuts horizontal recoil by roughly 10 to 15%. Adds minor weapon sway.
- 10-Point Brake: Similar horizontal recoil reduction to the 5-Point, without the added sway.
- Compensated Brake (20 pts): Cuts both vertical and horizontal recoil by around 15%. Noticeably tightens the grouping of early bullets.
- Standard Suppressor (20 pts): The entry level suppressor. Keeps you off the minimap with baseline recoil support.
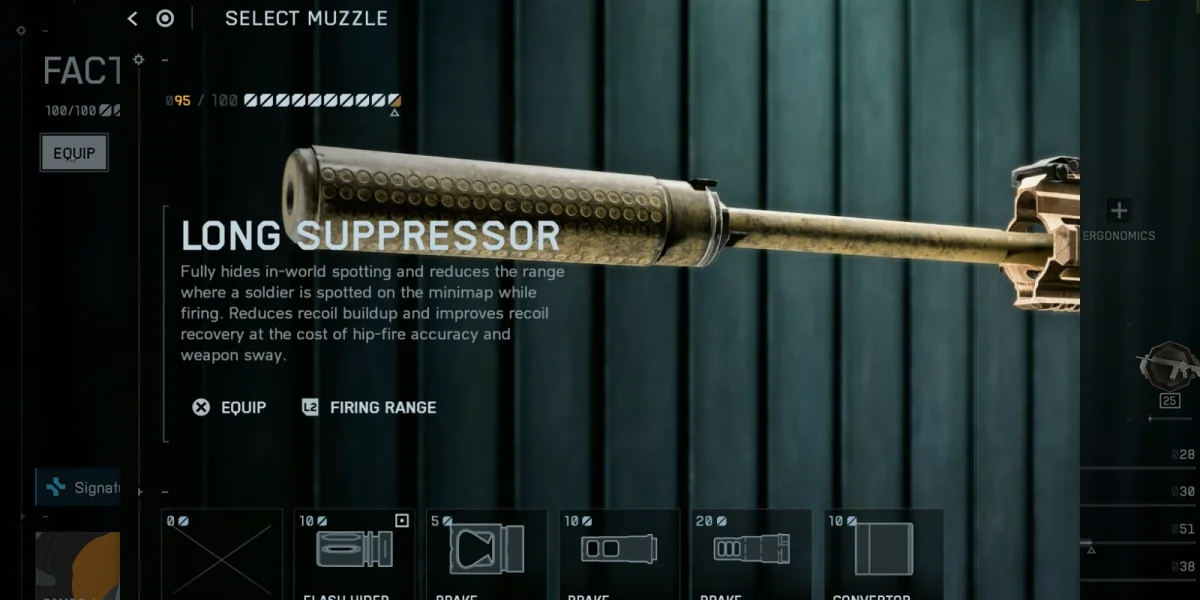
- Long Suppressor (25 pts): Reduces recoil buildup over sustained fire, so vertical recoil stays more controlled the longer you hold the trigger. Keeps you off the minimap. Strong all around pick.
- Lightened Suppressor (30 pts): Similar sustained fire recoil reduction to the Long Suppressor.
- Basic Barrel: No changes to velocity or ADS speed.
- 20" LE Barrel: Raises projectile velocity to 900 m/s and improves ADS speed.
- 20" SDM-R Heavy Extended: Also pushes velocity to 900 m/s with a focus on accuracy and precision, at the cost of ADS speed.
- Light 16.5" Fluted (20 pts): Improves ADS speed and ADS accuracy while moving.
- Low-Profile Stubby (45 pts): Cuts recoil and improves ADS speed with a cost to ADS accuracy while moving. Pushes ADS time to 250 ms when paired with the right barrel. Delivers the same recoil reduction as the Classic Vertical while adding the ADS speed bonus.
- Classic Vertical (35 pts): Standard recoil reduction without the ADS speed bump.
- 6H64 Vertical: Heavy recoil reduction with significant gains to precision and control. Costs ADS accuracy while moving and slows ADS speed. Best for stationary or deliberate play.
- Hand Stop (15 pts): Minor recoil help. Paired with the right barrel, still gets you to 250 ms ADS.
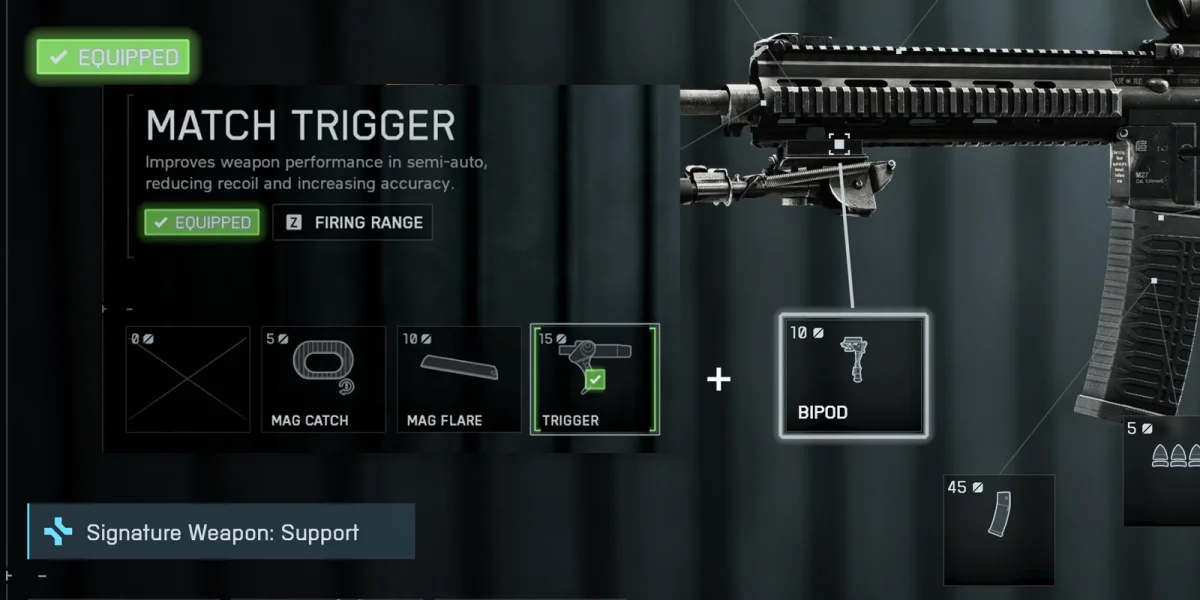
- Bipod: Greatly cuts recoil when mounted. Best on the semi auto DMR build.
- 30-Round Magazine (Standard)
- 36-Round Magazine
- 40-Round Fast Magazine: Reasonable point cost with extra capacity.
- 30-Round Fast Magazine: Faster reloads at standard capacity.
- 10-Point Fast Magazine: Budget fast mag option.
- Standard Ammo: Baseline option.
- Synthetic Tips: Increased headshot damage. Central to the weapon's high damage ceiling.
- FMJ: Improved material penetration.
- Match Trigger: Switches the weapon to semi auto. Cuts horizontal recoil significantly and lowers vertical recoil in semi auto mode.
- 50MW Blue Laser: Small improvements to hipfire accuracy and ADS accuracy while moving.
- Rail Cover: Speeds up weapon draw, so you bring the gun up faster when switching.
Build 1: The Greed Build
It's called the greed build because it stacks advantages rather than compromising, and it does require some consistency to pay off.
| Slot | Attachment |
|---|---|
| Muzzle | Flash Hider |
| Barrel | 20" LE Barrel |
| Underbarrel | Low-Profile Stubby |
| Magazine | 36-Round Magazine |
| Ammunition | Synthetic Tips |
| Optic | Mini Flex or any preferred sight (2.5x, 3x, etc.) |
The flash hider hides enemy spotting while firing without costing as many points as a suppressor, freeing up budget for the barrel. The 20" LE barrel pushes velocity to 900 m/s and improves ADS speed. Combined with the Low-Profile Stubby, ADS time drops to 250 ms, on par with what you'd expect from a carbine. The 36-Round Magazine gives you more shots before reloading, and synthetic tips bring the three shot headshot kill out to 75 meters.
All the stats the DRS-IAR can reach at its peak are accounted for here: 900 m/s velocity, 250 ms ADS, enemy spotting hidden, and maximum damage potential.
Build 2: The Fallback Build
This is the setup to come back to when you want something consistent. It's not a specialist configuration, and it covers most situations well across all ranges. Suitable for all skill levels, centered on versatile, suppressed, reliable play at any range. When in doubt, this is where to start.
| Slot | Attachment |
|---|---|
| Muzzle | Long Suppressor |
| Barrel | Basic Barrel |
| Underbarrel | Low-Profile Stubby |
| Magazine | Standard 30-Round Magazine |
| Ammunition | Standard |
| Optic | Personal preference |
The Long Suppressor is the centerpiece. It reduces recoil buildup during sustained fire, so the weapon gets more stable as you hold the trigger, and it keeps you off the minimap. The Low-Profile Stubby gives you the same recoil reduction as the Classic Vertical but adds an ADS speed bump, bringing the weapon to 250 ms. You end up with a 59 control / 29 precision stat spread at 250 ms ADS without touching the barrel at all.
Velocity is the trade off, since the basic barrel doesn't reach the 900 m/s of the 20" LE. To get both the extra velocity and suppression, swap to the Standard Suppressor and the 20" LE barrel. You lose the sustained fire recoil stability but gain faster bullet speed. Both options work.
Build 3: The Stationary Powerhouse
This is the build for players willing to trade mobility for raw accuracy. It's not a flanking or rushing setup, and it's designed for holding positions, watching angles, and beating opponents at range. Best for intermediate players focused on defensive, lane-holding, support-oriented play at medium to long range. You give up suppression and drop back to the 367 ms base ADS speed, but the shot consistency is a real payoff.
Primary Variant (Synthetic Tips)
| Slot | Attachment |
|---|---|
| Muzzle | Compensated Brake |
| Barrel | 20" SDM-R Heavy Extended |
| Underbarrel | 6H64 Vertical |
| Magazine | Standard |
| Ammunition | Synthetic Tips |
| Optic | Personal preference |
The Compensated Brake applies a heavy reduction to both horizontal and vertical recoil, making the first three bullets group even tighter than they do by default. That's exactly what you want when relying on synthetic tips for the three shot headshot kill. The 6H64 Vertical adds more precision and control on top of that. The 20" SDM-R Heavy Extended barrel pushes velocity to 900 m/s and tightens accuracy, rounding out a setup built entirely around putting shots where you're aiming.
Secondary Variant (Maximum Control, No Synthetic Tips)
To push control even further without synthetic tips:
| Slot | Attachment |
|---|---|
| Muzzle | Compensated Brake |
| Barrel | 20" SDM-R Heavy Extended |
| Underbarrel | Low-Profile Stubby |
| Magazine | 10-Point Fast Magazine |
| Ammunition | Standard |
| Optic | Personal preference |
This variant reaches 35 precision / 62 control and a 300 ms ADS time. You lose the three shot headshot potential but gain a slightly faster ADS and even more control. The weapon becomes a high control beam that drops targets through raw accuracy and fire rate alone.
Build 4: Accuracy While Moving
This build is for players who fight on the move more than they stop to aim. It's not really a hipfire build since LMGs have a large base hipfire cone, and even a laser only brings it up to something like a standard assault rifle. What this setup actually does is stack ADS accuracy while moving, with just enough hipfire improvement to help in sudden close range situations. Suitable for all skill levels - best at 0 to 50 meters.
| Slot | Attachment |
|---|---|
| Muzzle | Long Suppressor |
| Barrel | Light 16.5" Fluted (20-Point) |
| Underbarrel | Hand Stop (15-Point) |
| Magazine | Standard |
| Ammunition | Standard |
| Accessory | 50MW Blue Laser |
| Optic | Personal preference |
The Long Suppressor cuts recoil buildup and keeps you off the minimap. The Light 16.5" Fluted barrel improves ADS speed and, more critically, ADS accuracy while moving. The 50MW Blue Laser adds a small hipfire bonus and stacks on top of the barrel's movement accuracy improvement. The Hand Stop fills out the underbarrel slot and, combined with the barrel, gets ADS time to 250 ms.
Both the barrel and the laser target the same stat (ADS accuracy while moving), so they compound each other's effect. That stacking is what makes this build work rather than feeling like a random collection of parts.
Build 5: Semi Auto DMR Setup
This is the most unconventional of the five builds. The match trigger converts the DRS-IAR to semi auto, and combined with synthetic tips, it creates what might be the best DMR configuration in the game. The match trigger nearly eliminates horizontal recoil in semi auto and substantially cuts vertical recoil. You're still working with 771 RPM, so even semi auto shots cycle faster than most dedicated DMRs can manage. Best suited for intermediate to advanced players targeting medium to long range - 40+ meters.
| Slot | Attachment |
|---|---|
| Muzzle | Standard Suppressor |
| Barrel | Basic Barrel |
| Underbarrel | Bipod (preferred) or 10-Point Vertical |
| Magazine | Standard |
| Ammunition | Synthetic Tips |
| Trigger | Match Trigger |
| Optic | Personal preference |
The match trigger and synthetic tips are the foundation. In semi auto with synthetic tips, the DRS-IAR fires accurate, hard hitting shots faster than other DMRs can answer. The Standard Suppressor keeps you off the minimap and provides recoil support. The bipod is the preferred underbarrel because, when mounted on cover, walls, or deployable cover, it dramatically cuts recoil and turns this into an absolute laser at range.
Keeping the basic barrel is intentional. Velocity matters less in a pure medium to long range semi auto setup, and keeping the barrel slot cheap frees up points for the trigger and bipod.
Class Recommendations
The DRS-IAR works across all classes without the movement penalty most LMGs carry.
Support is the most natural fit. Support buffs ADS speed and removes the sprint speed penalty for LMGs. Deployable cover is a big deal on the DMR build, and on the other builds the passive bonuses are still worth having.
Assault is a solid alternative. The assault sling lets you carry a close range backup like the M4A1 carbine or M87A1 shotgun, which helps on the stationary or DMR builds where you're more vulnerable up close.
Engineer works well on the unsuppressed builds where you're operating with a team and your red dot is less likely to stand out.
Burst Firing: The Universal Technique
On almost every build, burst firing past medium range is the right approach. At 771 RPM the DRS-IAR sends two to five rounds in a group before a pause. At distance:
- Each burst break resets first shot accuracy and clears accumulated bloom.
- The first three bullets of each burst are the tightest grouped.
- With synthetic tips, a single burst can drop a target to around 70 health almost instantly, leaving very little cleanup.
Full auto is fine at close range. At medium range (roughly 21 to 40 meters), short bursts are the move. Past 40 meters, deliberate two to four round bursts are the cleanest way to apply the weapon's damage model.
Build Comparison
| Build | ADS Speed | Velocity | Suppressed | Synthetic Tips | Best For |
|---|---|---|---|---|---|
| Greed Build | 250 ms | 900 m/s | No (Flash Hider) | Yes | Mobile, headshots, all range |
| Fallback Build | 250 ms | 720 m/s | Yes | No | General play, versatility |
| Stationary (Synth) | 367 ms | 900 m/s | No | Yes | Lane holding, high damage |
| Stationary (Control) | 300 ms | 900 m/s | No | No | Lane holding, max control |
| Movement Build | 250 ms | 720 m/s | Yes | No | Strafing, mobile play |
| DMR Build | Standard | 720 m/s | Yes | Yes | Mid to long range, semi auto |