
Call of Duty: Black Ops 7 Zombies represents a major evolution for the mode, introducing massive maps, fresh gameplay systems, and an expanded Dark Aether storyline. This guide covers everything from initial setup through advanced strategies, so you'll have all the knowledge needed to survive and thrive in this undead dimension.
Game Overview & Launch Content
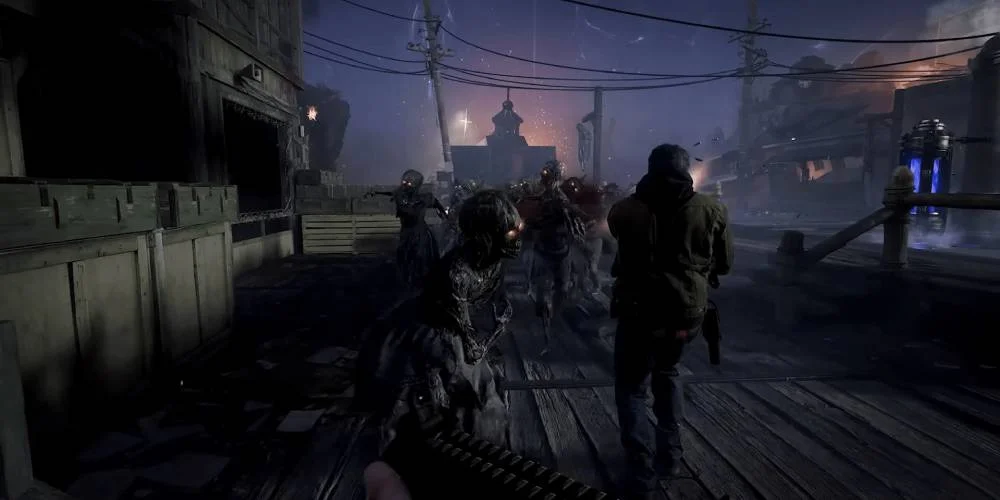
Black Ops 7 Zombies launched on November 14, 2025, marking a complete shift into the Dark Aether dimension. The launch package includes two distinct playable maps and introduces multiple gameplay innovations that reshape the traditional Zombies formula.
Vandorn Farm Survival: A compact map designed for classic endless-round gameplay
Players engage in round-based survival while managing Essence (the currency system), upgrading weapons through Pack-a-Punch machines, and uncovering hidden objectives. The mode supports solo play through four-player cooperative sessions, with enemy difficulty and spawn rates adjusting based on player count.
Up to four players can participate in online cooperative play. Team coordination becomes particularly valuable during boss encounters and Easter egg sequences, as players can synchronize Field Upgrades, GobbleGums, and perk setups. Solo players benefit from Quick Revive's instant self-revival and balanced spawn rates that make all content accessible without team support.
Match duration varies significantly by mode and objectives. Standard runs on Ashes of the Damned typically last 60 to 120 minutes depending on round progression and Easter egg completion. Players pursuing the Main Quest or pushing beyond round 50 should expect sessions extending past two hours. Vandorn Farm Survival offers quicker 20 to 40 minute sessions for faster gameplay loops.
Pre-Game Setup & Configuration
Before jumping into your first match, proper menu configuration and loadout preparation significantly impact your effectiveness.
Core settings to configure before your first match include sensitivity adjustments for your preferred aiming speed, weapon and world motion blur settings (many players prefer these disabled for clarity), and sprint cancels reload option. The game includes mechanics allowing you to fire while sprinting, making this essential for mobility.
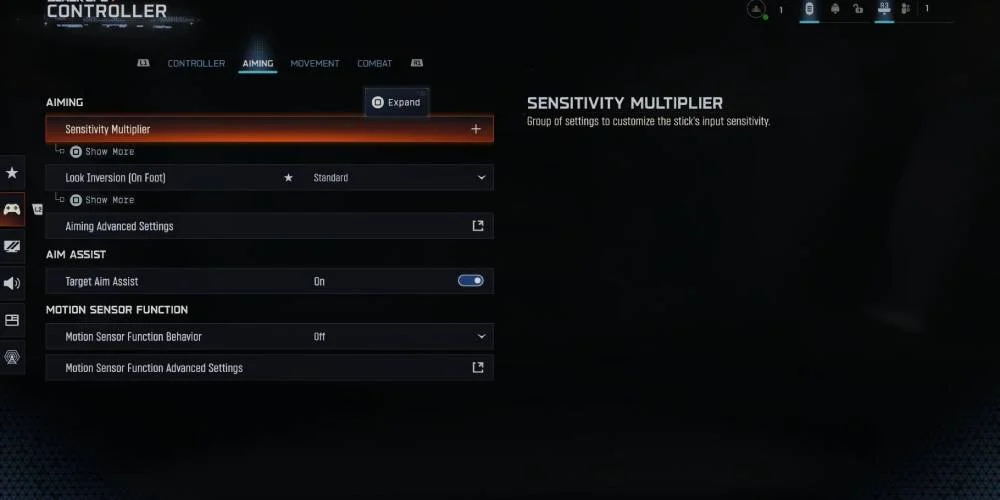
The interface offers extensive customization options. Standard mode provides the default modern layout. Classic mode repositions HUD elements to match the traditional Black Ops 3 Zombies experience. You can toggle individual elements including minimap, compass, scorestreak widget, mission tracker, GobbleGums, round counter, and perk display.
New players must reach specific levels to unlock customization options. Level 4 unlocks loadout customization, while Level 11 provides access to the augment system. You can equip any weapon unlocked across Multiplayer, Warzone, or Campaign, with weapon progression carrying across all modes. Each weapon supports up to eight attachments, allowing full customization before entering a match.
Augment System Fundamentals
Augments provide powerful bonuses to Perk-a-Colas, Ammo Mods, and Field Upgrades. Understanding this system is crucial for building your character effectively.
Augments add extra benefits or modify existing mechanics. For example, Juggernog normally increases health, but augments can push that health boost even higher or provide extra armor benefits. Each perk, ammo mod, and field upgrade can equip one major augment and up to two minor augments after unlocking the final research path.
The final path in each research tree unlocks the ability to equip two minor augments simultaneously on every perk, field upgrade, and ammo mod. This represents a significant power increase and should be a priority for dedicated players.
Game Mode Selection
Black Ops 7 Zombies offers several distinct modes, each catering to different playstyles and objectives.
| Mode | Description | Best For |
|---|---|---|
| Standard Mode | Traditional round-based format with all features unlocked | Full Zombies experience with Easter eggs and exploration |
| Directed Mode | Narrative-focused with clear objectives and dialogue hints | Story enjoyment without complex puzzle-solving |
| Survival Mode | Pure combat endurance without story elements | Weapon leveling and classic Zombies gameplay |
| Cursed Mode | Hardcore challenge modifiers with special rewards | Experienced players seeking maximum difficulty |
| Dead Ops Arcade 4 | Top-down arcade experience with multiple difficulty options | Casual play sessions and arcade-style action |
Standard mode delivers the complete Black Ops 7 Zombies experience on Ashes of the Damned with traditional round-based gameplay. Directed mode provides a narrative-focused experience with reduced puzzle complexity and clear objectives. Survival mode strips away story elements, focusing purely on combat endurance in compact maps like Vandorn Farm.
Getting Your Early Game Right
Your performance in the first few rounds determines your entire session's trajectory. Poor opening decisions create resource shortages that compound through later rounds, while smart early-game execution sets you up for efficient progression.
Choose your spawn weapon based on infestation clearing capability rather than personal preference. The opening cyst destruction sequence provides exactly 30 seconds, making weapon choice critical for success. Assault Rifles and LMGs offer excellent damage output with effective range and manageable recoil, making these ideal for quickly destroying multiple cysts. SMGs provide good fire rate compensation for lower per-shot damage, while snipers prove too slow for timed sequences.
The dedicated melee weapon becomes your primary tool for rounds 1 through 3, dramatically increasing Essence per kill. Walk directly up to zombies and aim slightly upward before executing your melee attack for consistent critical hits. This approach typically nets an extra 500 to 800 Essence compared to standard weapon usage.
Power Activation & Pack-a-Punch Access
Activating power and accessing Pack-a-Punch represents your primary early objective on any map. The process differs between Survival mode and the full Ashes of the Damned experience.
For Vandorn Farm Survival, destroy orange growths covering the power station with no time limit, enter the barn and navigate to the second floor, then flip the power switch to activate Wunderfizz and Pack-a-Punch. The Wunderfizz machine spawns upstairs in the house while Pack-a-Punch appears in the back of the barn's upper level.
- Purchase the door in spawn leading to server room and melee the floor grate to reveal Ted's Head
- Install Ted's Head onto Ol' Tessie by interacting with either front door of the vehicle
- Choose left route through Monolith Forest or right route through Collapsed Tower to Vandorn Farm
- Clear infestation on power pump within 30-second timer after shooting first spore
- Activate power switch in chosen area (barn second floor or cabin upstairs)
- Drive to Ashwood Bridge and clear central infestation with 30-second timer
- Activate Ashwood Bridge power switch at top of bridge
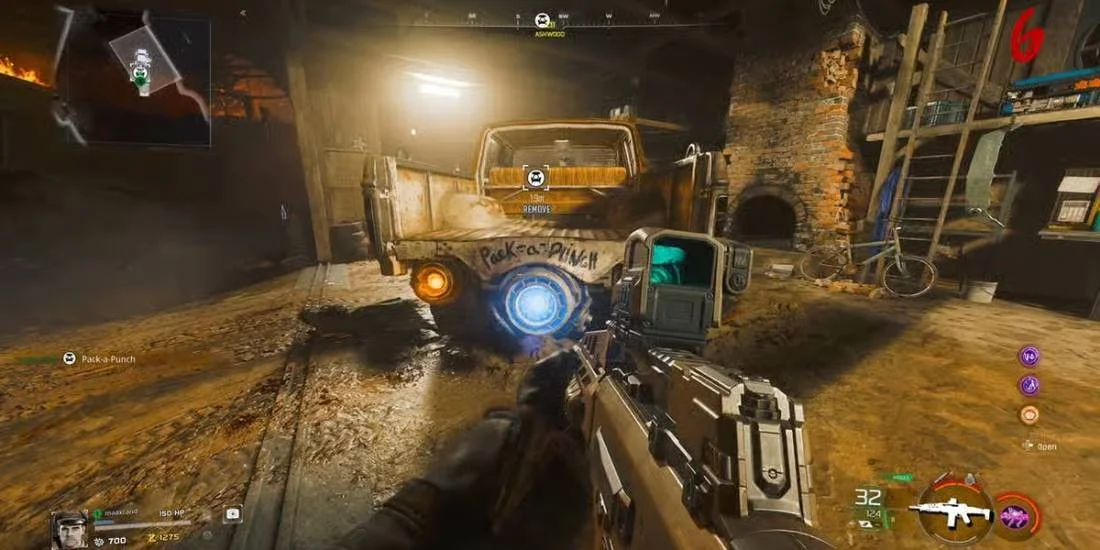
- Drive Ol' Tessie into Ashwood garage and install Pack-a-Punch at workbench
This creates a fully portable Pack-a-Punch machine. Wherever Ol' Tessie travels, Pack-a-Punch remains accessible, providing unprecedented upgrade access anywhere on the map as long as you know the vehicle's location.
Ol' Tessie Vehicle System
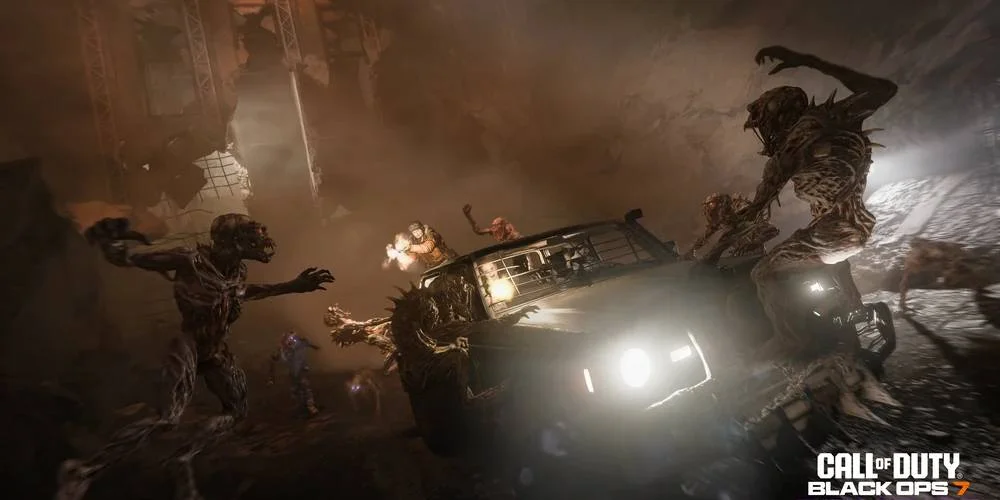
Ol' Tessie transforms map navigation while introducing unique mechanics requiring understanding for best usage. After installing Ted's head, the vehicle becomes drivable across the map, providing safe transport through fog-covered zones that are otherwise extremely dangerous on foot.
The vehicle can sustain substantial damage from Ravagers attacking while driving through fog, red growths that damage and throw the vehicle, and general enemy attacks when stationary. If the vehicle takes excessive damage, it ejects all passengers, creating extremely dangerous situations in fog due to heavy enemy presence.
The Ashwood garage provides two critical systems for managing Ol' Tessie location. At the vehicle summoning station in front of the garage, spend 1,000 Essence to bring Ol' Tessie directly back inside. Stand on the pad inside the garage and spend 500 Essence to teleport directly into Ol' Tessie wherever it sits on the map. These systems mean you never permanently lose access to the vehicle or Pack-a-Punch.
While navigating fog zones, ground vegetation plays a critical role. Green growths restore vehicle health and extend survival in dangerous zones when you run over them. Red growths deal damage and violently throw the vehicle around, potentially causing loss of control or ejection. Successful navigation requires constantly scanning the ground ahead and steering toward green growths while avoiding red ones.
Map Navigation & Points of Interest
Ashes of the Damned combines locations from different historical periods into interconnected zones. Understanding the layout and navigation options helps with efficient movement.
Janus Towers Plaza serves as the spawn zone, containing the server room where Quick Revive spawns. After purchasing four perks, the Wunderfizz machine materializes near a specific door in this zone. The Rampage Inducer also spawns in a corner here, allowing faster round progression.
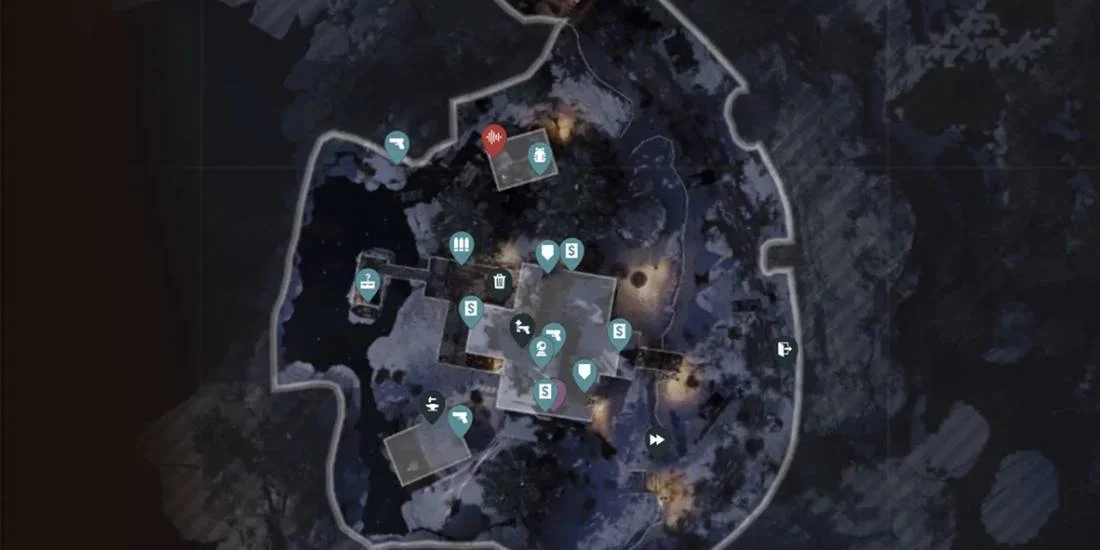
Vandorn Farm features two main buildings with the farmhouse containing the Stamin-Up perk machine and the barn's second floor housing Death Perception perk along with the power switch. Blackwater Lake's cabin contains the Speed Cola perk machine and a Mystery Box spawn location, with the power switch upstairs opposite the entrance.
Ashwood represents the map's nerve center with multiple interconnected areas. Market Square accessed via left zip line houses the Vulture Aid perk machine in the back. Judgment Square outside the Taylor Shop contains the Double Tap perk machine. Ashwood Bridge connects zones and features the third infestation and power switch on top.
Zarya Cosmodrome is a Cold War-era launch site featuring a massive rocket and high-tier loot. The new Wisp Tea perk stands outside near the armor wall-buy station. The flame trench beneath the rocket contains the PhD Flopper perk in one corner. Exit 115 is a roadside area with Deadshot Daiquiri inside McDogle Service Station garage and Elemental Pop in Reber's Diner.
Perk System & Wunderfizz Mechanics
Black Ops 7 Zombies features 12 Perk-a-Colas, including 11 returning favorites and one new addition. Each perk provides distinct benefits amplified by augments.
Augments allow the wisp to collect drops or revive allied NPCs
Juggernog increases total health, letting you absorb extra hits before going down. This perk is necessary for all build variations due to fundamental survivability improvement. Quick Revive speeds up self-revive and allied revive times, providing one automatic instant revival in solo play. Speed Cola significantly reduces reload and equipment usage time, maintaining consistent fire rate during rapid waves.
Stamin-Up boosts sprinting speed and endurance, crucial for traversing large maps like Ashes of the Damned and escaping elite enemy spawn points. Double Tap Root Beer doubles fire rate and increases bullet count per shot, perfect for automatic rifles and light machine guns. Deadshot Daiquiri boosts headshot damage and provides auto-snap aim to critical areas when using a controller.
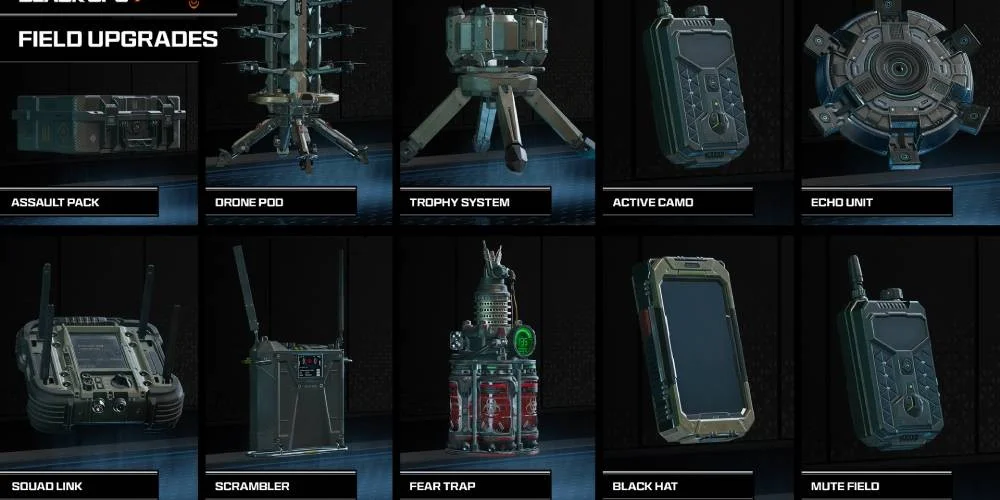
Field Upgrades & Equipment Systems
Field Upgrades provide powerful rechargeable abilities that charge through combat. The system connects to the Augment Research system, allowing further customization.
Aether Shroud surrounds you with Dark Aether energy, rendering you invisible to all enemies for several seconds, perfect for last-second revives or escaping cornered positions. Healing Aura releases healing energy that immediately restores health to all nearby allies, commonly used in support-focused builds. Frenzied Guard forces all zombies to attack you while your armor becomes the sole damage source, great for tank builds.
Energy Mine deploys an explosive mine that detonates repeatedly, clearing zombies crossing its path and providing effective area denial. Dark Flare projects a twisted energy beam that punches through enemy ranks, destroying lines of undead. Toxic Growth, the new addition, spawns thorny vines that slow and weaken enemies passing through, perfect for area control setups and creating safe zones.
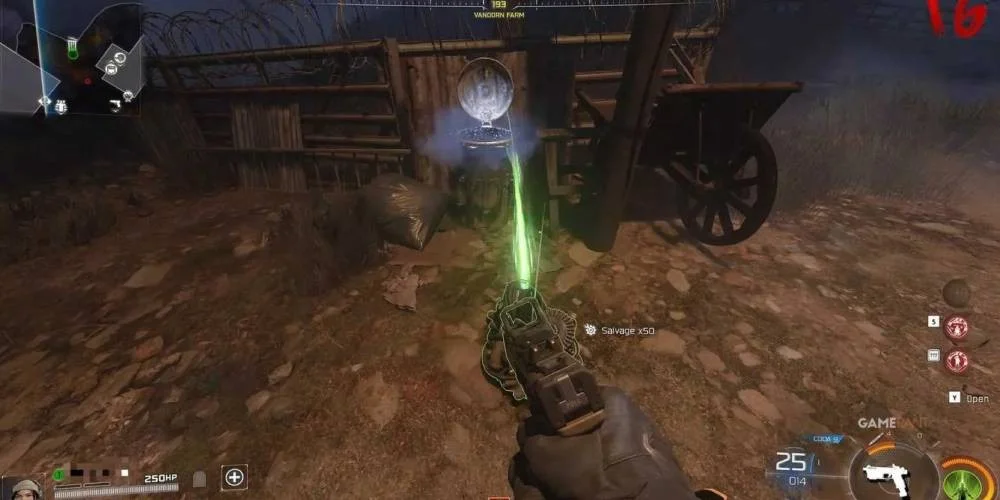
Progression Systems: Essence, Salvage & Trials
Black Ops 7 Zombies employs multiple interconnected progression systems that must be managed simultaneously for best performance.
Essence replaces traditional points as the central resource driving all interactions. You earn Essence through zombie eliminations with varying amounts based on kill type: 90 Essence base, 105 with melee, 115 for critical weapon hits, and 150 for critical melee hits. Spend Essence to unlock new areas, purchase weapons from wall-buys, activate Jump Pads, upgrade Ol' Tessie, buy perks, and activate Pack-a-Punch upgrades.
Salvage enables crafting and upgrading. Craft lethal and tactical equipment, deploy support items like Sentry Turrets or Self-Revive Kits, upgrade weapon rarity at Arsenal Stations, and make various crafting bench purchases. Zombies drop Salvage as you clear waves, with the Rucksack automatically collecting drops.
Trials provide bite-sized challenges rewarding power-ups, perks, weapons, and bonus Essence. Activate Trials via special consoles throughout the map with challenges including headshot streaks, melee combo kills, defending marked areas, explosive kills, jump pad eliminations, and score streak kills.
Performance determines reward quality with the golden chest legendary rarity reward representing the highest tier. Potential rewards include Perk-a-Cola bottles, Pack-a-Punch crystals, Ether tools, high-tier weapons, Wonder Weapons including Ray Guns, Salvage, and Essence. Trials appear after powering zones around round 15, marked by purple light beams in the sky.
Enemy Types & Combat Strategies
Black Ops 7 introduces a diverse enemy roster designed to challenge players through various mechanics.
Standard Zombies form the bulk of spawns with threat level increasing through round progression via health scaling and eventual super sprinter transformation after round 55. Armored Zombies appear less frequently than in Black Ops 6, move slower, but compensate with significantly harder hits and damage absorption due to armor plating.
Ravagers are feral four-legged creatures that replace traditional Hellhound rounds. These enemies hunt in packs, leap across long distances, and possess a unique theft mechanic where they can steal dropped loot if you don't collect it quickly. Ravagers become attracted to loose items on the ground, consuming about three different items before running to a hidden map spot and teleporting away with your loot.
Zursa is a powerful undead bear boss appearing periodically at specific rounds, first showing around rounds 15-16. The Zursa features glowing cyst weak points marking critical hit zones. Focus fire on these spores for rapid elimination and bonus damage. The bear employs multiple attack patterns including throwing bees at players, leaving beehive radius zones dealing damage over time, and powerful melee swipes.
Napalm Burst ammo modification deals exceptional bonus damage to this boss type, reducing encounter time significantly. Ray Guns also prove extremely effective. Prepare a decent weapon loadout before the first Zursa encounter to avoid early downs from under-preparation.
Advanced Mechanics & Hidden Systems
Ashes of the Damned contains numerous secret mechanics and Easter eggs that provide significant advantages when understood.
A fumigator item spawns in multiple map locations including Janus Towers Plaza spawn room, Judgment Square upstairs on a box, Blackwater Lake tool shed right of dartboard, and Vandorn Farm barn upstairs left corner from power switch. Use it to spray green plants scattered across zones, initiating a growth process where zombies become attracted to the sprayed plant and purple-eyed zombies spawn to attack it.
Bins labeled "Chompy" appear throughout every map section. Melee Chompy, then feed it either weapons or equipment to receive random Salvage amounts based on item rarity. You can feed Chompy up to three times per round, providing great Salvage income by recycling unwanted Mystery Box weapons into Salvage rather than wasting them.
You can convert unused GobbleGums into Essence during matches by opening your GobbleGum pack and selecting the convert option instead of the use button. Hold the button to crush the GobbleGum. Essence gained varies by rarity: Purple (Rare) GobbleGums provide 1,500 Essence, Epic GobbleGums provide 2,500 Essence, and Ultra Rare GobbleGums provide 5,000 Essence.
The Rampage Inducer located in a Janus Towers Plaza spawn room corner speeds up round progression. Activate it to speed through initial rounds more quickly. You can disable or re-enable it at any point, providing control over pacing and proving particularly valuable when rushing through early rounds for setup or farming weapon levels.
Weapon Systems & Upgrades
Proper weapon progression determines your ability to survive escalating rounds.
| Phase | Rounds | Priority Upgrades |
|---|---|---|
| Foundation | 1-10 | Pack-a-Punch Level 1 (5,000 Essence), Uncommon Rarity (750 Salvage), Rare Rarity (1,500 Salvage) |
| Power Spike | 10-15 | Pack-a-Punch Level 2 (15,000 Essence), Epic Rarity (2,500 Salvage), First perks (Juggernog priority) |
| Domination | 15+ | Pack-a-Punch Level 3 (30,000 Essence), Legendary Rarity (5,000 Salvage), Ammo mods (Napalm Burst) |
This progression provides steady power increases matching round difficulty scaling. Prioritize Pack-a-Punch upgrades over rarity when Essence-limited, as Pack-a-Punch provides larger damage boosts. Rarity upgrades through Arsenal Stations improve weapon stats and add passive benefits.
Three Wonder Weapons are available in Black Ops 7 Zombies. Ray Gun provides classic high burst damage with strong late-round scaling as a Mystery Box drop. Ray Gun Mark II returns with familiar high damage output and effective crowd control. Necrofluid Gauntlet is a new living Aether weapon firing hardened spikes that drains health from enemies while pulling nearby drops toward the player.
The saw blade trap costs 1,000 Essence but can eliminate entire rounds while generating profit. Position yourself near the activation point and funnel zombies into the mechanism. Trap efficiency remains viable through round 40 and beyond, making it your primary crowd control tool for extended sessions while conserving ammunition and generating Essence simultaneously.
Exfiltration & Session Management
Planning your session end requires understanding the exfiltration system and available alternatives.
Exfil opportunities appear every five rounds via telephone booth prompts in any map area. When called, cooperative games trigger a vote determining whether players participate or continue playing. Once activated, an objective appears to eliminate the HVT (High Value Target) zombie near the portal within a time limit.
Successful exfil provides slightly more XP than dying at equivalent rounds, making exfil valuable when actively unlocking augments through research progression, ranking up to unlock loadout options, or when limited play time requires efficient XP gain. For players with everything unlocked, playing until death offers more challenge and extended gameplay without pressure to exfil.
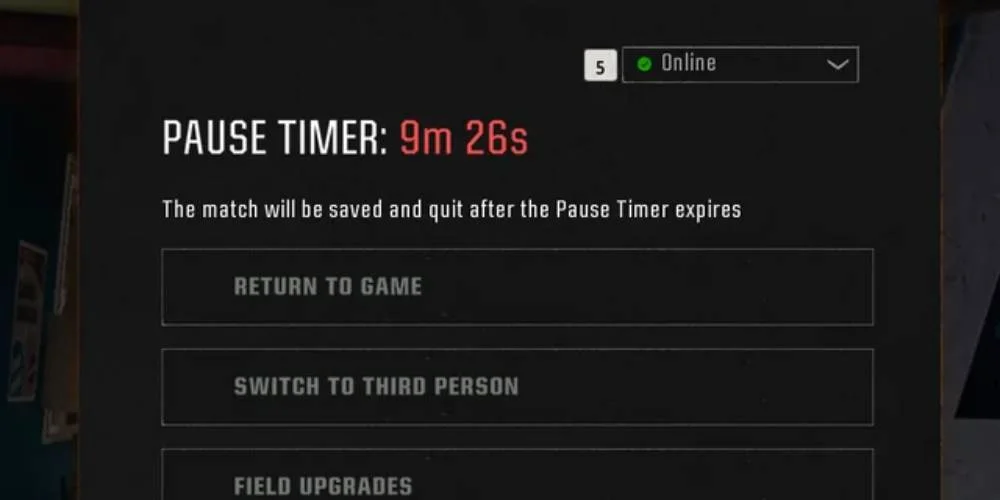
The Save & Quit system returning from Black Ops 6 lets you pause your session and return later. After saving, you have 30 days to resume your game from the exact state you left it. This accommodates players unable to complete long sessions in one sitting, making high-round attempts more accessible.
Complete Augment Recommendations
Augments dramatically improve your effectiveness when properly selected. These recommendations prioritize survival and damage dealing for players at all skill levels.
For Juggernog, pair Probiotic major augment with Hardened Plates minor augment for extra damage negation on armor. Hardened Plates outperforms Durable Plates because reducing damage taken proves more valuable than slightly slower armor degradation.
Speed Cola augments should use Classic Formula major augment for extremely fast reloads paired with faster weapon swap speed minor augment. Vulture Aid benefits from Gas cloud major augment making you completely invisible to zombies as a great panic button, plus the new Black Ops 7 specific auto-armor plates minor augment requiring testing.
Death Perception augments include Critical Eye major augment providing occasional body shots dealing headshot damage, paired with Bird's Eye View minor augment for increased enemy visibility on minimap. Critical Eye provides tangible damage increases especially for certain weapon types.
PhD Flopper augments feature Dr. Ram major augment where initiating sprint pushes zombies over to escape corners, paired with Tribologist minor augment for faster and longer slide distance. Both augments significantly improve mobility and survival options.
- Most important damage-dealing augments
- Dead Head and Dead Break major/minor combo
- Double Standard and Double Time increase fire rate
- Critical for maximizing damage output
- Vulnerability makes enemies more susceptible
- Demon's Wrath extends elemental duration
- Provides consistent benefit for most players
- Works with any weapon loadout
Final Tips & Quality of Life Features
Settings worth exploring include motion blur adjustments for improved clarity, HUD customization for preferred information density, control scheme import from Black Ops 6 if applicable, and sensitivity fine-tuning for your aiming preference.
Gameplay options provide third-person mode available anytime via pause menu, HUD themes including Standard or Ethereum with purple effects, layout options between Standard modern or Classic Black Ops 3 style, and extensive widget visibility controls for minimalist HUD.
Mystery Boxes spawn in various locations throughout the map with Blackwater Lake cabin containing one confirmed spawn. Arsenal Stations allow weapon rarity upgrades using Salvage, complementing Pack-a-Punch upgrades by improving base weapon stats. Crafting Benches enable tactical and lethal equipment crafting, support item deployment, and various other crafts.
The left route through Monolith Forest to Vandorn Farm is generally recommended as the better opening path, providing faster initial power activation, access to barn hanging zombies for bonus Essence, more straightforward fog navigation, and better positioning for subsequent Ashwood progression.
Salvage: Prioritize rarity upgrades and equipment crafting. Exploit alternative Salvage sources aggressively.
Time: Complete Trials when available for efficient reward acquisition. Don't ignore these valuable opportunities.
Advanced player strategy includes maximizing early Essence economy through melee critical hits, executing Chompy Salvage Strategy with Ryden 45K, pursuing permanent perks through late-game Trials, using trap strategies for high-round survival, mastering jump pad network for positioning, completing full augment research for maximum power, targeting Zursa weak points with Napalm Burst, maintaining Ol' Tessie positioning for Pack-a-Punch access, exploiting plant growth system every round, and progressing Main Quest for complete content access.
Black Ops 7 Zombies delivers exceptional depth and replayability. Whether grinding weapon levels in Vandorn Farm Survival or pursuing the Main Quest on Ashes of the Damned, these systems and strategies provide the foundation for success in the Dark Aether.