
Build Overview and Core Concept
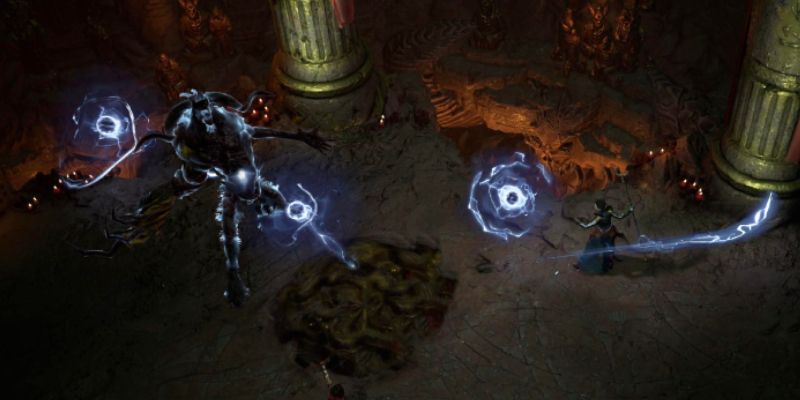
Welcome to Boosting Ground's definitive Chain Lightning Sorcerer guide for Season 8. This build harnesses devastating electrical energy that cascades through enemy ranks, delivering exceptional single-target burst damage while maintaining efficient area clearing capabilities. The build excels in all endgame content, from speed-farming Helltides to pushing high-tier Pits.
Build Rating and Performance
Primary Strengths: Exceptional burst damage, self-sustaining mana economy without basic attacks, rapid movement capabilities, and multiple defensive layers
Notable Limitations: Damage optimization requires crowd control application, demands careful resource and cooldown management, vulnerable during defensive skill downtime
Core Build Philosophy
This iteration abandons traditional basic attack patterns in favor of a pure Chain Lightning spam approach, sustained through intelligent Crackling Energy generation and absorption mechanics. The synergy between Destructive Chain Lightning and Overflowing Energy creates a self-perpetuating cycle of damage and cooldown reduction.

Essential Skills and Allocation Strategy
Active Skill Loadout
- Chain Lightning - Primary damage dealer
- Ice Armor - Core defensive layer
- Flame Shield - Secondary defense and elemental synergy
- Familiar - Crowd control and damage amplification
- Teleport - Mobility and positioning tool
- Unstable Currents - Ultimate skill for burst phases
Complete Skill Point Distribution (71 Points Total)
Skill Point Allocation


Basic Skills
- Arc Lash: 1 point (prerequisite only - do not equip)
Core Skills
- Chain Lightning: 5/5 points
- Destructive Chain Lightning: 1 point (essential for Crackling Energy generation)
Defensive Skills
- Ice Armor: Maximum ranks through gear and tree
- Flame Shield: Core allocation plus gear bonuses
- Teleport: Base points with enchantment consideration
Conjuration Skills
- Familiar: Full investment for maximum stun frequency
Ultimate Skills
- Unstable Currents: 1 point (enhanced through cooldown reduction)
Key Passives
- Inner Flames: Prioritize for barrier generation
- Hoarfrost: Essential for defensive synergies
- Vyr's Mastery has been replaced with Overflowing Energy for superior cooldown management
Additional Allocations
- Charged Bolts: 1 point for enchantment slot only
- Supporting passives focused on damage reduction, mana efficiency, and critical strike optimization
Enchantment Configuration
The Sorcerer's unique enchantment system transforms two skills into passive effects:
Primary Enchantment: Charged Bolts
- Triggers from Familiar stuns and Raiment of the Infinite pulls
- Provides supplemental area damage without mana cost
Secondary Enchantment: Chain Lightning
- Generates additional procs for consistent damage output
- Alternative: Teleport enchantment for speed-farming variants
Comprehensive Gear Strategy
Legendary Aspect Priority System
Each gear slot requires specific legendary powers for optimal performance. Here's your complete aspect roadmap:
| Gear Slot | Legendary Aspect | Effect |
|---|---|---|
| Amulet (50% bonus) | Lightning Rod Aspect | 25% chance for 50-80% increased Chain Lightning damage, doubled against bosses and CC'd enemies |
| Ring 1 | Recharging Aspect | Gain 1.5-3.0 mana per Chain Lightning bounce off your character |
| Ring 2 | Aspect of Control | 20-35% increased damage to immobilized, stunned, or frozen enemies |
| Gloves | Aspect of Shredding Blades | 15-30% vulnerable damage increase (Ice Blades component irrelevant) |
| Main Weapon | Storm Swell Aspect | 15-35% increased damage during Ice Armor, additional 15% vs frozen enemies |
| Off-hand/Focus | Aspect of the Unbroken Tether | 30-40% chance for Chain Lightning to chain 4 additional times |
| Helm | Everliving Aspect | 20-25% damage reduction from controlled/vulnerable enemies |
| Chest | Aspect of Concentration | 15-25% damage reduction after conjuration skills |
| Pants | Snowveiled Aspect | Ice Armor grants unstoppable and 25% damage reduction for 3.5-5.5 seconds |
| Boots | Aspect of the Orange Herald | Lucky hit chance to reduce ultimate cooldown |
Stat Priority Hierarchy
Prioritize stats in this exact order for each equipment slot:
Tempering Manual Selection
Apply these tempering recipes strategically:
- Shock Augments - Surge: Chain Lightning double-hit chance
- Shock Finesse: Shock critical strike damage amplification
- Natural Schemes: Barrier generation enhancement
- Worldly Endurance: Armor to cap, then transition to Frost Cage for Ice Armor duration
Utility Options
- Natural Motion: Evade cooldown reduction for Telestomp variants
- Ultimate Efficiency - Sorcerer: Unstable Currents cooldown reduction
Unique and Mythic Item Integration
Core Uniques (Listed by priority)

Enables Chain Lightning area damage
Masterwork priority: Damage Reduction from Close Enemies
Fundamentally changes build dynamics

Teleport gains pull and stun mechanics
Masterwork priority: Glass Cannon ranks
Essential for speed-farming configurations
3. Flickerstep (Synergistic enhancement)
- Superior evade cooldown implicit (2.5 seconds vs 1.5 standard)
- Masterwork priority: Damage Reduction from Close Enemies
4. Tal Rasha's Iridescent Loop (Damage multiplier)
- Up to 75% damage increase with tri-element rotation
- Masterwork priority: Cooldown Reduction
5. Heir of Perdition (Helm slot optimization)
- Highest damage output for slot
- Masterwork priority: Critical Strike Chance
Optional Considerations
- Ring of Starless Skies: Alternative mana solution (replaced by Axial Conduit setup)
- Harlequin Crest: Defensive option with skill rank benefits
Socket Configuration
Socket Priority
Runeword Implementation
Install two runewords in the following configuration:
Primary Runeword: Tam + Gar
- Trigger: Non-channeled core skill cast
- Effect: Stacking critical strike chance to 25%

Secondary Runeword: Igni + Zec
- Trigger: Offering accumulation system
- Effect: Ultimate cooldown reduction per 100 offering
Paragon Board Mastery Guide
Board Progression Overview
Your paragon journey follows a specific path designed to maximize both offensive and defensive capabilities. Here's your complete board-by-board progression:
1. Starting Board
- Path directly to first board attachment point
- Prioritize rare nodes offering vulnerable damage and critical strike
- Socket position for first glyph at earliest opportunity
- Key stats: Intelligence, damage reduction
2. Enchantment Master Board (First attachment)
- Legendary node: Runic Invocation or equivalent enchantment synergy
- Glyph: Torch or Tactician for early mana sustainability
- Path through elemental damage nodes
- Exit toward damage multiplication board
3. Elemental Summoner Board (Second attachment)
- Focus on conjuration skill enhancement
- Legendary node affecting Familiar effectiveness
- Glyph: Unleash or Conjurer variant
- Prioritize cooldown reduction rare nodes
4. Burning Instinct Board
- Legendary node for critical strike damage scaling
- Glyph: Destruction or critical-focused option
- Path through attack speed nodes
- Intelligence optimization throughout
5. Static Surge Board
- Lightning damage specialization
- Legendary node: Chain reaction effects
- Glyph: Exploit for vulnerable damage
- Maximize shock skill bonuses
6. Ceaseless Conduit Board
- Crackling Energy enhancement focus
- Legendary node for energy generation
- Glyph: Control for crowd control synergy
- Mana regeneration nodes priority
7. Frigid Fate Board
- Defensive layer completion
- Ice Armor duration and effectiveness
- Glyph: Winter Gust or defensive option
- Damage reduction saturation
8. Additional Board Selection
- Searing Heat for barrier generation
- Enchantment Master duplicate if available
- Focus on rare node optimization
- Complete all damage reduction opportunities
Glyph Strategy and Placement
1. Destruction: Maximum damage output
2. Exploit: Vulnerable damage multiplication
3. Control: Crowd control damage synergy
4. Tactician: Resource management
5. Unleash: Conjuration enhancement
6. Torch: Burning damage and mana
7. Winter Gust: Defensive scaling
Glyph Leveling Priority
- Level 15: All offensive glyphs first
- Level 21: Destruction and Exploit priority
- Defensive glyphs can remain at 15 until offense complete
Node Allocation Strategy
| Node Type | Points | Priority |
|---|---|---|
| Magic Nodes | 5 points each | Intelligence always when available Damage reduction secondary priority Resistance only if under cap |
| Rare Nodes | 3 points each | Vulnerable damage highest priority Critical strike chance/damage Cooldown reduction Attack speed Maximum life percentage |
| Legendary Nodes | Varies | Always allocate if within reasonable path Worth 10-15 point detours for major nodes Skip only if completely opposite to progression |
Stat Benchmarks Through Paragon
By Paragon 100
- 1,000 armor (capped)
- 40%+ critical strike chance
- All resistances 50%+
By Paragon 150
- 70%+ critical strike chance
- Maximum resistances achieved
- 30%+ cooldown reduction
By Paragon 200
- Critical strike chance approaching cap
- 40%+ cooldown reduction
- 200%+ vulnerable damage
Paragon 200+
- Perfect stat optimization
- All defensive benchmarks met
- Focus purely on damage multiplication
Board Rotation and Pathing Tips
- Always path through intelligence when available
- Minimize travel nodes - plan routes before committing
- Rare node clusters take priority over isolated nodes
- Glyph radius determines rare node selection
- Board entry/exit positions matter for optimization
- Skip common nodes unless necessary for pathing
- Respec considerations - save gold for optimization at 200+
Season 8 Specific Optimizations
Boss Power Configuration
Primary Power: Beast in the Ice's Sleet
- Triggers after 3 crowd control applications
- Deals 800% cold damage with freeze effect
- Synergizes perfectly with Familiar and Teleport
Modifier Selection (Choose based on needs):
1. Hatred's Embrace's Haste: Up to 50% critical strike from shadow resistance
2. Harbinger of Hatred's Volley: Vulnerable application and 30% damage boost
3. Sinerat's Flames: 5-25% elemental damage scaling
Mercenary Setup
- Skills: Cleave, Hysteria, Bloodthirst, Bloodlust
- Provides consistent damage support
- Skill: Bastion
- Trigger: Player injury threshold
- Defensive emergency support
Combat Execution and Rotation
Standard Combat Sequence
Optimal Skill Rotation
1. Pre-engagement: Cast Familiar (ensure shock variant through prior shock skill use)
2. Initiation: Teleport into enemies if using Raiment setup
3. Ultimate Timing: Activate Unstable Currents for elites/bosses
4. Defensive Rotation: Alternate Flame Shield and Ice Armor every 8 seconds
5. Primary Loop: Chain Lightning spam with Crackling Energy collection
Mana Management Protocol
- Recharging Aspect enables perpetual casting
- Resource Cost Reduction supplements efficiency
- Never ignore Crackling Energy orbs
Positioning Strategies
- Maintain medium range for safety
- Position for Chain Lightning bounces
- Utilize terrain for Crackling Energy funneling
- Retreat paths always available
Build Variants and Adaptations
Telestomp Speed-Farming Configuration
This variant transforms the build into an aggressive speed-clearing machine:
Required Modifications:
1. Equip Raiment of the Infinite
2. Replace Chain Lightning with Teleport in enchantments
3. Mandatory evade cooldown reduction boots
4. Temper evade cooldown on amulet
Playstyle Adjustments:
- Teleport becomes primary engagement tool
- Stun-locking enemy groups
- Charged Bolts provide area coverage
- Ideal for Helltide and dungeon farming
Axial Conduit Endgame Evolution
Ultimate Build Evolution
1. Equip Axial Conduit unique pants
2. Transition to two-handed staff
3. Lucky Hit resource restoration mandatory
4. Lightning Rod Aspect on weapon
- Storm Swell moves to amulet
- Unbroken Tether becomes replaceable
- Consider Conceited or Control aspects
- Significantly higher mana consumption
- Lucky Hit restoration critical
- Offering generation for ultimate resets
Consumable Optimization
Elixir Priority
- Elixir of Precision: If under 100% critical strike
- Elixir of Advantage: If under attack speed cap
- Elixir of Resource: Early game mana solution
- Elixir of Fortitude: General survivability
Seasonal Considerations
Season 8 Balance Updates
- Worldly Fortune no longer provides crowd control tempers
- Aspect of Concussive Strikes damage component removed
Adaptation Strategies
Focus on reliable crowd control sources through Familiar and Teleport rather than random procs. Build consistency improved overall despite some aspect nerfs.
Progression Milestones
1. Acquire Recharging Aspect
2. Cap resistances
3. Obtain movement speed boots
4. Begin paragon foundation
1. Raiment of the Infinite acquisition
2. Tal Rasha's ring integration
3. Offensive glyph leveling
4. Cooldown reduction stacking
1. Axial Conduit transformation
2. Perfect stat optimization
3. Paragon 200+ completion
4. Uber unique integration
This comprehensive guide provides everything needed to master the Chain Lightning Sorcerer in Season 8. The build's flexibility allows adaptation from speed-farming to pushing the absolute limits of endgame content. Master the Crackling Energy mechanics, perfect your crowd control timing, and electrify your path through Sanctuary's challenges.