
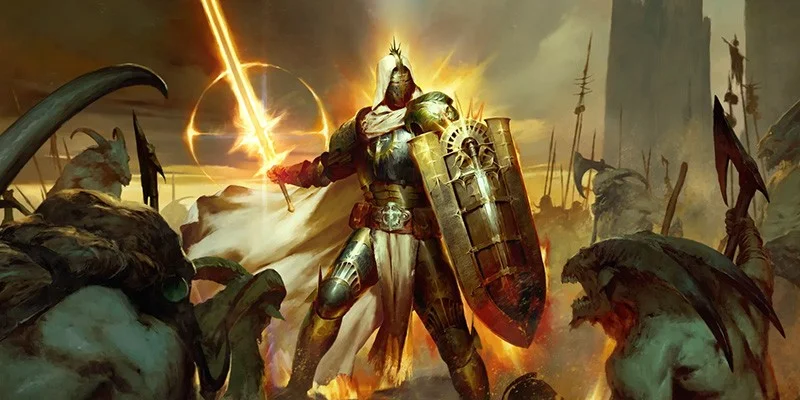
The Paladin Dominates Season 11
The Paladin class is the undisputed powerhouse of Diablo IV Season 11. With damage numbers reaching into the thousands of trillions, build variety spanning from AFK farming to hardcore pushing, and excellent survivability through its Block mechanics, the Paladin sits comfortably above every other class in the current meta.
To put the power gap in perspective, top Paladin builds are clearing roughly 15 Pit tiers higher than the next strongest class (Barbarian). The class offers something for every playstyle, from completely passive "walking simulator" builds to complex high-APM rotations, and all of them remain competitive in endgame content.
This guide breaks down every viable Paladin build in Season 11, organized by power level and suited playstyle. New players looking for an easy entry point and veterans pushing for leaderboard rankings will both find what they need here.
Quick Reference Tier List
S-Tier: Endgame Dominators (Pit 120+)
| Build | Highest Clear | Playstyle | Difficulty |
|---|---|---|---|
| Judgement Paladin | Pit 138+ | Active, strategic pulling | Medium-High |
| Blessed Hammer Paladin | Pit 120+ | Semi-passive, speed-focused | Easy |
| Shield of Retribution | Pit 120+ | Thorns-based, balanced | Easy |
| Wing Strikes Paladin | Pit 121 | Passive, auto-targeting | Easy |
A-Tier: Excellent All-Rounders (Pit 100-120)
| Build | Highest Clear | Playstyle | Difficulty |
|---|---|---|---|
| Brandish Paladin | Pit 110+ | Basic skill spam, positioning | Easy |
| Spear of the Heavens | Pit 110+ | Speed farming, automatic | Easy |
| Auradin (Dawnfire) | Pit 100+ | AFK farming, walking simulator | Very Easy |
| Zeal Paladin | Pit 110 | High attack speed, melee | Medium |
| Divine Lance | Pit 100+ | Visually impressive, ranged | Medium |
| Shield Bash Paladin | Pit 100+ | Classic smite fantasy | Easy |
Utility Tier
| Build | Role | Notes |
|---|---|---|
| Support Paladin | Group Buffer (zDPS) | Massive party damage amplification |
Paladin Core Mechanics
Before diving into individual builds, you'll want to understand the Paladin's fundamental systems. These affect every build choice and determine how you'll approach the endgame.
The Three Oaths
Every Paladin must choose one of three Oaths, which fundamentally shapes their playstyle and available synergies. This choice unlocks at Level 15.
Key mechanics:
- Disciple only refreshes its duration; using multiple skills won't stack the timer
- Benefits from Arbiter of Justice upgrades including Seraph's Wings and Reach of the Law
- Cannot refresh the full duration of manually-cast Arbiter of Justice
- All Disciple skills gain 50% increased damage inherently
Key mechanics:
- Judgement base damage equals 50% Weapon Damage as Holy
- Judgement has no Lucky Hit Chance
- Judgement can't stack on the same target; reapplying has no effect
- Detonating Judgement triggers chain reactions with other marked enemies
Key mechanics:
- Juggernaut only consumes stacks after the previous buff expires
- Minimum Resolve counts toward consumption but can't be removed (permanent 20% damage reduction)
- Juggernaut's Covenant aspect increases the Oath's damage bonus additively (total x1.625 multiplier)
Block Mechanics: Your Primary Defense
Block is the Paladin's signature defensive mechanic, and reaching 100% Block Chance is mandatory for endgame content. Block provides massive damage reduction that scales exponentially as you approach the cap.
What Block Does:
- Triggers from any incoming hit damage (direct strikes, slams, projectiles, spells, elite affixes)
- Sources of Block Damage Reduction stack additively
- Does NOT work against ground effects (poison puddles, burning ground)
- Does NOT work against Damage over Time attacks (Andariel's poison bolts)
- Belial's frontal slam
- Belial's breath
- Elite affix: Explosive
Sources of Block Chance:
- Base Shield: 20%
- Herald of Zakarum: +20% (additional to base shield)
- En Garde passive: 5% per point (10-15% per temper)
- Defensive Temper: 5-7.5% each
- Beacon Paragon board: 16%
- Castle Paragon board: 14%
- Shield Bearer Paragon board: 25%
- Aegis: 100%
- Enhanced Clash (without Skirmish): 15%
- Bulwark's Aspect: 30-60%
Attack Speed Caps
The Paladin has two separate Attack Speed caps of +100% each, giving you a maximum potential of +200% total. Knowing which sources fall into which cap matters for proper stat allocation.
Cap 1 Sources (Gear and External):
- Gear rolls
- Paragon nodes
- Elixirs
- Artillery Shrine
- Moonrise
- Conviction
- Varyana mercenary buffs (Hysteria, Bloodthirst, Bloodlust)
Cap 2 Sources (Skill-Based):
- Accelerating aspect
- Rapid aspect
- Fanaticism Aura
- Preacher
Stagger Mechanics for Boss Fights
Bosses are immune to Crowd Control but instead take Stagger Damage. Understanding this system helps you kill bosses faster.
How Stagger Works:
- Different CC types contribute different stagger amounts proportional to their normal duration
- After being hit by a CC type, the boss temporarily takes less Stagger Damage from that same type
- To stagger quickly, use as many different CC types as possible
- Bosses naturally regenerate 1% Stagger HP per second
Stagger Damage Reduction After Each Stagger:
- After 1st Stagger: 20% reduction
- After 2nd Stagger: 40% reduction
- After 3rd Stagger: 60% reduction
- After 4th Stagger: 90% reduction
After the fourth stagger, the 90% reduction combined with natural regeneration makes additional staggers nearly impossible without extreme CC investment.
Season 11 Sanctification System
Season 11 introduces Sanctification at Hadriel's Forge, representing the ultimate gear gamble. Understanding this system matters for pushing your build's potential.
How Sanctification Works
Sanctifying gear can add new stats, Greater Affixes, or even Legendary Aspects to items, but sanctified items become Unmodifiable permanently. You can no longer:
- Temper the item
- Masterwork the item
- Enchant affixes
- Add sockets
- Imprint new aspects
You CAN still:
- Swap Gems
- Swap Runes
Best Sanctification Outcomes by Build Type
Universal Jackpot Outcomes:
- The Grandfather (Mythic) - massive damage increase
- Harlequin Crest (Mythic) - cooldown reduction and survivability
- Ring of Starless Skies (Mythic) - damage multiplier, requires Faith spender
Strong Offensive Aspects:
- Edgemaster's
- Inner Calm
- Conceited (requires Barrier source)
- Accelerating
- Retribution (use Essence of Hellfire)
Valuable Defensive Aspects:
- Hale's Salve
- Bulwark's
- Undying
- Disobedience
Priority Affixes:
- All Skill Ranks
- Holy Damage
- Attack Speed
- Critical Strike Chance
- Cooldown Reduction
- Strength
- All Stats
- Maximum Life
Divine Gifts System
Defeating the Lesser Evils (Andariel, Duriel, Azmodan, Belial) unlocks Corrupted Essences that increase rewards and danger in specific content:
- Andariel: Undercity
- Duriel: Helltide
- Azmodan: World Bosses
- Belial: The Pit
Progressing the Seasonal Reputation board unlocks Purified Essences, which increase rewards while providing small character buffs. Both types can be combined for maximum rewards, though you should remove Corrupted Essences if their downsides become overwhelming.
S-Tier Build Breakdowns
#1: Judgement Paladin - The Undisputed Champion
Highest Verified Clear: Pit 138 (Pit 140 projected achievable)
Damage Potential: Up to 5,000+ trillion per hit
Recommended For: Players pushing leaderboards who are comfortable with strategic gameplay
The Judgement Paladin sits alone at the pinnacle of Diablo IV's power hierarchy. By triggering Judgement explosions as frequently as possible and chaining them between enemies, this build creates cascading holy fireworks that demolish everything on screen.

Why Judgement Paladin Dominates
The build's power comes from several synergistic interactions:
- Judgement Chain Reactions: Judgement marks can detonate other Judgement marks, creating exponential damage scaling with enemy density
- Spear of the Heavens Synergy: Each spear carries a Judgement that persists and can be repeatedly triggered
- Arbiter Form Benefits: Permanent transformation provides Wing Strikes that apply additional Judgements via Reach of the Law
- Golden Hour + Judicator Combo: Judgement explosions self-perpetuate between targets
Core Gameplay Loop
- Maintain Arbiter of Justice form permanently to apply Judgement through Wing Strikes
- Cast Spear of the Heavens whenever available to create persistent Judgement sources
- Use Blessed Hammer to manually detonate Judgements early (this is a major damage boost)
- Spam Fanaticism Aura and Defiance Aura for buffs and Arbiter form maintenance
- Group enemies with Condemn for maximum chain reaction potential
The Blessed Hammer Technique (Advanced)
Recent discoveries by high-level players have unlocked even greater potential by incorporating Blessed Hammer (using the Shattering Blow upgrade, NOT Disciple's Halo) to manually detonate Judgements.
The rotation becomes:
- Hammer → Spear → Hammer → Spear (while maintaining Arbiter form)
- This triggers immediate Judgement detonation without waiting for natural timers
- Dramatically increases single-target DPS (7-minute boss kills on Pit 138 content)
- Maintains Ring of Starless Skies stacks more easily
This technique requires dropping either Consecration (losing healing) or Defiance Aura (losing defensive buffs and Unstoppable). Most high-level players drop Consecration but note significantly reduced survivability.
Gear You Need
Weapons:
- Griswold's Opus (mainhand) - Core damage scaling
- Judicator (offhand) - Judgement double damage chance
Armor:
- Shroud of False Death (chest) - roughly 50-60% damage gain plus utility
- Heir of Perdition (helm) - Massive critical strike and damage multiplier
- Golden Hour (gloves) - Enables Judgement chaining
- Indomitable (pants) - Defensive stability
- Wildbolt (boots) - Additional utility
Jewelry:
- Celestial Strife (amulet) - Arbiter form synergies
- Ring of Starless Skies - Damage multiplier and resource management
- Seal of the Second Trumpet - Judgement-specific bonuses
Paragon and Glyphs
Glyph Priority (Level 15): Law, Resplendence, Judicator, Honed, Spirit
Glyph Priority (Level 46): Law, Judicator, Spirit, Honed, Resplendence
- Highest damage potential in the game
- Exceptional AoE scaling with enemy density
- Very tanky with proper Block investment
- Chain reactions create satisfying visual spectacle
- Single-target damage significantly lower than AoE (boss fights are the bottleneck)
- Requires strategic pulling for best performance
- Complex interactions to master
- Benefits enormously from specific Mythic/Sanctified gear
#2: Blessed Hammer Paladin (Hammerdin)
Highest Verified Clear: Pit 120+
Speed Clear: Pit 100 in 60 seconds
Recommended For: Average players wanting one build for all content, Diablo 2 veterans
The Blessed Hammer Paladin brings the classic Diablo 2 Hammerdin fantasy to Diablo IV with modern improvements. With Disciple's Halo, hammers orbit your character, transforming you into a walking whirlwind of destruction. The Argent Veil ring enables automatic hammer casting during Arbiter form Evades, creating an extremely smooth and fast playstyle.
Why Hammerdin Excels
- Versatility: Performs well in all content types without significant adjustments
- Speed: One of the fastest clear speeds for farming content
- Accessibility: Relatively simple rotation with forgiving mechanics
- Nostalgia: Faithful recreation of the beloved D2 archetype
Core Gameplay Loop
- Cast Blessed Hammer to create orbiting hammers (becomes Disciple skill with Disciple's Halo)
- Maintain Arbiter form using Falling Star, Condemn, or Advance
- Use Arbiter Evade to automatically trigger hammers via Argent Veil
- Spam Fanaticism Aura, Defiance Aura, and Rally for buffs and resources
- Group enemies with Condemn for efficient clearing
Gear You Need
Weapons:
- Herald's Morningstar (mainhand) - Excellent Blessed Hammer damage
- Herald of Zakarum (offhand) - Core skill bonuses and Block
Armor:
- Shroud of False Death (chest) - roughly 50-60% damage gain
- Heir of Perdition (helm) - Critical strike and damage multiplier
- Holy Punishment (gloves) - Attack speed and hammer bonuses
- Indomitable (pants) - Defensive stats
- Arbiter's Zephyr (boots) - Arbiter Duration extension
Jewelry:
- Ascension (amulet) - Arbiter form synergies
- Argent Veil (ring) - Auto-cast Blessed Hammer with Evade
- Ring of Starless Skies (ring) - Damage and resource management
Common Issues and Solutions
- Use Rally more frequently
- Focus on Lucky Hit: Chance to Restore Resources
- Roll or temper Resource Cost Reduction
- Use Elixir of Resourcefulness II
- Remove Qax rune if you're using it
- Add Lum rune to your setup
- Use Falling Star or Condemn more regularly to refresh
- Activate transformation skills before level transitions
- Temper and Masterwork more Arbiter Duration
- Stack additional Cooldown Reduction
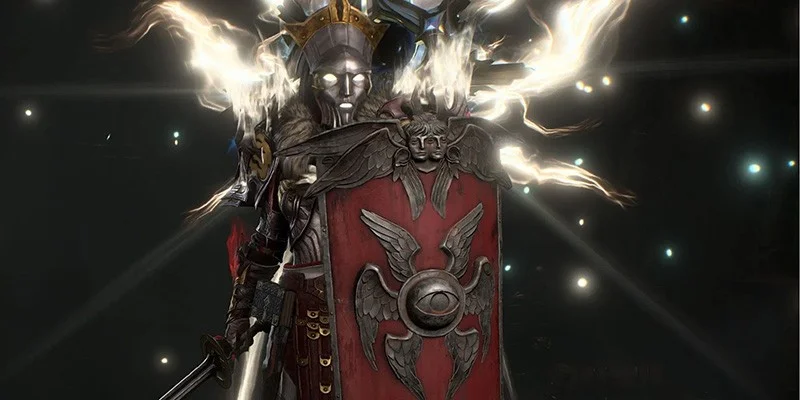
#3: Shield of Retribution Paladin (Captain America Build)
Highest Verified Clear: Pit 120+
Recommended For: New players, leveling, those wanting straightforward Thorns gameplay
The Shield of Retribution Paladin (affectionately called the "Captain America build") throws slow-moving disks that pulse Thorns damage. This build requires minimal gear to function and offers a smooth progression curve from fresh level 60 through endgame content, making it the recommended starter build for all new Paladin players.
Why Shield of Retribution Works
- Gear Independence: Functions well with minimal investment, scales smoothly with upgrades
- Defense as Offense: Thorns scaling converts survivability stats into damage
- Balanced Gameplay: Mid-range playstyle with good AoE and single-target
- Juggernaut Synergy: Enhanced survivability through Resolve mechanics
Core Gameplay Loop
- Activate Clash at least once every 5 seconds for your Thorns buff
- Spam Blessed Shield (Shield of Retribution) to throw damage disks
- Position at short-to-medium range to overlap up to six Thorns pulses per throw
- Activate Fanaticism Aura, Defiance Aura, and Rally frequently (ideally every 3 casts for Ward of the White Dove)
Understanding Shield of Retribution Mechanics
- Creates a slow-moving disk that pulses Thorns damage six times (every 0.5 seconds)
- Thorns damage can naturally Overpower and Critical Strike
- Thorns damage benefits from Core Skill damage bonuses (Discipline) but NOT skill ranks
- "Blessed Shield Deals Double Damage" stat works for Thorns damage
- Thorns damage is NOT affected by Blessed Shield skill ranks
Gear You Need
Weapons:
- Griswold's Opus (mainhand) - Passive damage bonuses
- Ward of the White Dove (offhand) - Core build enabler
Armor:
- Mantle of the Grey OR Shroud of False Death (chest) - Mantle provides slightly more damage
- Heir of Perdition (helm) - Damage and critical strike
- Chastisement (gloves) - Thorns and cooldown reduction
- Indomitable (pants) - Thorns and defensive stats
- Audacity (boots) - Defiance Aura Potency
Jewelry:
- Virtuous (amulet) - Passive skill bonuses
- Juggernaut's Covenant (ring) - Resolve synergies
- Ring of Starless Skies (ring) - Damage multiplier
Recommended Consumables: Soothing Spices, Scents of the Desert Afternoon, Spiral Morning, Elixir of Iron Barbs II
Ward of the White Dove Mechanics
This shield's unique effect is central to the build:
- Cannot be triggered by Auras, Aegis, or Fortress
- Damage buff applies to Shield of Retribution Thorns damage
- Resource cost reduction is a flat value applied after RCR (can reach 0 cost)
- Refreshing stacks at the same moment as consuming the last stack can cause the buff to drop
#4: Wing Strikes Paladin - Passive Destruction
Highest Verified Clear: Pit 121
Recommended For: Players wanting AFK-style gameplay with high push potential
The Wing Strikes Paladin is completely enabled by the Disciple Oath, using an ability that doesn't exist in the skill tree. Wing Strikes automatically targets and attacks nearby enemies while in Arbiter form, creating a truly passive playstyle where damage happens simply by existing near enemies.
Why Wing Strikes Appeals
- Minimal Input: Auto-targeting attacks require almost no manual aiming
- Comfortable Movement: Permanent Arbiter form enables Movement Speed cap and constant Vulnerable application
- High Ceiling: Despite its passive nature, pushes into S-tier territory
- Unique Fantasy: Truly feels like an angelic being smiting enemies automatically
Core Gameplay Loop
- Cast Arbiter of Justice upon entering any area to begin extended Arbiter form
- Wing Strikes automatically attack nearby enemies while you're transformed
- Use Falling Star frequently to maintain Ascension stacks and traverse areas
- Manually cast Fanaticism Aura and Defiance Aura when their active effects are helpful
- Drop Consecration on Elite packs and Bosses for extra damage
- Use Clash to generate Resolve, boost Block Chance, and activate Rite of Might
Key Unique Items
- Sanctis of Kethamar (Amulet): Provides massive Wing Strikes bonuses unavailable elsewhere
- Tyrael's Jurisdiction: Increases Wing Strikes range and enables seeking behavior toward nearby enemies instead of random targeting
Gear You Need
Armor:
- Angelic Masterwork or Hale's Salve (helm/chest) - Strength and armor stacking
- Virtuous (gloves) - Arbiter Duration
- Indomitable (pants) - Defensive stability
- Arbiter's Zephyr (boots) - Arbiter Duration extension
Weapons:
- Lagera's Sovereignty (mainhand) - Vulnerable damage and double damage chance
- Holy Punishment (offhand) - En Garde tempers and defensive stats
Jewelry:
- Tyrael's Jurisdiction (amulet) - Range and targeting improvements
- Celestial Strife (ring) - Wing Strike damage
- Ascension (ring) - Wing Strike damage
Frequently Asked Questions
Wing Strikes appear to activate approximately twice per second regardless of Attack Speed investment.
No, Wing Strikes doesn't have inherent Lucky Hit Chance, limiting certain proc-based synergies.
A-Tier Build Breakdowns
Brandish Paladin - The Angelic Boomerang
Pit Potential: 110+
Recommended For: Players wanting straightforward Basic skill gameplay
The Brandish Paladin embodies the angelic warrior fantasy, firing arcs of pure Holy energy in all directions while permanently transformed into Arbiter form. Combining Brandish with Returning Light and Supplication creates eight separate waves in a full circle that boomerang back to hit everything twice.
Core Mechanics
- All eight projectile waves can overlap on single targets for massive boss damage
- Best positioning: Stand directly inside enemy hitboxes with Unhindered from Condemn
- Simple gameplay loop: Hold Brandish while maintaining Arbiter form
- Cycles between Condemn and Falling Star to maintain permanent transformation
The Supplication Sword
The Supplication sword is mandatory for this build. It creates the 7 extra casts in a circle around you that define the build's identity.
Supplication Mechanics:
- Creates 7 extra casts in a circle (8 total with original)
- Returning Light and Sword of Mastery fire arcs at 45° angles
- Cross Strike fires arcs at 36° angles
- "Chance for Brandish to Deal Double Damage" applies to all projectiles at once, not rolled individually
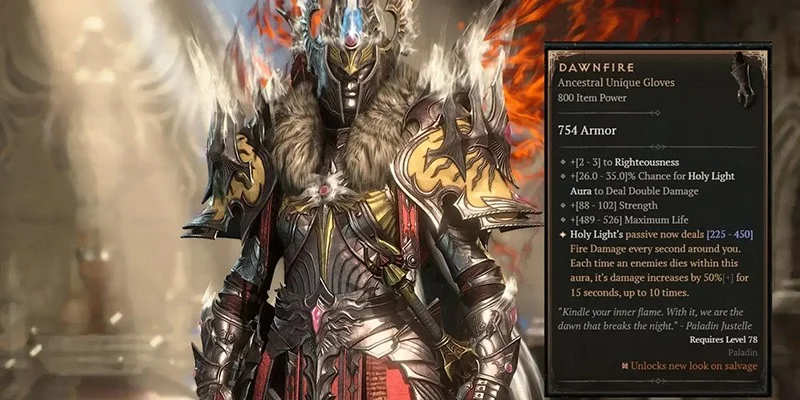
Auradin (Dawnfire Build) - The Walking Simulator
Pit Potential: 100+
Recommended For: Casual players, Hell Tide farming, AFK gameplay enthusiasts
The Auradin is the most laid-back build in Diablo IV. Instead of attacking with skills, you melt everything around you simply by existing, thanks to Dawnfire gloves replacing Holy Light Aura's passive damage. This creates a true "walking simulator" experience reminiscent of the classic Diablo 2 Dream Paladin.
Why Auradin Excels at Farming
- Zero Input Required: Walk near enemies; they die
- Excellent Speed: One of the fastest Torment 4 farmers
- Scaling Damage: On-kill stacking damage bonus from Dawnfire creates a snowball effect
- Wolf Multiplication: Wolves from Ceh rune also carry the aura, multiplying your damage
Core Mechanics
Dawnfire Unique Effect:
- Replaces Holy Light Aura's passive damage ticks completely
- Visual AoE appears small but actually hits nearly the entire screen
- Benefits from Holy Light Aura Potency and Attack Speed (Attack Speed scaling may be a bug)
- Holy Light Aura skill ranks increase damage
- Benefits from Judicator-tag buffs (Judicator damage, Judicator Glyph, Proselytizing Aspect)
- Nearby allies and Ceh wolves carry Holy Light Aura but NOT the Dawnfire effect
Why Stack Attack Speed?
The primary reason to stack Attack Speed (up to 100% cap 1) is for Preacher passive benefits. Holy Light Aura and Dawnfire damage per tick also scales with Attack Speed (this is likely a bug but currently functional).
Vulnerable Application
Wolves spawned by Ceh rune trigger Vulnerable and Frozen with their attacks. Multiple wolves cover most of the screen without additional sources needed.
Spear of the Heavens (Non-Judgement Version)
Pit Potential: 100+ (Sub-90-second Pit 100 clears possible)
Recommended For: Speed farming, goblin hunting, players wanting automatic gameplay
This variant of Spear of the Heavens focuses purely on speed rather than Judgement synergies. Everything falls from the sky automatically via Argent Veil ring triggering spears during Arbiter form Evades.
Key Differences from Judgement Build
- No manual casting required, fully automatic via Evade procs
- Sacrifices maximum damage potential for speed
- Excels at lower-to-mid Pit tiers where one-shot potential matters more than scaling
- Similar to Hammerdin in execution but with vertical attack pattern
Zeal Paladin - Spin-to-Win Fantasy
Pit Potential: Pit 110
Recommended For: Players wanting high attack speed melee combat, visually impressive builds
The Zeal Paladin uses the Zealot mechanics to create rapid after-images and achieve extremely high attack speeds. This build appeals to players who enjoy the visceral feel of rapid melee strikes.
Visual Appeal
- Creates multiple after-images during attacks
- Extremely high hit frequency
- Satisfying rapid-fire gameplay loop
- Uses Argent Veil for additional automated damage
Shield Bash Paladin - Classic Smite Returns
Pit Potential: 100+
Recommended For: Diablo 2 Smite Paladin fans, players wanting a defensive playstyle
The Shield Bash Paladin brings back the Diablo 2 Smite fantasy, excelling at converting defenses into offense. With Gate of the Red Dawn, Fortress becomes a damage-dealing nuke for burst windows.
Core Mechanics
Gate of the Red Dawn Interaction:
- Increases damage of all Juggernaut Core Skills against first target hit by 100%
- This damage instance is stored, up to 10 times
- Casting Fortress detonates all stored damage on all enemies in its area
- All stored damage is lost after Fortress cast (resets to 0)
- If Fortress is recast without stored damage, its explosion deals no damage
- Always use a Juggernaut Core Skill before recasting Fortress
Fortress Mechanics:
- 5 ranks in Fortress increase Immunity duration and area duration by 50%
- Provides brief Immunity and damage burst
- Can be recast to move location with Barricade upgrade
Speedfarming Variant
Bastion of Sir Matthias makes Fortress trigger automatically when attacked, enabling semi-passive gameplay that rewards large enemy pulls.
Support Paladin - Group Utility King
Role: Zero DPS support (zDPS)
Recommended For: Coordinated group play, supporting high-pushing carries
The Support Paladin provides overwhelming offensive, defensive, and utility buffs for group play without contributing direct damage. This build transforms group capability dramatically.
Offensive Buffs Provided
- x55% Damage (Wreath of Auric Laurel)
- x15% Damage (War Cry)
- x15% Damage (Consecration)
- x15% Damage (Law glyph via Judgement application)
- +50% Critical Strike Damage (Fanaticism Aura)
- +60% Critical Strike Chance (Fanaticism Aura)
- +100% "Cap 2" Attack Speed (Fanaticism Aura)
- x10% Damage (Wildbolt)
Special Synergy for Judgement Paladin Carries
- Roughly 15% Damage from Defiance Aura Potency
- Roughly 30% Damage from Castle board benefits
- Extra Spear of the Heavens casts
- Manual Judgement detonations for massive damage increases
Defensive Buffs Provided
- +150% Armor and 30% Max Life (Defiance Aura)
- Weaken application (reduced enemy damage)
- Immortality window (Entrench)
- Bastion from Raheir Reinforcement
- Healing through Anointing
- Lucky Hit healing on Temerity
- Life per Second sharing
- Life on Hit
- Undying aspect healing
- Consecration healing
- Rite of Prayer healing
Utility Provided
- Enemy grouping (Shepherd the Flock)
- Pull-in effects (Wildbolt)
- Vulnerable application (Lucky Hit on gloves)
- 15% Resource Cost Reduction (Enhanced Consecration)
- Daze application (Purify)
- 15% Execute Threshold (Exorcism)
Fanaticism Aura snapshots its Potency when you spend Faith. You MUST avoid spending any Faith until you have a Consecration down from casting Defiance Aura with Sundered Night equipped. Casting any Faith-spending skill first causes Fanaticism Aura to snapshot a weaker buff.
Correct Order:
- Cast Defiance Aura (triggers Consecration via Sundered Night)
- Now freely spend Faith on other abilities
Universal Survivability Improvements
All Paladin builds share common survivability issues in high-tier content. These solutions apply regardless of which build you're running.
When Fights Last Too Long
- Cap Block Chance: Ensure permanent 100% Block Chance to avoid massive damage spikes
- Use Defensive Consumables: Reddamine Buzz, Soothing Spices, Elixir of Fortitude II
- Prioritize Maximum Life: Roll Maximum Life instead of offensive stats where possible
- Kite Unstoppable Enemies: When enemies become Unstoppable, maintain distance
- Add Defensive Runes: Replace offensive runes with Mot, Que, or Xal
Hardcore Adjustments
- Focus on Maximum Life, Armor, and Resistances over DPS stats
- Masterwork Life rolls more frequently than normal
- Prioritize defensive skills, passives, and Paragon nodes during progression
- Play slightly lower difficulty than your maximum capability
- Ensure access to Unstoppable to escape crowd controls
- Use defensive elixirs and incenses instead of offensive options
Build Selection Guide by Player Type
New Players / First Paladin Character
Recommended: Shield of Retribution (Captain America)
Start here because:
- Requires no specific gear to function
- Smooth progression from level 60 onward
- Teaches core Paladin mechanics (Block, Resolve)
- Remains viable into early endgame
Casual Farmers / Hell Tide Grinders
Recommended: Auradin (Dawnfire)
Why it works:
- Literally zero buttons required for clear
- Walk through content while watching TV
- Extremely fast Torment 4 farming
- Wolves handle stragglers automatically
Speed Farmers / Goblin Hunters
Recommended: Blessed Hammer Paladin
What makes it ideal:
- Sub-60-second Pit 100 clears
- Automatic hammer casting with Argent Veil
- Satisfying Diablo 2 nostalgia
- Scales well into pushing content
Leaderboard Pushers
Recommended: Judgement Paladin
The reasons:
- Highest damage ceiling by significant margin
- Pit 140 projected achievable
- Rewards mastery with exponential scaling
- Necessary for competitive rankings
Group Players
Recommended: Support Paladin (zDPS)
What you get:
- Transforms group damage output dramatically
- Provides irreplaceable defensive utility
- Makes carrying allies through content trivial
- Especially powerful supporting other Judgement Paladins
AFK/Passive Playstyle Lovers
Recommended: Wing Strikes Paladin
Why it fits:
- High S-tier performance with minimal input
- Auto-targeting removes aiming entirely
- Permanent Arbiter form creates smooth gameplay
- Still pushes Pit 121+ despite passive nature
Recommended Consumables by Build Type
General Farming/All-Rounder Builds
- Soothing Spices
- Reddamine Buzz
- Spiral Morning
- Elixir of Fortitude II
Thorns/Shield of Retribution Builds
- Soothing Spices
- Scents of the Desert Afternoon
- Spiral Morning
- Elixir of Iron Barbs II
Wing Strikes/Strength-Stacking Builds
- Soothing Spices
- Song of the Mountain
- Ancient Times
- Elixir of Iron Barbs II
Support Paladin
- Elixir of Advantage II OR Elixir of Fortitude II
- Spiral Morning
- Reddamine Buzz
- Soothing Spices
The Paladin Era
Season 11 has firmly established the Paladin as Diablo IV's premier class. With damage potential exceeding thousands of trillions, builds for every playstyle from AFK walking simulators to complex chain-reaction specialists, and inherent tankiness through the Block system, there's simply no wrong choice when rolling a Paladin.
Players entering the class fresh should start with Shield of Retribution for an accessible entry point that scales into endgame. From there, Blessed Hammer offers the perfect stepping stone to learn Arbiter mechanics before transitioning to Judgement Paladin for serious pushing.
The class rewards both casual and dedicated players equally. You can zone out farming Hell Tides with Auradin or meticulously plan your pulls for that next Pit tier on Judgement. Your preferred playstyle doesn't matter; the Paladin delivers.
Welcome to the Divine Intervention. Your enemies await judgment.