
Overview and Core Concept
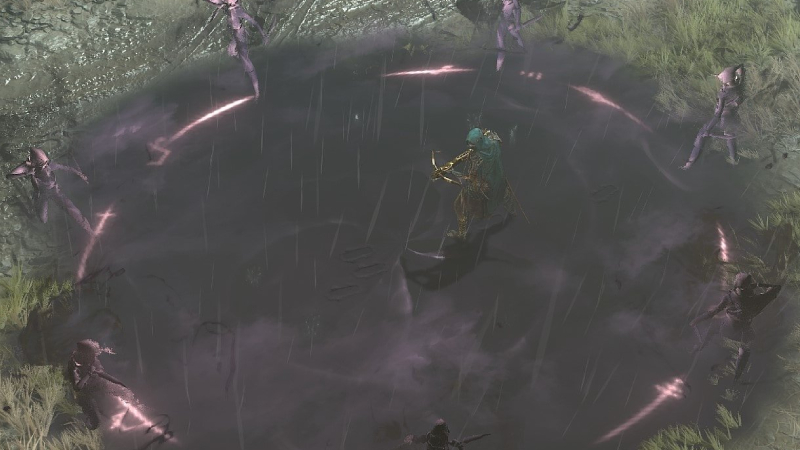
Welcome to Boosting Ground's definitive guide for the Flurry Overpower Rogue, one of the most powerful endgame builds in Diablo 4's Season 8. This build transforms your Rogue into a whirlwind of destruction, delivering guaranteed Critical Overpower strikes with every Flurry cast while maintaining near-immortal survivability.
The foundation of this build revolves around the synergy between Banished Lord's Talisman and Beastfall Boots, creating a seamless cycle where consuming 275 Energy guarantees your next Core Skill will Overpower. Through meticulous resource management and cooldown optimization, you'll achieve continuous Overpower strikes while maintaining exceptional mobility through Improved Flurry's instant dashing mechanics.
This guide provides everything needed to master this A-tier build, from initial gearing requirements through advanced Pit-pushing strategies. While the build demands strict itemization to function properly, the payoff is extraordinary - clearing Torment 4 content at blazing speeds and pushing beyond Tier 100 in The Pit.
Build Strengths and Limitations
- Guaranteed Critical Overpower Mechanics: Every Flurry activation delivers massive damage through the Banished Lord's Talisman interaction
- Superior Area Coverage: Flurry's wide attack radius combined with instant target dashing creates exceptional mob clearing potential
- Unmatched Speed-Farming Capability: The combination of high damage and mobility makes this the premier choice for efficient Torment 4 farming
- Near-Invulnerability: Second Wind passive combined with rapid resource consumption creates exceptional survivability
- Inflexible Gearing Requirements: Specific unique items and exact stat thresholds are mandatory for basic functionality
- Advanced Mechanical Execution: Success requires mastering precise skill rotations and resource management
- Melee Combat Dependency: All damage requires close-range engagement with enemies
Essential Prerequisites and Gearing Requirements
Before attempting this build, ensure you've acquired these mandatory components:
Critical Unique Items

The cornerstone that enables guaranteed Overpower mechanics

Essential for Energy consumption mechanics and Preparation activation

Provides crucial Maximum Resource and Cooldown Reduction
Resource Threshold Requirements
- Base Energy + 87 from gear
- Elixir of Resourcefulness II contribution
- Momentum passive's 1.30x multiplier
Priority sources for the 87 gear-based Energy:
- Maximum Resource rolls on Harlequin Crest and Beastfall Boots (prioritize Greater Affixes and Masterworking)
- Galvanized Slasher's Aspect (35 Energy maximum, but sacrifices damage - use only if necessary)
- Tibault's Will option (provides Maximum Energy but creates resource consistency issues)
Cooldown Management Requirements
Death Trap must reach 15.25 seconds or lower cooldown through:
- Cooldown Reduction from Harlequin Crest
- Ultimate Cooldown Reduction from Beastfall Boots
- Death Trap Cooldown Reduction tempers on two rings via Ultimate Efficiency - Rogue
- Masterworking bonuses to amplify these reductions
Complete Skill Configuration
Active Skill Loadout
Rogue Core Skills
Skill Point Distribution (71 Total Points)
Specialization Selection
Preparation is the mandatory Rogue Specialization. When Flurry consumes all Energy via Beastfall Boots, it triggers Preparation three times, reducing Death Trap's cooldown by 15 seconds total.

Comprehensive Gear and Stat Strategy
Legendary Aspect Configuration
| Gear Slot | Aspect | Effect |
|---|---|---|
| Ranged Weapon | Aspect of Encircling Blades | 35-55% increased Flurry damage in circle pattern (+100% bonus) |
| Dual-Wield Slot 1 | Aspect of Retribution | 10% stun chance from distant enemies, 15-35% increased damage to Stunned/Knocked Down |
| Dual-Wield Slot 2 | Edgemaster's Aspect | 5-25% damage scaling with available Primary Resource |
| Helm | Harlequin Crest | Unique |
| Chest | Cheat's Aspect | 10-30% damage reduction from Crowd Controlled enemies, movement speed on hit |
| Gloves | Conceited Aspect | 10-30% increased damage with active Barrier |
| Pants | Umbrous Aspect | 45-65% chance for free Dark Shroud shadow on Critical Strike |
| Boots | Beastfall Boots | Unique |
| Amulet | Banished Lord's Talisman | Unique |
| Ring 1 | Breakneck Bandit's Aspect | 25-45% Flurry damage, 20% stun chance |
| Ring 2 | Aspect of Stolen Vigor | 30-50% Cutthroat damage at max Momentum, periodic Unstoppable |
Stat Priority Framework
Tempering Strategy
- Agile Augments: Flurry Double Damage Chance (target 100% cap)
- Secondary options: Trap Expertise (Caltrops Duration) or Cutthroat Finesse (Attack Speed)
- Alchemist Control: Flurry Size (target 100% cap)
- Rogue Cloaking: Ranks to Aftermath
- Ultimate Efficiency - Rogue: Death Trap Cooldown Reduction (critical for rotation)
- Cutthroat Finesse: Cutthroat Attack Speed
Unique Item Integration
Required Uniques:
- Harlequin Crest: Masterwork Maximum Resource or Cooldown Reduction
- Banished Lord's Talisman: Masterwork Ranks to Core Skills
- Beastfall Boots: Masterwork Maximum Resource or Ultimate Cooldown Reduction
Recommended Additions:
- Shroud of False Death: +1 All Passives provides significant damage boost (Masterwork Maximum Life)
- Doombringer: Massive Maximum Life scaling for Overpower (Masterwork Maximum Life)
- Asheara's Khanjar: Optimal with Greater Affix on Weapon Mastery ranks (Masterwork this stat)
Situational Options:
- Tibault's Will: Only if struggling to reach 275 Energy threshold
- Ring of Starless Skies: 1.5x damage multiplier if Death Trap cooldown is already optimized
Socket Configuration
Gems:
- Weapons: Grand Diamond (Ultimate Damage for No Witnesses scaling)
- Armor: Grand Emerald (Dexterity)
- Jewelry: Resistance gems as needed or Grand Skull for Armor (1,000 cap)

Runewords (2 total in Helm/Chest/Pants):
1. Yul + Xal: 50 Offering from Cooldown skills → 20% Maximum Life for 6 seconds
2. Zan + Qax: 150 Offering from Ultimate → Next skill deals up to 100% increased damage
Detailed Paragon Board Progression
Board Progression Order and Strategy
Since visual boards cannot be displayed, here's the complete text-based progression guide:
- Path directly toward your first board attachment point
- Prioritize Dexterity nodes for basic scaling
- Grab any Maximum Life nodes along efficient paths
- Socket your first Glyph in the central socket once available
- Attach your first legendary board focusing on Critical Strike or Overpower damage
- Path efficiently toward the Legendary node
- Acquire the Legendary node as priority
- Socket appropriate damage-scaling Glyph
- Collect Dexterity clusters along the path
- Select a board offering Maximum Energy or Cooldown Reduction bonuses
- Legendary node acquisition remains top priority
- Focus on nodes that support resource generation
- Place utility-focused Glyph in socket
- Choose defensive-oriented board with Maximum Life focus
- Path through Armor/Resistance nodes as needed
- Legendary node provides damage reduction or life scaling
- Socket defensive Glyph for added protection
- Final standard board focuses on movement speed or crowd control
- Efficient pathing more important at this stage
- Grab any remaining Maximum Life nodes
- Complete Glyph collection in final socket
- Additional boards for min-maxing specific stats
- Focus entirely on Maximum Life and Dexterity
- Skip inefficient paths unless they lead to crucial stats
Glyph Strategy and Placement
- Damage Amplification: Glyphs scaling Flurry damage or Critical Strike
- Resource Enhancement: Energy regeneration or Maximum Resource glyphs
- Defensive Layers: Damage reduction or Maximum Life scaling
- Utility Options: Movement speed or crowd control duration
- Level damage glyphs to 15 first
- Resource glyphs to 15 second
- Defensive glyphs as needed
- Utility glyphs last
Statistical Benchmarks Through Paragon
| Paragon Level | Dexterity from Paragon | Maximum Life from Boards | Additional Goals |
|---|---|---|---|
| By Paragon 100 | 350+ | 15%+ | Critical Strike Chance approaching cap |
| By Paragon 150 | 500+ | 25%+ | Cooldown Reduction optimized |
| By Paragon 200 | 650+ | 35%+ | All defensive requirements met |
Node Priority Guidelines
- Legendary Nodes - Always highest priority
- Glyph Sockets - Required for build functionality
- Rare Nodes - Maximum Life and Dexterity clusters
- Magic Nodes - Only if on efficient paths
- Normal Nodes - Fill requirements for Legendary node activation
Season 8 Boss Powers Configuration
The Season of Belial's Return introduces Boss Powers that significantly enhance build performance:
Beast in the Ice's Sleet: Triggers after 3 crowd control/stagger skills, launching sleet spikes dealing 800% Cold damage with 2-second Freeze
Modifier Selection (Choose One):
Mercenary Configuration
Upon unlocking the Den through Vessel of Hatred's main questline:
- Shield Charge (Fortify generation)
- Raheir's Guard (defensive support)
- Provoke (threat management)
- Mocking Lure (enemy grouping)
- Bloodthirst ability
- Triggers on any player skill cast during combat
Advanced Build Mechanics
Core Interaction Explained
The build's foundation relies on this sequence:
Consume All Energy
Guaranteed Overpower
Damage Scaling Factors
Overpower Scaling:
- Maximum Life directly multiplies Overpower damage
- Fortify amount adds to Overpower calculation
- Maintain 100% Fortify through Raheir's Shield Charge
Multiplicative Bonuses:
- Critical Strike (guaranteed through Overpower interaction)
- Vulnerable application
- Crowd Control status effects
Defensive Mechanics
- Rapid Energy consumption triggers constant healing
- High Maximum Life pool amplifies healing amounts
- Creates near-immortal gameplay loop
Imbuement Selection
- Optimal single-target damage via Mixed Cold Imbuement
- Benefits from Frigid Finesse passive
- Standard choice for Pit pushing
- Superior for multi-target farming
- Respec: Remove points from Cold Imbuement (3), Sturdy (3), Dark Shroud (1)
- Invest in Shadow Imbuement Rank 5, Enhanced, and Mixed variants
Resource Generation Management
Calculating Energy Requirements
The build requires precise Energy generation to maintain 275 per Flurry cast:
Optimal Aftermath Configuration
- 3 base skill points in Aftermath
- +1 from Shroud of False Death's All Passives
- +3 from Rogue Cloaking temper on pants
- Total: Rank 7 Aftermath
Troubleshooting Resource Issues
Banished Lord's Talisman Buff Monitoring:
- 275: Perfect execution
- 200-274: Insufficient Energy generation
- 25 or below: Missed Death Trap in rotation
Tibault's Will Considerations
While providing Maximum Energy, Tibault's Will creates inconsistency:
- Multiple cooldown activations don't always grant full Energy
- Legendary pants with Aftermath ranks prove more reliable
- Only use if absolutely necessary for 275 threshold
Combat Rotation and Execution
Standard Rotation Sequence
Core Combat Loop
Repeat sequence continuously for optimal damage output
- Preparation Phase: Activate potion for Unstable Elixirs (every 10 seconds)
- Elite Engagement: Deploy Caltrops for Enhanced damage bonus
- Optional: Smoke Grenade application (5-second intervals)
- Cast Death Trap (Energy generation via Aftermath)
- Cast Cold Imbuement
- Cast Dark Shroud
- Cast Flurry
- Repeat sequence
Button Holding Optimization
- Hold: Death Trap, Cold Imbuement, Dark Shroud
- Tap: Flurry (after each Shadow Clone appearance)
- Release movement keys to allow held skills to activate
- Attack Speed determines Flurry casting rate
- Hold: Cold Imbuement, Dark Shroud (2-button limit)
- Alternate tapping: Death Trap and Flurry
Timing Considerations
- Avoid spamming Flurry too rapidly
- Wait for Shadow Clone animation
- Maintain consistent rhythm based on Attack Speed
Consumables Strategy
Elixir Priority
- Elixir of Resourcefulness II: Essential if below 275 Energy without it
- Elixir of Fortitude II: Maximum damage if Energy requirement already met
- Reddamine Buzz Incense: Additional Maximum Life for Overpower scaling
Advanced Pit Pushing Configuration
For pushing highest Pit tiers (10-15 tiers higher than standard):
Modified Skill Setup
- Remove 3 points from Dash → Invest in Subverting Smoke Grenade
- Remove 3 points from Dark Shroud → Invest in Subverting Concealment
- Equip Concealment on skill bar
Rotation Adjustments
- Cast Concealment immediately before each Flurry
- Activates Danse Macabre for multiplicative damage
- Precise timing critical - no button holding technique
Gear Modifications
- Replace Deadly Ambush board with Danse Macabre board
- Equip Tibault's Will for easier stat requirements
- Legendary weapon preferred over Asheara's Khanjar
- Consider Elixir of Fortitude II if reaching 112 Maximum Resource
Execution Difficulty
This variant demands perfect manual timing and is only recommended for dedicated Pit pushing. The complexity increase is substantial but enables clearing content 10-15 tiers higher than the standard build.
Season 8 Specific Changes
Relevant Updates for This Build
- Fists of Fate no longer applies random crowd controls (more consistent gameplay)
- Frostbitten Aspect moved to Offensive category (potential alternative aspect)
- Trick Attacks reworked: Now provides 1/2/3% Critical Strike Chance and Damage per stack (down from 2/4/6%), stacks to 5/10/15% (down from 12/24/36%), but duration increased to 8 seconds
- Aspect of Concussive Strikes no longer provides damage bonus
- Worldly Fortune cannot roll crowd control tempers
Conclusion
The Flurry Overpower Rogue represents the pinnacle of speed-farming efficiency and endgame pushing potential in Diablo 4's Season 8. While the build demands exact itemization and practiced execution, mastering its mechanics rewards players with unmatched clearing speed and near-invulnerable gameplay.
Success hinges on meeting the strict 275 Energy requirement, optimizing Death Trap cooldown to 15.25 seconds or less, and executing the rotation with precision. Whether farming Torment 4 content at lightning speed or pushing deep into The Pit, this build delivers exceptional performance for dedicated players willing to master its complexities.
For build planning tools and additional community resources, consider using neutral platforms like d4builds.gg to visualize your progression. The journey to mastering Flurry Overpower demands dedication, but the destination offers gameplay that truly lives up to its promise of overpowering your foes with blazing speed.