
The Tower brings competitive endgame to Diablo 4 for the first time, complete with official leaderboards. This timed dungeon challenges you to prove your build against the clock while competing for global rankings. From players pushing for top placements to those just testing how far their character can go, this guide covers everything you need to climb successfully.
Understanding The Tower
What Is The Tower?
The Tower is a competitive endgame activity built specifically for leaderboard competition. It shares some DNA with The Pit, but the focus here is entirely on speed and efficiency rather than farming rewards.
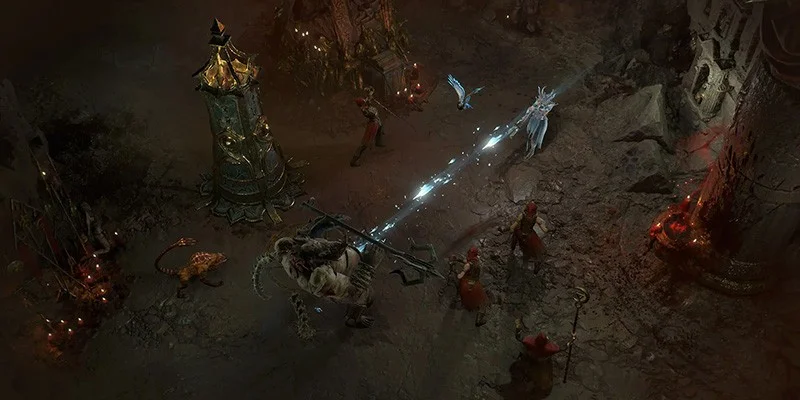
You enter a randomized multi stage dungeon with a strict 10 minute timer. Your goal is to fill a progress bar by killing enemies and collecting orbs, then defeat a boss before time runs out. Finish the run, and your time gets recorded for potential leaderboard placement.
The activity has five floors, each with randomized layouts and monster families. No two runs play out the same way, which keeps things fresh but also introduces variance that competitive players need to plan around.
The Tower vs. The Pit
Understanding how the Tower differs from The Pit helps you adjust your approach:
| Aspect | The Pit | The Tower |
|---|---|---|
| Time Limit | 15 minutes | 10 minutes |
| Floor Count | 2 floors | 5 floors |
| Progress System | Kill enemies directly | Kill enemies AND collect dropped orbs |
| Monster Leashing | Enemies return to spawn if pulled too far | Enemies don't leash |
| Boss Spawn | Portal opens to separate boss lair | Boss spawns on your current floor |
| Backtracking | Sometimes required | Never required thanks to 5 floor design |
| Pylons | Not present | Exclusive Tower mechanic |
| Rewards | Repeatable loot drops | One time tier completion rewards only |
| Purpose | Farming and progression | Competition and leaderboard placement |
Unlocking and Accessing
Prerequisites
To unlock the Tower, you need to complete the Hellish Descent Capstone Dungeon, which corresponds to reaching Season Rank 2 in your Season Journey. This is the same requirement for unlocking The Pit.
How to Enter
You access the Tower through the Artificer's Obelisk in Cerrigar, the same spot where you enter The Pit. The interface lets you choose between the two activities.
When selecting the Tower, you'll notice it displays with a purple color scheme and a "Beta" indicator. Select your desired difficulty tier before starting the run.
Difficulty Tier System
The Tower shares its difficulty tier system with The Pit, and progression works both ways. Any tier you've unlocked for The Pit is automatically available for the Tower. Completing higher Tower tiers unlocks those same tiers for The Pit. You can push Tower tiers independently of your Pit progression.
So if you've cleared Pit Tier 50, you can immediately attempt Tower Tier 50. If you then complete Tower Tier 55, you'll unlock Tier 55 for both activities.
Tower Mechanics and Progression
The Progress System
Your objective is filling the progress bar before the 10 minute timer expires. Progress comes from two sources.
Every enemy you kill contributes progress based on the experience value that monster would normally provide. Higher value enemies like elites and champions contribute more than standard monsters.
Progression orbs are glowing orbs that drop from specific enemy types and must be manually collected. They provide substantial progress boosts. Orbs drop from elites, champions, and Treasure Goblins (when present).
If you kill an enemy while standing nearby, the orbs spawn closer to your position. Otherwise, they appear at the monster's corpse location.
Elites and Champions show up as red dots on your minimap, helping you prioritize high value targets.
Floor Structure
Each Tower run has five floors. Every floor uses a different randomized tile set and spawns a different monster family. The five floor design eliminates backtracking concerns. As you climb, maintaining pace becomes increasingly important.
The randomization means you might face favorable or unfavorable monster combinations. Some enemy types naturally suit certain builds better than others.
Starting a Run
When you enter the Tower, you begin in a circular safe zone. The timer doesn't start until you exit this circle, but monsters can enter this circle and attack you before you start.
If your build lacks inherent stealth or defensive measures, enemies may engage you while you're still in the starting area. The timer won't begin, but you could take damage or die before officially starting.
You can kill monsters that enter the starting circle before the timer begins, but they won't drop progression orbs during this prestart phase.
Boss Encounters
Once your progress bar fills completely, a Tower Guardian spawns directly on your current floor. In The Pit, completing progress opens a portal to a separate boss arena, but the Tower skips that step entirely.
Tower Guardians have health pools that match equivalent Pit boss levels but are less powerful overall. They don't have self healing abilities or invisibility phases. The boss spawns immediately and is easily accessible.
Certain bosses have been excluded from the Tower due to inconsistent behavior, specifically the Vampire Wraith and the Fallen Shaman "Sower of Decay."
These exclusions and the removal of healing and invisibility mechanics reduce the "fishing" problem. Previously, players would restart runs hoping for favorable boss spawns.
After defeating the Tower Guardian, a portal spawns nearby for a quick exit. Your completion time is recorded, and you'll see your result along with your leaderboard position if applicable.
Pylons: Tower Exclusive Power Boosts
What Are Pylons?
Pylons are enhanced shrine like objects exclusive to the Tower. They provide powerful temporary buffs lasting 30 seconds that can dramatically speed up your clear time.
How Pylons Work
Every pylon spawns protected by a destructible shield. You must destroy this barrier before activating the pylon. The shield has relatively low health and breaks quickly.
Once the shield is destroyed, you can immediately activate the pylon with no additional delay.
Pylon Types and Effects
Pylon Distribution
Every Tower run guarantees exactly four pylons. The first three are one of each type (Power, Speed, Channeling) in random order. The fourth pylon is a random repeat of one of the three types.
This system guarantees you'll encounter each pylon type at least once per run, reducing variance compared to purely random distribution.
Strategic Pylon Usage
The Pylon of Power is generally the strongest for most builds because of the raw damage multiplier. Different builds get different value from each type though.
For high damage builds, prioritize Power Pylon. Resource intensive builds get good value from Channeling Pylon. Support builds in group play also benefit from Channeling Pylon for maintaining buff uptime. If your build is already Unstoppable, Speed Pylon's movement bonus still helps, but other effects may be redundant.
The Leaderboard System
Leaderboard Basics
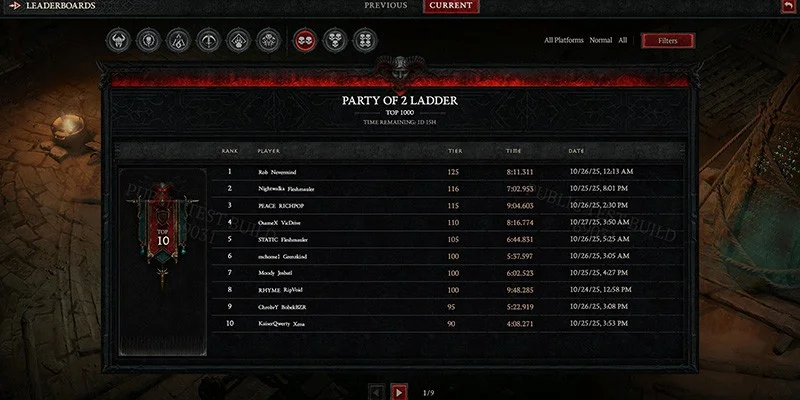
The Tower leaderboards track the top 1,000 players in each competitive bracket. Rankings are determined first by the highest Tower tier completed, then by completion time as a tiebreaker.
A faster clear at the same tier ranks higher than a slower one. Completing a higher tier always ranks above lower tiers regardless of time.
Accessing Leaderboards
You can view leaderboards at the Artificer's Obelisk in Cerrigar or through the Collections menu (default keybind: Y).
Loading times for leaderboard data can be lengthy, particularly when browsing through rankings.
Leaderboard Brackets
Solo class categories include Barbarian, Necromancer, Sorcerer, Rogue, Druid, Spiritborn, and Paladin.
Group categories include Party of 2, Party of 3, and Party of 4.
Each bracket maintains separate rankings for Normal and Hardcore modes.
Filtering Options
Leaderboards can be filtered by platform (All Platforms or specific platform), mode (Normal or Hardcore), friends list, and clan membership. These filters let you compare performance against relevant peer groups.
Profile Viewing
You can inspect other players' profiles from the leaderboard to see their equipped gear and skills, but profiles show current equipment, not a snapshot from when the rank was achieved.
If a top-ranked player changes their build after setting their record, you'll see their current loadout rather than what they actually used. Players who set their profile to private can't have their builds viewed at all.
Profile inspection only shows equipped items and skills. You can't view Paragon board allocations or other detailed build information.
Cross Platform Considerations
Disabling cross platform play limits your leaderboard access. You can only view rankings from your own platform, and you can't inspect profiles of players on other platforms.
Tower Climbing Strategies
General Approach
Successful Tower climbing requires balancing speed with efficiency. The 10 minute limit is strict and leaves no room for significant mistakes or inefficient routing.
Follow red dots on your minimap to locate elites and champions. Collect every progression orb and don't leave them behind. Use pylons strategically rather than immediately. Keep moving forward since the five floor design rewards continuous progress.
Monster Stacking Strategy
The lack of leashing opens up aggressive pulling strategies. Make sure your defensive layers can handle multiple packs at once. Pull aggressively and gather several elite packs and champion groups together. Drag enemies to pylon locations before activating. Then use pylon buffs plus your cooldowns to eliminate stacked groups quickly.
Stacking enemies this way maximizes orb collection per engagement and gets more value out of limited pylon duration.
Handling Goblins
Treasure Goblins appear in the Tower and drop large quantities of progression orbs. Their spawns seem random, so they may not appear in every run, or you may need to explore to find them.
When you encounter a Goblin, prioritize killing it. The orb yield substantially speeds up progress bar completion.
Build Considerations
Top builds for Tower pushing share characteristics with top Pit pushing builds. You need high burst damage for quick elimination of elite packs, adequate survivability for handling multiple threats at once, mobility for efficient floor traversal, and AoE capability for clearing stacked groups effectively.
Recommended Builds by Class
The following builds represent the strongest options for Tower pushing based on current performance data. Build effectiveness may shift as the meta develops.
Judgment functions like a sticky explosive, attaching a timed detonation to enemies that deals massive damage when triggered. The skill benefits from numerous multiplicative damage bonuses and can be instantly triggered with Spear of the Heavens. Judgment builds are currently hitting the highest tier completions across all classes. They're capable of dealing trillions of damage even before full gear optimization.
This build scales damage based on maximum Fury using the Ramaladni's Magnum Opus weapon. The Melted Heart of Selig unique greatly increases Fury capacity. Optimal setups use two Melted Heart of Selig items, one equipped normally and one as a Sanctification. This makes the build more investment heavy but delivers the highest Barbarian damage output.
Spiritborn continues using gorilla themed abilities as the core damage engine. Key uniques include Hesha E Kesungi gloves, Rod of Kepeleke quarterstaff, Harmony of Ebewaka helmet, and Shroud of False Death as the required Mythic. Additional Mythic items like The Grandfather or Harlequin Crest (Shako) provide further power but aren't strictly necessary.
The Heartseeker build returns as the dominant Rogue option. Combined with the Orphan Maker crossbow, this setup delivers exceptional single target and cleave damage. Dance of Knives builds remain viable but don't push as high as Heartseeker for leaderboard competition. Death Trap variants also work but fall behind the Heartseeker ceiling.
Poison Pulverize with Rotting Lightbringer continues as the Druid's premier pushing build. This build needs several Mythic uniques including Heir of Perdition, Shroud of False Death, and Ring of Starless Skies. The investment barrier is higher than some other classes, but the power ceiling justifies it for competitive pushing.
Necromancer has two competitive options. Shadow Blight is a returning build from previous seasons that remains strong for Tower pushing. The new Gravebloom mace transforms your single Golem into three separate Golems. This creates a viable golem focused build that competes with Shadow Blight. Having two roughly equal options gives Necromancer players build flexibility based on available gear.
Sorcerer gets a major boost from the new unique mace Orsivane, which grants 20 to 40% multiplicative damage for each defensive skill NOT on your action bar. You also gain the Enchantment effect of each missing defensive skill automatically. This bonus fits perfectly with full lightning/Crackling Energy builds that don't require defensive skill slots. Players essentially trade active defensive abilities for passive defensive enchantments plus massive damage increases. No other Sorcerer build currently comes close to this setup's performance for competitive Tower pushing.
Rewards
Current Reward Structure
The Tower is designed as a pushing activity rather than a farming activity. Unlike The Pit, you don't receive repeatable loot drops for completing runs.
Currently, the Tower offers one time rewards for completing specific tiers for the first time. Complete details on these milestone rewards haven't been fully documented.
Basic experience rewards are granted for completion, comparable to Pit experience values.
Planned Future Rewards
Blizzard has announced plans to expand the reward structure.
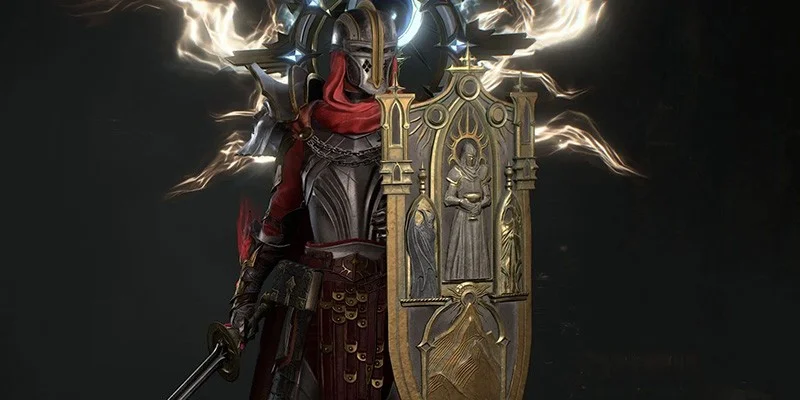
Reaching certain leaderboard rank thresholds will reward exclusive halos that only that specific character can equip. These serve as visible proof of competitive achievement.
Additional reward types may be introduced as the system exits Beta.
Leaderboard Integrity
Current Challenges
The competitive nature of leaderboards introduces concerns about fair play.
Players with access to traded high end items (perfect stat rolls, perfect aspects) can gear up faster than self found players. This includes situations where community members or viewers feed streamers optimal gear.
Some players also acquire powerful items through third party services, potentially placing higher than players gearing legitimately.
Planned Solutions
Blizzard has confirmed a Solo Self Found leaderboard category is coming in a future update. This mode will create a completely level playing field where all competitors must acquire their own gear independently.
Until SSF mode launches, current leaderboards reflect both player skill and gear acquisition methods.
Seasonal Schedule
The Tower operates in rounds during its Beta period. Each round lasts two weeks, with Round 1, Round 2, and Round 3 running consecutively.
Leaderboards reset between rounds, giving players fresh opportunities to compete. This cadence lets Blizzard implement adjustments between rounds based on player feedback.
Tips for Competitive Success
Before Running
Make sure your gear, skills, and Paragon allocations are fully set before attempting competitive runs. Know the highest tier you can realistically complete within 10 minutes. Get familiar with efficient floor navigation through practice. Figure out which pylons benefit your specific build most.
During the Run
The 10 minute limit demands constant forward progress, so maintain momentum at all times. Keep your eyes on the minimap since red dots indicate high value targets. Collect every orb because progress orbs are not optional for competitive times. Save cooldowns for stacked groups to maximize damage efficiency. Stack enemies before activating pylons when possible.
After the Run
Review your time and identify where seconds were lost. Check your leaderboard position to understand where you stand. Iterate on your strategy since small improvements add up over multiple attempts.
Group Play Considerations
For party leaderboards, coordination becomes important. Designate roles for damage, support, and pulling. Communicate pylon usage and coordinate burst windows on stacked groups. Support builds get a lot of value from Channeling Pylon for maintaining buffs.
Frequently Asked Questions
No. Profiles show current equipment, not a snapshot from when the rank was achieved. Players may have changed builds since setting their record.
No. Completing higher tiers in either activity unlocks that tier for both.
You respawn on the same floor where you died, so you can resume your attempt. You don't restart from the beginning.
This isn't definitively confirmed. Goblins seem to have some randomness to their spawns.
Players with private profiles can't have their builds inspected. Cross platform restrictions also limit profile access.
No. Your ranking is based on your completion time and tier, not your equipped gear. Others viewing your profile will see your current gear though.
Summary
The Tower represents Diablo 4's competitive endgame, offering skilled players a place to prove their builds against the global playerbase. Success requires understanding the unique mechanics (progression orbs, pylons, no monster leashing) and adapting your approach for the strict 10 minute timer.
While the system remains in Beta with more features planned, the core experience is ready for competition. Focus on build setup, efficient routing, strategic pylon usage, and aggressive monster stacking to climb the leaderboards.
The Tower provides a challenging benchmark for Diablo 4's most dedicated players, from those pushing for top rankings to anyone testing their build's limits.