
Getting to level 60 in Diablo 4 Season 11 doesn't have to be a grind. This guide covers the fastest leveling routes available, from the campaign speedrun method that can get you there in under two hours to alternative open-world strategies for players who want more variety. We'll break down everything you need to know about efficient progression, including which activities give the best XP, how to avoid common time-wasting mistakes, and when to actually invest resources in your gear.
This guide works for solo and group play, and it's built for everyone from speedrunners chasing personal records to returning players who just want to hit endgame without the tedium. We're assuming you've finished the campaign at least once on your account, so you can skip the original story when making new characters.
What Changed in Season 11
Season 11 made some big changes to how leveling works:
You don't get those 14 free skill points at level 1 anymore. They're spread throughout Seasonal Journey challenges now, so you'll need to complete specific objectives to unlock them. This makes your character noticeably weaker at the start compared to previous seasons.
Capstone dungeons are back in the game. They're tied to your seasonal progression and affect how quickly you can move through difficulty tiers.
The old reputation system is gone. All those bonuses that used to unlock gradually? They're now split across different chapters of the Seasonal Journey. You'll need to actually prioritize these quests instead of letting them complete passively.
Altars of Lilith basically don't matter anymore. The rewards are so small you can ignore them completely, even when starting fresh.
These changes slow down your early game since you start weaker, but there are still multiple fast paths to 60.

Before You Create Your Character
Pick the Right Build
You probably already know what endgame build you're aiming for, but leveling builds are different. What you need for 1-60 isn't always what performs best at max level.
Good leveling builds share a few traits: they clear monster packs fast, they have high movement speed, they use movement abilities with short cooldowns, and they don't run out of resources constantly. Find a leveling build for your class that checks these boxes. It'll carry you to 60 where you can swap to whatever endgame setup you prefer.
Unlock Your Aspects Early
If you're leveling an alt and your main hasn't unlocked the Legendary Aspects your build needs, you've got two options. You can farm the required dungeons on your main before creating the alt (this unlocks them account-wide), or you can grab them while leveling your new character. The first option is way more efficient if you care about speed.
Finding aspect dungeons is simple: open the Codex of Power, search for what you need, left-click it, and you'll get a waypoint. Complete the dungeon, extract the aspect at the Occultist, and you're done.
Save Gear for Future Characters
Planning to level multiple characters? While you're playing your main, stash gear with good stats for your future builds. Item level requirements depend on the character level that found the item, not the item's power level. Save batches of gear every 5-10 levels.
You can also buy build-defining Unique items from other players. If you're lucky enough to get a Mythic Unique, any character can equip it at level 35 for a massive power boost.
Stock Up on XP Consumables
Always keep an Elixir active while leveling. At level 10, Level 1 Elixirs give +5% XP. Around level 50, you'll find or craft Level 2 Elixirs that give +8% XP. The type doesn't matter for the XP bonus, so just use whatever's cheapest to craft or gives you the stats you need.
Incenses start dropping at level 45 and add another +5% XP. They last 20 minutes, persist through death, and cost a lot to craft. Use them when you're actively grinding, not when you're messing around in town. They buff all nearby players too. The XP bonus doesn't stack if you use multiple Incenses, but the combat stats from different types (Core Stat, Defensive, Resistance) do stack.
- Core Stat Incenses: Ancient Times, Blessed Guide, Sage's Whisper, Spiral Morning, Queen's Supreme
- Defensive Incenses: Reddamine Buzz, Song of the Mountain (available at 45)
- Resistance Incenses: Desert Escape, Storm of the Wilds, Soothing Spices
Once you hit 60 and have access to all Elixirs and Essences, stack four separate XP buffs: one Elixir at 8%, plus three different Essence types. From this point forward, keep everything running at all times.
There are two other big XP sources you'll use later. Legion Event bonfires give +15% XP for 15 minutes, and Nightmare Dungeon wells (guaranteed with the Forgotten Wisdom affix, sometimes random otherwise) give an XP buff for a full hour.

Smart Crafting During Leveling
Your weapon determines most of your damage output, so you'll replace it constantly as higher DPS options drop. This gets expensive fast if you're re-imprinting and re-tempering every new weapon you find.
Save materials by putting your most important Legendary Aspect on jewelry instead. Rings and amulets get replaced less often, and the stat difference between jewelry pieces matters less than weapon upgrades. Imprinting and tempering costs scale with Item Power, so the higher level your gear, the more expensive it gets.
If this is your first seasonal character, you won't have tons of materials. Only invest enough to keep one-shotting trash mobs. Save the real investment for when you need a power spike to move up a difficulty tier.
You can imprint Legendary Aspects on both Legendary and Rare items. When you imprint on a Rare, it becomes Legendary but keeps the same number of stats as the original Rare had. Don't waste materials fully upgrading or rerolling anything below item level 800. You can temper 750+ items, but don't go heavy on the upgrades or rerolls.
Which Stats Actually Matter While Leveling
Some stats punch way above their weight early on, then fall off. Others scale up as you level.
Early game priorities are additive damage rolls (% Damage, Close Damage, Fire Damage, etc.), resource per second, movement speed, and defensive stats like Armor and Elemental Resistances. Additive damage is incredibly strong when you have few damage modifiers, but its value drops as your gear improves and you stack more multipliers. Resource generation is critical until you solve your resource problems. Movement speed is always good, cap it as fast as you can. If you max out Armor and Resistances early, you'll feel nearly invincible for a while.
Stats that get better as you level include main stats (Strength, Dexterity, Intelligence, Willpower), Resource Cost Reduction, and Cooldown Reduction.
Character Creation Settings
When you make your seasonal character, skip the original campaign. Then decide if you want to start with or skip the Vessel of Hatred campaign based on your leveling method (we'll cover both routes).
Start on Normal difficulty. Your character is weaker than in past seasons thanks to the new skill point system. You can bump up the difficulty once you're comfortably destroying everything. Most players move to Hard around level 45.
The available difficulty tiers from 1-60 are Normal, Hard (+75% XP and Gold), Expert (+125% XP and Gold), and Penitent (+175% XP and Gold).
First Steps (Levels 1-15)
Equip a Pet Immediately
First thing after logging in: open your character panel, go to your wardrobe, equip a pet. Pets auto-collect resources and gold. This saves you from stopping to pick up materials constantly, which adds up to significant time saved over your entire leveling session.
Get Your Mercenaries Set Up
Head to the mercenary den in Nahantu if you've done the unlock quest. First-time Vessel of Hatred players need to complete that quest. Mercenaries unlock at level 15.
The four mercenaries are Raheir (tanky Shieldbearer), Varyana (melee Berserker), Aldkin (shapeshifting Caster), and Subo (ranged Bounty Hunter).
For your primary slot, Subo is the best choice for most players. He highlights enemies and resources on your map, which stays useful even in endgame. If you're new and struggling with survivability, Raheir works as a primary for the defense boost. He also helps defensively when placed in the support slot.
For secondary, Varyana gives attack speed, or you can double up on defense with Raheir again.
Your build guide probably has specific mercenary recommendations if there are better synergies for your class.
Start the Seasonal Questline
Jump into the Seasonal quests right away (they're marked with leaf icons). You only need to complete the first 1-2 quests, which takes about 1-2 minutes. This unlocks your first seasonal power and the Seasonal Reputation Board. Seasonal powers give you big character boosts.

Fastest Leveling Route: Vessel of Hatred Campaign
The Vessel of Hatred campaign is hands down the fastest way to level from 1 to around 50-57. Campaign quests give fixed, huge XP rewards. Some completions grant multiple levels instantly. You can average roughly one level per minute from levels 1-40. Quest objectives guide your path naturally, so there's no guessing about where to go or what to do. You'll also get some legendary drops along the way that can speed things up further. A clean run takes 90-120 minutes total.
- Fastest method to level 50-57
- Fixed XP rewards for consistent leveling
- Clear objectives with no guesswork
- 90-120 minute total time
- Legendary drops along the way
- Repetitive for alt characters
- Less variety than open world
- Can't skip during Deeds of a Champion
- Efficiency drops after level 50
Running the Campaign
Create your character with the Vessel of Hatred campaign not completed. Play on Normal (or Hard if your build is strong). Focus on objectives, not kills. Run from objective to objective and skip most monsters between waypoints. Fight only when necessary, and one-shot everything. Can't maintain that pace? Drop the difficulty.
Use Tributes of Growth immediately by running Kurast Undercity. Same goes for Nightmare Sigils with the Forgotten Wisdom affix. Both drop tons of XP orbs.
When to Skip the Rest
The later parts of the campaign get less efficient. Around level 50-57, particularly after you beat Urivar and hit the lake section and tomb area, the XP per minute drops.
You don't need to finish the campaign. Around level 50, return to character select and hit "Skip Campaign." This auto-completes the remaining quests including the Deeds of a Champion questline.
Skipping matters because if you turn in the final campaign quest after returning to Kurast, the campaign ends and immediately starts Deeds of a Champion. You can't skip the campaign during that questline. Deeds of a Champion is required for Tree of Whispers access but it's terrible for leveling efficiency.
Skip around level 50-57, and you auto-complete both the remaining campaign and Deeds of a Champion, giving you full access to everything while saving time.
Finishing to 60
After skipping the campaign around level 50, knock out the remaining levels through Strongholds. Details below.

Alternative Route: Open World Leveling
If you don't want to touch the campaign again (and honestly, it's not the most exciting content to repeat), open world leveling is solid. It's slower than the campaign route but more varied.
- More variety in activities
- Better for multiple alts
- Can mix different content types
- More engaging for some players
- Better loot opportunities
- Slower than campaign route
- Requires more planning
- Less consistent XP gains
- More decision-making needed
Complete Initial Seasonal Quests (Level 1-5)
Start the seasonal questline (leaf icon markers). Progress until you unlock your first seasonal power and the Seasonal Reputation Board. This starts in Kurast and takes 1-2 minutes.
Get Your First Skill Points (Level 5-15)
Open the Seasonal Journey menu. Only complete challenges that reward skill points right now (Rank 1/Tier 1). Skip everything else for now. These early skill points are crucial for character power.
Enter Helltide and Kill Duriel (Level 15+)
Head into your first Helltide and make Duriel your priority. Duriel replaced Blood Maiden as the Helltide boss. He can drop a Divine Gift called Essence of Squalor, which makes maggots in Helltide drop XP orbs. Equip this immediately in your seasonal interface if you get it.
Farm Helltide to Level 30
Kill everything, especially maggots if you have the XP orb power. Do Tree of Whispers bounties (focus on the ones worth 5 and 3 Grim Favors). Return to the Tree when you have 10 Grim Favors for a big XP chunk. Open Helltide chests with your Aberrant Cinders. Join Helltide Events when they pop up. Run any Fleeting Infernal Horde compasses you get from chests or caches.
Most important: run Kurast Undercity the second you get a Tribute of Growth. These experience tributes give massive XP rewards at completion.
Level 30 Capstone Dungeon
At level 30, if you feel strong enough, clear the Rank 1 Capstone Dungeon. Access it through the Seasonal Journey menu (there's a button on the right that teleports you straight there). You'll get a skill point and unlock Rank 2 Seasonal Journey challenges. Complete the Rank 2 challenges that give skill points.
Skip the Second Capstone
Don't bother with the Rank 2 Capstone Dungeon until you're 60. It takes way too long when you're under-leveled. Go back to Helltide instead.
Farm Helltide to 60
Keep doing what worked from 15-30. Kill monsters, open chests, complete whispers, run Undercity when you get growth tributes, use Infernal Horde compasses. Repeat until level 60.
Fill your Helltide Threat Meter fast by killing everything. More threat means more monster spawns. Prioritize Tree of Whispers and Legion Events for the best XP. Join Helltide Events for extra Aberrant Cinders.
Save all your Baneful Hearts until level 60. The Duriel event monsters give almost no XP, so you're just wasting time if you use hearts while leveling.
Open chests right before Helltide ends. The XP reward from chests scales with your level, so if you open them at the start when you're level 30, you get level 30 XP. If you save cinders and open them at the end when you're level 33, you get better rewards.
Using XP Orbs Without Dying
That Essence of Squalor power from Duriel makes maggots drop glowing XP orbs. During events like Hellspires that spawn tons of maggots, don't collect the orbs right away. Stand still, kill maggots, let orbs pile up on the ground. Collect them all after the event ends.
Gaining 5+ levels in seconds means your gear doesn't scale with you. Every level makes monsters tougher while you're still wearing the same items. You haven't spent skill points, you haven't upgraded equipment, but suddenly everything hits harder and takes longer to kill. In hardcore, this can straight up kill you.
This mechanic's power on live servers might differ from the test realm since developers mentioned nerfs. Still, it's a good supplemental XP source in Helltides.
Strongholds for Fast Levels
Strongholds give massive fixed XP rewards when you beat the final boss and ring the bell. The reward doesn't scale with difficulty, so you should run them on Normal for maximum clear speed.
Run Strongholds around level 45-50. At level 45, they give half to one full level per completion. At level 20, they can give 2+ levels. Most take 1-2 minutes. Ten Strongholds at level 50 will push you to 60.
Stronghold Tier List
| Efficiency Tier | Stronghold Name | Notes |
|---|---|---|
| Very Efficient | Vyeresz | Fastest clear time |
| Very Efficient | Ruins of Qara-Yisu | Quick objectives |
| Very Efficient | Malnok | Straightforward layout |
| Very Efficient | Onyx Watchtower | Easy boss fight |
| Very Efficient | Temple of Rot | Unlocks Legion Event |
| Very Efficient | Altar of Ruin | Fast completion |
| Very Efficient | Kor Dragan | Unlocks Legion Event |
| Decent Speed | Moordaine Lodge | Moderate clear time |
| Decent Speed | Alcarnus | Unlocks Legion Event |
| Decent Speed | Chakhir | Unlocks Legion Event |
| Decent Speed | Nostrava | Average efficiency |
| Slow (Avoid) | The Festering Dark | Time-consuming objectives |
| Slow (Avoid) | Hope's Light | Long completion time |
| Slow (Avoid) | Tur Dulra | Inefficient layout |
Clear Strongholds outside Nahantu to finish your last 10 levels. Play on Normal to maximize speed. The final bosses usually drop 1-2 legendaries and some rare temper manuals. Some Strongholds also unlock Legion Events in their areas.
Other Leveling Activities
Kurast Undercity
Kurast Undercity is a time-attack mode that can give strong XP when you have the right tributes.
You need level 15 to unlock it through the priority quest "The Kurast Undercity." Run it immediately whenever you get a Tribute of Growth (experience tribute).
Growth tributes provide buffed XP at completion. Undercity also farms runes for early runeword combinations, and it now drops more runes than previous seasons. The cooldown reduction buff during runs lets you spam movement abilities constantly.
You can technically run Undercity without tributes, but it's way less rewarding. Run on easy difficulties (Normal or Hard) to keep clear speeds high. The completion XP scales with tribute quality, not difficulty.
Nightmare Dungeons
Nightmare Dungeons work differently at different stages of the game.
Before Torment 1, they're just regular dungeons with the word "Nightmare" slapped on them. Only visit them to grab Codex of Power aspects for your build. Find aspects in the Codex, left-click to waypoint, clear the dungeon, extract at the Occultist. You can imprint aspects on both Legendary and Rare items. Rare items become Legendary when imprinted but keep their original stat count.
After Torment 1, real Nightmare versions unlock. They become serious content. High monster density, Obducite drops, and valuable events like Cursed Chests and Cursed Shrines that pump out massive XP. Always prioritize dungeon events when you see them.
You don't need to fully clear Nightmare Dungeons. Kill roughly 80% of monsters while rushing to objectives and events. Judge whether monster packs are worth the detour. Only pick up Rares and Legendaries to minimize salvage trips. If your materials are comfortable, consider just dropping items that aren't upgrades.
Infernal Horde Basics
Regular Infernal Horde compasses unlock at Torment 1. A weaker "fleeting" version drops during leveling.
Horde is one of the best XP farms in the game. You'll need to run it later anyway for Scroll of Escape farming. Compasses drop from Helltide chests and Tree of Whispers caches.
If you die, wait for a revive from another player. Don't self-revive. The death counter is shared for the entire group. Use compasses as you get them. Don't hoard them. At higher tiers, you'll have more compasses than you can possibly use.
Pit Activities
The Pit is endgame content that gives XP and loot but no crafting resources.
You'll spend tons of time in The Pit during endgame, so don't force yourself to live there while leveling. After 60, use The Pit to determine your appropriate world tier. Your target tier is whatever you can clear solo in 3-4 minutes.
Don't move to the next world tier if the corresponding Pit level takes over 4 minutes. Stay where you are for better farming efficiency.

Legion Events
Legion Events spawn every 3 hours and give multiple benefits.
The bonfire gives up to +15% XP for 15 minutes (lasts until the next Legion). Crowds of players melt everything instantly, so you don't need good gear. Loot is decent for early game. You'll also need Forgotten Souls from Legions later in endgame.
If Legion and World Boss spawn at the same time, pick World Boss.
World Bosses
World Bosses spawn every 3 hours. Decent varied loot, not particularly dangerous, quick completion. They take priority over Legion Events if both are available.
Tree of Whispers
Complete Tree of Whispers bounties while you're already doing other activities. Check what bounties are available in areas where you're leveling. Bounties give you reasons to run Kurast or Horde. Whisper caches drop level-appropriate loot even early on.
Play around available bounties strategically. When the 5 and 3 point bounties are gone, switch to other activities.
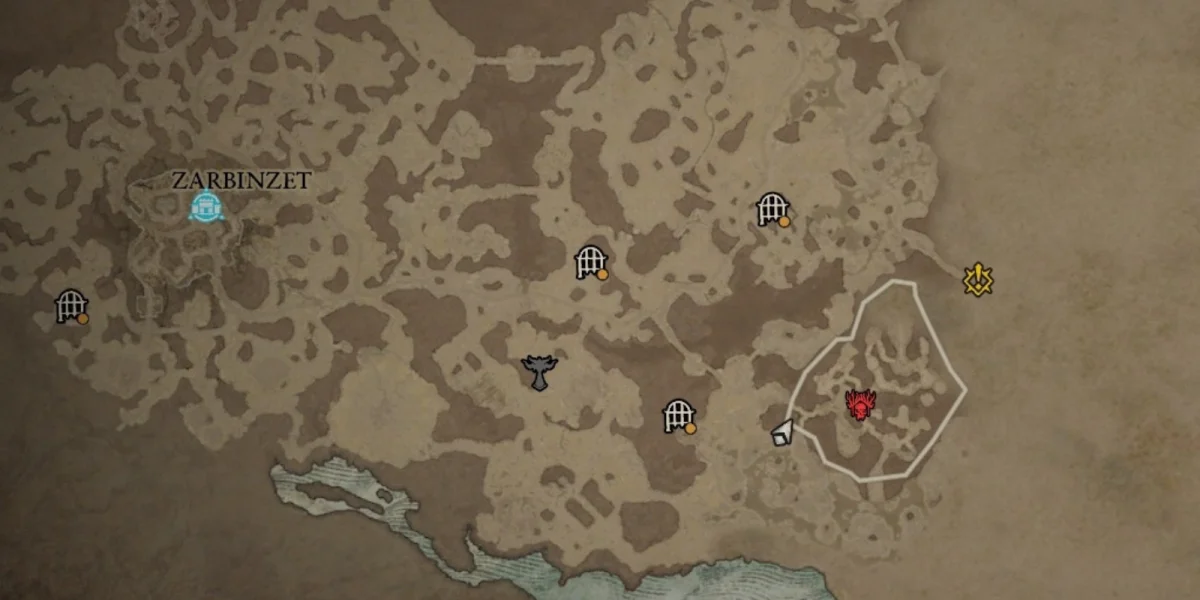
Azmodan (New Seasonal Boss)
Season 11 adds Azmodan as a summonable boss south of Zarbinzet. You can summon him for free (no spawn cost), but you need materials to guarantee loot. He's spammable. Keys to summon him drop from The Pit, Helltide, and Kurast Undercity.
Azmodan gave insane XP on the test realm, but developers said they nerfed it heavily for live. Based on pre-launch info, he's probably not worth farming for leveling XP. This might change after season launch, so check community findings.
Paragon After 60
You start earning Paragon points at level 60.
Get all 5 boards with your needed glyphs in the right positions. Glyphs increase their radius twice: at level 16 and level 46. You level glyphs by running The Pit. Until Paragon 200-250, ignore secondary bonuses from rare nodes. Focus on glyph positioning.
Paragon glyphs drop everywhere after Torment 1. Follow your build guide for specific Paragon layouts and glyph priorities.
Unique and Mythic Item Farming
After Torment 1, all unique items for your build can drop from any activity. Targeted legendary farming works best on Uber bosses, but until you have summoning materials, any legendary can drop anywhere.
Use Uber boss keys as soon as you get them. Don't hoard them. You need uniques throughout your progression. Don't wait until Torment 4 to start farming Ubers. You might never get there without the uniques from lower difficulties.
Mythic Uniques (Uber Uniques) now drop from multiple activities beyond just Uber bosses. They can drop from various endgame content starting at Torment 1, though Uber bosses remain the most reliable source.
Group Play Reality
Each nearby player gives +5% XP (even without a party). Partying up adds another +5% per member. Total: +10% XP per nearby party member.
- Shared Threat Meter spawns in Helltide
- Split objectives in Nightmare Dungeons
- Shared materials (Compasses, Tributes, Sigils)
- +10% XP per party member
- Monsters gain up to +100% HP per member
- Constant gear sorting delays
- Time wasted in town
- Invitation system issues
- Coordination overhead
The invitation system is painful. Invitations auto-decline when anyone joins or leaves. Players who spend several minutes sorting loot after runs decline your next invitation. There's no indicator showing who declined. You don't know who to kick.
When in a party, accept activity invitations before dismantling loot or leaving. This prevents auto-declines.
Group play makes sense when playing with friends for fun, sharing materials at low levels, competing on leaderboards (2, 3, and 4-player ladders are coming), or playing socially without caring about max efficiency.
For alt power-leveling, The Pit boosting is fastest. Create level 1 character, get invited by another player on their main, they open Pit Tier 65-70, you wait at the entrance while they clear, collect all XP at completion. Use all available XP boosters.

Complete Leveling Path Breakdown
Fastest Method (Campaign)
- Create character without Vessel of Hatred completed
- Start Normal difficulty
- Begin Seasonal questline for first power and reputation board
- Run through Vessel of Hatred campaign
- Use Growth Tributes (Undercity) and Forgotten Wisdom Sigils when found
- Around level 50-57 (after Urivar, before/during lake), skip campaign from character select
- Finish levels 50-60 with efficient Strongholds on Normal
Total time: 90-120 minutes for campaign, 20-30 more for Strongholds
Alternative Method (Open World)
- Create character with Vessel of Hatred skipped
- Start Normal difficulty
- Complete Seasonal questline for first power and reputation board
- Complete Rank 1 Seasonal Journey skill point challenges
- Enter Helltide, kill Duriel for XP orb power
- Farm Helltides to 30: Whispers, events, chests, Growth Tributes, Fleeting Hordes
- Complete Rank 1 Capstone at 30
- Complete Rank 2 Seasonal Journey skill point challenges
- Skip Rank 2 Capstone
- Continue Helltide farming to 60
Total time: Slower than campaign, varies by efficiency
Mix and Match
You can run campaign to 30-40 for a power spike, then swap to open world. You can start Strongholds at 50 for consistent half to full levels. You can complete the entire Vessel of Hatred campaign on Normal for roughly level 60 at the end (but you can't skip during Deeds of a Champion if you fully complete it).
Quick Reference Checklist
- Equip pet for auto-resource collection
- Get mercenary at 15 (Subo for enemy reveals)
- Start Seasonal questline for first power and board
- Gather herbs for Elixir crafting
- Keep Elixir active (5-8% XP)
- Start Incenses at 45 (extra 5% XP)
- Play Normal until 45
- Get starting aspects from dungeons
- Get movement speed on boots and amulet
- Prioritize Seasonal Journey skill point challenges
- Class specialization at 15 (might be automatic)
- Mercenary barter at 40 for cashes
- Don't miss World Bosses (every 3 hours)
- Hit Legion Events for bonfire buff (every 3 hours)
- Run Undercity for Growth Tributes immediately
- Run Nightmare Dungeons with Forgotten Wisdom now
- Do Tree of Whispers bounties when convenient
- Clear Strongholds around 40-50 on Normal
- Mix activities, don't fixate on one spot
- Use Horde Compasses as you get them
- Start Uber attempts when you get keys
- Ignore white and blue items
- Yellow items obsolete every 10 minutes
- Legendaries temporary until item level 800
- Don't invest in items below 800
- Only temper items you'll use extensively
- Keep important aspects when swapping gear
- Imprint critical aspects on jewelry not weapons
- Stay Normal until elites die instantly
- Move to Hard around 45 if comfortable
- Higher difficulty doesn't mean better XP, clear speed does
- Don't advance world tiers if Pit takes over 4 minutes
- Don't hoard Seasonal Journey rewards
- Don't hoard mercenary coins
- Don't hoard Compasses
- Don't hoard Sigils
- Don't hoard Uber keys
Additional Notes
You can skip Vessel of Hatred campaign anytime except during Deeds of a Champion. If you fully complete the campaign and start Deeds, you can't skip until it's done. Plan accordingly.
Seasonal Journey needs deliberate completion in Season 11. All old reputation bonuses (skill points, Paragon points) are in Journey chapters now.
Altars of Lilith give meaningless rewards now. Skip them entirely.
All items in your first ~10 hours are extremely temporary. Don't spend time comparing them. Equip obvious upgrades and move on. Save evaluation for item level 750+ gear.
After Torment 1, Nightmare Dungeon wells give big XP buffs for 1 hour. Forgotten Wisdom affix guarantees a well, but they can appear randomly in any dungeon.
At 60+, you can stack 4 separate XP buffs: one Elixir (8%), three Essence types (varying bonuses). Multiple Incenses don't stack their XP bonuses. Combat effects from different Incense categories do stack.
Be careful with XP orbs. Collecting multiple orbs rapidly can give you 5+ levels instantly. Your gear doesn't scale with sudden level spikes, making you weaker against scaling enemies. In hardcore, this can kill you. Let orbs accumulate, collect after events.
Wrapping Up
Season 11 gives you multiple solid paths to 60. The Vessel of Hatred campaign is objectively fastest, especially when you skip around level 50 and finish with Strongholds. Open world Helltide farming with Undercity and Forgotten Wisdom dungeons provides a strong alternative if you're tired of campaign runs.
Regardless of your method, maintaining XP buffs, prioritizing movement speed, and understanding when to use each activity creates efficient progression. Minimize town time, avoid over-investing in temporary gear, and choose difficulties that prioritize clear speed over higher base XP modifiers.
Season 11's changes make early characters feel weaker and require more deliberate Seasonal Journey completion, but multiple efficient paths mean reaching endgame content stays accessible for new and experienced players alike.