
Alright, Nephalem, so you've been hearing the whispers, the legends, the tales of epic battles and even more epic loot? You've likely stumbled upon talk of the Helliquary, and let me tell you, if you're looking to truly test your mettle and skyrocket your power in Diablo Immortal, you've come to the right place. This guide is your personal tour through one of the most thrilling endgame activities Sanctuary has to offer in 2025. We'll cover everything from what the Helliquary is, why it's absolutely crucial for your progression, to detailed strategies for every demonic monstrosity that awaits. Think of me as your seasoned battle-buddy, here to show you the ropes and get you prepped for glory!
Getting Started with the Helliquary
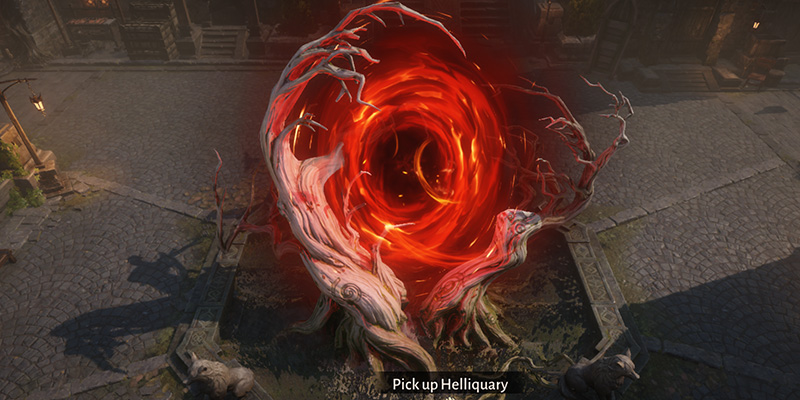
What is the Helliquary?
So, what's the big deal with the Helliquary? Imagine a gauntlet, a series of ever-escalating boss fights against some of the Burning Hells' most formidable lieutenants. You, alongside seven other champions (or sometimes, for specific challenges or if you're feeling particularly heroic, even on your own!), will venture into their lairs to put them down. Why face such terror? Simple: Combat Rating (CR) and a treasure trove of rewards!
The Helliquary is a cornerstone of your endgame journey in Diablo Immortal. Its primary function is to provide you with Demonic Remains – trophies from your defeated foes that directly boost your all-important Combat Rating. You'll also rake in weekly goodies like Scoria (essential for upgrading the Helliquary itself), gold, and Battle Points.
Now, why is this so critical? Your Combat Rating isn't just a fancy number; it's the key that unlocks higher difficulty levels across the entire game. Falling behind in CR means you'll struggle not just with tougher Helliquary bosses, but also in higher Inferno difficulties for dungeons, open-world farming, and accessing better gear from all activities. Consistent Helliquary participation is, therefore, not an optional sideline but a central pillar of your power progression. Think of it as your ticket to the big leagues. Plus, let's be honest, there's a certain thrill to conquering these demonic titans and the bragging rights that come with each victory!
Unlocking the Helliquary
Ready to answer the call? Your path to Helliquary glory begins with Rayek, Westmarch's resident (and slightly overzealous) expert on demonic incursions. First things first, you'll need to reach the appropriate character level. As of a significant update in April 2025, the "Opening the Helliquary" questline now becomes available at level 60, a shift from the previous level 36 requirement. This change seems geared towards ensuring adventurers have a more solid footing in the endgame, with access to Paragon levels and a better grasp of game mechanics before tackling even the initial Helliquary challenges. It helps prevent new heroes from immediately hitting a daunting CR wall.
- Reach level 60 and seek out Deckard Cain
- Visit Rayek in his workshop in Westmarch
- Complete the vision quest showing Westmarch overrun by demons
- Defeat Chaos Herald Pyl in a solo Challenge Rift
- Return to Rayek to officially unlock the Helliquary
Once you're level 60, seek out Deckard Cain, who will then point you towards Rayek in his workshop. Rayek will set you on a questline that involves a rather unsettling vision of Westmarch overrun by demons. This culminates in your first Helliquary encounter: Chaos Herald Pyl. Uniquely, this first hunt is a solo affair, tackled within a Challenge Rift, rather than through the usual 8-player raid portal. Conquering Pyl officially opens the Helliquary for business, allowing you to team up and take on much bigger threats.
Helliquary Resets & Timing
This part is crucial, so listen up! You can't just farm Helliquary bosses endlessly for their top-tier rewards. The system operates on a reset schedule. The main rewards, including Scoria and the chance for new Demonic Remains from bosses you haven't defeated that cycle, reset twice a week: every Monday and Thursday at 3:00 AM server time.
During each reset period (e.g., Monday to Thursday, or Thursday to Monday), you can only earn these primary rewards from the first five Helliquary bosses you defeat. This cap means you'll need to be strategic about which bosses you target, especially if you're not yet strong enough to clear every boss available to you. Prioritizing higher-difficulty bosses you can manage is generally a good idea, as they tend to drop Demonic Remains with better potential stats, maximizing your chances for a CR upgrade.
Furthermore, teaming up with your Warband offers distinct advantages. Completing Helliquary raids with at least four members of your Warband not only nets you additional Scoria but also grants all participating Warband members a weekly Eternal Legendary Crest voucher. This makes coordinating with your Warband for those first five kills highly beneficial.
Understanding Helliquary Rewards
Scoria, Hellfire Scoria, and Voidblood Slag
Let's talk about the currencies that fuel your Helliquary's growth and, by extension, your own power. The primary material you'll be hunting for is Scoria.
- Scoria: This is your raw material, typically awarded at a rate of 15x for the first time you defeat a specific Helliquary boss each week (within the twice-weekly reset).
- Hellfire Scoria: Once you've gathered Scoria, you'll take it to any Blacksmith. For a nominal gold fee, they will refine it into Hellfire Scoria. This is the actual material you use to upgrade the level of your Helliquary device.
- Voidblood Slag: As you advance your Helliquary to higher levels, the upgrade requirements will shift. Hellfire Scoria might be converted into Voidblood Slag, or Voidblood Slag may be obtained from other sources (like salvaging unwanted Demonic Remains or from higher-level content). This is used for the upper echelons of Helliquary upgrades. The stack limit for Voidblood Slag was increased to 9999 in early 2025, a welcome change for long-term players.
A significant point of discussion within the community as of early 2025 is the Helliquary's current level cap, which stands at Level 70. Many dedicated players, some as early as September 2024, have reached this ceiling. This has led to a situation where these adventurers are accumulating vast stockpiles of Voidblood Slag with no current use for it. This accumulation of a once-vital resource has become a notable pain point, potentially diminishing the incentive for maxed-out players to continue farming Helliquary bosses if the primary upgrade material offers no further progression. The community is actively requesting either an increase to the level cap or alternative uses for these materials, such as converting them into other valuable resources. Given the widespread nature of this feedback, it's plausible that future updates may address this to maintain engagement with the Helliquary system.
To help you visualize the journey, here's what you can generally expect from upgrading your Helliquary:
| Helliquary Level Range | Material Used | Approx. CR Bonus per Level | Cumulative CR Bonus (Example) | Other Stat Bonuses Unlocked/Increased |
|---|---|---|---|---|
| 1-10 | Hellfire Scoria | +8 to +12 CR | Up to ~100 CR | +Armor, 1st Demonic Remain Slot |
| 11-20 | Hellfire Scoria | +10 to +15 CR | Up to ~250 CR | +Potency, 2nd Demonic Remain Slot |
| 21-30 | Hellfire Scoria | +12 to +18 CR | Up to ~450 CR | +Resistance, 3rd Demonic Remain Slot |
| 31-40 | Voidblood Slag (Low) | +15 to +20 CR | Up to ~700 CR | +Armor Pen, 4th Demonic Remain Slot |
| 41-50 | Voidblood Slag | +18 to +25 CR | Up to ~1000 CR | Increased stat bonuses, 5th Slot |
| 51-60 | Voidblood Slag | +20 to +30 CR | Up to ~1500 CR | Further stat increases |
| 61-70 (Current Cap) | Voidblood Slag (High) | +25 to +35 CR | Up to ~2500+ CR | Maxed base Helliquary stats |
Note: The exact Scoria/Slag costs and precise CR/stat bonuses per level vary. This table provides a general idea of progression. As of May 2025, Level 70 is the maximum Helliquary level. Players report significant total CR gains from a maxed Helliquary, often exceeding 2400 CR.
This table clearly demonstrates the substantial, long-term power gains tied directly to consistently upgrading your Helliquary. It's a marathon, not a sprint, but the rewards are well worth the effort.
Demonic Remains and Their Impact

When you vanquish a Helliquary boss, you have the chance to claim a piece of their very essence: a Demonic Remain. These trophies are slotted into your Helliquary, granting you an immediate boost to your Combat Rating and, crucially, powerful attribute bonuses.
While all slotted Demonic Remains contribute to your overall CR, the specific attributes (like +Strength or +Armor Penetration) from each Remain are also added to your character's stats. Demonic Remains can roll with a combination of Primary Attributes (Strength, Intelligence, Fortitude, Vitality, Willpower) and Secondary Attributes (Armor, Armor Penetration, Potency, Resistance).
Generally, the higher the difficulty of the Helliquary boss, the greater the potential for the Demonic Remains they drop to have higher base CR and attribute values. However, don't expect every new Remain from a higher tier to be an instant upgrade. The attribute rolls involve a degree of randomness (RNG). It's quite possible for a well-rolled Remain from a lower Inferno difficulty to be better than a poorly-rolled one from a newly unlocked, higher tier, especially if your Paragon level is still relatively low for that new tier. This means that true optimization of your Demonic Remains is an ongoing process of farming and comparing.
Among the primary attributes, Fortitude (which boosts Armor and Armor Penetration) and Willpower (which boosts Potency and Resistance) are often highlighted by experienced players as particularly impactful. Armor enhances your survivability, while Armor Penetration significantly increases your critical hit damage. Potency extends the duration of harmful effects you apply to enemies, and Resistance shortens the duration of those nasty debuffs enemies try to stick on you. Prioritizing these can offer substantial combat advantages. If you acquire Demonic Remains you don't need, they can be salvaged at the Blacksmith for Voidblood Slag, fueling further Helliquary upgrades.
This table should guide you in evaluating the Demonic Remains you acquire, helping you decide which ones best complement your class and build beyond just their raw CR contribution.
Other Helliquary Rewards
Defeating Helliquary bosses is a rewarding endeavor beyond just CR and Demonic Remains. Each takedown, especially your first five per reset period, showers you with other valuable loot:
- Battle Points: Typically 20 Battle Points for each of your first five boss kills in a reset cycle.
- Gold: A respectable sum of gold accompanies each victory.
- Mystery Equipment: You have a chance to receive a piece of unidentified Set or Legendary equipment weekly.
- Experience: Boss kills grant a good chunk of experience, with first-time kills on higher difficulties offering substantial amounts (e.g., a reported 3 million XP for initial Inferno 6 raid clears).
- Warband Rewards: As mentioned, Warband completions can yield Warband Chests and the coveted Eternal Legendary Crest voucher.
- Cosmetics: Special cosmetic items, such as the "Molten Ruptured Soul" armor, weapon, and portal cosmetics, can be earned, often tied to achievements in the Helliquary Gauntlet featuring newer bosses like the Dreadbirth trio.
Helliquary Boss Roster
Boss Progression Path
The Helliquary is structured as a ladder of escalating demonic challenges. You'll start with relatively manageable foes and progressively unlock tougher demons as you prove your strength. Each new Inferno difficulty tier typically introduces more powerful versions of existing bosses alongside entirely new adversaries.
The general progression path involves defeating a specific boss (sometimes on multiple difficulties or a particular one) to unlock access to the next boss or difficulty tier. For instance, defeating Morsagurei the Fisher's Ruin (a boss from a previous Helliquary set) is the gateway to unlocking Inferno Difficulty IV and the first of the Dreadbirth Helliquary Bosses, Vogmarik the Tormentor. Taking down Vogmarik then unlocks Inferno V and Mulgaist the Molten, and defeating Mulgaist opens the way to Inferno VI and Deosbrae, Sovereign Shade.
A significant and welcome change implemented in late 2024 or early 2025 was the removal of invulnerable phases from all Helliquary Bosses. Additionally, the downtime and transition times for many older bosses (from Iscea, Twofold Rebirth up to Morsagurei the Fisher's Ruin) were shortened by removing "Life locks" (phases where the boss's health wouldn't drop below a certain point until adds were cleared) and adjusting enemy spawn triggers. This makes the encounters feel much more fluid and continuous. Fights are now less about waiting out immunity periods and more about sustained damage output and consistent execution of mechanics. This shift particularly benefits builds that excel in consistent damage rather than relying solely on perfectly timed burst windows.
New Bosses in 2025
Steel yourselves, heroes, because the demonic legions never rest! The "Epoch of Madness" roadmap for 2025 has laid out plans for ongoing Helliquary evolution. Most notably, the "Prince of Freedom" major update, which rolled out between April and June 2025, promised new Helliquary bosses.
While the specific identities of entirely new raid bosses introduced directly under the "Prince of Freedom" banner (beyond the Dreadbirth set, which appears to have launched in the "Shattered Sanctuary" update bridging late 2024 and early 2025) may still be emerging or were part of the Dreadbirth wave, the commitment to expanding the Helliquary roster is clear. The Dreadbirth bosses—Vogmarik the Tormentor, Mulgaist the Molten, and Deosbrae, Sovereign Shade—are the most recent major demonic threats detailed leading into and during early 2025.
Blizzard's roadmap indicates a steady cadence of new Helliquary content. This ongoing development means that the Helliquary will continue to be a dynamic and evolving endgame pursuit, providing fresh challenges and compelling reasons for players to continuously enhance their gear and Combat Rating. The "Prince of Freedom" update was the most recent significant content drop players were anticipating for Helliquary expansions, ensuring the climb in power remains relevant.
Current Boss Roster (May 2025)
Here's a rundown of the major demonic adversaries you'll encounter on your ascent through the Helliquary. Remember the golden rule: you gotta beat 'em to meet 'em (and then beat 'em again for more loot!).
| Boss Name | Difficulty Tier Introduced | Unlock Prerequisite |
|---|---|---|
| Chaos Herald Pyl | Special (Quest) | Complete initial Helliquary quest from Rayek (Level 60+); defeated solo in a Challenge Rift. |
| Lassal the Flame-Spun | Normal | Defeat Chaos Herald Pyl. Unlocks Hell Difficulty I access upon first Normal defeat. |
| Vitaath the Shivering Death | Hell I | Defeat Lassal the Flame-Spun on Normal. |
| Gorgothra the Claimer | Hell II (typically) | Defeat Vitaath the Shivering Death on Hell I. |
| Beledwe and Gishtur | Hell III (typically) | Defeat Gorgothra the Claimer on Hell II. (May offer first-kill Normal bonuses later). |
| Izilech the Misshapen | Hell III (typically) | Defeat Beledwe and Gishtur on Hell III (or previous Hell III boss). (May offer first-kill Normal bonuses later). |
| Peisthal the Underearth Empress | Inferno III | Defeat previous Hell III/Inferno II bosses as per in-game progression. |
| Aeyntragga, Eater of Storms | Inferno III / Inferno IV | Defeat Peisthal on Inferno III (to access Aeyntragga in I3). Defeat Aeyntragga I3 to progress. |
| Uthmaash-Ksarr the Breath Collector | Inferno III / IV / V | Progress through previous Inferno tier bosses. |
| Xekorendaag, Ice Leviathan | Inferno III / IV / V / VI | Progress through previous Inferno tier bosses. |
| Morsagurei the Fisher's Ruin | Inferno III / IV / V / VI | Progress through previous Inferno tier bosses. Defeating Morsagurei (likely on Inferno III or IV) unlocks Inferno IV and the Dreadbirth line. |
| Dreadbirth Bosses: | ||
| Vogmarik the Tormentor | Inferno IV / V / VI | Defeat Morsagurei (likely on highest available difficulty for your progression); unlocks Inferno V. |
| Mulgaist the Molten | Inferno V / VI | Defeat Vogmarik (likely on Inferno V); unlocks Inferno VI. |
| Deosbrae, Sovereign Shade | Inferno VI | Defeat Mulgaist (likely on Inferno VI). Currently one of the final Helliquary challenges. |
| New "Prince of Freedom" Bosses | To Be Confirmed (Q2 2025) | Likely to follow Deosbrae or introduce new parallel progression paths. |
This progression path provides a clear roadmap for your Helliquary journey, helping you anticipate upcoming challenges and the Combat Rating milestones you'll need to achieve.
Boss Strategy Guides
Conquering the Helliquary requires more than just high Combat Rating; it demands knowledge of each boss's unique mechanics and deadly abilities. This section will break down the key encounters, providing strategies for both solo adventurers and coordinated Warbands.
General Structure for each Boss Guide:
- [Boss Name] – The [Title]
- A Glimpse into Darkness: A brief, thematic introduction.
- Combat Rating Check: Are You Prepared? A table listing the CR requirements for this boss across relevant Inferno difficulties. Meeting these CRs significantly reduces incoming damage and boosts your outgoing damage. Falling below these thresholds results in substantial penalties.
- Dance of Death: Key Mechanics & Abilities: A detailed breakdown of the boss's phases, signature attacks, area-of-effect (AoE) patterns, summoned minions, environmental hazards, and crucial debuffs or mechanics.
- Strategies for Victory:
- Going it Alone: Solo Player Tactics: Tips on positioning, kiting, self-sustain, managing adds, and prioritizing mechanics when fighting solo.
- Strength in Numbers: Warband & Group Coordination: Advice on tank responsibilities (if applicable), DPS focus, support roles, communication for critical mechanics, and revive strategies.
- Class-Specific Wisdom: Actionable tips for each class.
- Prized Possessions: Notes on any particularly valuable Demonic Remains or other rewards associated with the boss.
(Detailed guides for Lassal, Vitaath, Gorgothra, Beledwe & Gishtur, and Izilech would follow here, using the structure above and drawing from snippets like 8 for Vitaath9 for Gorgothra, and 24 for Beledwe/Gishtur & Izilech. For brevity in this example, we'll focus on the newer/higher-tier bosses.)
Aeyntragga, Eater of Storms
"Aeyntragga, a vortex of storm and fury, has stalked the Cold Isles for ages, demanding tribute to quell its wrath. Now, it ventures further inland, a maelstrom of destruction."
Combat Rating Requirements
| Inferno Difficulty | Required Combat Rating (May 2025) | Source(s) |
|---|---|---|
| Inferno IV | 41,615 | 38 |
| Inferno III (Older) | 36,920 | 39 |
Key Mechanics & Abilities
- Immunity Phases: Aeyntragga will periodically become immune, requiring the raid to defeat summoned minions before damage can resume on the boss. This is a common mechanic in several Helliquary fights.
- Swirling Projectiles/Bees: The boss unleashes patterns of projectiles (described as "bees" in one account) that move around the arena, often in an anti-clockwise direction.
- Area Denial: Expect numerous AoE attacks that demand constant repositioning.
- Shrinking Arena: At certain points, the boss may reduce the size of the fighting area, concentrating the danger.
- Potential Bug: Some players have reported issues with reviving teammates during this encounter.
Strategies for Victory
Solo/Warband: Prioritize killing adds quickly during immunity phases. To avoid the anti-clockwise "bee" projectiles, players should try to move clockwise around the map. Maintain spatial awareness to dodge the many AoEs. If the revive bug is active, focus on staying alive rather than risky revives.
Class-Specific Tips
- Ranged Classes: Utilize your range to stay clear of sweeping attacks while focusing down adds or the boss.
- Melee Classes: Be prepared for rapid disengages when AoEs appear. Mobility skills are key.
Prized Possessions: Standard Helliquary rewards, including Scoria and a chance at Demonic Remains.
Morsagurei the Fisher's Ruin
A Glimpse into Darkness: (Lore for Morsagurei is less detailed in provided snippets, but it's a significant gatekeeper boss).
Combat Rating Requirements
| Inferno Difficulty | Required Combat Rating (May 2025) | Source(s) |
|---|---|---|
| Inferno IV | 43,865 | 38 |
| Inferno V | 46,465 | 38 |
| Inferno VI | 47,990 | 40 |
| Inferno III (Older) | 38,125 | 39 |
Key Mechanics & Abilities
- Multiple Legs/Appendages: Morsagurei's defining mechanic involves its multiple destructible legs. The raid needs to focus fire on these.
- Seafloor Worms: This boss may summon Seafloor Worms as adds. A reported bug indicates these worms might continue spawning and attacking even after Morsagurei is defeated.
Strategies for Victory
Solo/Warband: The most effective strategy, especially for solo players or smaller groups, is to damage all of Morsagurei's legs somewhat equally, bringing them all to low health before quickly destroying them in succession. Focusing down one leg at a time can prolong the fight or make later phases harder if the boss has other mechanics tied to leg destruction. For groups, assign players to specific legs or coordinate target switching. Be wary of the persistent Seafloor Worms post-fight if the bug is present.
Class-Specific Tips
- High Single-Target DPS Classes (e.g., Demon Hunter): Excel at burning down individual legs.
- Cleave/AoE Classes (e.g., Barbarian, Wizard): Can help manage any summoned adds while still contributing damage to clustered legs.
Prized Possessions: Defeating Morsagurei is crucial for unlocking Inferno IV and the Dreadbirth Helliquary bosses.
Vogmarik the Tormentor
"This fiend stalks humans and angels, collecting bones and armor for his grisly trophies. Expect a painful hunt where the very ground betrays you!"
Combat Rating Requirements
| Inferno Difficulty | Required Combat Rating (May 2025) | Source(s) |
|---|---|---|
| Inferno IV | 44,765 | 38 |
| Inferno V | 47,065 | 38 |
| Inferno VI | 47,990 | 40 |
| Inferno IV (Older) | 42,265 | 39 |
Key Mechanics & Abilities
- Moving Arena Floor: The most distinctive mechanic is the constantly moving floor, which typically pulls players away from Vogmarik, making it challenging to maintain damage uptime, especially for melee classes.
- Environmental Hazards: The arena is littered with dangers, including spikes on the walls and large, spiked wheels that roll across the floor.
- Wall Crush Phases: This is the fight's effective enrage timer. At certain health thresholds, or triggered by adds, the walls of the arena will begin to close in. Players must either defeat specific adds pulling the walls or burn down Vogmarik himself before being crushed. In the final phase, Vogmarik directly pulls the walls in.
- Reported Bugs: The wall crush phase is prone to issues. Sometimes, when Vogmarik initiates his low-health wall pull, the floor simultaneously starts moving players away, drastically increasing the difficulty of the DPS check. Auto-aim abilities may incorrectly target the walls instead of the boss. If the walls touch, players can become stun-locked by damage, unable to move or use abilities, effectively ending the attempt. The moving arena itself can cause characters to be teleported erratically or become unable to move/attack.
Strategies for Victory
Solo/Warband: Movement speed is paramount. Equip skills and items that enhance mobility or allow damage while moving. During wall crush phases, DPS must be highly coordinated to eliminate adds quickly or focus fire on the boss. Be extremely mindful of the moving floor and its interaction with the wall crush. If the floor bug occurs during a wall crush, bursting down the boss becomes even more critical and difficult.
Class-Specific Tips
- Wizard: Teleport is invaluable. Lightning Nova modified by the Sprite Spark (if it allows movement while casting or quick casts) can be very effective for dealing damage while repositioning.
- Barbarian: Whirlwind (especially with the Fallow Field essence for knockback immunity) can help maintain DPS during floor movement, but the health drain must be managed.
- All Classes: Prioritize skills that can be cast on the move or have short cast times.
Prized Possessions: Chance to earn parts of the Molten Ruptured Soul cosmetic set from Helliquary Gauntlet clears involving Vogmarik.
The fight against Vogmarik, with its dynamic arena and mechanically intensive phases (compounded by potential bugs), represents a significant step up in Helliquary challenge. Success hinges not just on meeting the CR requirement but also on mastering these complex, and at times unpredictable, interactions.
Mulgaist the Molten
"Deep within an immense volcano, shrouded by a lake of lava, slumbers Mulgaist. Its presence is heralded by plumes of magma, leaving surrounding villages as charred monuments to its fiery wrath."
Combat Rating Requirements
| Inferno Difficulty | Required Combat Rating (May 2025) | Source(s) |
|---|---|---|
| Inferno V | 46,190 | 40 |
| Inferno VI | 48,590 | 40 |
| Inferno V (Older) | 47,690 | 39 |
Key Mechanics & Abilities
(Detailed text descriptions of Mulgaist's specific mechanics are sparse in the provided materials, often relying on video playthroughs.)
- Lava Eruptions/Magma Pools: Expect the arena to be hazardous with frequent lava-based attacks, including plumes of magma and lingering pools of molten rock that players must avoid.
- Add Summons: It's likely Mulgaist summons minions, possibly fire-themed or emerging from lava.
- High Environmental Damage: The fight will likely emphasize spatial awareness and quick reactions to ground-based AoE effects.
Strategies for Victory
Solo/Warband: Constant vigilance for ground-targeted attacks is essential. Ranged classes may find it easier to maintain DPS uptime while dodging lava. Melee classes will need precise positioning and quick disengages. Spreading out can help minimize casualties from overlapping AoEs. Prioritize survival during intense eruption phases.
Timing Tip: For maximum benefit, consider tackling Mulgaist in Inferno VI when you are very close to or at Paragon 800 to capitalize on the substantial first-time experience bonus.
Class-Specific Tips
- Classes with Damage Immunity/High Mobility: Skills like a Crusader's Conjuration of Light or a Demon Hunter's Daring Swing can be lifesavers for navigating intense lava phases.
Prized Possessions: Chance to earn parts of the Molten Ruptured Soul cosmetic set from Helliquary Gauntlet clears. Defeating Mulgaist also unlocks the "Exalted Hellslayer Stash" bundle in the shop.
Deosbrae, Sovereign Shade
"From the lightless bowels of the earth, Deosbrae births an endless tide of shadowy abominations. Her children infest Sanctuary, carrying her chilling message: darkness is as inevitable as death."
Combat Rating Requirements
| Inferno Difficulty | Required Combat Rating (May 2025) | Source(s) |
|---|---|---|
| Inferno VI | 49,315 | 40 |
Key Mechanics & Abilities
- Pull and Heal: Deosbrae has a critical mechanic where she attempts to pull players towards her into a marked circle. If any player is hit by the culmination of this ability within the circle, Deosbrae will heal for a significant amount, potentially resetting progress. Escaping this pull is paramount.
- Flower Phase / Minion Interaction: Some strategies mention a "flower" phase or interactions with minions being key. For example, a Necromancer might need to correctly target or interact with something during this phase. This could involve preventing adds from reaching the boss or fulfilling a specific objective to avoid a detrimental effect or enable a damage window.
- Summon Shadowy Abominations: True to her lore, expect Deosbrae to summon waves of minions.
- High DPS Requirement: Given her potential to heal and the general difficulty of a final Inferno VI boss, a high and sustained DPS output from the raid will be necessary. (Referencing similar high-tier boss DPS checks).
Strategies for Victory
Solo/Warband: Dodging the pull/heal mechanic is non-negotiable. All players must prioritize moving out of the indicated circle immediately. If there are specific objectives during phases like the "flower phase," clear communication and assignment are vital. Manage adds effectively to prevent being overwhelmed. This fight is a significant test of both mechanics and raw output.
Class-Specific Tips
- Necromancer: Bone Armor can provide crucial survivability for the raid. Coordinated use of crowd control for adds can also be beneficial.
- High Mobility Classes: Essential for escaping the pull mechanic quickly.
Prized Possessions: Chance to earn parts of the Molten Ruptured Soul cosmetic set from Helliquary Gauntlet clears. Defeating Deosbrae unlocks the "Unstoppable Seeker Trove" bundle in the shop, containing valuable items like Orbs, Legendary Crests, and gems.
Team Compositions & Class Roles
2025 Meta Team Compositions
While skill and sufficient Combat Rating can carry any class combination through many Helliquary encounters, certain team compositions synergize exceptionally well, leading to faster, smoother, and more reliable clears. The Diablo Immortal meta is ever-evolving due to balance patches and new class introductions, like the agile Tempest. Fortunately, the game's flexible class change system allows players and Warbands to adapt to these shifts without losing their overall character progression.
As of April-May 2025, the class landscape for high-end PvE like Helliquary raids looks something like this:
S-Tier (Highly Desirable):
- Tempest: Offers absurd mobility and lethal burst damage, making them excellent at dodging mechanics and contributing high DPS.
- Demon Hunter: Provides fantastic sustained ranged DPS and can bring valuable AoE damage buffs to the party. Their mobility is also a key asset.
- Barbarian: Rejuvenated by recent buffs, Barbarians bring excellent AoE clear for adds, significant party damage buffs (like shouts), and surprising solo PvE potential.
A-Tier (Strong & Reliable Choices):
- Blood Knight: Recently buffed, Blood Knights offer a potent mix of lifesteal, chaotic AoE, and overall durability, making them effective as both damage dealers and resilient front-liners.
- Wizard: Still a powerhouse of AoE damage and crowd control through devastating spell combinations, even if some aspects have seen minor nerfs.
- Necromancer: A tactical choice providing consistent damage through minions and curses. Bone Armor offers significant group protection, and summons can distract bosses or adds.
B-Tier (Specialized/Niche Picks):
- Crusader: Their Holy Banner (Banner of Command) is an unparalleled source of Critical Hit Chance for the party, making them almost mandatory for speed kills or pushing difficult content. However, their personal DPS can lag behind other classes, especially in solo scenarios.
- Monk: Formerly a top-tier class, Monks have seen nerfs to their shielding and mobility. They can still offer some support with shields and healing, but are often outshined by other classes in current Helliquary compositions.
Example Meta Compositions for Helliquary (8-Player):
Maximum Crit & Burst:
- 1 Crusader (for 100% Banner uptime if possible, or close to it)
- 2-3 Demon Hunters (primary ranged DPS)
- 1-2 Barbarians (AoE, party damage buffs)
- 1 Tempest (mobile burst DPS, mechanic handling)
- 1 Wizard (AoE, CC, supplemental ranged DPS)
- 1 Necromancer (Bone Armor, Dark Curse for vulnerability, add control)

Balanced & Sustainable:
- 1 Blood Knight (can act as a durable front-liner/off-tank while dealing good damage)
- 1 Necromancer (summons for off-tanking/distraction, Bone Armor, curses)
- 2 Demon Hunters (consistent ranged DPS)
- 1 Barbarian (AoE and buffs)
- 1 Wizard (AoE and CC)
- 1 Tempest (flexible DPS/mechanic specialist)
- 1 Crusader (for Crit buff, even if not full uptime, it's impactful)
The key is flexibility and understanding boss mechanics. Sometimes a composition heavy on ranged DPS is preferable, other times melee burst with strong support is the way to go.
Understanding Class Roles
While Diablo Immortal doesn't enforce a strict "holy trinity" (Tank, Healer, DPS) like some traditional MMOs, classes naturally excel in certain functions within an 8-player Helliquary raid:
Damage Dealers (DPS): This is the primary role for most. Demon Hunters, Wizards, Tempests, and Barbarians are prime candidates. Blood Knights can also output very competitive damage. Their focus is on maximizing damage to the boss and any priority adds while flawlessly executing mechanics.
Support & Buffers: These players amplify the party's effectiveness.
- Crusaders are unparalleled for their Holy Banner (Critical Hit Chance) and can provide damage immunity with Conjuration of Light.
- Barbarians offer potent party-wide damage buffs through shouts and can apply armor shred with certain essences.
- Necromancers provide defensive support with Bone Armor for the party, can apply vulnerability with Dark Curse, and their minions can help control aggro on lesser adds.
- Monks, though less meta, can still provide shields and some healing.
Survivability & "Off-Tanks": While there's no dedicated taunting tank in most DI content, some classes are inherently more durable or can mitigate significant threat.
- Blood Knights excel here due to their substantial lifesteal and damage reduction abilities.
- Barbarians can build to be very tanky and often find themselves in the thick of things.
- Necromancers with a strong contingent of summons can effectively "tank" or distract numerous smaller adds.
Crowd Control (CC): Essential for managing adds or interrupting specific boss abilities.
- Wizards have access to powerful CC like Frost Nova.
- Barbarians can provide stuns through various skills.
- Monks and Tempests also have CC options in their kits.
Essential Buffs and Debuffs
Maximizing your raid's effectiveness often comes down to stacking the right buffs on your allies and debilitating debuffs on your enemies. Communication and timing are key.
Key Offensive Buffs to Prioritize:
- Critical Hit Chance: Crusader's Holy Banner is the gold standard. Other classes may have self-buffs or minor party buffs.
- Damage Increase: Barbarian shouts (e.g., Wrath of the Berserker with certain essences), Demon Hunter's Vengeance, and various Legendary Gem effects (like Bottled Hope).
- Attack Speed: Some skills or essences can boost party attack speed.
Key Defensive Buffs:
- Damage Reduction: Necromancer's Bone Armor is a significant party-wide defensive cooldown.
- Shields: Provided by Monks, some Crusader skills, and various Legendary Gems or Familiar abilities.
- Damage Immunity: Crusader's Conjuration of Light can make the party briefly immune to damage, crucial for surviving massive unavoidable attacks.
Key Debuffs to Apply to Enemies:
- Increased Damage Taken: Many classes have skills or essences that make targets take more damage (e.g., Necromancer's Dark Curse, Demon Hunter's Marked for Death).
- Armor Shred/Reduction: Barbarian's Five Fresh Claws essence for Whirlwind, for example, can significantly increase damage taken by the target.
- Slows, Stuns, Freezes: Essential for controlling adds and sometimes for interrupting boss mechanics.
Coordinating the application of these effects, especially potent damage amplification debuffs with party offensive cooldowns, can drastically shorten fight times.
Advanced Helliquary Tactics
Solo vs. Warband Strategies
How you approach your Helliquary runs can influence the quantity and type of rewards you receive. Both solo and Warband play have their merits.
Solo Play:
- Feasibility: Entirely possible if your Combat Rating is adequate for the chosen boss and difficulty. Many players run Helliquary solo, especially if coordinating a full group is challenging.
- Focus: Primarily on personal Demonic Remain upgrades and acquiring Scoria for Helliquary level progression.
- Challenges: Finding groups through the public queue system can sometimes be slow or result in under-geared parties, particularly for lower CR players or off-peak hours. You'll also miss out on Warband-specific bonuses.
- Strategy: If playing solo, ensure your build is self-sufficient with good damage and survivability. You might need a slightly higher CR than if you were in a coordinated group to comfortably clear. Prioritize bosses you can defeat reliably to ensure you get your five main rewards per reset.
Warband Play (ideally 8 players, minimum 4 Warband members for certain bonuses):
- Enhanced Rewards: The most significant advantage. Raiding with your Warband (specifically, having at least 4 Warband members in the party for the crest voucher) yields:
- Additional Scoria.
- Warband Chests containing loot.
- A weekly voucher for an Eternal Legendary Crest.
- Tableau Progression: Participating in Warband activities, including Helliquary raids, earns Warband Points, which are used to upgrade your Warband Tableau, a significant source of passive Combat Rating.
- Potentially Easier Clears: A coordinated group that communicates effectively can often handle complex mechanics more smoothly. Roles can be clearly defined, and revives can be managed more efficiently.
- Strategy: Aim to complete your first five rewarded Helliquary kills each reset period with your Warband to maximize these lucrative bonuses. Even if you're primarily a solo player, joining or creating a "solo player" Warband (a Warband of one) still allows you to gain Tableau benefits from your own activity.
It's worth noting that many active players and Warbands organize their raids through external platforms like Discord, or within clan and faction chats, rather than relying solely on the in-game "find party" feature. Proactive communication and networking can be key to finding consistent and capable groups.
Understanding Helliquary Surges
Just when you think the coast is clear after a hard-fought victory, the Burning Hells might have one more surprise in store for you: a Helliquary Surge!
What It Is: After defeating any Helliquary boss on any difficulty, there's a random chance for a Helliquary Surge to occur. If triggered, you'll be immediately thrust into battle against a few additional, randomly selected Helliquary bosses. The good news? These "surge" bosses appear at a reduced strength compared to their standard counterparts.
The Rewards: Successfully quelling a Helliquary Surge grants you extra loot and, of course, bragging rights. Importantly, even if you've already received rewards from your five main boss kills for that reset period, you will still get a reward chest for completing the Surge. This makes Surges a pure bonus opportunity.
Rarity & Triggers: Surges are entirely random. Some players might encounter them frequently, while others might go weeks without seeing one. There's no specific boss that's more likely to trigger a Surge; it's a chance event after any Helliquary boss kill. For example, one player reported seeing two Surges in a single raid after downing five bosses, none of which were Lassal, while another went months without one.
The unpredictable nature of Surges adds an extra layer of excitement to Helliquary runs. Since they offer bonus rewards regardless of your weekly cap, it's always worthwhile to engage and defeat the surged bosses, even if you were initially just helping others after completing your own five.
Recent System Updates (2025)
The landscape of Diablo Immortal is constantly being reshaped by updates and patches. Staying informed about these changes is crucial for optimizing your Helliquary experience. Here are some of the key adjustments from early to mid-2025:
Removal of Invulnerability Phases from All Helliquary Bosses: As highlighted earlier, this is a major shift. Boss encounters are now more continuous, emphasizing sustained DPS and consistent mechanic execution rather than waiting out immune periods.
Significant Combat Rating Adjustments for Inferno V & VI:
- In February 2025, the CR requirements for Inferno V activities were notably reduced, making this tier more accessible.
- Inferno V Open World CR: Lowered from 45,665 to 44,765.
- Inferno V Dungeons CR: Lowered from 46,115 to 44,945.
- CR for various Inferno V Helliquary bosses were also adjusted downwards (see specific boss CR tables).
- In March 2025, Inferno VI also saw CR reductions:
- Inferno VI Hidden Lairs and standard Dungeons CR: Decreased from 47,690 to 46,190.
- Inferno VI Challenge Dungeons CR: Decreased from 48,115 to 47,690.
- CR for Inferno VI Helliquary bosses were also updated (see specific boss CR tables).
These adjustments were made because previous values were deemed "higher than intended" and aim to bring them more in line with player progression curves.
Dungeon Kick Feature Updates (May 2025): While not exclusive to Helliquary, these changes affect all grouped dungeon content. Party leaders now have the ability to initiate a vote to kick players for reasons such as being AFK/inactive or for harassment/inappropriate remarks. However, there are protections: a player cannot be kicked for being AFK if they are among the top two damage dealers in the party, nor can they be kicked for inappropriate remarks if they haven't actually typed anything in chat.
Helliquary Unlock Level Change: As mentioned in Section 1, the questline to unlock the Helliquary now begins at character level 60, up from the previous level 36.
These changes collectively aim to streamline progression, improve the player experience in group content, and ensure that Helliquary challenges remain appropriately tuned to the evolving power levels of the player base.
The Future of the Helliquary
Upcoming Content
The Helliquary is far from a static feature in Diablo Immortal; it's a dynamic system that continues to receive attention and updates from the developers.
The "Prince of Freedom" major update, which arrived in Q2 2025 (April-June), was confirmed to include new Helliquary bosses as part of its content offerings. While the exact nature and mechanics of these newest adversaries are still being discovered and mastered by the community, their introduction signals Blizzard's ongoing commitment to expanding this endgame pillar.
Looking further ahead, the "Epoch of Madness" roadmap also outlines subsequent major updates: "Flesh Harvest" in Q3 2025 (July-September), which is slated to introduce a new playable class and zone, and "The First & Last King" in Q4 2025 (October-December). While these updates have other primary focuses, it's common for major content patches in Diablo Immortal to include tweaks, balance adjustments, or even further evolutions for existing systems like the Helliquary.
Players should also anticipate ongoing class balance patches. These adjustments, even if not directly targeting Helliquary mechanics, will inevitably influence the meta team compositions and optimal strategies for Helliquary raids.
Addressing the Level 70 Cap & Material Hoarding
The Diablo Immortal community is a vocal and passionate one, and their feedback often shapes the game's future. One of the most prominent discussions surrounding the Helliquary in 2025 revolves around its current Level 70 cap and the consequent issue of accumulating vast, unusable quantities of Voidblood Slag.
As detailed earlier, many long-term players hit this cap months ago and now find themselves with thousands, even tens of thousands, of Voidblood Slag items filling their inventory with no outlet for their use. This has understandably led to calls for Blizzard to address the situation. Common suggestions from the player base include:
Increasing the Helliquary Level Cap: The most straightforward solution would be to add more levels beyond 70, providing new progression goals and a direct sink for Voidblood Slag.
Alternative Uses for Voidblood Slag: Players have proposed allowing Voidblood Slag to be used for other purposes, such as:
- Rerolling the attributes on Demonic Remains.
- Converting it into other valuable materials like the newer crafting ores (e.g., Rhodolite), Hilts, or standard enchanting materials (Scrap/Dust).
The sheer volume of feedback on this topic across official forums and community platforms suggests it's a significant concern for the dedicated player base. Game developers are generally attentive to such widespread sentiment, especially when it pertains to endgame progression systems where players invest considerable time and effort. Ignoring this could lead to diminished engagement with the Helliquary from those who have hit the current progression ceiling. Therefore, it is quite likely that a future update will introduce a solution, whether it's new Helliquary levels, additional material sinks, or a broader revamp of the upgrade economy.
Final Thoughts
And there you have it, champion! Your comprehensive field guide to navigating and conquering the Helliquary in Diablo Immortal, as it stands in the fiery heart of 2025. It's a demanding, thrilling, and ultimately incredibly rewarding journey that forms a critical part of your endgame power progression.
Remember these key takeaways: always keep an eye on those Combat Rating requirements, learn the deadly dances of each demonic boss, and coordinate with your Warband whenever possible to snag those extra spoils. The Burning Hells are always scheming, with new bosses and system tweaks regularly appearing on the horizon, so stay adaptable and keep honing your skills.
"The Helliquary is more than just a series of boss fights; it's a testament to your growth as a hero of Sanctuary."
The Helliquary is more than just a series of boss fights; it's a testament to your growth as a hero of Sanctuary. Each victory brings you closer to unimaginable power and prepares you for the even greater threats that undoubtedly await.
Now, take this knowledge, gather your allies, and charge forth! Send those demons screaming back to the abyss. Sanctuary—and some seriously epic loot—is counting on you. Go get 'em, Nephalem!