
The Labyrinth is currently the fastest way to level up in Escape from Tarkov's PvE mode. This endgame activity delivers massive experience gains that don't scale down based on your level, making it incredibly valuable for rapid progression. This guide covers everything you need to farm the Labyrinth successfully, from gear requirements to boss-killing strategies.
Why Farm the Labyrinth?
Each successful run nets you between 40,000 and 50,000 XP. The lowest recorded payout sits around 33,000, which depends on how many guards and scavs spawn during that particular raid. The XP reward is flat, meaning it doesn't diminish as you level up. A level 15 player gets the same massive payout as a level 40 player.
Gear Requirements
Ammunition: Your Top Priority
High-penetration ammunition makes or breaks your Labyrinth runs. You need ammo with at least level 4 or level 5 penetration to reliably kill the bosses. Anything less and you won't deal enough damage before they drop you.
Finding High-Tier Ammo: Interchange's Bogatyr camp spawns plenty of BS and BP ammunition. A single raid can yield three 120-round boxes of high-pen ammo. The Chalet area on Lighthouse also has regular spawns for M855A1 and M995.
Weapon Selection
Pick weapons with high rates of fire. The faster you put rounds on target, the better your odds of killing bosses before they shoot back. Missing a few shots hurts less when you're firing 700-800 rounds per minute.
| Weapon Type | Fire Rate | Notes |
|---|---|---|
| 5.45x39mm rifles (NL545) | 800 RPM | Use 95-round drums or 60-rounders |
| SA-58 (7.62x51mm) | 700 RPM | Higher damage per shot, great with M80/M993 |
| 5.56x45mm platforms | Varies | Works but less effective due to damage trade-offs |
Magazine Recommendations: Bring at least two large-capacity magazines (60+ rounds). If you're running 95-round drums, two drums plus one or two 30-round backups gives you plenty of ammo. Running dry mid-fight against these bosses usually means death.
Armor Considerations
Armor matters less than you'd expect. Both Labyrinth bosses carry the best ammunition in the game. Tagilla and Killa spawn with weapons loaded with BS, PPBS, or equivalent top-tier ammo that shreds through most armor regardless.
A basic plate carrier with level 5 plates gives you adequate protection against guards and scavs. Don't bring expensive armor you can't easily replace. Insurance doesn't work in the Labyrinth, so any gear you lose is gone for good.
Medical Supplies
XTG Antidote – You absolutely need this. The Labyrinth has poison barbed wire scattered throughout the map. Stepping into it applies a toxin similar to the Cultist poison, dealing damage over time that will kill you. The antidote neutralizes this effect.
Bosses and guards frequently carry XTG antidotes, so you can loot them. Still, always bring your own. If you walk into barbed wire during a firefight, you need immediate access to the cure.
Getting Into the Labyrinth
The Nos Key
The Nos key opens the Labyrinth facility entrance on Shoreline. Multiple spawn locations exist throughout the game. Check the Escape from Tarkov wiki for spawn points. Learning to use the wiki will help you throughout your Tarkov experience since it covers quest items and key locations.
The Labyrinth Access Key Card
The access key card works like a Labs key card. You need this consumable to transit into the Labyrinth once you reach the entrance.
Getting the Key Card Through Jaeger: After completing the initial Labyrinth quest steps for Jaeger, he unlocks a barter trade for the access key card. The barter costs:
- 2 Sausages
- 2 Vodka
- 1 Moonshine
Total value runs around 350,000 rubles. A time gate applies here. You must wait roughly two days after completing the prerequisite quest steps before Jaeger offers the trade.
Alternative Route Through Mechanic: A side quest through Mechanic also grants access to the key cards. This quest unlocks automatically at level 15. The chain starts on Ground Zero, where you find a book belonging to the Nos facility manager in a specific vehicle. After turning the book in to Mechanic, you progress through additional steps that eventually let you purchase key cards directly for rubles instead of bartering.
This path has shorter time gates than Jaeger's quest line, making it the better choice if you want to minimize waiting.
Getting There
Once you have both keys:
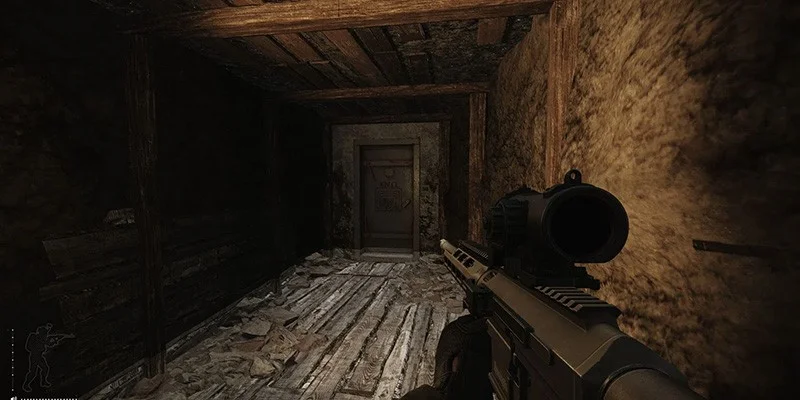
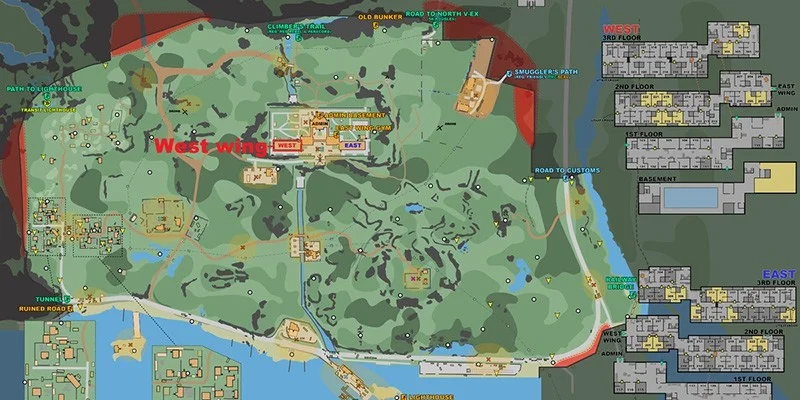
- Enter Shoreline and head to the Resort
- Go through the West Wing entrance
- Take the stairs immediately inside, heading down to the basement
- Cross to the opposite side of the swimming pool area
- Use the Nos key to open the locked door
- Drop through the opening beyond the door
- Use your access key card at the transit point
Labyrinth Layout and Mechanics
You spawn in a random starting room when you enter. This initial area is completely safe with no enemies nearby. The randomized spawn means you could end up in various rooms, each with its own puzzle and trap setup.
Room Mechanics and Traps
Each starting room contains:
- A key that spawns randomly somewhere in the room
- A door that key unlocks
- A trap you must deactivate (usually a lever)
- The main exit door that opens once the trap is disabled
Trap types vary by room. The shotgun trap is particularly nasty. If you're in a metallic, container-like room, don't walk to the end of the corridor before hitting the lever. You might survive triggering it, but the damage is brutal.
Keep the Escape from Tarkov wiki open to reference room layouts and key spawn locations. After a few successful runs, you'll have the positions memorized. The map is small, so learning it doesn't take long.
Environmental Hazards
Poison Barbed Wire: Spread throughout the Labyrinth, this wire damages your legs immediately and applies a damage-over-time poison. If you walk through it:
- Get out of the wire immediately
- If you're in combat, finish the fight first
- Pop your XTG antidote as soon as you're safe
- Don't let the poison tick for too long
Trip Wires: Trap wires exist throughout the map. If you trigger one, keep sprinting and move into another room. The explosion won't hit you if you maintain momentum.
Boss Fight Strategy
How Boss Spawns Work
The Labyrinth has two bosses: Tagilla and Killa. They don't spawn at the same time.
Spawn Order:
- Tagilla spawns at raid start along with his guards
- Guards are present from the beginning and aggro when Tagilla does
- Killa only spawns after you kill Tagilla
- Killa immediately rushes your position when he appears
Finding Tagilla
Tagilla patrols the central Labyrinth area. You can track him through audio cues. He makes distinctive heavy breathing sounds that grow louder as you get closer.
If you can't find him, throw a grenade into the central area to pull aggro. Sometimes you'll catch him walking past a doorway. Take the shot if you have it.
The Core Strategy: Hold Angles
Step-by-Step Boss Elimination:
- Trigger Aggro: Either through line-of-sight or by throwing a grenade
- Retreat to a Corner: Position yourself holding an angle on a doorway
- Pre-aim Head Height: Point your weapon where their head will appear
- Mag Dump: The moment Tagilla rounds the corner, unload into his head and upper thorax
- Stay in Position: Keep holding the angle for guards and Killa
With high-pen ammo and a good rate of fire, Tagilla goes down before he fires a shot. Killa rushes you right after Tagilla dies, so the same approach works on him too.
Recovering from Mistakes
If You Miss or Don't Get the Kill:
- Throw another grenade to reset the boss's aggro
- Move to a new angle
- The grenade makes the boss break away or change direction
- Hold your new angle and wait
Grenades don't deal damage to Labyrinth bosses. The reason isn't clear, possibly something to do with floor traps they might trigger. Grenades are still invaluable for manipulating boss positioning and resetting bad situations.
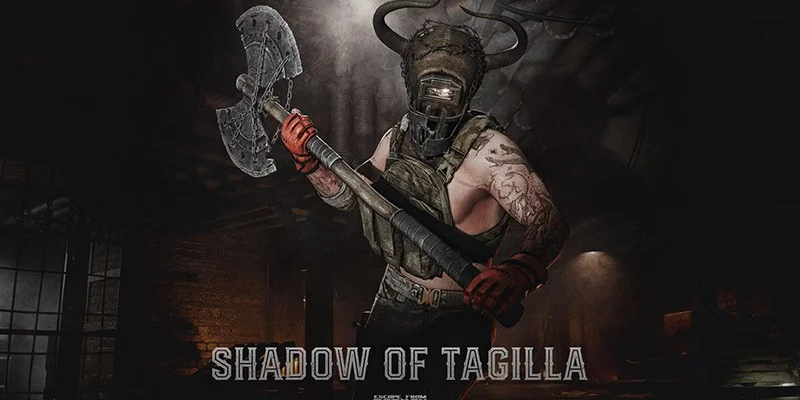
If Tagilla Pulls His Axe: When Tagilla commits hard and charges with his melee weapon:
- Stay calm and back away to a new angle
- He can't deal damage while the axe is out
- Pre-aim and fire when you have a clear shot
- Watch for guards who may still be shooting
Killa's Unique Behavior
Killa sometimes doesn't fully commit to rushing you. After killing Tagilla, Killa may approach but then stop and kneel in a nearby room.
Dealing with a Kneeling Killa: This situation is dangerous. A kneeling Killa can randomly stand up and charge without warning, rush past your weapon and end up behind you, or open fire while you're repositioning.
The solution is to pre-fire as you swing the corner. Don't give Killa time to react. Commit to pushing while already firing. Engaging a stationary Killa on your terms beats waiting for him to catch you off-guard.
This doesn't happen often, but stay ready for it.
Additional Enemies
Guards
Guards spawn with Tagilla at raid start. Once aggroed, they rush directly at you. Keep holding your angle after killing the bosses since guards will keep pushing.
Their armor isn't great, making them easy to drop. They carry top-tier ammo though (M855A1, BS, BP), so they'll punish you fast if you get caught unaware.
Late-Raid Spawns
Additional scavs can appear around the 20-minute remaining mark. This spawn isn't guaranteed but happens often enough that you should stay alert during the second half of your raid.
These late spawns behave like guards. They rush on aggro, so the corner-holding strategy works. Their armor is weak, but their ammunition is deadly.
What Loot to Expect
Ammunition Sustainability
Labyrinth farming sustains itself because both bosses carry large magazines filled with high-pen ammo.
Typical Ammo Haul (two successful raids):
- Around 500 rounds of PPBS (5.45x39mm)
- Plenty of BP ammunition (7.62x39mm)
- Various other high-tier ammo types
Killa frequently carries multiple 60-round magazines of top-tier ammo. Tagilla also spawns with 60-rounders when using compatible weapons. This creates a self-sustaining loop where successful runs replenish (and often exceed) your ammo usage.
High-Value Items
The Labyrinth consistently spawns valuable loot:
| Category | Items |
|---|---|
| Electronics | GPUs, VPXs, Virtex processors, Military flash drives, SAS drives |
| Hideout Components | NIXXOR lenses, MCBs, SMTs, MGTs, Cyclone batteries, Power filters |
| Trade Items | Tetriz units, Defibrillators |
| Injectors | Various stimulants spawn throughout the map |
| Quest Items | Labyrinth research notes (save for quests) |
| Grenade Launcher Ammo | M433, M441, and other 40mm rounds |
Special Loot Rooms
The Corpse Room: A locked room containing:
- Bitcoin spawns
- Weapon cases
- Key card holders
- Other high-value containers
The corpse room key spawns in about six locations throughout the Labyrinth. You'll memorize these after several runs.
The Observation Room: This room requires a key with five uses. Inside you'll find:
- Dense loot spawns
- Labyrinth research notes
- Stimulants and medical items
- Access needed for main story quest progression
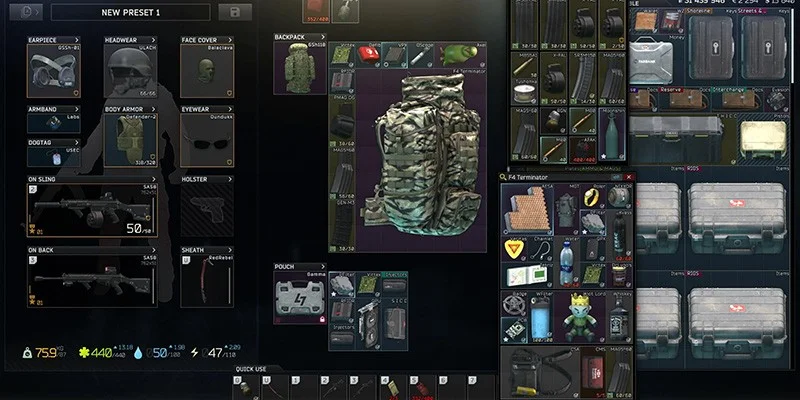
Maximizing Inventory Space
Backpack Choice
Use a mid-tier backpack you can afford to lose. The Beta2 works well since it provides decent space without being a major investment. Raid backpacks give more room but are hard to replace if lost, especially without high-tier quest completion.
Extra Storage with Rigs
Bring additional rigs to maximize what you extract with:
- Micro Rig: Takes 6 slots but holds 8 (net +2 slots)
- Black Variant Rig: Takes 6 slots but holds 10 (net +4 slots)
Guards often spawn wearing these rigs. If you don't want to risk your own, just grab them from dead enemies.
Quest Integration
The Labyrinth Chapter
The Labyrinth has its own quest chapter that starts automatically when you first enter. You complete various objectives inside while farming, making progression efficient.
You need to finish the Labyrinth chapter to access new maps and content tied to later quest lines.
Mechanic's Side Quest
Save your Labyrinth research notes. They're required for the Mechanic quest line that unlocks direct key card purchases. Selling them early means more farming later.
Quick Reference Summary
- Ammunition matters most – Level 4-5 penetration minimum, level 6 preferred
- High fire rate weapons make up for missed shots and ensure fast kills
- Hold angles, never peek – Let bosses come to you
- Grenades reset bad situations without damaging bosses
- Bring an XTG antidote – The poison wire will kill you without it
- Watch spawn timers – More enemies appear around 20 minutes remaining
- The farm sustains itself – Successful runs replenish ammo and generate millions
- Deaths happen – One good raid covers multiple failures
The Labyrinth offers the best XP-to-time ratio in Escape from Tarkov PvE right now. With consistent 40,000-50,000 XP runs, solid loot, and self-sustaining ammo returns, this farm accelerates your progression without relying on traditional task completion.