
Marathon is a first-person PvPvE extraction shooter from Bungie, the studio behind Halo and Destiny. You play as a Runner, a human who's uploaded their consciousness into a cybernetic shell, and you drop into hostile zones on the derelict colony of Tau Ceti IV to scavenge loot, complete faction contracts, and get out alive. The game launches March 5, 2026 on PC, PlayStation 5, and Xbox Series X|S at $40 for the standard edition, with full crossplay and cross-save across all platforms.
If you've played Arc Raiders or Escape from Tarkov, you already know the basic tension here: everything you bring into a match is on the line, and dying means losing your gear. Bungie's twist is layering class-based abilities, deep buildcrafting, and a faction progression system on top of that extraction formula. The world is built around what Bungie calls "persistent, evolving zones," meaning maps and narrative develop over time with each season.
Bungie has also talked about making the extraction genre easier to get into for newcomers. Barrett explained: "One of the ways we're addressing this is by making the core fantasies of survival and extraction fun, clear, and easy to understand. We want people to quickly understand fundamentals like healing, or oxygen, or how to organize their gear."
This guide covers every confirmed system, class breakdown, and strategy tip you need to hit the ground running at launch.

Core Gameplay Loop
Marathon follows the standard extraction shooter format, but if this is your first time with the genre, here's exactly how each run flows.
The Basic Loop
Barrett has said the team wants "to make sure players have tons of strategic choices, both in terms of the gear available and their loadouts, but also on the ground in terms of tactical options, entrance and exfil points, and so on." There are also multiple ways to succeed beyond just surviving. Completing contracts, securing high-value loot, and building faction reputation all count as productive run outcomes.
Here's the cycle:
- Prepare your loadout. You pick your Runner Shell (your class), equip weapons, mods, implants, cores, a shield module, equipment, and fill your backpack with consumables like healing items, ammo, and grenades.
- Drop into the map. You spawn into a shared zone with other players, either with a crew of up to three or completely solo. AI enemies and environmental hazards fill the map alongside rival player teams.
- Scavenge, fight, and complete objectives. Once you're on the ground, it's open-ended. Loot containers, take out enemies for their drops, work through faction contracts, trigger map events, fight mini-bosses, or just stay quiet and collect resources.
- Extract. Head to your designated extraction point (Exfil) and activate it to escape. A successful extraction means you keep everything you found.
- Lose everything if you die. Get eliminated before extracting and you lose all the gear you brought in plus everything you picked up. This is the core tension of the entire game.
- Sell, upgrade, repeat. Back in the menus, sell valuables, invest in faction upgrades, buy new gear from the black market, and kit up for the next run.
Match Structure
Each match runs on a timer (roughly 25 minutes based on available information). When it expires, all standard extraction zones close and a single final Exfil opens for every remaining player. This creates a brutal endgame where survivors converge on one spot, forcing a fight.
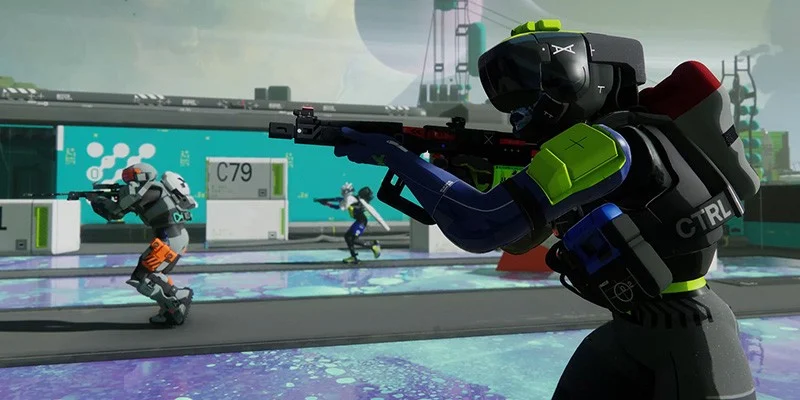
Maps support up to 18 players on some zones and 15 on others (numbers vary by map). You can enter solo, as a duo, or in a three-person crew. Even solo players will run into full three-player squads, so awareness and positioning matter more than raw firepower.
Loot Categories
Items you pick up during a run fall into several categories:
- Weapons and weapon mods that change how your guns handle and perform
- Implants that give stat bonuses and perks (usable on all Runner Shells)
- Cores that are specific to individual Runner Shells and modify abilities
- Equipment like grenades and shield modules
- Consumables like patch kits, shield recharges, and status-clearing items
- Materials used for faction upgrades and progression
- Keys that open locked boxes and locked rooms with high-tier loot inside
- Backpacks of varying sizes with bonus effects (some grant invisibility, auto-reload, faster item usage, and other strong perks)
- Valuables you can sell for in-game currency
Runner Shell Basics
Runner Shells are Marathon's version of character classes, but they don't follow the usual tank/healer/DPS triangle. Each Shell is a biosynthetic body with its own abilities, traits, and base stats built around a specific gameplay archetype.
How Runner Abilities Work
Every Shell comes with four ability components:
- Prime Ability - Your strongest tool, with a long cooldown. Think of it as an ultimate.
- Tactical Ability - Your main combat ability with a shorter cooldown, meant for frequent use during fights.
- Trait 1 - A passive or situational bonus that's always available or triggers under specific conditions.
- Trait 2 - A second passive or situational bonus.
Buildcrafting: Cores and Implants
Your Shell is just the starting point. The real depth comes from two buildcrafting systems:
- Cores are Shell-specific modifiers. Each Runner has a unique pool of cores that change how your abilities work, sometimes drastically. Cores come in rarity tiers: gray (standard), green (enhanced), blue (deluxe), purple (superior), and gold (prestige). Higher rarity means bigger effects.
- Implants are shared across all Shells. They provide stat bonuses plus a random perk. The highest-tier implants also include a bonus fixed perk on top. For example, the Bionic Leg Upgrades V5 implant grants a speed boost after leaping from great heights, plus a random perk roll like explosive and melee resistance. Other implants include Knifight V3 (increased melee damage) and Protector V3 (increased shield capacity). Between your Shell choice, core loadout, and implant selection, the buildcrafting possibilities run deep.
Base Stats
Every Runner Shell has a set of base stats that shape how it performs. Understanding these will help you evaluate gear and plan upgrades:
Additional stats include Melee Damage, Prime Recovery / Tactical Recovery (ability recharge rates), Fall Resistance, and Ping Duration.
All Runner Shells
Marathon launches with six main Runner Shells plus the special Rook scavenger frame. Below is a full breakdown of each, including abilities, stats, ideal playstyle, common mistakes, and team synergies.
Archetype: Frontline aggressor. The Destroyer is built to push into fights, hold space, and create openings. If you like being the first one through the door and thrive on aggressive plays, this is your Shell.
Lore: Ex-UESC special operations combat specialist.
Destroyer Abilities
- Prime - Search and Destroy: Activates shoulder-mounted missile pods. Dealing sustained damage to targets launches homing missiles that immobilize and deal damage on impact. One thing many players get wrong: this isn't fire-and-forget. You need to actively shoot a target first to lock on, and then the missiles fire while you keep engaging. Just pressing the button won't do anything on its own.
- Tactical - Riot Barricade: Deploys a forward-facing energy shield that blocks incoming damage. It drains energy over time, and absorbing hits drains it faster. This works both defensively and offensively. Push through sightlines with it, protect teammates during revives, or create temporary cover mid-fight.
- Trait 1 - Thruster: Activate while airborne to fire boosters in whatever direction you're moving. Gives you lateral dodges and directional bursts in the air.
- Trait 2 - Tactical Sprint: Double-press sprint to move faster at the cost of generating heat (stamina).
Confirmed Destroyer Cores
| Core Name | Rarity | Effect |
|---|---|---|
| Ankle Breaker | - | Reduces Thruster heat cost when near enemies. |
| Bull Rush | - | Riot Barricade stops draining energy while you're in Tactical Sprint. |
| Myrmidon | - | Increases melee damage after using Thruster. |
| Impact Siphon | - | Damage dealt to your Riot Barricade returns to you as shield energy. |
How to Play Destroyer
The Destroyer excels when you play aggressively but with discipline. Your job is to be the player who crosses dangerous sightlines so your teammates don't have to. Use the Riot Barricade to push through open areas, shield allies during revives, and take space. Thruster gives you unexpected angles on enemies. Search and Destroy works best as pressure on targets already engaged in a fight. The homing missiles immobilize enemies, letting your team collapse on them.
Cores like Myrmidon and Impact Siphon open up a tanky brawler playstyle: fly in with Thruster for boosted melee damage, pop your Barricade to absorb incoming fire that feeds your shields back, and finish enemies in close range. Pair that with implants like Knifight V3 (melee damage), Bionic Leg Upgrades V5 (speed boost on landing plus damage resistance), and Protector V3 (shield capacity), and the Destroyer becomes a genuine threat in close quarters.
Archetype: Stealth infiltrator. The Assassin controls fights by denying information to enemies. Built for patient players who win through positioning and timing rather than raw aggression.
Lore: Unknown origin. Shadow assassin with invisibility systems.
Assassin Abilities
- Prime - Smoke Screen: Throws a smoke disc that sends out a line of smoke fields in front of you, disrupting the optics of anyone who steps inside. Blocks enemy vision and creates confusion zones.
- Tactical - Active Camo: Activates your shell's camouflage, making you invisible. Shooting, taking damage, and using abilities or consumables will briefly disrupt the cloak. It lasts roughly 12 seconds and is one of the most feared abilities in the game.
- Trait 1 - Shadow Dive: Activate while airborne to slam a smoke disc into the ground, deploying a smoke field on impact. This also negates fall damage, letting you drop from any height safely.
- Trait 2 - Shroud: Your shell automatically cloaks when you enter any smoke field. The invisibility sticks around for a short time (roughly 2 seconds) after you leave the smoke.
Confirmed Assassin Cores
| Core Name | Rarity | Effect |
|---|---|---|
| Breathing Space | - | Shroud increases your weapons' reload speed while in any smoke field. |
| Patience | - | While stationary, your invisibility timer is paused at the cost of generating heat. |
| Guerrilla | - | Active Camo and Shadow Dive recharge more quickly while in smoke. |
| Shadow Strike | - | Your Utility Knife deals greatly increased damage when attacking from invisibility. |
How to Play Assassin
Everything in the Assassin's kit revolves around information denial. Smoke first, reposition with invisibility, take a guaranteed shot, then disappear before the enemy can trade back. Strong Assassin players focus on generating panic in the opposing team and patiently picking off anyone who gets separated. The synergy between Smoke Screen, Shroud, and Shadow Dive lets you chain smoke fields and invisibility together, making you extremely hard to pin down. With the Guerrilla core, you can effectively spam Active Camo and Shadow Dive as long as you stay in smoke, taking the chain potential even further. Patience lets you hold invisible angles indefinitely while stationary, and Shadow Strike turns your Utility Knife into a lethal opener from cloak.
Keep in mind that Recon hard-counters the Assassin. Echo Pulse reveals invisible targets, and Stalker Protocol tracks you through holographic trails after a shield break. A good Assassin needs to be aware of enemy team compositions and adjust their aggression accordingly.
Archetype: Information warfare. Recon is for the thinking player, built for in-game leaders (IGLs) who call shots based on gathered intel. This Shell won't win fights on its own, but it decides them by giving your team knowledge nobody else has.
Lore: Classified. Tactical strategist specializing in threat detection.
Recon Abilities
- Prime - Echo Pulse: Activates your shell's detection systems, releasing sonar pulses that reveal nearby hostiles, including players, AI enemies, and even invisible targets. You're essentially a walking UAV.
- Tactical - Tracker Drone: Deploys a mechanized microbot that hunts nearby hostiles and explodes, overheating anyone caught in the blast. Because overheat drains enemy stamina and locks out their movement abilities, this drone applies real pressure even without dealing lethal damage.
- Trait 1 - Interrogation: You get an automatic HUD warning when an enemy Runner pings you. On top of that, performing a finisher on a downed Runner pings the location of their entire crew. Incredibly strong for tracking down remaining squad members after dropping one enemy.
- Trait 2 - Stalker Protocol: After breaking a combatant's shields, they leave behind a lingering holographic trail for a short time. Glowing footprints that let you track anyone who tries to run.
Confirmed Recon Cores
| Core Name | Rarity | Effect |
|---|---|---|
| Cluster Payload | - | Tracker Drone explodes into shrapnel on detonation for additional damage and area coverage. |
How to Play Recon
Recon's strength is giving your team permission to make smart pushes. Use Echo Pulse before rotations so you know exactly what you're walking into. Deploy Tracker Drones to force enemy movement and apply overheat pressure. Push immediately after shield breaks to capitalize on Stalker Protocol's holographic trails. What matters most is acting on the information you gather. Intel without action is useless. Because Interrogation chains into your team's next engagement (finishing one enemy reveals the rest of their crew), Recon players should always be the ones finishing downed enemies when possible.
Archetype: High-mobility disruptor. The Vandal thrives on speed, chaos, and constant repositioning. If you love using movement to outplay opponents and enjoy a fast-paced action-heavy style, this is your Shell.
Lore: Martian freedom fighter. Combat anarchist with enhanced movement.
Vandal Abilities
- Prime - Amplify: Overcharges your movement systems, reducing heat buildup on all movement abilities. Also boosts movement speed and weapon handling. This is your "go fast" button that lets you chain movement actions without overheating.
- Tactical - Disrupt Cannon: Press to fire a high-powered energy projectile that deals damage and pushes targets away. Hold to overcharge the cannon for a bigger blast with more damage. You can also use the blast to launch yourself into the air for vertical plays. The devs have mentioned that blasting enemies off buildings with this has already become a meme internally.
- Trait 1 - Microjets: Activate in the air for a double jump, at the cost of heat.
- Trait 2 - Power Slide: Grants a supercharged extended slide that generates heat.
Confirmed Vandal Cores
| Core Name | Rarity | Effect |
|---|---|---|
| Adrenal Core | - | Reduces heat generation while Amplify is active, extending your window for chained movement. |
| Microjet Efficiency | - | Grants an additional Microjet charge, giving you a triple jump. |
How to Play Vandal
Vandal's role is disrupting enemy positioning through movement. Use Amplify to force enemies into chasing and splitting up, then hit them with Disrupt Cannon to knock players into bad spots or panic them. Your double jump and extended slide give you angles that other Shells simply can't reach. Cores like Adrenal Core and Microjet Efficiency push the movement ceiling even higher, letting you chain jumps and slides far beyond what base Vandal can do. Finding these cores early is critical to getting the most out of this class.
Archetype: Loot-focused infiltrator. The Thief is built around maximizing your looting efficiency and economy. Quietly one of the strongest Shells in Marathon, the Thief excels at planned routes, high-value extractions, and information gathering through its unique drone.
Thief Abilities
- Prime - Pickpocket Drone: Deploy a remote-controlled origami butterfly drone with a mechanical whip. The drone knocks loot out of players and AI enemies, then collects what drops. But it has a powerful secondary use: you can fly it around as a scouting tool, pinging enemy locations for your squad. This gives Thief a mini-UAV on top of its looting power.
- Tactical - Grapple Device: Fires a dart from your forearm that unfolds into a hovering propeller, pulling you toward it. Unlike traditional grappling hooks that need a surface to attach to, this one creates its own anchor point in mid-air. Fire it into open sky and use it to launch yourself from virtually anywhere, giving you exceptional mobility and escape options.
- Trait 1 - X-Ray Visor: Flip down your visor to see loot containers through walls, including the rarity of items inside. It also highlights enemies within your direct line of sight (not through walls, only targets you can actually see).
- Trait 2 - Backpack Scaling Bonus: Your base stats passively increase as you fill your backpack with more loot. This includes faster grapple recharge and improved weapon handling. The more loot you carry, the stronger you get.
Confirmed Thief Cores
| Core Name | Rarity | Effect |
|---|---|---|
| Greed Is Good | Enhanced | When your backpack is completely full, sprint speed and slide distance increase. |
| Hidden Run | Deluxe | Hitting a target with a melee or knife attack immediately after grappling hacks them and knocks random loot from their backpack. |
| Case the Joint | Superior | X-Ray Visor gains increased vision range. |
| Partner in Crime | Prestige | While not being piloted, your Pickpocket Drone periodically pulses to ping nearby hostiles. |
| Second Grapple Charge | - | Grants a second charge of your Grapple Device. |
| Drone Ping | - | Pickpocket Drone periodically pings nearby enemies while not being piloted. |
How to Play Thief
Thief rewards players who plan routes and think about extraction economy. Use X-Ray Visor to find high-value containers, Grapple Device for rapid repositioning and early exits, and Pickpocket Drone for both stealing loot and scouting enemy positions. The Backpack Scaling Bonus means you get progressively stronger as a run goes on. A Thief with a full backpack is a noticeably better fighter than one running empty.
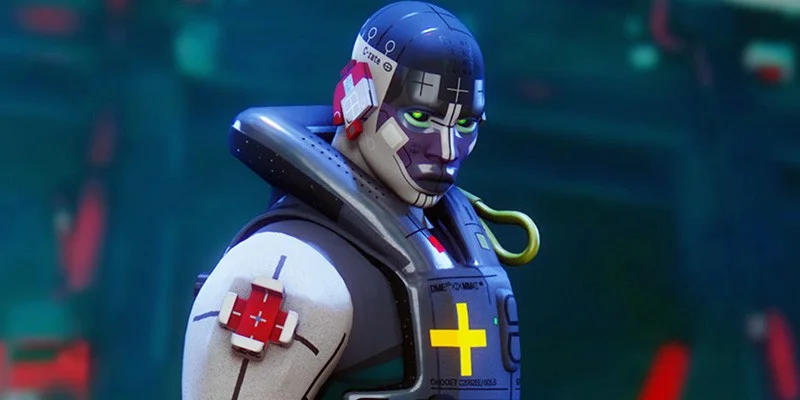
Archetype: Combat medic. Triage keeps your team standing through firefights with healing, revives, and combat buffs. In an extraction game where staying alive is everything, a good support player can swing every fight in your team's favor.
Triage Abilities
- Prime - Capacitive Gauntlets: Activates an overcharge that sends out shocking tendrils. These revive downed allies from range while also dealing damage to enemies. You can zap opponents and bring teammates back into the fight at the same time.
- Tactical - Med-Drone: Deploys a drone that hovers over an ally's shoulder (or your own), providing health and shield regeneration. You can send it to whichever teammate needs it most.
- Trait 1 - Battery Overcharge: Temporarily boosts your weapon performance. While active, energy weapons gain the ability to EMP targets when you break their shields. This ties directly into battery-type weapons, making specific weapon choices matter more on Triage than on other Shells.
- Trait 2 - Shareware: Allies with Med-Drones attached automatically receive copies of any consumables or heals you use. This is one of the most powerful passive abilities in the game. Using a single health item effectively heals your entire team from any distance, as long as they've got drones on them.
Confirmed Triage Cores
| Core Name | Rarity | Effect |
|---|---|---|
| High Voltage | Enhanced | Killing hostiles affected by EMP reduces the cooldown of your next Battery Overcharge. |
| Electron Recapture Syncs | Deluxe | While Battery Overcharge is active, defeating a hostile or downing a runner with a vault weapon instantly restores a portion of the weapon's charge. |
| No Good Deed | Superior | You receive a burst of healing when your Med-Drone attaches to a crew member. |
| Samaritan | Prestige | Sharing a consumable through Shareware reduces the cooldown of your next Med-Drone. |
How to Play Triage
Triage shines when you're turning your teammates' mistakes into quick recoveries. Keep Med-Drones active on your squad to enable Shareware healing. Use Capacitive Gauntlets to revive downed allies from range while simultaneously damaging enemies. This can completely flip a fight when the other team thinks they've got the advantage. Battery Overcharge also makes you a real combat threat despite being the support class, and the EMP effect on shield breaks adds utility to every engagement.
Archetype: Risk-free scavenger. Rook isn't a traditional Runner Shell. It's a stripped-down scavenger frame for low-risk solo runs. If you've lost a lot of gear and need to rebuild, or you just want to learn the maps with zero stakes, Rook is the way to do it.
Rook Restrictions
- You can only enter as Rook solo, no crew.
- You join matches that are already in progress, not at the start.
- You spawn with a predetermined basic loadout that you can't customize.
- You have no offensive abilities like the other Shells.
- You bring nothing in, so you risk nothing.
- There are no cores for Rook, as it's purely a scavenger frame.
Rook Abilities
- Prime - Recuperation: A basic self-sustain ability (exact details are limited).
- Tactical - Signal Mask (Blend): Activates a mask that makes UESC AI forces treat you as non-hostile. Enemy NPCs won't attack you while it's active, letting you move through PvE-heavy areas safely. Other players can still see and attack you.
How to Play Rook
Rook is Marathon's version of a Scav run. Drop in, loot everything you can, avoid other players, and extract. Signal Mask is particularly strong for moving through NPC-heavy areas to reach valuable loot without drawing fire. Since you join mid-match and nobody gets notified of your arrival, you've got a stealth advantage that starting players don't have. You can blend in with enemy AI, scavenge the bodies of fallen Runners, and walk out with a full backpack while risking absolutely nothing.
Team Compositions
Marathon lets you run any combination of Shells, including multiples of the same class. But running a diverse team generally gets you better results. Here are three strong compositions for launch:
| Composition | Shells | Strategy |
|---|---|---|
| Balanced and Consistent | Recon + Destroyer + Triage | Recon provides intel, Destroyer pushes into fights with that information, and Triage keeps everyone alive. The most well-rounded composition for reliable extractions. |
| Aggressive Profit | Destroyer + Vandal + Thief | Destroyer and Vandal create pressure and chaos on the frontline while Thief exploits the distraction to grab the best loot. For groups that want combat dominance and maximum extraction value. |
| Stealth Control | Assassin + Recon + Thief | Built around controlling information and striking from the shadows. Recon identifies targets, Assassin creates confusion and picks off stragglers, and Thief cleans up the loot. For squads that prefer to dictate fights on their own terms. |
Weapons and Mods
Marathon launches with 28 confirmed weapons across eight archetypes, plus over 400 weapon mods that can drastically change how those weapons perform. The mod system is one of the deepest customization layers in the game.
Confirmed Weapons
| Category | Weapons |
|---|---|
| Assault Rifles | Overrun AR, M77 Assault Rifle, V75 Scar, Impact HAR |
| Submachine Guns | Bully SMG, V22 Volt Thrower, BRRT, Copperhead RF |
| Shotguns | WSTR Combat Shotgun, Misriah 2442, V85 Circuit Breaker |
| Sniper Rifles | Longshot, Outland, V99 Channel Rifle |
| Precision Rifles | Hardline PR, Repeater PR, Twin Tap HBR, V66 Lookout, BR33 Volley Rifle, Stryder M1T |
| Machine Guns | Conquest LMG, Retaliator LMG, Demolition HMG |
| Pistols | V11 Punch, CE Tactical Sidearm, Magnum MC |
| Railguns | V00 Zeus RG, Ares RG |
Ammo Types
Weapons use different ammo types, and managing your supply is part of every loadout decision. The confirmed ammo types at launch are medium rounds, heavy rounds, volt batteries, volt cells, and MIPS rounds (sniper rifle ammo). MIPS rounds in particular are expensive on the black market, so finding them in the field saves real currency.
Weapon Mod System
Weapons support four mod slots:
- Magazine - Increases ammo capacity.
- Barrel - Improves handling and projectile characteristics.
- Sight - Changes your optic.
- Dedicated Mod Slot - Has the biggest impact on how the weapon feels and performs.
Mods follow the same rarity tiers as other items (gray/green/blue/purple/gold). Higher-rarity mods deliver more dramatic effects. Bungie has said that some legendary (gold) mods completely change a weapon's identity. One example is the Full Blown gold mod, which turns a battery SMG into something that functions like the Needler from Halo, complete with tracking projectiles. Another is a gold Silencer mod for sidearms that grants invisibility on kill, regardless of which Shell you're running.
Other confirmed mods include Torch Bug (purple rarity, causes eliminated hostiles to explode) and Afterburner (reloads a portion of your magazine and increases stability and accuracy while sliding).
Factions and Progression
Factions are one of the most important systems in Marathon. They're your main source of progression, rewards, and power growth across a season.
How Factions Work
At launch, six competing factions fight for influence over Tau Ceti IV: Arachne, CyberAcme, NuCaloric, Sekiguchi, Traxus, and MIDA. Each faction has its own personality and goals. MIDA, for example, leans heavily into destruction, sending you on missions to upload malware to UESC ships, and rewards you with explosives like grenades and claymores. By completing their contracts (missions you work on during runs), you earn reputation and unlock rewards. As your reputation grows, you gain access to:
- Runner Shell upgrades and stronger starting options
- Account-wide passive buffs (stat increases, more vault space, faster revive speed, and more) that remain permanent for the rest of the season
- Higher-tier items in each faction's black market shop
- Core unlocks for purchase
- Story content and narrative elements tied to each faction
Each faction has its own upgrade tree with multiple tiers. Progressing through these trees requires specific materials found during runs, which makes material gathering an important secondary goal in every match. As you push deeper into a faction's tree, you'll hit capstone upgrades that unlock special abilities (like disarming claymores) and eventually open access to the best loot in the game, including purple and gold tier items.
Contracts
Factions offer several types:
- Priority Contracts - Main story-driven missions that push your faction reputation forward and gate the most important upgrades. These should be your top focus.
- Boosted Contracts - Special agreements with better loot rewards on completion.
- Daily Contracts - Smaller tasks for daily XP and contract rewards. You can re-roll these if they don't fit your plans.
Progress Even on Death
One of Marathon's more forgiving progression features: certain faction rewards (like XP and contract completion credit) are kept even if you die and fail to extract. As long as you completed the objective the faction sent you on during the run, you get credit for it. This prevents runs from feeling completely wasted after a death.
Sponsor Kits
If you've burned through your currency and gear after a rough streak, factions offer sponsored loadouts (Sponsor Kits). These give you a free kit in exchange for completing a faction mission during that run. It's a safety net that keeps you from being locked out of gameplay entirely after a string of losses.
Vault Space
Your vault is persistent storage for items you don't bring into matches. Space is limited at the start, and expanding it should be one of your first priorities. The CyberAcme faction tree has vault space upgrades near the top left of its tree, and going after these early will save you constant headaches with inventory management.
Codex
The Codex is Marathon's in-game collection tracker. It logs your achievements, collectibles, audio logs, and item discoveries. As you find more items and explore more of Tau Ceti IV, the Codex fills in lore entries that flesh out the story of Marathon and the role each item plays in that world. Beyond lore, the Codex also tracks and unlocks cosmetic rewards including Runner skins, weapon skins, weapon charms, stickers, emblems, Runner backgrounds, and titles.
Seasonal Resets
Marathon runs on a seasonal model. At the start of each new season (approximately every three months based on available information), your loot and progression reset. New seasons bring new maps, weapons, events, story content, and other additions. Full details on exactly what persists between seasons haven't been laid out yet.
Maps and Environments
Marathon launches with three maps, each with distinct environments and escalating difficulty.
Known Maps
- Perimeter - One of the primary surface maps on Tau Ceti IV, featuring research facilities, relay stations, and various compounds. Most early faction contracts direct you here, so expect to spend a lot of time on this map during your first days.
- Dire Marsh - A second surface map with different loot pools, its own compounds, terrain, and enemy layouts.
- A third map is confirmed for launch but details are limited.
The Cryo Archive: Endgame
This area is built for players with strong builds and high-tier gear. The Cryo Archive plays like a heist. You push through seven vaults, each one harder than the last, with raid-light mechanics that require coordination and problem-solving (one of the lead designers from Destiny's Vault of Glass raid worked on this content). Tight corridors force close-quarters PvP against other fully equipped teams, and every threat you've faced on the surface maps will be present here, including the UESC themselves. Reaching the seventh vault unlocks some of the best loot in the game and reveals more about what happened aboard the Marathon ship.
Map Features and Points of Interest
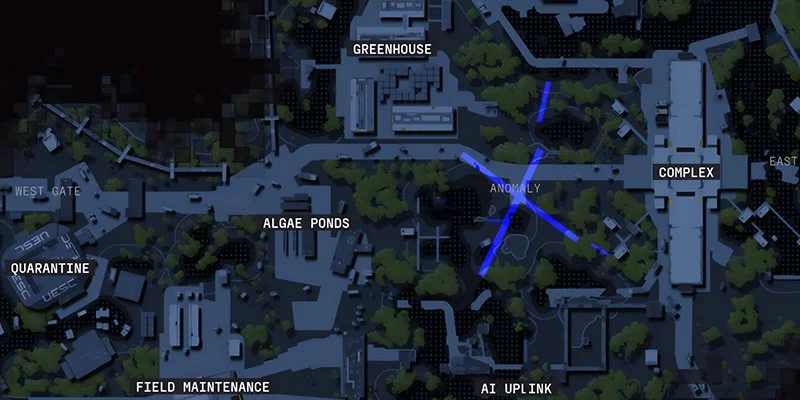
Maps in Marathon are packed with interactive elements:
- Compounds - Named locations with loot containers, weapon lockers, and materials. Each compound has its own loot pool.
- Floating Drones - Fly around the map carrying yellow loot boxes. Shoot the box down and loot it.
- Ship Drop Events ("Ringing the Dinner Bell") - Some compounds have interactive devices that call in a ship dropping four pods of loot with weapon attachments and valuable gear. Activating this sends a loud audio cue across the entire map and shows all players where the ship is heading. High risk, high reward.
- Mini-Bosses (Incursions) - Random mini-boss encounters that appear during matches. Tougher than standard AI but guard valuable drops.
- Locked Boxes and Locked Rooms - Require keys found during runs. Locked box keys work on any locked box across any compound on either map. Locked room keys are much rarer and may need to be used on a different map than where you found them. If you find a key but can't find its matching box or room, extract with it and use it next run.
- Flare Rooms - Some compounds occasionally display red flares on the corner of their buildings, indicating a nearby loot room with above-average drops. Not as good as locked rooms but more common and don't need keys.
- Interceptors and Incursion Objectives - Terminal-based objectives at designated compounds that update your map with new waypoints and give XP and rewards.
- Tunnels and Vent Systems - Alternate routes and flanking paths throughout the maps.
- Environmental Hazards - Bungie mentions deadly environments and dynamic weather. Certain areas feature infested caverns with exploding bugs and other hostile wildlife. Some environments affect your oxygen supply. Getting shot in certain ways can cause oxygen to deplete faster, and running out of oxygen drains your health.
Survival Tips
Your First Runs
- Mark your extraction immediately. As soon as you spawn in, open the map and mark your Exfil. It's surprisingly easy to lose track of time in this game. Knowing your escape route at all times is critical.
- Don't fire first if you can help it. Being the first shots heard on the map paints a target on you. Playing as the third party, not the one getting third-partied, is a strong early survival strategy.
- Consider going in light on your very first match. You can enter with just a knife, loot weapons and gear off the map, and extract with solid gains while risking nothing. It's a legitimate strategy for learning map layouts with zero stakes.
- Start on Perimeter. Most early faction contracts send you here, and the compounds have reliable materials for your first upgrades.
Loot Priorities for Early Progression
- Go after vault space upgrades first. The CyberAcme faction tree has vault expansion near the top left. The first upgrade costs microprocessors, which drop in specific compounds (North and South Perimeter Relay on the Perimeter map). Hover over the material in the upgrade tree to confirm drop locations.
- Grab every material you see, except purple materials early on. Purple mats take up too much vault and backpack space, and you won't need them for upgrades for a long time.
- Loot UESC enemy drops. Don't skip the boxes that drop from standard AI enemies. They occasionally contain surprisingly valuable items.
- Keep backup shield implants and runner implants in your vault. Dying with no replacement shields or implants makes the next few runs rough.
- Hold onto weapons you like. If you find a gun that feels good (the Longshot sniper and Bully SMG are strong options), extract with it as a backup.
- Pick up MIPS rounds when you see them. These sniper rifle rounds are expensive on the black market, so finding them in the field saves real currency.
Combat and Survival
- Understand the health system. Four shield bars, one health bar. Passive healing only kicks in after several minutes of not taking damage. It's not a quick regen. Pack patch kits (health) and shield recharges (shields) as your primary healing.
- Carry status-clearing consumables. Mechanics Kits remove physical status effects (immobilize, overheat, toxin) by temporarily maxing your Hardware stat. OS Reboots clear electronic status effects (EMP, hack) by maxing your Firewall stat. If your abilities get disabled by an EMP and you don't have an OS Reboot, you're stuck waiting out the timer.
- Self-revive items exist but they're rare. You can find or buy them, but don't expect them to be abundant. Treat them as high-value survival tools.
- Your teammates can always revive you as long as at least one crew member is still alive, even after a full down.
- Extraction sends a signal. Activating your Exfil shoots a beam into the sky and plays an audio cue. Every player on the map can see and hear this. Expect company during your extraction.
Economy and Inventory Management
- Build a starter loadout from the black market before each run. A reliable starting kit: five patch kits (ten if you take a lot of hits), ten shield recharges, one Mechanics Kit, one OS Reboot, and an extra stack of ammo for your primary weapon.
- If you go broke, use Sponsor Kits. Factions give you a free loadout in exchange for completing their mission. It's your safety net.
- Currency farming runs are a real strategy. If you need funds, enter a match focused entirely on grabbing valuables and extracting quickly to build up your bank.
- Don't hoard weapon mods for guns you don't use. Mods eat vault and backpack space. Only keep mods for weapons you're actually going to equip.
Advanced Tips
- Proximity chat is active. You can hear nearby players, and they can hear you. Use it for coordination or deception, but be aware it can also give away your position.
- Team loot sharing works for high-tier items. If you extract but your teammates die, certain high-rarity team-shared items (purple and gold tier) can still be rewarded to your fallen squadmates along with XP. Getting even one person out alive with valuable loot benefits everyone.
- Stat trade-offs exist in buildcrafting. Some buffs reduce another stat in exchange. You can't just stack every advantage. Build choices involve real trade-offs.
- Reconnect is supported. If you disconnect mid-match, you can rejoin the raid in progress.
- The final extraction timer changes everything. If the match timer expires, all extraction zones close and a single last-chance Exfil spawns for every remaining player. This can be a high-risk play, but it also means every surviving team converges on one point.
Endgame Content
Ranked Mode: Rated
Marathon will feature a competitive ranked mode called Rated launching during Season 1. It assigns ranks based on your performance in each run, including how well you played and how successfully you extracted. Leaked information suggests that Rated will require a minimum gear score or gear ante to enter, meaning you'll need to bring real investment into every match. Specific ranking tiers and rewards haven't been fully revealed.
Season 1 Content Plan
Bungie has outlined the following for Season 1 and ongoing post-launch:
- New maps and zones
- Additional weapons and weapon mods
- New Runner Shells beyond the launch seven
- Ranked mode (Rated)
- Endgame challenges (including the Cryo Archive)
- Seasonal narrative storytelling
- Community events
- Hidden secrets and discoverable content
Quick Reference
| If You Like... | Play This Shell |
|---|---|
| Aggressive frontline combat | Destroyer |
| Stealth and ambush tactics | Assassin |
| Gathering intel and calling shots | Recon |
| Fast movement and creating chaos | Vandal |
| Maximizing loot and extraction value | Thief |
| Supporting and healing your team | Triage |
| Risk-free solo scavenging runs | Rook |
Final Thoughts
Marathon isn't about picking the strongest class. It's about picking the class that covers your group's weaknesses, plays to your personal strengths, and fits the map you're on. The buildcrafting system through cores and implants means that even within a single Shell, there's enormous room for customization and experimentation. Pick wrong and the game will feel punishing. Pick right and everything clicks.
Focus your early runs on vault space upgrades, learn the map layouts, stick with your crew, and always have an exit plan. Good luck on Tau Ceti IV, Runner.