
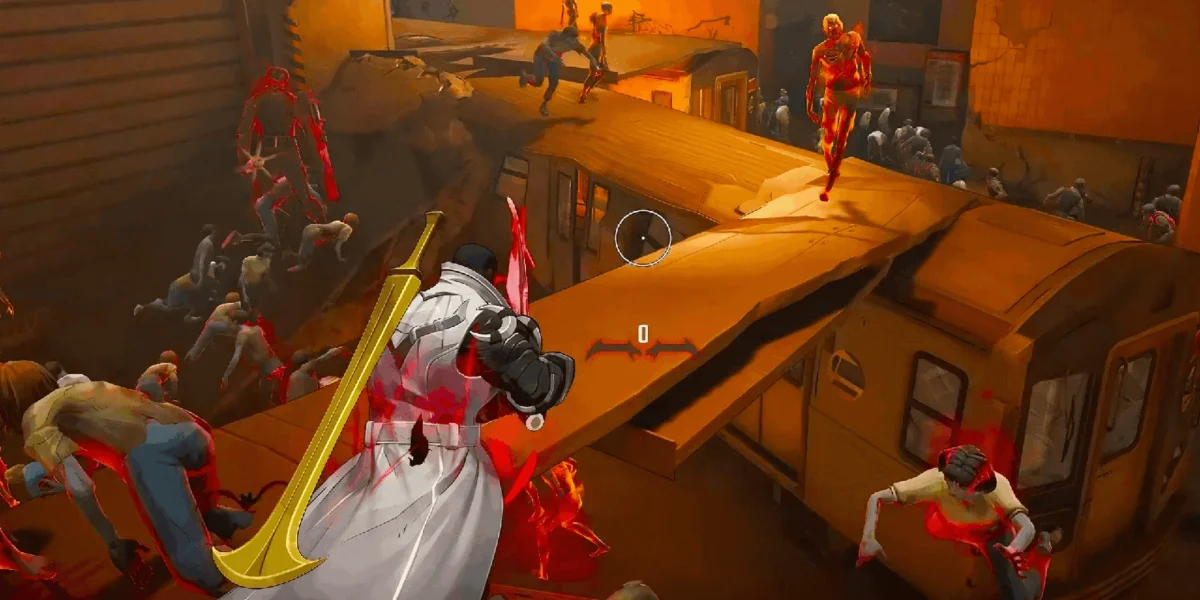
Marvel Rivals has introduced a PvE wave-based survival mode where you fight through hordes of zombies. It's a break from standard competitive play, offering cooperative gameplay with unique progression systems and boss encounters.
Zombies mode is a four-player co-op experience where teams face increasingly difficult waves of undead enemies, special zombie variants, and challenging boss fights. The mode uses roguelike progression, character-specific upgrades, and a blessing system that lets you experiment with different playstyles and strategies.
Mode Overview and Basic Information
Player Count and Team Composition
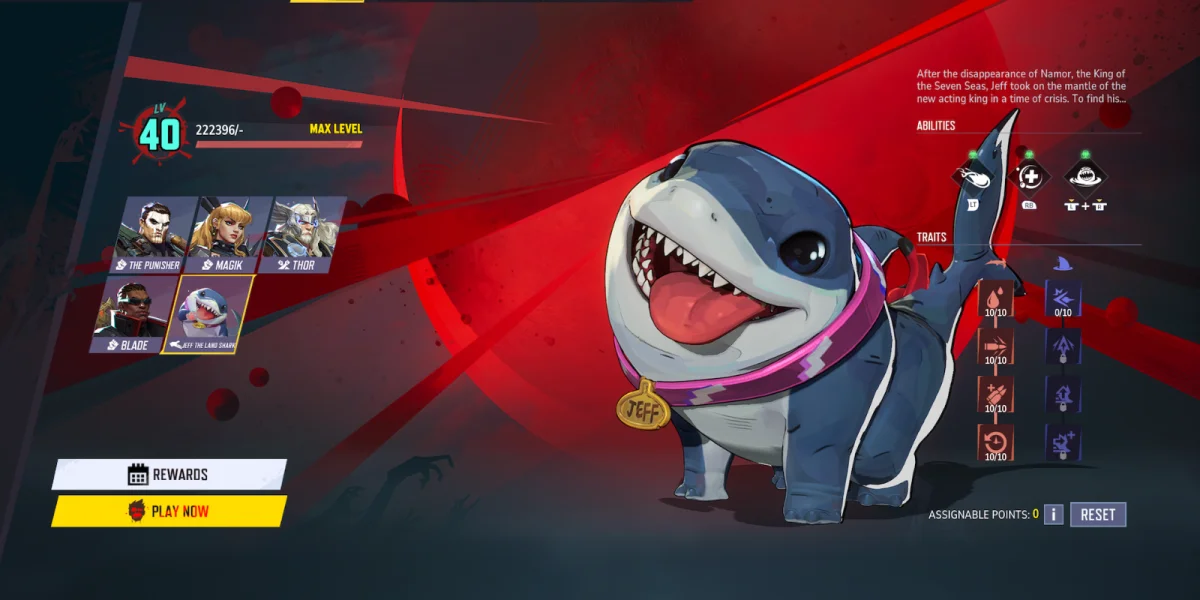
Zombies mode supports exactly four players in co-op. If you've got five friends ready to play, someone's sitting out. The mode doesn't enforce hero limits, so your entire team can pick the same character. You could run four Jeff the Land Sharks if you really wanted to.
Available Heroes
Five heroes are playable in Zombies mode:
- The Punisher - Duelist role, ranged combat specialist
- Magik - Duelist role, melee-focused with transformation mechanics
- Thor - Vanguard role, close-range tank with zoning capabilities
- Blade - Duelist role, mobile melee fighter with blocking abilities
- Jeff the Land Shark - Strategist role, high mobility with healing support
Each hero's been tweaked for the PvE environment with modified abilities and unique upgrade paths you won't find in standard competitive mode.
Match Duration and Structure
Most Zombies runs take about 15 minutes, though this varies based on difficulty and team performance. Nightmare matches consist of at least ten waves (also called rounds or phases), with specific waves featuring special events and boss encounters.
Here's how Nightmare matches break down:
- Waves 1-4: Standard zombie elimination
- Wave 5: Boss encounter (Namor)
- Waves 6-9: Standard zombie elimination with ramping difficulty
- Wave 10: Second boss encounter (Scarlet Witch/Queen of the Dead)
- Wave 11-14: Standard zombie elimination at maximum difficulty
- Wave 15: Final boss encounter (Scarlet Witch+Namor at the same time)
Core Gameplay Mechanics
The Blessing System
You start each match with a set amount of blessing points to spend on initial upgrades. Blessings are temporary power-ups that boost your hero's capabilities for that specific run. They're split into two categories:
General Blessings affect universal stats that work for all heroes:
- Maximum health increases
- Damage boost percentages
- Lifesteal for survivability
- Unique AoE effects
- Moonlight protection (damage reduction)
Character-Specific Blessings give you unique upgrades tied to individual hero abilities and playstyles. Blade gets blessings related to his Moon Blades and his connection to Khonshu, while other heroes have their own specialized blessing trees.
Ability Upgrade Perks
After you invest specific point thresholds into blessing categories (20, 60, and 120 points in one specific color), your selected ability gains a unique perk. These perks provide massive power spikes and become crucial for surviving later waves. The system rewards focused investment in specific upgrade paths rather than spreading points around.
Roguelike Progression
Zombies mode has permanent progression that carries between matches. You gain experience by completing runs, which unlocks more customization options and increases hero power for future attempts. This includes:
- Event leveling that increases available upgrades
- Trait unlocks that give permanent passive bonuses
- Character-specific abilities you can select before each run
- Level cap currently lets you assign up to 80 upgrade points
All hero progression is shared across characters, so you gain account-wide experience no matter which hero you play. Trait upgrades are individual to each hero though, making specialization in one character the fastest way to max out stats.
The Random Blessing Slot
After you rack up points from wave completion, you can access a random blessing slot. This costs 15 coins and gives you a random blessing upgrade. Don't use it. The strongest builds focus heavily on specific upgrade paths, and the randomness can give you upgrades that don't fit your build at all.
Difficulty Levels Explained
Seven difficulty tiers are available at launch:
- Normal
- Hard
- Extreme
- Nightmare I
- Nightmare II
- Nightmare III
- Nightmare IV
You need to complete each difficulty before unlocking the next tier. Normal difficulty is designed to be nearly impossible to fail, so it's a great place to learn the mode's mechanics. Use this difficulty to experiment with different heroes, blessings, and strategies without any pressure.
Performance at Different Tiers
As difficulty ramps up, several things change. Enemies deal more damage to you, you deal less damage to enemies, and the zombie count per wave likely increases. Special zombie variants show up more frequently, and boss encounters' mechanics become more unforgiving.
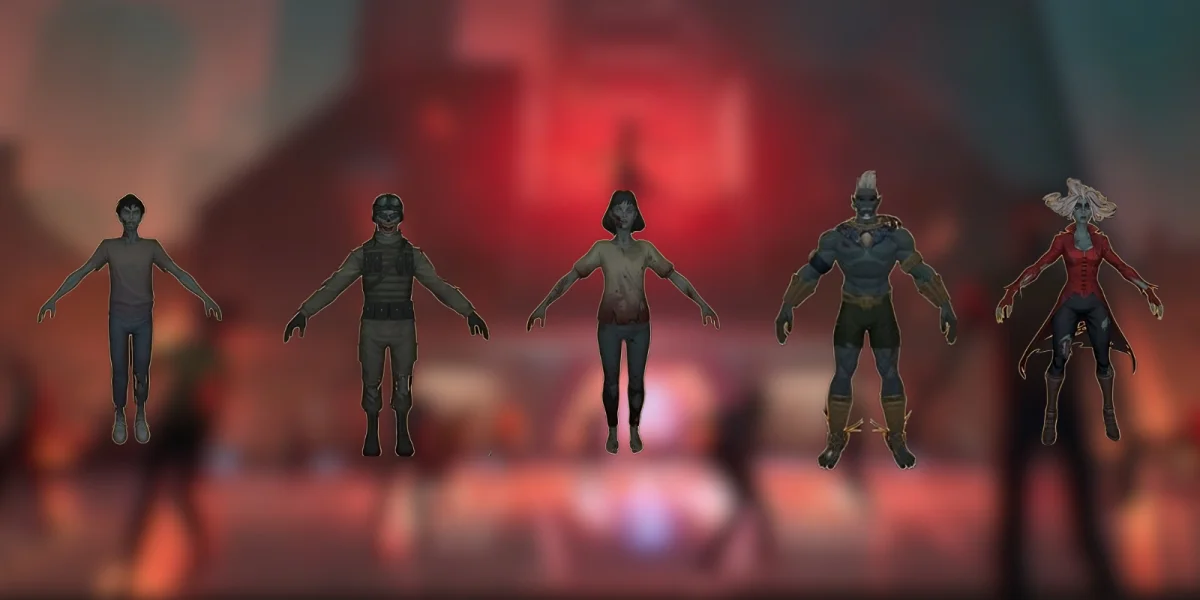
Enemy Types and Threats
Standard Zombies
Basic zombies make up most of each wave. They chase you down and attack in melee range. They're weak individually, but their strength comes from overwhelming numbers. Waves can feature 120 or more zombies at once.
Berserk Zombies (Red Highlighted)
Zombies highlighted in red move way faster than standard variants. These enemies close the distance quickly and need to be prioritized to prevent them from overwhelming your position. They show up more often in higher-difficulty waves.
Soldier Zombies
Soldier zombies throw grenades at you, giving them a ranged threat. Their grenades can teleport or act weirdly due to server issues, making them unpredictable, but mostly harmless.
Toxic Zombies
One of the most likely run ruiners is glowing green zombies with ranged attacks. Their real strength lies in the toxic AoE puddles they periodically throw on the ground. If green zombies are not focused, your battleground can quickly turn into a deadly swamp, or quickly lead to a wipe on higher difficulties.
Exploding Zombies
Another troublesome enemy unit is the glowing orange zombies that run into you at high speed. After you kill them, they explode with a small delay, dealing massive damage that will absolutely melt your HP. Stay clear of them at all times!
Shielded Soldier Zombies
The tankiest standard enemy variant is Undead Sentinels, shielded soldier zombies that carry shields and batons. They soak up tons of damage before going down and can be really annoying in large numbers. Focus fire from multiple teammates is often necessary to burn through them efficiently, and on higher difficulties, their AoE attacks and charges can often one-shot you. They might look deceptively slow, but the best strategy to deal with them is to not let them near you at any cost.
| Enemy Type | Threat Level | Priority |
|---|---|---|
| Standard Zombies | Low | Lowest |
| Fast Zombies | Medium | High |
| Undead Sentinels | High | Very High |
| Explosive/Toxic Zombies | Very High | Highest |
Enemy Visibility
Zombies are visible through walls, with indicators showing their location and which direction they're coming from. The UI displays total zombie count for each wave at the top of the screen, letting you track how many kills you still need.
Boss Encounters
Namor (Wave 5 Boss)
Namor is your first major boss encounter at Wave 5. This fight has unique mechanics and tests how well your team coordinates.
Phase One (Invulnerability Phase)
Namor can't take direct damage during the initial phase. You need to destroy his summoned squid creatures (Monstro Spawns) to progress. As you kill squids, damage transfers to Namor's shield, eventually breaking it so you can hurt him directly.
Three types of Monstro Spawns appear:
- Icy Monstro Spawns slow your movement speed when nearby
- Standard Monstro Spawns fire continuous damage rays at you
- Giant Monstro Spawns have a lot of HP and need to be focused as a team
Namor also uses AoE abilities that can knock you up in the air or lock you into a bubble that needs to be damaged in order to let you move again.
Phase Two (Damage Phase)
Once the shield breaks, Namor becomes vulnerable to direct damage. During this phase, he also summons 4 of his Giganto whale ults in a random pattern. Ranged heroes should keep prioritizing squids, while melee heroes stay on Namor himself. Coordinate between squid elimination and boss damage based on your team comp.
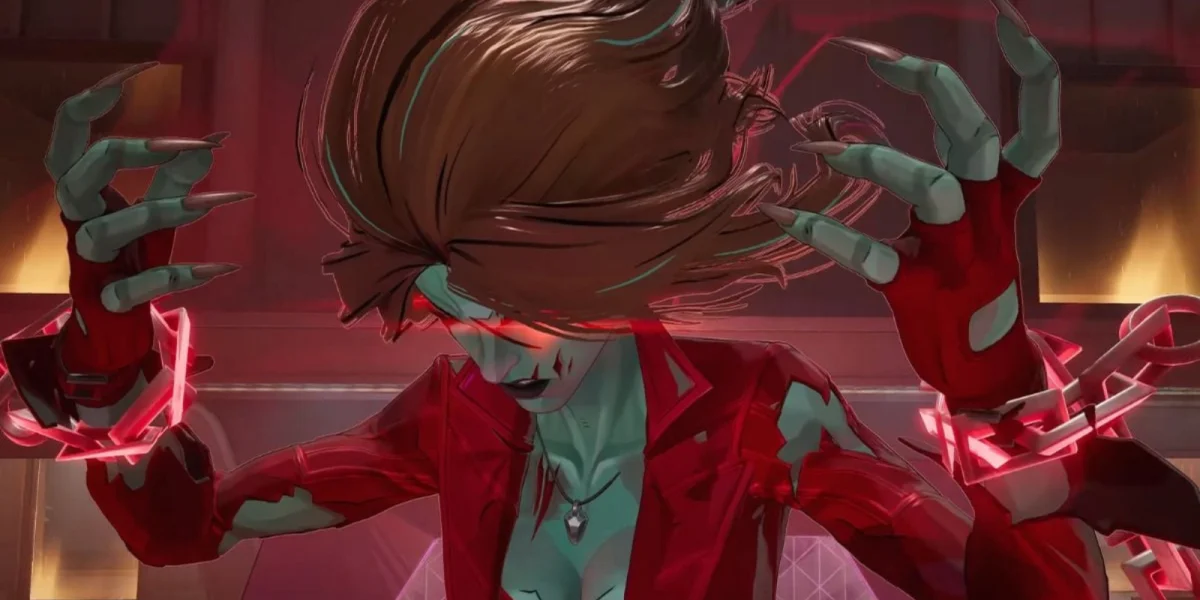
Scarlet Witch / Queen of the Dead (Wave 10 Final Boss)
The final boss encounter against Scarlet Witch has three distinct phases with multiple mechanics that require tight team coordination.
Key Mechanics
Chaos Control: This ability drains health from you and your teammates, so you need healing support and smart positioning.
Dark Seals: During Phases One and Two, Scarlet Witch surrounds herself with Dark Seals. These create a hazard zone around her that repeatedly stuns melee attackers. Heroes should avoid these stun zones at all costs.
Important! Periodically, Wanda casts an attack that re-uses her Doctor Strange team-up animation, continuously sending damaging bolts after one target. This is an extremely hurting ability that should be avoided or healed if possible. At higher difficulties, surviving this ability is key to continuing your run.
Phase Two Scarlet Witch receives a new spell, surrounding herself with a barrier that channels strong AoE damage. Not only that, but even more Dark Seal stun zones appear after every party member once every few seconds. She will only ramp up the damage until you break the shield. This is one of the 2 damage and heal checkpoints you will have to pass in order to defeat Wanda on Nightmare III and IV. A failure to deal with this attack properly may result in your party being stunlocked on respawn or a very fast wipe. However, after you break her shield, she is stunned and vulnerable to damage for a few seconds.
Reality Erasure: During Phase Three, Scarlet Witch moves to the center of the arena and starts casting Reality Erasure. Her ultimate is a massive DPS check. Below her main health bar, a secondary bar constantly fills and depletes. This bar depletes over time and fills up if you manage to break Crystals around her. If the Reality Erasure bar depletes completely and she detonates her ultimate before you kill her, everyone dies instantly and the run's over.
Crystal Spawns: Scarlet Witch spawns floating crystals around the arena. Destroying these crystals is critical because they delay her ultimate ability. Focus on crystal destruction while keeping damage on the boss.
Uber Boss: Scarlet Witch Strategy
Focus on clearing up additional zombies and staying alive.
Scarlet Witch starts casting her oppressive AoE attack. Prioritize her shield and avoid the stun zones at all costs. Melee heroes should give each other space to dodge the Dark Seal zones.
Maximum aggression phase. Priority: crystals first, then boss damage. Watch for Reality Erasure bar depleting and dump everything to prevent the wipe.
Universal Strategy and Tips
Movement and Positioning
Keep moving constantly. Standing still or holding a fixed position gets you swarmed and killed. Continuously reposition to maintain a safe distance from enemies while dealing damage.
Kiting Zombies
"Kiting" means having one player draw zombie attention and lead them around the map while staying at a safe distance. This gives your team several benefits: other teammates get breathing room, zombies cluster into tight groups for area damage, and healing plus repositioning becomes safer.
If you're playing in a coordinated group, communicate about your kiting movements. A player with high mobility or survivability should have no trouble gathering zombies into cluster groups, making them way easier for teammates to wipe out with AOE abilities. You do need to watch out when multiple players are kiting enemies, as crossing into each other may result in a one-shot attack you won't even manage to see.
Team Coordination
Teamwork matters more as difficulty climbs. Good coordination means designating a squad leader for callouts, protecting allies, efficiently spreading on the map, focusing fire on priority targets, and communicating special zombie positions and threats.
Target Prioritization
Always focus on larger zombies and special variants first. Shielded zombies pose way bigger individual threats than a pack of standard ones. Here's the standard priority order:
- Shielded soldier zombies (tankiest)
- Toxic zombies (ranged threat)
- Explosive and berserk zombies (high pressure)
- Standard zombies (lowest priority)
Defend Objective
At Normal, Hard, and Extreme difficulties, you get a defend objective where you protect a pillar against zombie hordes. This event introduces shielded soldier zombies. The pillar can take damage, and you fail if it gets destroyed before the wave timer ends.
Position teammates around the pillar to cover all approach angles. Use AOE abilities to clear enemy clusters efficiently. After completing this event, you get bonus blessing points through the random blessing system.
Technical Performance Considerations
Server performance can drop during later waves as zombie count goes way up. Players report lag and reduced frame rates when tons of enemies fill the screen. This seems to be a server capacity strain rather than client-side performance problems.
Zombie pathing can get buggy during high enemy density, with zombies teleporting short distances or getting stuck on terrain. Soldier zombie grenades might also teleport unexpectedly. Just stay aware that enemy behavior won't always be perfectly consistent because of these technical limitations.
Hero-Specific Builds and Strategies
Build Philosophy
All top-tier builds in Zombies mode focus heavily on maxing out a single aspect of your hero's kit. Don't try to make well-rounded generalist builds because specialization gives you way more power. Damage output matters most, so don't over-invest in health and damage reduction.
The Punisher
Overall Assessment
Punisher is widely considered the strongest single-target damage hero for Zombies mode, particularly at maximum difficulty. His ranged combat lets him stay safe while dealing insane damage to both zombie hordes and bosses. His damage scaling gets so good that using his ultimate can actually lower his DPS compared to his fully upgraded primary weapon.
You might trail teammates in damage during early waves. But at the final location, his power scaling makes him dominant. Expect to melt bosses in most games.
Primary Build Path (Assault Rifle Specialization)
Focus only on Adjudication (Assault Rifle), not Deliverance (Shotgun). The shotgun becomes less valuable as you unlock wide spread for the rifle.
- Hero Traits: Invest everything in the Red trait tree
- Abilities: Pick all Green abilities. Use the deployable turret rather than the mounted turret version
- Blessings: Focus on every blessing that increases Assault Rifle damage. Secondary priorities are life steal and reload speed
Snare Beacon works like decoy grenades, drawing enemy attention away from you. Use the zipline ability whenever your team gets overwhelmed to redirect zombie focus away from your position.
Magik
Overall Assessment
Magik offers two completely different playstyles based on whether you build for or against her Darkchylde transformation. Both approaches work equally well, but don't try to split between them. Commit fully to one path.
Build Path 1 (Mortal Will / No Darkchylde)
This build prevents Darkchylde transformation but significantly buffs her attack, turning it into a ranged wave of destruction.
- Pick the Mortal Will ability that locks you out of Dark Child form
- Invest in Red blessings to get Phantom Edge
- Focus on attack speed and damage blessings
- Grab demon sword bonuses when available
This build excels against the final boss but has slightly less AOE against standard zombie hordes compared to the Darkchylde build.
Build Path 2 (Permanent Darkchylde)
This alternative build keeps you in permanent Darkchylde transformation, giving you better AOE against zombie hordes but potentially more trouble against bosses.
- Pick the infinite Darkchylde form ability and Reaper's Revolve for Stepping Disks
- Invest in blessings that increase your Eldritch Whirl damage
- Become the arena-wide damaging helicopter
General Strategy
Magik fights close-quarters and excels at cutting through zombie lines. Position aggressively in enemy clusters and use wide melee swings to kill multiple targets at once. Watch your surroundings to avoid getting completely surrounded.
The Dash ability upgrades are solid, particularly the piercing Dash modification. Magik's specialty is handling large groups, and piercing Dash maxes out your AOE damage with each ability use. Her Stepping Disks and Dash are good ways to escape a scary situation.
Thor
Overall Assessment
Thor has one dominant build that players love for both fun factor and raw power. The strategy centers on maxing out time spent in his Awakening Rune state.
Awakening Rune Build
Invest everything in Blue traits, Blue abilities, and Blue blessings. Thor's build path is the most straightforward of all heroes. Just pick every Blue option available.
The awakened state lasts for 150 seconds in Zombies mode, compared to its way shorter duration in competitive play. Once you unlock the legendary Blue blessings Endstorm and Rune Recycle together, Thor's power becomes overwhelming.
- Abilities: Focus on Lightning Realm with a stun upgrade at the start of the game, activating it frequently for survival
- Follow with Awakening Rune immediately after
General Strategy
Awakening Rune Thor is better played as a ranged build. Position at the back and use your buffed ranged attack to melt enemies from a distance. Your buffed headshot and AOE damage make you perfect for holding positions and breezing through bosses.
Blade
Overall Assessment
Blade ranks as the strongest hero for Nightmare IV completion. His mobility and life steal mechanics give you insane survivability while keeping high damage output.
Sword Specialization Build
Focus only on Blade's sword weapon. Put everything into sword damage and life steal mechanics.
- Hero Traits: Focus on the Red trait tree
- Abilities: Upgrades for abilities don't really matter for Red Blade
- Blessings: Priority order is attack speed, direct damage increases, sword range (improves AOE), health, and damage reduction. Moon Knight's Ankhs are a good investment at least once for crowd control.
General Strategy
Blade excels at close-quarter encounters with crazy mobility. Use your dash to weave between enemy lines, cutting through groups fast. Bloodline Awakening lets you survive way longer than typical duelists because of built-in sustain.
Your sustain makes you the best hero for tanking bosses or even completing the event solo. Block enemy projectiles when needed, particularly during boss fights when ranged attacks become common.
Jeff the Land Shark
Overall Assessment
Jeff is highly effective in Zombies mode, keeping a strong performance. His mobility, self-sustain, and different playstyles make him the most self-sufficient hero in the roster.
Collision Damage Build (Hide and Seek)
- Prepare Menu Selections: Choose Hydro Grenade, Vitality Bubble, and either It's Jeff! or Hazardous Depths
- All Traits: Invest everything in Blue traits
- All Blessings: Pick every Blue blessing with Jeff's fin icon
The main combat loop centers on collision damage dealt while submerged. Stay underground as much as possible and ram through enemies constantly. This build's nicknamed the "ultimate Hide and Seek build."
Ability (Underground): While underground, Jeff damages enemies as he passes through them. This gives you both mobility and damage at the same time.
General Red Build Strategy
Jeff deals high damage from his primary attack. Pick everything from Red traits to Red Fire Rate and Damage Blessings. Stack Gnashing Waters for insane DoT damage on bosses. Avoid healing bubble blessings, but pick a few Projective Capacity ones for utility.
Jeff's movement makes him great for kiting zombies and keeping map control. His healing makes him invaluable on teams without other sustain options.
Advanced Tips and Best Practices
Break Walls for Progression
Some waves in Normal, Hard, and Extreme require breaking through walls to access the next area. Look for destructible walls between zones when wave completion doesn't move the game forward.
Blessing Point Management
Never save up blessing points. Spending points immediately gives you power that helps complete the current wave, which then earns you more points. Hoarding points only delays power spikes without any benefit.
Refresh the blessing shop (1 coin per refresh) as many times as needed to find blessings that match your build path. Buying unwanted blessings or using the random slot wastes resources you could spend on targeted power increases.
Ultimate Ability Usage Considerations
As matches progress into later waves, weapon damage and blessing buffs often scale faster than ultimate ability damage. For some heroes (particularly Punisher), using ultimates becomes worse for DPS than just continuing normal attacks.
Build Focus Beats Versatility
Resist the urge to create balanced builds. A hero with 100% investment in rifle damage and 0% in shotgun damage will massively outperform a hero with 50% in both. Specialization scales exponentially, while spreading yourself thin scales linearly.
Solo Queue vs Premade Groups
Solo queue fills teams quickly, letting you play immediately. But premade four-player groups let you coordinate way better for high-difficulty runs. Voice communication for callouts, assigned roles (kiting, target focus), and strategic planning become crucial at Nightmare difficulties.
- Fast queue times
- Play anytime
- No coordination needed for lower difficulties
- Practice individual mechanics
- No voice communication
- Random team composition
- Harder on Nightmare difficulties
- Less strategic coordination
Server Lag Mitigation
If you're experiencing bad lag during later waves, this is a known issue related to high enemy counts. Some players report better performance on certain difficulties or at specific times. The lag's typically server-side rather than a client problem.
Preparation Screen and Permanent Upgrades
Trait System
Traits are permanent passive bonuses specific to each hero. They need individual investment per character, unlike the shared experience system. Traits modify base stats like maximum health, damage dealt, damage reduction, movement speed, and ability effectiveness.
Ability Selection
Before matches, you pick ability variations from available options. Different abilities can dramatically change playstyle. For example, Punisher's choice between stationary and deployable turret, or Magik's choice about Darkchylde availability.
Three options show up for each ability slot. Choose abilities that work with your intended blessing build path.
Level 25 Milestone
Hitting level 25 matters because it unlocks all ability upgrade options. Until this point, some powerful customization options stay locked. Focus on reaching level 25 through regular play and challenge completion before trying the highest difficulties.
Matchmaking and Accessibility
Queue Times
Queue times are fast because the mode is popular. Solo queue typically finds full teams within seconds.
No Hero Restrictions
The lack of hero limits means no competition during hero selection. Take your time making the best choice for your build rather than rushing to claim heroes before teammates.
Difficulty Gating
You need to complete each difficulty tier before accessing the next. This makes sure you gradually build skill and gear progression before facing maximum challenges.
Mode Availability
Zombies mode is currently scheduled to run until December 6th. The mode launched as part of a Halloween event, but whether it'll return after that date or become a permanent fixture hasn't been confirmed by developers yet.
Event Schedule
Limited-time PvE event • Exclusive rewards • Seven difficulty levels
Common Mistakes to Avoid
Do's and Don'ts
| Mistake | Why It's Bad | What To Do Instead |
|---|---|---|
| Saving blessing points | Delays power spikes, makes waves harder | Spend all points every wave |
| Using random blessing slot | Gets upgrades that don't fit your build | Refresh shop for targeted blessings |
| Spreading upgrades thin | Weak at everything, strong at nothing | Specialize heavily in one path |
| Ignoring boss mechanics | Causes instant wipes (Reality Erasure) | Prioritize crystals and mechanics |
| Standing still | Gets swarmed and killed quickly | Constant movement and repositioning |
Frequently Asked Questions
Yes, Zombies mode supports 1-4 players. Solo play is possible but significantly harder, especially on Nightmare difficulties. You'll need optimized builds and perfect execution since you won't have teammates for revives or support.
Experience is shared account-wide, but Trait upgrades are individual to each hero. This means your overall level increases regardless of which hero you play, but you need to invest trait points separately for each character.
In solo play, death means run failure. With teammates, downed players revive automatically after 10 seconds. If all players are down simultaneously, the run ends. You can use Holy Ankhs for instant self-revives.
With consistent play and challenge completion, most players reach level 25 within a few successful runs. Higher difficulties award more experience, speeding up progression. Focus on challenges for bonus experience boosts.
Conclusion
Zombies mode brings serious depth through its blessing system, hero specialization, and roguelike progression. Success needs focused build strategies, team coordination, and understanding of encounter mechanics. Every hero works at maximum difficulty with the right build, letting you choose based on preference rather than forced meta picks.
The mode's mix of wave survival, boss encounters, and permanent progression creates tons of replay value. Whether you're looking for a break from competitive ranked play or chasing completion of all difficulty tiers, Zombies mode offers a distinct and enjoyable PvE experience within Marvel Rivals.
This limited-time event introduces the first-ever PvE mode to Marvel Rivals, featuring roguelike progression and epic boss battles. Don't miss your chance to earn exclusive Halloween-themed cosmetics!
- Five specialized heroes with unique abilities
- Seven difficulty levels from Normal to Nightmare IV
- Two major boss encounters with complex mechanics
- Permanent progression system with trait unlocks
- Event runs until December 6th, 2025