
Understanding Nightmare 4 Difficulty
Nightmare 4 is the ultimate challenge in Marvel Rivals' Zombies mode. Everything that spawns will one-shot you after round 4, no matter how much health you stack. Success comes down to three things: a perfectly tuned build, smart positioning, and coordinated teamwork.
You'll fight through 20 rounds with boss encounters every 5 rounds. The boss progression is:
- Round 5: Namor
- Round 10: Scarlet Witch
- Round 15: Namor + Scarlet Witch (simultaneous)
- Round 20: Double Scarlet Witch (final challenge with reality erasure mechanics)
Round 20's double Scarlet Witch encounter is the final stat check. If your numbers aren't high enough, reality erasure will end your run instantly.
What You Need to Clear:
- Character level 40 before attempting
- Fully invested single-path build (hybrid builds can't keep up)
- 12-13k HP with 45-50% damage reduction by round 20
- Team coordination and spawn awareness
- Smart resurrection management
Pre-Game Preparation
Character Level Requirements
Hit level 40 before you attempt Nightmare 4. This unlocks the final tier in your skill tree, giving you crucial bonuses. Blade gets 2,000 extra HP at the end of his tree, which is 1,000 more than any other character.
Only invest in one skill path during leveling. Splitting points between paths kills your effectiveness because damage scaling in this mode rewards going all-in on a single tree.
Understanding Scaling Mechanics
Player count affects enemy spawns and health pools. Solo mode spawns about 25% fewer zombies compared to four-player teams. The scaling isn't perfect though. While individual zombies die faster when you're solo, boss health doesn't scale down proportionally.
Four-player teams with properly built characters usually perform better against bosses and late-game waves. But everyone needs to pull their weight. If one player finishes with 10 million damage while others hit 200 million, you'll fail the stat checks at rounds 15 and 20.
Solo players should seriously consider buying resurrection packages (10-20 resurrections) with blue credits. It'll save your sanity during progression attempts.
Core Build Philosophy
Why Hybrid Builds Fail
Hybrid builds don't work in Nightmare 4. Period. The damage scaling requires extreme specialization in one path to meet the stat checks from late-game bosses. Trying to balance two paths leaves you with weak damage and poor survivability.
Going all-in on a single path dramatically outperforms any hybrid approach.
Resource Management: Credits Are Precious
You start each run with 150 credits. Every purchase matters because bad choices compound throughout the run.
- Not every gold rarity card is worth it
- Purple rarity damage cards often beat gold alternatives
- Spending 10 credits to reroll for valuable cards beats wasting 50 credits on mediocre upgrades
- Take your time selecting cards instead of rushing purchases
For example, a 60% damage purple card or even a 10% damage card for 1 credit significantly outperforms Blade's ultimate duration gold card. You rarely use ultimates anyway, so duration is worthless.
Card Selection Priority
Blue and Red Cards (Always Buy):
- Base damage increases
- Attack speed
- Range/ability length/magazine capacity (diminishing returns apply)
Purple Cards (Be Selective):
- Health upgrades: Only buy 450+ HP cards
- Damage reduction: Rarest and most critical stat. Buy every single time
- Lifesteal: Cap at 25% (Blade doesn't need to buy lifesteal at all)
Health and Damage Reduction Benchmarks
Building health in tempo is crucial. Stacking too much health early won't save you from Scarlet Witch's reality erasure, so balance your progression carefully.
| Round | Health Target | Notes |
|---|---|---|
| Start | 5,000 HP | Base starting point |
| Round 5 | 6,000-7,000 HP | Namor checkpoint |
| Round 10 | 8,000 HP | First Scarlet Witch |
| Round 15 | 9,500-10,000 HP | Dual boss encounter |
| Round 20 | 12,000-13,000 HP | Final stat check |
Character Guide: Meta Picks and Builds
Blade (Highest Recommended)
Blade dominates Nightmare 4 with the highest solo clear rate. His combination of AOE damage, sustain, lifesteal scaling, and bonus HP makes him the most consistent character from start to finish.
Blade's red tree (primary weapon path) provides the most consistent scaling and highest damage output. Skip the blue tree ultimates completely. They reduce your DPS and leave you vulnerable.
Must-Have Cards
- On the Hunt: Ancestral Sword damage +10%
- Swift Edge: Ancestral Sword attack speed
- Sweeping Edge: Ancestral Sword attack range
- Blade Dance (Critical): Daywalker Dash triggers spinning slashes when hitting enemies. Stacking increases spin count
Stat Priority
- Base damage increases
- Attack speed
- Attack range (especially critical early game for safety)
- Skip all thousandfold slash (ultimate) cards
Range becomes increasingly important by round 3, letting you keep safe distance while dealing damage. By round 10, proper range investment means you'll wipe entire waves before they reach you. At round 20, enemies die offscreen.
But don't over-invest. Too much range gives diminishing returns. Balance range with damage and attack speed upgrades.
Optional Card
Nightrunner (Daywalker Dash cooldown reduction) gives faster dash cooldown for maintaining spin uptime. It's secondary to primary weapon improvements though.
Ankh Spawning
One card that spawns Ankh symbols on enemy death helps group enemies, making crowd control easier.
Combat Strategy
Hold left-click as your primary attack, continuously mowing down enemies. Use Daywalker Dash to trigger spinning slashes, but only dash toward safe targets. After round 4, all zombies one-shot you even with strong HP pools.
Never dash into exploders or sentinels. Keep safe positioning, hold primary attack, and only engage spin mechanics when you're completely safe.
Parry Mechanics (Advanced)
Blade's parry requires timing about one second before impact. It's not instant like Sekiro's parry system. Use parry in four specific situations:
- Exploder/Sentinel Defense: Parry before their attack connects
- Namor Bubble: Right-click instantly pops the bubble
- Namor Ultimate: Cancel the knockdown and damage
- Double Scarlet Witch Phase: When both bosses phase out simultaneously, Doctor Strange team-up missiles keep tracking. You must parry to survive, especially solo
Scarlet Witch Crystals
Don't worry about the crystals Scarlet Witch spawns. Your normal damage output destroys them while you attack her. Just make sure crystals aren't positioned behind you. Otherwise ignore them while maintaining DPS.
Punisher (High Single-Target Specialist)
Punisher provides extreme single-target damage but struggles with AOE compared to Blade. He starts weak and ramps slowly, making early rounds challenging. Expect frequent deaths until your build develops.

Invest exclusively in Punisher's red tree. Your role is eliminating high-priority targets like sentinels, protecting teammates from these dangerous enemies.
Important Stats
- Attack speed
- Gun headshot damage
- Base damage
- Magazine capacity: Two 250% magazine boost cards
- Reload speed: One 200% reload boost for Scarlet Witch fights
Auto-Tracking Investment
The ability that auto-tracks and groups shots requires multiple cards. The exact number varies based on feel. Eventually it'll proc on about 90% of your shots, significantly improving consistency.
Progression Timeline
Punisher feels extremely weak until you reach red tree tier 3. Early deaths are expected. Once your build develops, single-target damage becomes exceptional, but you'll always trail Blade's overall damage due to weaker AOE.
Magik (Red Tree Specialist)
Magik starts relatively weak but scales powerfully with proper investment. Her red tree provides the meta path for Nightmare 4, despite blue tree's appeal.
Blue tree with infinite ultimate and spinning attacks provides strong AOE damage and fun gameplay. But it fails catastrophically during boss encounters. Entering portals takes too long for minimal damage gain. Players using blue tree Magik consistently reach round 20 but spend the entire boss fight repeatedly dying, contributing minimal damage.
Red tree scales harder for both crowd control and single-target damage. By late game, built red tree Magik players consistently throw 40+ marks, destroying waves and dealing heavy boss damage.
Build Specifics
The guide acknowledges limited personal Magik experience. But observations from successful players show red tree dramatically outperforms blue tree in Nightmare 4 due to superior boss fight performance. Without adequate single-target damage, defeating double Scarlet Witch becomes impossible.
Thor (Round 20 Specialist)
Thor's red tree becomes extraordinarily powerful in late game, though he stays weak until round 20. Proper investment makes him practically necessary for defeating the final challenge.
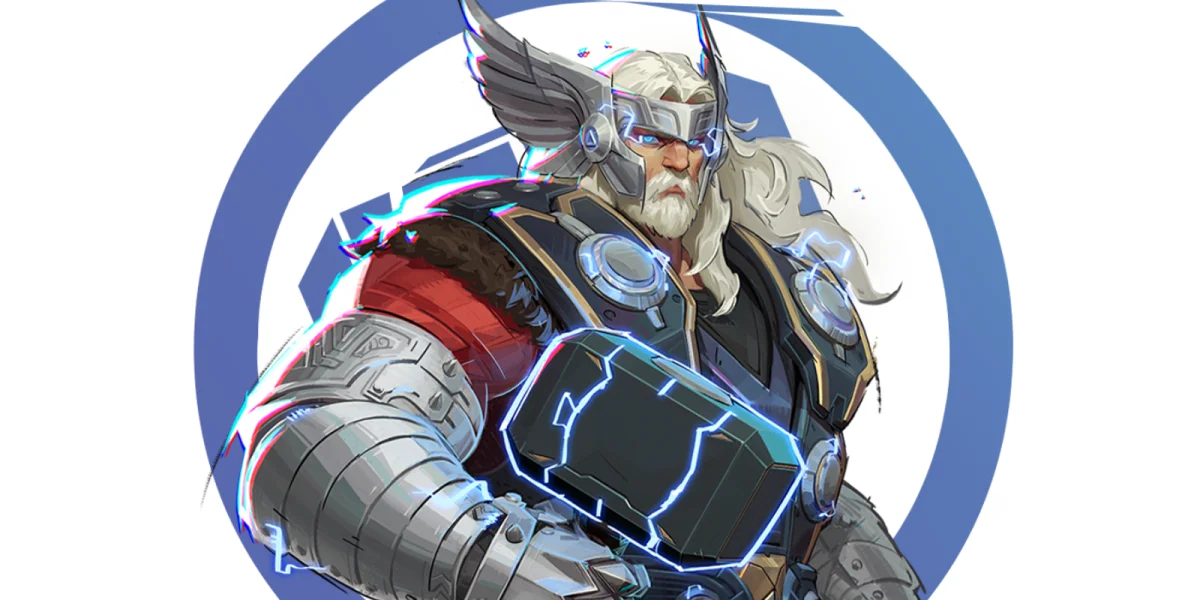
By round 20, Thor three-shots Scarlet Witch's shield through charged Thorforce dashes. He becomes CC immune while dashing, providing team-wide survivability support by maintaining pressure without dying.
Dash Technique
Aim downward during dashes to max out damage output. Thor can essentially fly continuously, keeping teammates alive during mob rounds.
Pre-Round 20 Weakness
Before round 20, Thor is exceptionally weak. Your primary task is survival. Eventually you gain flight capability and can support teammates, but sustained power doesn't arrive until the final challenge.
Thor isn't a complete solution. You need Blade, Magik, or Punisher providing consistent damage throughout earlier rounds.
Jeff (Suboptimal Pick)
Jeff survives better through red tree, as his dive ability often leads to deaths and scales poorly compared to red Thor. His ultimate falls off significantly in later rounds despite strong early performance.
Jeff is viable but isn't recommended for clearing attempts.
Ultimate Ability Usage
Avoid using ultimates in virtually all situations across Nightmare 4. Ultimates create two critical problems:
- DPS Loss: You lose significant sustained damage during ultimate animation
- Vulnerability: Most ultimates leave you stationary, letting enemies close distance and instantly kill you
- Thor and Jeff ultimates provide some value
- Should be used sparingly and strategically
- For Blade, Magik, and Punisher, ultimates waste valuable time
Between rounds, you only have 10 seconds to select power-ups (except boss rounds: 5, 10, 15, 20). This time pressure means avoiding ultimate-focused cards entirely. They waste credits and provide no practical benefit.
Enemy Types and Priority Targets
After round 4, all zombie damage scales to one-shot capability regardless of health pools. Treat every enemy as lethal.
Sentinels (Large Healthbar Tanks)
Plague Zombies (Green Enemies)
Exploders
Exploders are the most dangerous standard enemy. Their explosion radius combined with wave spawning creates lethal situations. Avengers Tower becomes particularly hazardous due to exploder spawn proximity.
Stay constantly aware of your position. Teammates accidentally training exploders into your position causes instant death. Focus and eliminate them immediately.
Exploders frequently end runs through distraction, teammate collision, or bad positioning. They spawn in waves rather than individually, requiring careful spacing management.
Grenadiers

Grenadiers exhibit strange behavior. Their grenades sometimes deal massive damage, sometimes minimal damage, with no apparent pattern. After eliminating exploders, plague zombies, and sentinels, prioritize grenadiers as secondary targets. The inconsistency makes them frustrating but less immediately threatening than other priority targets.
Kiting and Training Techniques
"Training" refers to gathering large zombie groups into cohesive masses and kiting them in circular patterns around the arena. This technique comes from Call of Duty Zombies high-round strategies.
Four-Quadrant Strategy
Divide the arena into four quadrants. Each team member trains one quadrant, maintaining zombie groups on separate map sides. This prevents collision, reduces chaos, and allows systematic elimination.
Training Execution
- Gather zombies into a tight group
- Run circular patterns around pillars and obstacles
- Maintain maximum distance by taking longest available routes
- Continuously attack while moving
- Avoid crossing into teammate trains
Solo Training
Solo players can utilize the entire arena for training. Create one large circular pattern, using terrain features to maintain distance while whittling down the group.
Boss Encounters
Namor (Round 5 and Round 15 Boss)
Namor is severely bugged in Nightmare 4. This bug affects both his round 5 solo appearance and his round 15 appearance alongside Scarlet Witch. You'll frequently find Namor remaining airborne for extended periods, unable to be damaged. Fights can extend beyond 10 minutes due to this bug.
Intended Mechanic
Killing squids should damage Namor's health until he descends. The bug causes squids to respawn, especially large squids, right before death. This prevents damage transfer to Namor, extending the fight indefinitely.
Additional Bug (Ability Interactions)
Certain abilities don't properly transfer squid damage to Namor. Blade's spin attacks kill squids without damaging Namor. This likely affects multiple builds and abilities.
Strategy
- Focus squids exclusively
- Verify dead squids damage Namor (watch his health bar)
- Use basic attacks to avoid ability bugs
- When Namor descends, maintain distance
- Punisher can avoid whale attacks entirely through range
- Blade and Magik must dodge and parry whale attacks
Round 5 Strategy
During Namor's solo appearance in round 5, focus entirely on squid elimination using basic attacks to ensure damage transfers properly.
Round 15 Boss Composition
Round 15 features both Scarlet Witch and Namor simultaneously. Due to Namor's extended clear time from the bugs mentioned above, prioritize eliminating Scarlet Witch first. Once Scarlet Witch is defeated, you can focus entirely on navigating Namor's squid mechanic without additional pressure.
Scarlet Witch (Rounds 10, 15, 20)
Scarlet Witch represents a pure stat check combined with positioning requirements. She appears as a solo boss in round 10, alongside Namor in round 15, and as a double boss encounter in round 20. Success requires meeting specific defensive thresholds while maintaining high damage output.
Round 10 (Solo Scarlet Witch)
Your first Scarlet Witch encounter tests your build progression and positioning fundamentals. Use this round to practice the mechanics described below before facing the more challenging variants.
Core Strategy
Positioning determines survival more than any other factor. Follow these guidelines:
- Spawn Area Evacuation: Most runs end because Scarlet Witch places multiple stun circles directly on spawn points, stunlocking respawning teammates. Always vacate spawn areas immediately
- Team Spread: Some players should engage at close range, others maintain distance
- Stun Circle Awareness: Continuously bob and weave around stun circles. Getting caught usually ends your run
- Teammate Collision: Monitor teammate pathing to avoid running into their positions
Boss Positioning Strategy
You can employ two strategies against Scarlet Witch:
Strategy A (Synchronized Rotation): Entire team circles Scarlet Witch in the same direction, maintaining constant movement while dealing damage.
Strategy B (Static DPS with Reactive Movement):
- Stand still dealing damage
- Watch for stun orb spawn animation (1 second warning)
- Sidestep to avoid
- Resume stationary DPS
- Repeat: Stand still, observe orb, sidestep, resume DPS
Both strategies work. Strategy B often proves more efficient for consistent damage output.
Double Scarlet Witch (Round 20 Final Challenge)
Round 20 simultaneously spawns two Scarlet Witch bosses, creating the mode's ultimate challenge.
Critical Positioning Rule
STAY AWAY FROM SPAWN AREAS. This can't be emphasized enough. Spawn camping Scarlet Witch creates stunlock death loops.
If caught in spawn stunlock, Blade and Magik players can potentially escape by dashing/teleporting immediately upon respawn. You have less than 0.5 seconds to execute this. Failure means repeated instant deaths consuming all resurrections.
After escaping stunlock, immediately attack Scarlet Witch to trigger lifesteal. Delaying attack guarantees death.
Simultaneous Phase Shift Danger
Both Scarlet Witches frequently phase shift simultaneously. During phase shifts, you can't deal damage or trigger lifesteal. Meanwhile, Doctor Strange team-up missiles continue tracking and attacking you.
Survival During Phase Shift:
- Blade: Must parry Doctor Strange missiles
- Magik: Must teleport to evade
- Punisher: Use cover near Avengers Tower back area
Failing to counter phase shift missiles causes deaths and wastes resurrections.
Reality Erasure Stat Check
Eventually both Scarlet Witches activate reality erasure simultaneously. This is the final stat check. If you lack 12-13k HP with 45-50% damage reduction, you lose instantly.
Meeting these thresholds doesn't guarantee victory. It simply lets you survive the mechanic. Victory requires sustained DPS throughout the extended fight.
Resurrection Management
Resurrections are finite and valuable resources. Strategic usage dramatically improves clear rates.
Early vs. Late Round Priority
Unless you bought 100 resurrections using 1,000 blue credits, conserve resurrections for late rounds. Losing at round 10 Scarlet Witch is acceptable. You'll need maximum resurrections for round 20's double boss encounter.
NetEase hasn't implemented CC immunity on respawn. This creates stunlock scenarios where players use 8+ resurrections, dying instantly on each spawn without counterplay opportunity.
Sometimes you must accept defeat rather than wasting all resurrections in stunlock loops. Recognize unwinnable situations and preserve resources for future attempts.
Recommended Purchase
Solo players should strongly consider buying 10-20 resurrection packages using blue credits. This significantly improves sanity preservation and clear probability, especially for players with limited time.
Time Pressure: Card Selection Between Rounds
Unlike lower difficulties allowing leisurely card selection, Nightmare 4 provides only 10 seconds between normal rounds. Boss rounds (5, 10, 15, 20) allow 10 seconds as well.
Color-Based Selection Strategy
The 10-second timer makes detailed card analysis impractical. Use color-based priority:
Team Composition
Four-Blade Composition (Highest Clear Rate)
The overwhelming majority of Nightmare 4 clears use four Blade characters. While other characters remain viable, Blade provides unmatched advantages:
- Survivability: Longest survival time among all characters
- Damage Output: Highest consistent damage throughout all rounds
- Ease of Use: Most forgiving execution requirements
- Mobility: Fastest movement speed in vampire mode for kiting
- Other characters can complete Nightmare 4
- Success rates drop significantly
- If playing casually, experiment with preferences
- For maximum difficulty progression, four Blades is best
Single-character compositions eliminate team coordination issues around different character capabilities and timing requirements.
Final Recommendations
Nightmare 4 demands near-perfect execution across multiple systems:
Success Requirements
Success requires 20+ hours of practice for most players. Even experienced players fail repeatedly. The difficulty is intentionally extreme.
- Use Blade with red tree specialization
- Buy resurrection packages
- Practice training techniques in lower difficulties first
- Coordinate with teammates on positioning and quadrant assignments
- Accept that numerous failed attempts are part of progression

Good luck. Nightmare 4 lives up to its name, but proper preparation and execution make victory achievable. Remember that even the best players die frequently during progression. Every failed attempt teaches you something new about positioning, timing, and resource management.
The satisfaction of finally clearing round 20 and defeating both Scarlet Witches makes all the struggle worthwhile. Stay focused, communicate with your team, and never give up!