
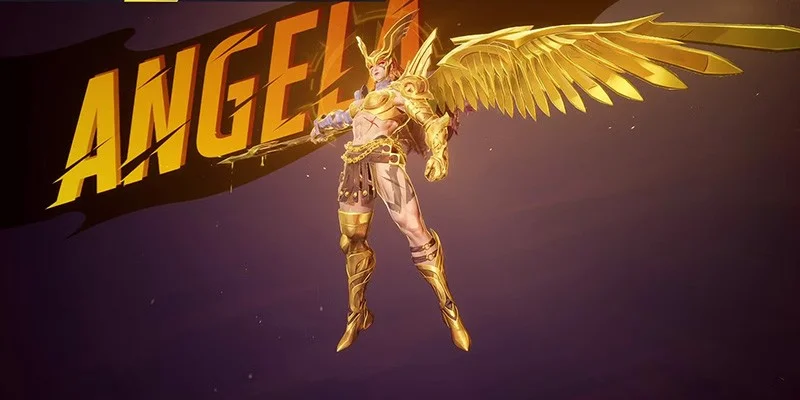
Angela finally gave Marvel Rivals players what they'd been asking for since launch: a flying Vanguard. She joined the roster as the game's first and only airborne tank, filling a gap that left ground-based Vanguards frustrated against teams stacked with flying DPS and Strategists.
Angela Overview
Angela switches between two combat stances. In the air, she uses a spear for pokes and displacement. On the ground, she pulls out twin axes for sustained melee combat. Learning when to use each stance separates average Angela players from good ones.
She's built around disrupting enemy positioning rather than soaking damage. Three crowd control abilities let you grab enemies, carry them through the air, and pull targets away from their team. You'll dominate on maps with elevated platforms and ledges. Enclosed spaces with low ceilings limit your effectiveness.
Understanding Angela's Role
Angela doesn't play like traditional frontline Vanguards such as Hulk or Magneto. Picture yourself as an eagle circling above the battlefield, looking for isolated targets or vulnerable backline heroes. You create opportunities for your team instead of holding chokepoints.
Your main job is pulling enemies out of position. Grab a healer, drag them to your team, and watch them die to focused fire. Yank an enemy tank off high ground and drop them into your DPS players. The displacement itself matters more than the damage you deal.
- Circle the battlefield while building Attack Charge
- Spot isolated or mispositioned enemies
- Dive in with a charged spear attack
- Use Assassin's Charge to grab and relocate targets
- Follow up with another charged attack or switch to axes
- Exit and reset for the next engagement
This hit and run approach keeps you alive despite having relatively low health for a Vanguard. You can't stand in front and absorb punishment. Your mobility is your survivability.
Angela's Abilities Explained
Passive: Seraphic Soar
Angela flies indefinitely, similar to Iron Man's flight mechanics. She moves at 10 meters per second while airborne, which is slower than Star-Lord's boots (with speed boost) and Iron Man's regular flight, but faster than grounded speedsters like Black Widow in her momentum state.
Flying builds your Attack Charge meter at roughly 22 charge per second. You need slightly over 4 seconds of continuous flight to reach the maximum 100 charge. You can also fly into walls or obstacles to charge your meter safely without exposing yourself to enemy fire.
Primary Fire: Spear of Ichors
Your spear damage scales directly with your Attack Charge meter. At zero charge, each poke deals only 45 damage with a 1 second attack interval. At maximum charge (100), you deal 105 damage total (45 base + 60 bonus) and launch enemies upward.
The spear has a 7 meter range and operates as a melee attack despite its appearance. Missing doesn't consume your Attack Charge. The piercing property lets your spear hit multiple enemies in a line.
| Attribute | Value |
|---|---|
| Base Damage | 45 |
| Full Charge Damage | 105 (45 + 60 bonus) |
| Attack Speed | Once per second |
| Range | 7 meters |
| Special Effect | Knockup at full charge |
Wait for full charge before engaging. The 105 damage threshold lets you finish wounded enemies or set up kills for teammates. The knockup interrupts channeled abilities and ultimates. Using your spear at partial charge wastes the resource system entirely.
Shift: Assassin's Charge
Every 3 seconds, you can activate an accelerated dash that moves you at 16 meters per second. This ability has its own energy meter (100 points) separate from your Attack Charge. The meter depletes at 25 energy per second while flying empty, giving you 4 seconds of dash time. When you've grabbed an enemy, depletion increases to 75 energy per second, cutting your carry distance to roughly 1.3 seconds.
You can grab up to two enemies during the dash. Enemies stuck on your spear get carried along your flight path until the energy depletes or you choose to stop. While dashing, you're immune to knockback and launch effects, but you can still be stunned by abilities like Luna Snow's snowball or Wolverine's scrap.
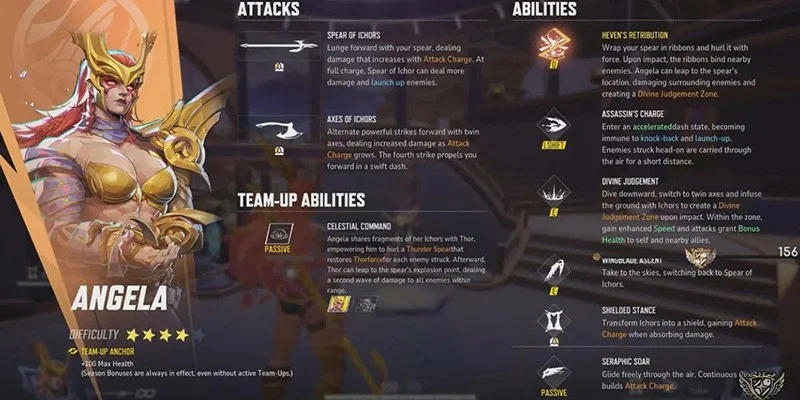
Alternate Primary Fire: Axes of Ichors
When you dive to the ground with Divine Judgment, your spear transforms into twin axes. The axe combo consists of four strikes: three 30 damage swings followed by one 50 damage finisher that dashes you forward. The complete combo deals 140 damage over roughly 2 seconds.
Your Attack Charge meter affects axe damage differently than the spear. With a full meter, your first two swings each consume half the meter and deal 55 damage instead of 30. This brings your total combo damage to 190 (55 + 55 + 30 + 50) when you start with full charge.
The axes cleave, hitting multiple enemies in front of you. Bonus health generation only occurs once per swing regardless of how many enemies you hit.
E (While Flying): Divine Judgment
You dive straight down, dealing 30 damage on impact. This creates a 16 meter wide golden zone on the ground that lasts 6 seconds. The zone deals 12.5 damage per second to enemies standing in it.
While standing in your Divine Judgment zone, you gain 35% movement speed (this buff only affects Angela, not allies). Every axe swing that connects with an enemy grants you 30 bonus health and grants nearby allies within the zone 15 bonus health per hit. Bonus health caps at 200, though you'll rarely reach this limit in normal fights.
Right Click: Shielded Stance
You raise a shield in front of your body that blocks 350 damage before breaking. The shield recharges at 50 health per second after it's lowered or destroyed. You can't spam the shield because there's a 1.5 second internal cooldown after you lower it before you can raise it again.
For every 100 damage your shield absorbs, you gain 25% of your Attack Charge meter (25 points). Blocking the full 350 damage generates 87.5 charge points, nearly filling your meter without any flight time.
Ultimate (Q): Heven's Retribution
You throw a ribbon wrapped spear in a straight line. When the spear contacts terrain (ground, wall, or ceiling), it plants itself and creates an 8 meter binding radius. Enemies caught in the initial impact take 30 damage directly and 10 damage in the area of effect.
Enemies within the radius are tethered to the spear. These tethers reduce movement speed by 80% and prevent all movement abilities. Tethered enemies can break free by destroying the spear (600 health) or by moving to the maximum tether distance, which breaks the ribbon.
Press Q a second time to leap to the spear's location. This leap deals 100 damage on impact and creates a Divine Judgment zone at that location without requiring Divine Judgment to be off cooldown.
The Attack Charge System
Your Attack Charge meter is the single most important resource to manage. Poor charge management drastically reduces your effectiveness. Understanding when to spend and when to build this meter separates good Angela players from great ones.
Charge Generation Methods
- Flying forward: 22 points per second (~4.5 seconds for full charge)
- Flying while grabbing one enemy: 50 points per second (2 seconds for full charge)
- Flying while grabbing two enemies: 100 points per second (1 second for full charge)
- Blocking damage with shield: 25 points per 100 damage blocked
- Flying into walls/obstacles: Same rate as normal flight (safe charging)
Charge Consumption
- Spear attack: Consumes ALL current charge in one attack
- Axe attacks: First two swings each consume 50% of meter if at full charge
- Uncharged attacks: No charge consumed, minimal damage dealt
Combat Combos and Techniques
Standard Engagement Combo
- Fly in with full Attack Charge
- Spear attack (105 damage + knockup)
- Immediately Assassin's Charge to grab them
- Carry them toward your team (meter rebuilds)
- Release and spear again (105 damage)
- Evaluate: Can you finish them with axes, or should you exit?
Total damage: 240 before any axe swings
Environmental Kill Combo
- Approach with full Attack Charge but DON'T attack yet
- Use Assassin's Charge to grab the target
- Carry them over the environmental hazard
- Release them above the void
- Immediately spear attack with knockup (105 damage)
The knockup interrupts their recovery ability while they're over the hazard. Most heroes will fall before they can use movement abilities to return to safety.
Ground Combat Combo (Divine Judgment)
Option A (Maximum burst):
- Approach with full Attack Charge
- DO NOT spear attack
- Activate Divine Judgment to drop down
- First two axe swings at 55 damage each (110 damage)
- Third swing at 30 damage
- Fourth swing at 50 damage (total: 190)
- Zone deals 12.5/second for 6 seconds (75 total)
Total possible damage: ~265. This exceeds the damage from a spear opener (105) followed by standard axe combo (140).
Strategy and Positioning
The Sewing Needle Pattern
Don't hover in the main fighting area. Circle the battle in wide loops, cutting through the center periodically to deliver high impact attacks, then exiting to the opposite side.
This keeps you unpredictable and harder to pin down. You're constantly in motion, constantly pressuring, but never standing still long enough to get focused.
Target Priority
Primary Targets (grab and relocate):
- Enemy healers positioned away from their team
- Enemy DPS on high ground or flanking positions
- Vanguards separated from their team
- Low mobility heroes near environmental hazards
Avoid:
- Full health tanks in the middle of their team
- Heroes with escape abilities still available
- Enemies with crowd control ready to counter you
- Groups of 3+ enemies unless your team is there
Team Compositions and Synergies
What Angela Needs from Teammates
Angela creates opportunities but struggles to finish kills alone. Her damage output is lower than other Vanguards, and she relies on teammates to confirm eliminations on targets she displaces.
Synergistic Vanguards
Magneto holds the frontline while you operate on angles. His bubble protects teammates from the pressure you create when pulling enemies back. He doesn't require your support to survive, letting you focus on disruption.
Similar to Magneto, she controls space independently while you create chaos elsewhere. Her defensive abilities keep the team alive when you pull dangerous enemies toward them.
The Celestial Command team up enhances Thor's dive potential and gives you 100 bonus health. Running both Thor and Angela creates frontline pressure issues unless you have exceptional Duelist players or a third tank.
Synergistic Duelists
Phoenix (Top Choice): Phoenix can follow up on your isolated targets instantly. Her mobility matches yours, she can finish wounded enemies you've damaged, and her ultimate combos with Heven's Retribution for team wipes.
Magik: Teleports let Magik reach targets you've displaced immediately. She benefits from the isolation you create and can secure kills on grabbed healers quickly.
Moon Knight: His ultimate zones enemies in place, which you can combo with Heven's Retribution for guaranteed multi kills. Coordinate ultimate usage for maximum value.
Synergistic Strategists
Cloak & Dagger (Top Priority): Provides sustained healing for your entire team, enabling the aggressive playstyle Angela requires. Her healing dagger reaches you even when you're operating away from the main group.
Luna Snow: Reliable healing and her ultimate provides teamwide survivability. Her freeze can lock down targets you've grabbed, confirming kills.
Mantis: Her damage boost enhances your burst damage combos. Sleep grenade sets up easy Assassin's Charge grabs. She provides peel when divers target your backline.
Counters and Bad Matchups
Vanguard Counters
Magneto (Hard Counter): His bubble completely negates your Assassin's Charge. You cannot grab bubbled enemies. He can protect his entire team from your primary function with one ability.
Hulk (Hard Counter): Similar to Magneto, he can bubble teammates to prevent grabs. His leap lets him reach you in the air, and his ultimate makes diving his team extremely risky.
Peni Parker (Stun Disruption): Her frequent stuns interrupt Assassin's Charge and lock you in place. She becomes less effective at higher skill levels where players have better positioning.
Duelist Counters
Punisher (Severe Threat): High sustained damage output tears through your 600 health pool quickly. He can track you while you fly and doesn't need to reload as often as other hitscan heroes.
Iron Man (Mobility Advantage): He flies faster than you (his normal flight exceeds your 10 m/s speed). He can outrun your Assassin's Charge attempts and farm you from range before you close the distance.
Phoenix (Stat Differential): Her numbers are simply higher than yours. She can outduel you consistently because her damage, mobility, and survivability all exceed what Angela brings.
Strategist Counters
Luna Snow (Freeze Shutdown): Her snowball freezes you completely, stopping Assassin's Charge mid flight and making you an easy target. You cannot avoid this ability reliably.
Invisible Woman (Displacement Specialist): Her force fields push and pull you, disrupting Assassin's Charge completely. She can reposition you away from her team easily.
Mantis: Her sleep grenade stops Assassin's Charge and leaves you vulnerable. You need to bait this ability or block it with your shield before attempting grabs on her team.
- Only flying Vanguard in game
- Powerful displacement and crowd control
- Excellent at isolating priority targets
- Strong on maps with environmental hazards
- Unmatched ability to punish poor positioning
- Lowest health pool among Vanguards (600)
- Very low poke damage without full Attack Charge
- Struggles against bubble abilities
- Vulnerable to crowd control
- Requires team follow up to confirm kills
Advanced Techniques
Ultimate Interruption
Your fully charged spear's knockup effect can cancel enemy ultimates during their startup animation. If Thor begins his ultimate callout and you hit him with a charged spear during the first second, you interrupt it completely. He drops back to 50% ultimate charge instead of completing the ability.
Canceling Support Ultimates with Displacement
You can pull supports away from their deployed ultimates, effectively canceling them for your team. Cloak & Dagger places her healing zone, you grab her and carry her away from it. Invisible Woman deploys her shield, you pull her out of position. The ultimates remain active, but the support can't benefit from them or protect them.
Body Blocking After Grabs
Your character model is large enough to completely block doorways and narrow corridors. After grabbing an enemy and dropping them in an isolated room or side area, position yourself in the doorway. They cannot path around you easily.
Common Mistakes and How to Fix Them
Using Assassin's Charge at Full Attack Charge
Mistake: You waste the value of your fully charged meter. The grab only lasts 1.3 seconds with a target, which isn't long enough to rebuild from zero to full charge.
Fix: Always spend your Attack Charge with a spear attack BEFORE grabbing. Spear (105 damage), then grab (30 damage + meter rebuilding during carry), then spear again when full (105 damage). Total: 240 damage.
Staying in Axe Form After Zone Expires
Mistake: Without the Divine Judgment zone, you're a slow ground hero with mediocre damage. You lose your primary advantage (flight mobility) and become an easy target.
Fix: Press E to return to flight form immediately when your zone expires or when enemies leave it. Get airborne, build charge, and set up your next engagement.
Fighting in the Main Frontline
Mistake: Angela has 600 health, the lowest of any Vanguard. Standing in front of your team and absorbing damage plays against your strengths.
Fix: Operate on angles, flanks, and from above. Cut through the main fight periodically to deliver burst damage or grab targets, then exit immediately. Think of yourself as a disruptive force rather than a stationary shield.
Chasing Kills Too Deep
Mistake: Your mobility can carry you deep into enemy territory, but once you're there without cooldowns, you're stuck. Angela's escape options are limited if you've used Assassin's Charge for the engagement.
Fix: Set a health threshold (300 HP recommended) where you automatically disengage. Exit fights before you're forced to. Make your attack, accomplish your goal (damage, displacement, or kill), then leave. Don't chase wounded enemies into their team.
Tips for Climbing Ranked
Communicate Your Intentions
Angela requires team coordination more than most Vanguards. Use voice chat or ping systems to signal your plans. Tell teammates "I'm going to grab their healer" so they prepare to shoot. Call "Ultimate ready for combo" so DPS can coordinate their ultimates. Say "Diving backline, need support" so healers or off tanks can follow up.
Without communication, your displacement plays often result in you dying alone while teammates focus elsewhere.
Adapt Your Target Selection
Against organized teams, healers will position more carefully. You can't always grab the backline easily. Adapt by targeting tanks separated from their team, DPS who overextend for kills, any hero near environmental hazards, or wounded enemies regardless of role.
Track Enemy Cooldowns
Knowing when abilities are on cooldown dramatically increases your success rate. Did their Luna Snow just use snowball? You have 10+ seconds to dive freely. Did their Invisible Woman use her push? Her peel options are limited. Did their DPS use escape abilities? They're vulnerable to grabs.
Know When to Switch
Angela struggles against certain team compositions. If the enemy is running Magneto, Luna Snow, Invisible Woman, and Punisher, you're going to have a bad time. Don't force Angela in bad matchups.
- The enemy has multiple hard counters (Magneto + Luna + Invisible Woman)
- Your team lacks follow up damage to confirm your grabs
- Maps don't support her mobility (too enclosed, no environmental kills)
- You've died 3+ times in the first fight without generating value
Master Environmental Kills
Maps with environmental hazards dramatically increase Angela's value. Learn every ledge, pit, and death zone on every map. These instant kills bypass healing, damage reduction, and defensive abilities.
Practice identifying safe grab angles (where you can pull them off but not fall yourself). Learn which heroes have movement abilities to escape (and save your knockup for them). Use environmental kills to break spawn camp situations.
Role in Team Fights
Initiation Phase (0-5 seconds)
Your team is poking, testing enemy positioning. You should be circling at range, building Attack Charge, and watching for opportunities. Don't commit yet.
- Fly loops around the engagement zone
- Charge meter to full by flying or wall charging
- Watch for isolated targets or bad enemy positioning
- Communicate potential targets to teammates
- Position yourself for optimal engagement angle
Engagement Phase (5-15 seconds)
One team commits. Abilities start flying. This is your window to create chaos.
- Execute displacement combo on high value target (healer, separated DPS)
- Use Divine Judgment if enemies are grouped and your team is pushing
- Disrupt enemy formation by grabbing frontline and pulling them backward
- Body block retreating enemies if your team is winning
- Use shield to block defensive ultimates (Luna freeze, Mantis sleep)
Sustained Fight Phase (15-30 seconds)
Both teams are fully committed. Abilities are on cooldown. It's a brawl.
- If Divine Judgment is available, drop it on grouped enemies or contested objectives
- Continue hit and run attacks with charged spears
- Peel for your healers if divers are pressuring them
- Watch for wounded enemies breaking line of sight (finish them with charged spear)
- Generate ultimate charge through cleaving axes or repeated engagements
Retreat/Reset Phase
Your team lost the fight or needs to reset. Fall back to regroup.
- Use flight to escape faster than grounded heroes
- Grab diving enemies who are chasing your retreating teammates
- Cover your team's retreat with Divine Judgment zones
- Find health packs to self heal
- Reposition for next engagement without feeding additional deaths
Map Awareness
Strong Angela Maps
- Maps with elevated platforms (high ground to grab enemies from)
- Maps with environmental kill opportunities (ledges, pits, water)
- Maps with rooms and corridors (for body blocking after grabs)
- Maps with vertical space for your flight advantage
Weak Angela Maps
- Enclosed spaces with low ceilings (limits flight mobility)
- Maps with few environmental hazards (reduces displacement value)
- Open, flat areas (no cover while circling, easy target)
Self Healing and Health Management
You should heal yourself most of the time. Your mobility lets you reach health packs faster than grounded heroes. Your healers need to focus on the frontline, who can't escape to safety as easily as you can.
Generate bonus health during axe combat inside Divine Judgment zones, but don't expect healers to pocket you. You're too mobile and too far from the main fight most of the time.
Fight Engagement Rules
When to Engage
- You have full or near full Attack Charge
- You've identified an isolated target
- Your team is in position to follow up
- You have Assassin's Charge available
- Your health is above 400
When to Exit
- Your Attack Charge is depleted and you can't rebuild it safely
- The target escapes or gets protection from their team
- You drop below 300 health
- Multiple enemies focus you
- You've accomplished your goal (secured kill, disrupted positioning)
Never
- Dive alone into 4+ enemies
- Engage with zero Attack Charge
- Stay grounded without your Divine Judgment zone active
- Try to 1v1 high sustain heroes without teammate support
- Fight in enclosed spaces where you can't use flight to escape
Quick Reference Guide
| Category | Details |
|---|---|
| Core Strengths | Only flying Vanguard, powerful displacement, excellent isolation ability |
| Core Weaknesses | Lowest Vanguard health (600), low poke damage, requires team follow-up |
| Best Maps | High vertical space, environmental hazards, elevated platforms |
| Worst Maps | Low ceilings, flat open areas, few environmental hazards |
| Core Combo | Full charge spear (105) → Grab (30) → Full charge spear (105) = 240 damage |
| Emergency Escape | Wingblade Ascent → Shield while flying → Fly to health packs |
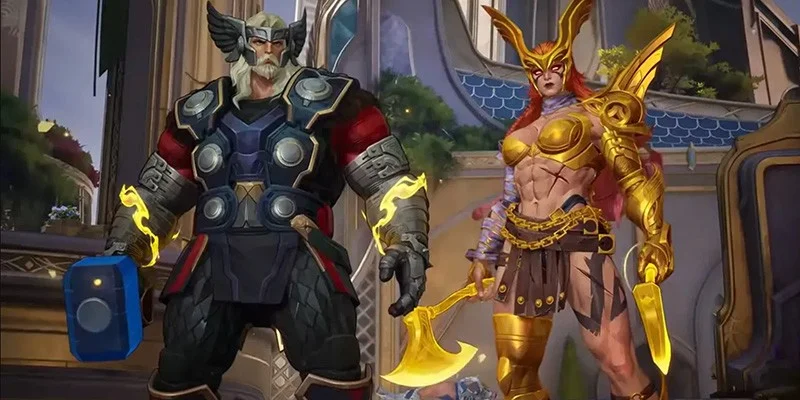
Team-Up: Celestial Command (with Thor)
When Angela is on your team, Thor gains access to Thunder Spear. He throws a spear that restores Thorforce for each enemy hit. After throwing, Thor can leap directly to the spear's explosion point, dealing a second wave of damage to surrounding enemies.
Angela receives 100 bonus health as the team up anchor, bringing her total health pool to 700.
Example Team Compositions
Balanced Aggressive Comp
- Vanguards: Angela, Magneto
- Duelists: Phoenix, Magik
- Strategists: Cloak & Dagger, Luna Snow
Angela creates displacement opportunities while Magneto holds the main frontline. Phoenix and Magik follow up on isolated targets immediately. Healers provide enough sustain for the aggressive positioning.
Ultimate Combo Comp
- Vanguards: Angela, Emma Frost
- Duelists: Moon Knight, Phoenix
- Strategists: Luna Snow, Mantis
Focused on combining Angela's Heven's Retribution with high damage ultimates from Moon Knight and Phoenix. Emma provides defensive utility while Angela and the Duelists dive aggressively.
Thor Synergy Comp (Experimental)
- Vanguards: Angela, Thor, Magneto (triple Vanguard)
- Duelists: Phoenix
- Strategists: Cloak & Dagger, Luna Snow
Uses the Celestial Command team up with triple tank setup. Requires exceptional coordination and mobile DPS to avoid lacking damage output. Only recommended for organized team play.
Final Thoughts
Angela rewards players who understand positioning, target selection, and resource management. Her 4 star difficulty rating is accurate because she requires significantly more game knowledge and mechanical skill than straightforward Vanguards like Hulk or Groot.
Success with Angela comes from creating opportunities for your team rather than securing kills yourself. You're not the star player. You're the disruptive force that makes everyone else's job easier. Grab their healer so your team can push. Knock their DPS off the map so your backline is safe. Bind multiple enemies so your Duelists can ultimate them.
The best Angela players don't top damage charts. They don't always have the most kills. But their teams win because enemies can never get comfortable, can never position safely, and can never protect their vulnerable heroes from being isolated and eliminated.
Master the charge management system. Perfect your displacement combos. Learn every environmental kill opportunity on every map. Communicate with your team. Adapt your targets based on what's available. Most importantly, know when Angela isn't the right pick and be willing to switch.
Angela isn't a universal solution. She's a specialized tool for specific situations. When those situations arise, she's one of the most impactful Vanguards in the game. When they don't, forcing her leads to frustration and losses. Understanding that difference separates good Angela players from great ones.