
Blade joined Marvel Rivals as a Duelist in Season 3.5, bringing a dual-weapon playstyle that splits between the Ancestral Sword for melee and the Hunter's Shotgun for ranged combat. The shotgun works differently at various distances, which makes crosshair choice particularly important if you want consistent damage output. This guide breaks down the optimal crosshair setup for Blade, including the exact reticle code, detailed settings explanations, and practical tips for better shotgun accuracy.
Understanding Blade's Hunter's Shotgun Mechanics
Before we get into crosshair settings, you need to understand how Blade's Hunter's Shotgun actually works. The weapon behaves completely differently depending on your distance from the target.
Distance-Based Damage Profile
The Hunter's Shotgun has unique behavior at different ranges:
- Under 8 meters: Fires as a single projectile with limited damage
- Beyond 8 meters: The projectile breaks into shrapnel, creating a proper shotgun spread with better damage and headshot potential
- After 20 meters: Damage falloff kicks in, making the weapon less effective
This transformation means your crosshair needs to do two things: give you precision for close fights and show you the spread pattern for mid-range combat.

Why Your Melee Weapon Doesn't Need Crosshair Help
Blade's Ancestral Sword shows red outlines around enemies when they're in melee range. You need to enable the Attack Range Hint setting for this to work, but once it's on, you don't need crosshair elements for sword combat. This lets the entire crosshair focus on making your shotgun more accurate.
The Best Crosshair Design: Center Dot with Outer Circle
The recommended crosshair uses two components: a central red dot with a larger red circle around it. Each part serves a specific purpose based on how far you are from your target.
Reticle Code for Instant Setup
Copy this code and paste it into Marvel Rivals to apply the crosshair instantly:
4;0;6.0,0.0,0.0,16.0;100.0,0.0,90.0,100.0;50.0,0.0,0.0,0.0;100.0,100.0,100.0,100.0;0.0,0.0,0.0,0.0;33.0,0.0,36.0,33.0;40.0;100.0,0.0,90.0,100.0;0.0;5.0,3,1,1;0.0,0.0,0.0;This automatically sets up all the configurations listed in the manual section below.
How Each Crosshair Component Works
The central dot gives you a precise aiming point for close-range shotgun fights when enemies are under 8 meters away. At this distance, the Hunter's Shotgun fires as a single projectile, so accuracy determines whether you land that initial hit before the shrapnel activates. Use the center dot when targets are right in your face.
The circle does several things:
- Shows Spread Pattern: The circle size matches the shrapnel spread at roughly 20 meters, helping you understand your effective damage zone
- Helps You Lead Shots: More importantly, the circle helps you judge bullet travel time for moving targets at mid-range
- Maximizes Damage: Keeping as much of the enemy inside the circle boundaries means more pellets hit from the shrapnel spread
The circle is sized to be visible without blocking your view. It's designed for targets around 20 meters away who are strafing. For enemies past 20 meters, you'll need to lead even more, which takes practice.
Complete Manual Crosshair Settings
If you'd rather configure settings yourself or want to know exactly what the reticle code does, here's every setting broken down:
Basic Setup
- Reticle Type: Circle and Crosshair (lets you use both dot and circle)
- Reticle Animation: Off (no distracting movement)
Dot Settings (Center Point)
- Dot Width: 16 (visible without covering targets)
- Dot Opacity: 100 (fully visible)
- Dot Outline Width: 0 (clean look)
- Dot Outline Opacity: 100 (doesn't matter with 0 width)
- Dot Blur: 0 (crisp edges)
- Dot Color: Red (stands out against most backgrounds)
Crosshair Settings (Arms/Lines - Turned Off)
- Crosshair Width: 0 (disables the lines)
- Crosshair Opacity: 0 (makes sure they don't show)
- Crosshair Outline Width: 0 (no outline)
- Crosshair Outline Opacity: 100 (doesn't matter)
- Crosshair Blur: 0 (doesn't matter)
- Crosshair Radius: 0 (no gap)
- Crosshair Length: 40 (doesn't matter with 0 opacity)
- Crosshair Angle: 0 (standard)
Circle Settings (Outer Guide)
- Circle Width: 0 (hollow outline instead of filled)
- Circle Opacity: 90 (mostly visible but slightly see-through)
- Circle Outline Width: 0 (no extra outline)
- Circle Outline Opacity: 100 (doesn't matter)
- Circle Blur: 0 (sharp edges)
- Circle Radius: 36 (matches 20-meter spread)
- Circle Color: Red (matches dot)
Important Hero Settings for Blade
Beyond the crosshair, several hero-specific settings affect how well you perform:
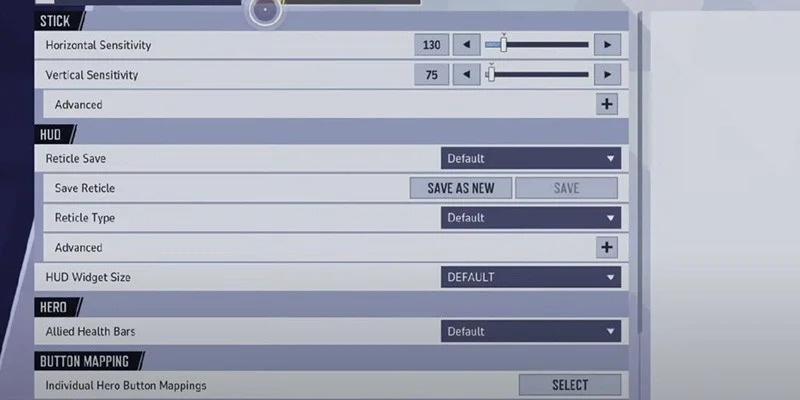
Mouse Sensitivity
- Mouse Horizontal Sensitivity: 3-5 (balances precision with quick turns)
- Mouse Vertical Sensitivity: 3-5 (matches horizontal for consistent tracking)
- Invert Horizontal Look: Off (standard)
- Invert Vertical Look: Off (standard)
These ranges work for most players, but sensitivity is personal. Start here and adjust based on whether you need more precision (go lower) or faster target swaps (go higher).
Visual Settings
- Attack Range Hint: On (shows red outlines on enemies in melee range, crucial for sword combat)
- Allied Health Bars: On (lets you see teammate status in fights)
Advanced Crosshair Customization
The base setup works well for most situations, but you can adapt it for specific needs.
Making the Circle More Visible
Some players can't track the circle during chaotic fights with tons of visual effects. To make it stand out more:
- Set Circle Opacity to 45 (less transparent)
- Change Circle Outline Width to 50 (adds a border)
- Change Circle Color to Green (better contrast against red enemy outlines)
This creates a more obvious circle that's easier to see during messy team fights. The tradeoff is you might focus on the crosshair itself instead of tracking enemies.
Reducing Visual Clutter After You've Learned the Weapon
Once you've got Blade's bullet travel time down and can lead shots naturally, you can make the circle less prominent:
- Lower Circle Opacity to 20 (subtle guideline instead of obvious element)
- Keep Circle Color as Blue instead of Red (blends better with backgrounds)
This approach lets you glance at the circle when needed without constantly pulling your attention from enemy positions. The circle becomes something you check occasionally rather than stare at.
Advanced Blade Settings: Weapon Switching Mechanics
Blade has a hero-specific setting that changes how weapon management works, especially relevant if you play dive heroes.
Bloodline Awakening Weapon Switching
Go to Blade's hero settings and find "Switch to Shotgun When Bloodline Awakening Ends."
Bloodline Awakening is Blade's third ability (the vampiric form). When you activate it:
- Attacks steal health
- Sword attacks build attack speed (the bar in your screen's center tracks this)
- Your sword becomes way more effective than normal
Outside Bloodline Awakening, the sword is pretty bad. The ability exists to create windows where melee damage actually works.
Default Behavior (Setting On)
When Bloodline Awakening ends, Blade automatically swaps to the Hunter's Shotgun. This makes sense since the sword sucks without the buff.
Alternative Behavior (Setting Off)
Disable this setting and Blade stays on the Ancestral Sword after Bloodline Awakening ends. You have to manually switch to the shotgun.
Why Dive Hero Players Should Consider Turning Off Auto-Switch
If you've played dive heroes (characters like Magik or Black Panther who go in aggressively), turning off automatic switching gives you more control:
Blade's dash changes depending on what weapon you're holding:
- Dash with Sword: Slows enemies you hit
- Dash with Shotgun: Reduces healing and deals damage to enemies you hit
Controlling when you switch weapons lets you choose which dash effect you get.
Dash Targeting Is Easier Than You Think
Unlike some characters (Magik needs specific crosshair designs to predict dash paths), Blade's dash is forgiving. The dash has a big hitbox and connects with enemies as long as you're aiming generally at them. You don't need to lead your dash or aim ahead of moving targets. Just point at the enemy and it'll hit. This simplicity means you don't need crosshair tweaks specifically for dash accuracy.
Combat Applications: Using the Crosshair Effectively
Understanding the theory is only useful if you can apply it in real fights. Here's how to use each component in different situations.
Close-Range Fights (Under 8 Meters)
Use the center dot. At close range, the Hunter's Shotgun fires a single projectile before the 8-meter shrapnel kicks in. Precision matters for landing that first shot. Put the center dot directly on the enemy's chest or head. At this distance, targets move fast across your screen, so smooth tracking with the center dot beats everything else.
Mid-Range Combat (8-20 Meters)
Use the outer circle. Past 8 meters, the projectile becomes shrapnel and deals better damage with headshot potential. But bullet travel time means you can't aim right at moving targets.
For stationary targets: If they're standing still or moving predictably, aim with the center dot. The spread is manageable enough that center-mass aiming works.
For moving targets: Position your aim so when the target moves, they'll cross into the circle. For enemies strafing left, aim the circle's right edge where they're heading. For targets going right, aim the left edge along their path. You want their character model staying inside the circle as they move, which gets you maximum pellet hits.
Long-Range Poke (Past 20 Meters)
Use the outer circle with extra lead. Damage falloff starts after 20 meters, but you can still chip away and finish low-health targets. You need to lead shots further than the circle shows at these distances. This takes practice and getting used to specific movement patterns. Use the circle as your starting point, then extend your lead based on how fast they're moving and which direction. This is less consistent than fighting at your best range, so try to close distance when you can.
Advanced Combat Techniques and Combos
Blade's kit has several weapon and ability combinations that maximize burst damage and control.
Basic Shotgun-Dash Combo
- Shoot with Hunter's Shotgun
- Dash immediately (shotgun equipped for healing reduction)
- Activate Bloodline Awakening during the dash (automatically pulls out Ancestral Sword)
- Follow up with buffed sword attacks
Why it works: First shotgun blast damages and applies healing reduction through the dash. Bloodline Awakening during dash creates a smooth transition to melee. You're in melee range with the buffed sword active and healing reduction already on them. They can't heal through your burst as effectively.
Extended Burst Combo
- Shoot with Hunter's Shotgun
- Dash forward (shotgun equipped)
- Activate Bloodline Awakening during dash
- Switch to shotgun and shoot again
- Use second dash charge to get out
Why it works: Opens with ranged damage before you commit. Applies healing reduction with first dash. Brief melee pressure with Bloodline Awakening. Another shotgun blast before escaping. Second dash lets you exit safely from enemy frontline.
Flanking Pattern
- Get to a flank position or off-angle
- Find an isolated target
- Execute burst combo from unexpected angle
- Use remaining dash to either finish the kill or retreat
Choosing Your Playstyle: Melee vs. Ranged Focus
Blade's design lets you emphasize different parts of his kit based on preference and what your team needs.
Aggressive Melee Style
When to use: Your team needs dive pressure, enemies have low-mobility supports, or you've played dive heroes before.
Core pattern: Focus on Bloodline Awakening uptime. Use shotgun mostly as an engagement tool and poke between melee windows. Build attack speed during Bloodline Awakening. Use sword dash for slows to secure kills.
Weapon setting: Consider turning off "Switch to Shotgun When Bloodline Awakening Ends" for smoother transitions and better dash control.
Traditional Duelist Style
When to use: Enemy team counters dive well, you prefer consistent ranged pressure, or your team needs sustained damage.
Core pattern: Stay at 8-20 meter range. Use Bloodline Awakening defensively or for finishing low targets. Focus on consistent shotgun accuracy over aggressive melee. Work on learning projectile travel time for moving targets.
Weapon setting: Keep "Switch to Shotgun When Bloodline Awakening Ends" on to automatically go back to your main damage tool.
Hybrid Approach
When to use: Most ranked games where adapting to each situation gives you the most value.
Core pattern: Judge each fight individually. Can you dive this isolated target or should you apply pressure from range? Use shotgun as your main damage, melee as burst tool. Recognize when enemy positioning lets you safely go in versus when ranged pressure is safer. Get comfortable with both weapons instead of focusing on just one.
Most important skill: Reading fights quickly and picking the right range and weapon for each moment instead of sticking to one style for the whole match.
Common Mistakes to Avoid
- Staring at the crosshair instead of tracking enemies
- Using sword outside Bloodline Awakening
- Not leading shots at mid-range
- Fighting at wrong ranges (too far or too close)
- See crosshair peripherally while focusing on targets
- Stick to shotgun when Bloodline Awakening is down
- Aim where enemies are going, not where they are
- Maintain 8-20 meter engagement range
Summary: Quick Setup Guide
Instant setup: Copy the reticle code from the start of this guide for immediate optimal setup, or use the manual settings breakdown if you want to understand each piece.
Must-have settings: Turn on Attack Range Hint for melee indicators. Set mouse sensitivity between 3-5 for both axes as your starting point.
Using the crosshair: Center dot for close precision (under 8 meters). Outer circle to judge lead distance for mid-range moving targets (8-20 meters) and see optimal spread coverage.
Customization path: Start with default at 90 circle opacity. Once comfortable with projectile speed, drop to 20 opacity for less distraction. Only increase opacity and add circle outline if you can't see the circle during fights.
Advanced settings: Dive hero players should consider turning off automatic shotgun switching after Bloodline Awakening for better control over dash effects and ability canceling.
Practice focus: Spend time learning the shotgun's projectile speed at different ranges. The crosshair guides you, but muscle memory for leading shots comes from experience.
This crosshair setup makes Blade's Hunter's Shotgun more accurate while keeping visual clutter low. But crosshair preference is personal. Use this as your foundation and adjust opacity, colors, or size based on what feels right for your playstyle.