
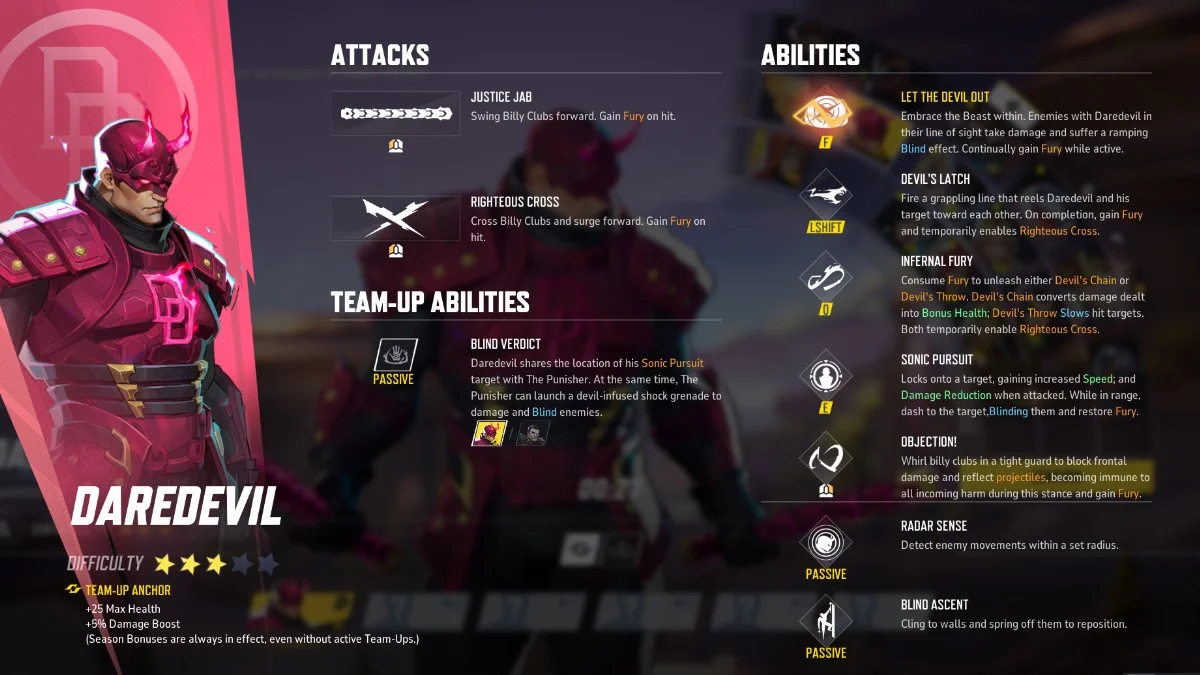
Daredevil joined Marvel Rivals in Season 4.5 as a Duelist who specializes in close-quarters melee combat using his Billy Clubs. His kit revolves around closing distance quickly and eliminating targets with rapid ability combinations. This guide covers optimal crosshair configurations, critical settings adjustments, and the reasoning behind each recommendation to help you get the most out of this melee-focused hero.
Understanding Daredevil's Crosshair Needs
Before diving into specific settings, you need to understand why Daredevil's crosshair requirements differ from ranged heroes. As a melee-focused character, most of your damage comes from abilities that activate at extremely close range. Your primary attack functions within a 4-meter radius, while your melee operates within a 3-meter radius. You'll spend most encounters at point-blank range where traditional aiming isn't a primary concern.
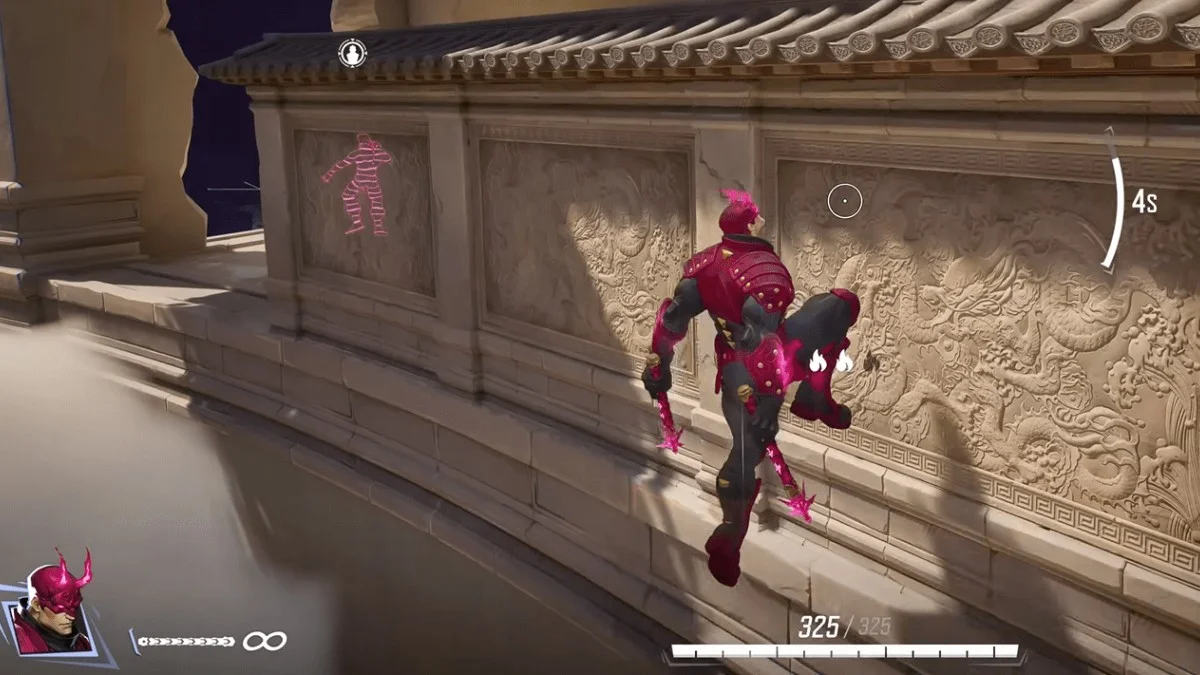
That said, one ability benefits significantly from crosshair guidance: your grapple. This mobility tool lets you close gaps and initiate combos, but it has a unique tracking property. If an enemy moves after you've initiated the grapple, you can adjust your aim to follow them before the grapple fully extends. As long as the grapple hasn't reached maximum distance or collided with terrain, you can micro-adjust your crosshair position to maintain target tracking. This mechanic makes having a visible crosshair reference valuable, even on a predominantly melee character.

Recommended Crosshair Configuration
Option 1: Large Arrow Design
This crosshair design uses a large arrow-style configuration that clearly indicates the grapple's hitbox area. The design consists of crosshair lines with specific measurements that create an arrow-like shape pointing toward your target.
Settings for Arrow Crosshair:
- Reticle Type: Crosshair only (no dot, no circle)
- Crosshair Color: White
- Crosshair Radius: 0
- Crosshair Length: Minimum setting
- Crosshair Blur: Enabled (reduces harsh outline, easier on eyes)
- Crosshair Opacity: Increased for better visibility
- All other elements (dot and circle): Disabled
The white color provides contrast against both the default red enemy outlines and the yellow outlines if you enable the accessibility setting modification.
Option 2: Simple White Dot
This minimalist approach uses only a center dot as your aiming reference. The dot serves as a clean positioning guide without adding visual complexity to your screen.
Settings for Dot Crosshair:
- Reticle Type: Dot
- Reticle Animation: Off
- Dot Width: 40
- Dot Opacity: 100
- Dot Outline Width: 0
- Dot Outline Opacity: 100
- Dot Blur: 0
- Dot Color: White
- All other elements (crosshair lines and circle): Disabled
Reticle Code:
3;0;6.0,0.0,0.0,40.0;100.0,0.0,91.0,100.0;50.0,0.0,0.0,0.0;100.0,100.0,100.0,100.0;0.0,0.0,0.0,0.0;33.0,0.0,36.0,33.0;40.0;100.0,0.0,91.0,100.0;0.0;5.0,3,1,0;0.0,0.0,0.0;

Copy this code and paste it into Marvel Rivals to instantly apply these crosshair settings.
Which Crosshair Should You Choose?
Both options serve valid purposes.
Choose the arrow crosshair if you frequently miss grapples due to enemy movement and want a larger visual reference for tracking adjustments. This design helps newer Daredevil players understand the grapple's hitbox size and gives you more visual information during fast-paced encounters.
Choose the dot crosshair if you prioritize screen clarity and minimal visual distraction. This works better for players who already have strong grapple accuracy and want to focus on reading the battlefield through Radar Sense without additional crosshair elements.
You can technically play Daredevil without any crosshair at all since his combat occurs at such close range. Having some form of reference point improves grapple consistency though.
Critical Hero-Specific Settings
Scan Line Effect and Enemy Visibility
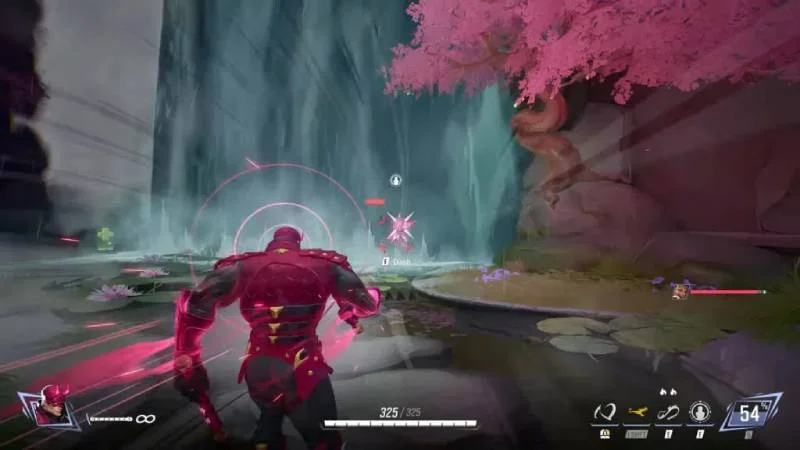
Daredevil's Radar Sense passive ability lets him detect enemies through walls within his detection radius. By default, the game displays these detected enemies with red outlines against purple and pink background effects. This color combination creates visibility problems because red and purple share similar color values, making enemy outlines blend into the Radar Sense visual effects.
There's a specific setting combination that dramatically improves enemy visibility:
Step 1: Navigate to Settings → Accessibility
- Change Enemy Outline Color to Yellow
Step 2: Navigate to Settings → Keyboard (or your input device)
- Change Hero to Daredevil
- Scroll down to find "Scan Line Effect Follows Accessibility Settings"
- Enable this setting
Why This Matters: In fast-paced combat situations, you need to instantly distinguish between terrain edges (which Radar Sense also outlines) and actual enemy positions. The yellow versus purple contrast eliminates any ambiguity, letting you quickly identify targets through walls and make split-second engagement decisions. This becomes particularly valuable when using Radar Sense to track enemies around corners or through obstacles before committing to your grapple.
Additional Hero Settings
These settings improve Daredevil's responsiveness and provide important visual information:
- Radar Sense Background Brightness: 0.80 - This setting controls how much the Radar Sense visual effect obscures your normal vision. The 0.80 value provides a balance where you can clearly see the Radar Sense information without completely darkening your normal sight lines.
- Allied Health Bars: On - Enables health bar visibility for teammates. This helps you identify when allies need support or when they're in position to follow up on your engagements.
- Attack Range Hint: On - Displays visual indicators for your ability ranges. This helps you understand when enemies enter your 4-meter primary attack range or 3-meter melee range.
Mouse Sensitivity Settings
| Setting | Recommended Value | Purpose |
|---|---|---|
| Mouse Horizontal Sensitivity | 3-5 | Responsive turning without overshooting |
| Mouse Vertical Sensitivity | 3-5 | Quick vertical tracking |
| Mouse Smoothing | Off | Eliminates input delay |
| Mouse Acceleration | Off | Consistent, predictable aim |
| Raw Input | Off | Standard control behavior |
These ranges provide responsive turning for tracking mobile enemies without overshooting during grapple adjustments. Daredevil needs to quickly rotate toward targets but also maintain precision during ability combos.
Both mouse smoothing and acceleration should be disabled for consistent, predictable aim. Mouse smoothing adds delay to input, while acceleration changes sensitivity based on movement speed. Neither benefits Daredevil's close-range combat style where you need immediate, linear response to input.
Understanding Daredevil's Attack System
Daredevil operates with two distinct attack types that serve different purposes in combat:
Primary Attack
- Range: 4 meters
- Pattern: Four-hit sequence
- Purpose: Basic damage output and ultimate charge generation
Your primary attack consists of four consecutive strikes. This is your standard damage tool when abilities are on cooldown.
Melee Attack
- Range: 3 meters (requires 1 meter closer positioning than primary)
- Pattern: Two-hit sequence (double hit)
- Purpose: Ability animation canceling and combo extension
The melee attack is shorter range but critically important for advanced play. Unlike the primary attack, the melee can be inserted between abilities without interrupting your ability rotation. This property lets you add extra damage to combos without waiting for ability animations to complete.
Combat Abilities and Mechanics
Grapple (Gap Closer)
This mobility ability pulls you toward a target location or enemy. Landing the grapple on an enemy automatically activates your Righteous Cross ability for bonus damage.
Tracking Mechanic: After initiating the grapple, you can adjust your aim before it reaches maximum extension. If an enemy dodges or uses a movement ability after you've fired the grapple, move your crosshair back to their new position. As long as the grapple hasn't hit terrain or reached its maximum distance, it will redirect toward your adjusted aim point.
Practical Application: When grappling toward airborne targets who might drop or dash away, keep tracking them with your crosshair during the grapple's travel time. Similarly, when targeting ground enemies who are strafing, you can correct for their movement mid-grapple.
Righteous Cross
This ability activates automatically when your grapple connects with an enemy, dealing extra damage. Beyond the automatic activation, you can manually trigger Righteous Cross during combos.
Combo Property: Righteous Cross can be used multiple times in a single engagement if you properly cycle your abilities. It becomes available again after building charge through your other attacks and abilities.
Devil's Chain
This ability forms part of your core damage rotation. After using Devil's Chain, you can immediately follow up with Righteous Cross for a powerful two-ability sequence.
Charge Mechanic: Devil's Chain requires charge to activate. You build this charge through basic attacks (both primary and melee). Once fully charged, the ability becomes available. After use, you must build charge again through attacks before the next activation.
Combo Integration: The optimal pattern is Devil's Chain → Righteous Cross (two hits) → continue basic attacks to recharge → Devil's Chain → Righteous Cross → repeat. This cycle maximizes your damage output during extended fights.
Objection (Deflection Ability)
This defensive ability blocks and deflects incoming attacks, including ultimates. While active, it protects you from enemy abilities and projectiles.
Damage Component: Objection deals small amounts of damage while active. The damage output is minor but can be tactically relevant when enemies are extremely low health or when their abilities are on cooldown. If you anticipate incoming attacks, you can use Objection proactively to both defend and add pressure.
F Ability
One additional ability exists on the F key (or corresponding input). This ability can be used before dashing and grappling to initiate extended combos. The specific function serves as a combo opener for maximum damage sequences.
Combat Rotation Guide
Basic Combo Structure (Low Health Targets)
This rotation eliminates support heroes and other low-health targets when executed correctly. Missing any component of this sequence may leave enemies alive with minimal health remaining.
Execution Notes: If you rush the sequence and miss one of the melee hits, support heroes like Luna Snow will survive with low health instead of being eliminated. Speed improves with practice, letting you execute this rotation quickly once you internalize the timing between each step.
Extended Combo (High Health Targets)
Tank heroes and other high-health targets require a different approach. The burst combo won't eliminate them, so you need to sustain damage over a longer engagement.
Initial Burst: Execute the same opening combo as above (steps 1-6). This delivers maximum upfront damage but won't secure the elimination.
Sustained Phase: After completing the initial burst, the target will still have substantial health remaining. At this point, begin cycling between charge generation and ability use:
- Use basic attacks (primary and melee) to build your charge bar
- Once Devil's Chain becomes available, activate it immediately
- Follow with Righteous Cross (two hits)
- Return to basic attacks to rebuild charge
- Repeat the Devil's Chain → Righteous Cross sequence
Cycle Pattern: Devil's Chain → Righteous Cross → basic attacks → Devil's Chain → Righteous Cross → basic attacks → continue until target is eliminated.
This sustained pattern maximizes ability uptime while maintaining consistent damage pressure. What matters most is efficiently building charge through basic attacks so Devil's Chain is available as frequently as possible.
Maximum Damage Opener
For situations where you have all abilities available and want to deliver the highest possible burst damage:
Full Sequence:
- Activate F ability
- Dash toward target
- Grapple to target
- Execute standard combo rotation
This extended opener adds additional damage before your main combo begins, creating the strongest possible engagement initiation.
Target Priority and Matchup Considerations
Optimal Targets
Daredevil excels at eliminating low-health, high-priority targets. Support heroes represent his ideal prey because:
- They typically have lower health pools that his burst combo can eliminate completely
- They often lack mobility tools to escape once you've grappled them
- Eliminating supports provides high value for your team by removing healing and utility
Strategists and other squishy damage dealers also fall into this category. Your goal is to identify isolated or vulnerable high-value targets and execute your elimination combo before they can receive support from teammates.
Challenging Matchups
Tank heroes present difficulties for Daredevil because:
- Their large health pools require extended engagements using the sustained damage rotation
- Extended fights give enemy teams more time to respond and peel you off the target
- Daredevil's damage output is better suited for burst elimination, not sustained tank pressure
While you can fight tanks using the extended combo pattern, your effectiveness drops significantly compared to targeting squishier heroes. When possible, avoid committing to tank duels unless you have teammate support or the tank is already critically wounded.
Grapple Accuracy Techniques
Predictive Aiming
Because the grapple lets you make mid-flight tracking adjustments, you don't need to predict enemy movement as precisely as you would with projectile-based abilities. Starting with accurate initial aim reduces the amount of correction needed though.
When targeting enemies:
- Anticipate their movement direction based on their current velocity
- Aim slightly ahead if they're moving laterally
- Adjust during grapple travel if they change direction
Correction Window
The tracking adjustment window exists from the moment you fire the grapple until it either:
- Contacts terrain or obstacles
- Reaches maximum extension distance
- Connects with a target
Practice recognizing this window duration so you know how much time you have for corrections. Against highly mobile enemies who dash or blink away, immediately move your crosshair to their new position within this window.
Hitbox Visualization
The crosshair designs recommended earlier help visualize the effective area where your grapple can connect. The large arrow design shows the approximate hitbox size, while the dot provides a precise center reference. Choose based on whether you prefer seeing the full hitbox area or having minimal visual obstruction.
Common Mistakes and Problem Areas
Melee Timing Errors
The most frequent combo execution error is rushing through melee attacks without letting both hits connect. Each melee input delivers two strikes, but if you immediately press the next ability before the second hit lands, you lose damage and risk not securing eliminations on support targets.
Solution: Develop a rhythm that accounts for the double-hit timing. There's a brief pause between the two melee strikes. Wait for both before continuing your combo.
Primary vs Melee Confusion
Using primary attack during combos instead of the dedicated melee button breaks your ability sequence. Primary attack has a four-hit animation that takes longer to complete and doesn't cancel into abilities the way melee does.
Solution: Mentally separate primary attack (used for basic damage and charge building) from melee (used specifically within combos between abilities). They serve different purposes and aren't interchangeable.
Grapple Overcommitment
Grappling into unfavorable situations (multiple enemies, no escape route, target near full health with team support) leads to quick deaths. Daredevil commits fully to engagements once he grapples in.
Solution: Assess target isolation and health before committing. Use Radar Sense to check for nearby enemies before engaging. Make sure your combo has kill potential before initiating.
Charge Management
Forgetting to monitor your Devil's Chain charge during fights can disrupt your rotation. If you try to activate Devil's Chain before it's charged, you interrupt your damage flow while waiting for it to become available.
Solution: Track your charge bar visually during basic attack phases. Once it fills, prioritize using Devil's Chain immediately to start your next ability cycle.
- Exceptional burst damage against low-health targets
- Radar Sense provides unmatched awareness
- Strong deflection ability counters projectiles
- Mobile wall-climbing capabilities
- No cooldowns on most abilities
- Limited vision range creates awareness challenges
- Struggles against high-health tank heroes
- Combo execution requires precise timing
- Vulnerable during extended engagements
- High skill floor for new players
Skill Development Path
Beginner Focus
If you're new to Daredevil, prioritize these fundamentals:
- Grapple Accuracy: Practice landing grapples consistently before attempting complex combos. Use the training range to get comfortable with the tracking adjustment mechanic.
- Basic Combo: Master the low-health target elimination combo (grapple → melee → Righteous Cross → Devil's Chain → melee → Righteous Cross). Execute this sequence until it becomes automatic.
- Target Selection: Focus on identifying isolated support heroes as your primary targets. Avoid fighting tanks or engaging in the middle of enemy groups.
- Crosshair Comfort: Try both recommended crosshair options to determine which feels more natural. Stick with one choice to build consistent muscle memory.
Intermediate Development
Once comfortable with basics, add these elements:
- Melee Weaving: Practice inserting melee attacks between abilities without timing errors. Focus on waiting for double-hits to complete.
- Sustained Rotation: Learn the extended combo pattern for high-health targets. Practice the charge generation and ability cycling rhythm.
- Radar Sense Usage: Actively use Radar Sense to track enemies through walls before engaging. Make decisions based on enemy positioning and teammate locations.
- Escape Recognition: Develop awareness of when fights aren't winnable. Recognize situations where you should disengage rather than commit.
Advanced Techniques
Experienced players should refine these aspects:
- Maximum Damage Openers: Incorporate the F ability → dash → grapple sequence for highest burst damage potential.
- Deflection Timing: Use Objection strategically to block key enemy abilities and ultimates, not just as panic defense.
- Micro Adjustments: Consistently land grapple corrections on highly mobile enemies who use dashes and blinks mid-flight.
- Combo Speed: Execute the full elimination combo as quickly as possible while maintaining accuracy. Speed increases pressure and reduces enemy response time.
Why These Settings and Approaches Work
Crosshair Philosophy
Complex crosshairs serve ranged heroes who need precise aim at various distances. Daredevil operates at melee range where traditional aiming plays a minimal role. The recommended crosshairs provide necessary information (grapple positioning) without cluttering your view of Radar Sense information, which is more critical for Daredevil's decision-making than precise aim.
Color Contrast Importance
Daredevil relies on visual information processing more than most heroes due to Radar Sense. The purple/pink visual effects occupy significant screen space during passive ability usage. Any elements that blend with these colors (red enemy outlines, complex red crosshairs) reduce your ability to quickly process the battlefield. White crosshairs and yellow enemy outlines create maximum contrast, allowing instant target recognition.
Combo Structure Logic
The ability rotation follows a specific logic: abilities that activate together or amplify each other are chained sequentially, while melee attacks are inserted during ability cooldowns to add damage without disrupting the rotation flow. Devil's Chain and Righteous Cross form a powerful combination used repeatedly, with basic attacks serving as the bridge to rebuild resources between these high-damage windows.
Target Priority Rationale
Daredevil's burst-damage profile and commitment-heavy engagement style make him ideal for assassination gameplay. Eliminating high-value, low-health targets provides maximum team impact while playing to his strengths. Tank fighting exposes his weaknesses (lower sustained damage, vulnerability during extended engagements) while providing lower value even if successful.
Settings Summary
Final Recommendations
Start with the simpler dot crosshair and yellow enemy outline settings. These provide immediate visibility improvements with minimal adjustment period. Practice the basic elimination combo in training mode until you can execute it consistently without thinking about the button sequence.
Once comfortable with fundamentals, experiment with the arrow crosshair if you want more visual information for grapple tracking. Add the advanced combo openers and sustained rotation patterns as your mechanical skill improves.
Daredevil succeeds through target selection as much as mechanical execution. Even perfect combo execution won't overcome poor engagement choices. Use Radar Sense to identify vulnerable targets before committing, and prioritize high-value eliminations over extended tank fights.
The settings recommendations here provide optimal visibility and control, but personal preference matters. If certain aspects feel uncomfortable, adjust them incrementally rather than reverting entirely. The core principles (minimal crosshair complexity, contrast-focused colors, responsive mouse settings) remain valuable regardless of specific value tweaks.
With proper settings configuration and dedicated practice, Daredevil becomes one of the most rewarding Duelists in Marvel Rivals. His unique mechanics create a high skill ceiling that separates good players from great ones, making mastery deeply satisfying for those willing to invest the time.