
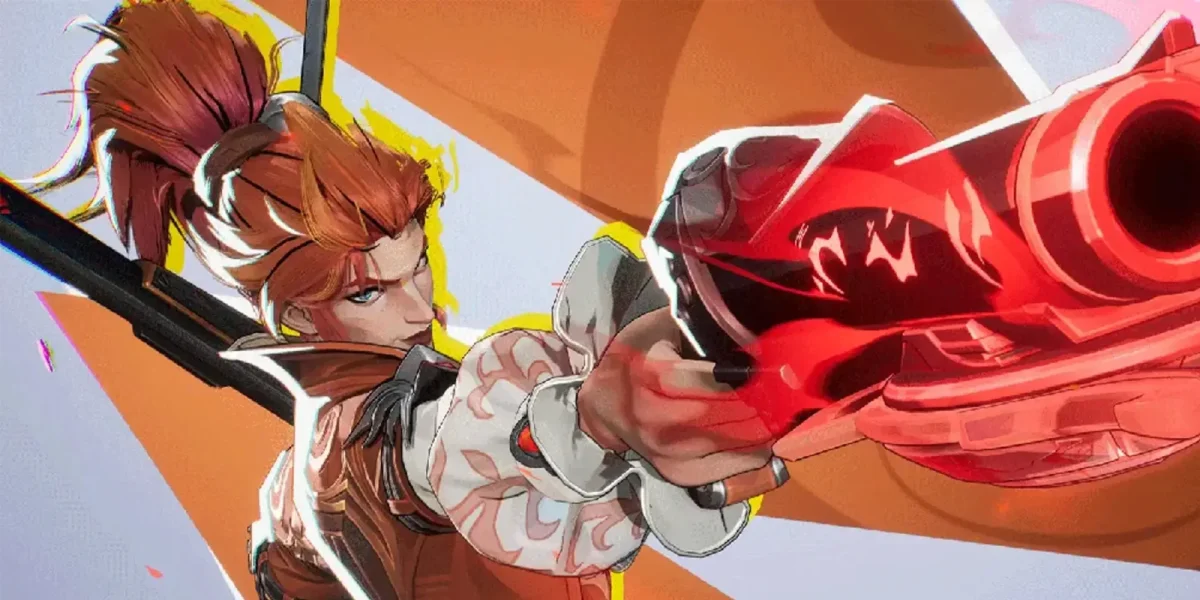
Elsa Bloodstone joined Marvel Rivals in Season 6.5 as a Duelist built around aggressive burst damage and monster-hunting flair. Armed with two firearms, creature abilities, and a kit that rewards constant aggression, she's one of the more satisfying characters to play once you get her rhythm down.
This guide covers her full ability kit, combos, team compositions, counters, and the gameplay strategies you need to start fragging out with Elsa.
As a Duelist, Elsa's job is straightforward: deal damage and secure kills on high priority targets. She's not here to tank hits like a Vanguard or keep teammates alive like a Strategist. She's here to delete the enemies giving your team the most trouble. With only 275 HP though, she's pretty squishy, so good positioning and smart use of her mobility tools matter just as much as raw aim.
Her kit looks simple on the surface, but there's real depth in how her weapon switching, movement abilities, and creature tools feed into each other. Learning those connections gives you access to some seriously punishing burst windows.
Ability Breakdown
Elsa's abilities draw from both her genetic inheritance and the mystical Bloodstone itself. She's a skilled marksman who fights with multiple weapons, and her kit revolves around two main ideas: switching between a shotgun and an elephant gun depending on range, and using movement abilities to power up her next shot. Her creature companions add trapping and crowd control on top of the gunplay.
Double Barrel Blaster (Left Click)
Elsa's default weapon is a shotgun that fires in a spread pattern at close range. It holds 8 shells before you need to reload, and it puts out solid damage up close. This is the gun you'll always start with and return to between ability casts. It hits hard in tight quarters but doesn't have the range or piercing power of her elephant gun.
Monster Piercer (Left Click, Conditional)
This is Elsa's elephant gun, a long range powerhouse that pierces through multiple enemies and can chew through several health bars. You don't have free access to it at all times, though. Instead, you get a single Monster Piercer shot after using certain abilities, and it expires after roughly 6 seconds if you don't fire.
Since Monster Piercer hits significantly harder and pierces through targets, triggering it as often as possible is the core of Elsa's damage output. Her entire gameplay rhythm comes down to cycling movement abilities so you always have an empowered shot ready.
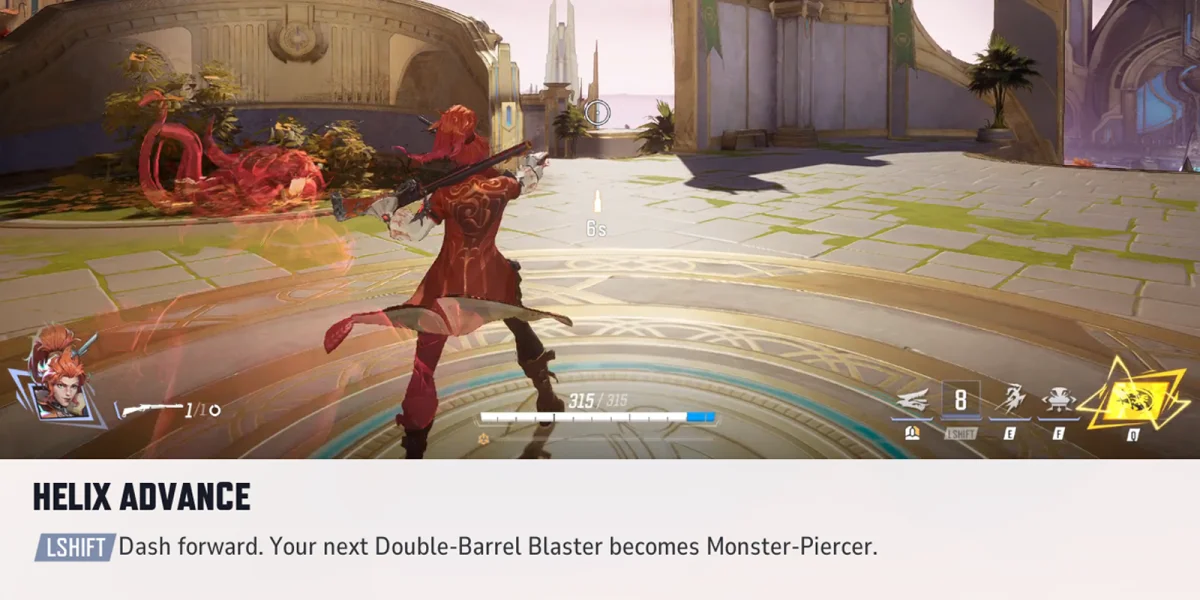
Helix Advance (Shift) - 3 Second Cooldown
A forward dash that transforms your next Double Barrel Blaster shot into a Monster Piercer round. This is Elsa's main mobility tool and the ability most directly tied to her damage loop.
The base cooldown sits at 3 seconds, which is already short. It gets even shorter through her passive, Inherited Instinct (more on that below). Once you've stacked enough Instinct, Helix Advance comes back so fast that you can chain dashes and empowered shots in rapid succession.
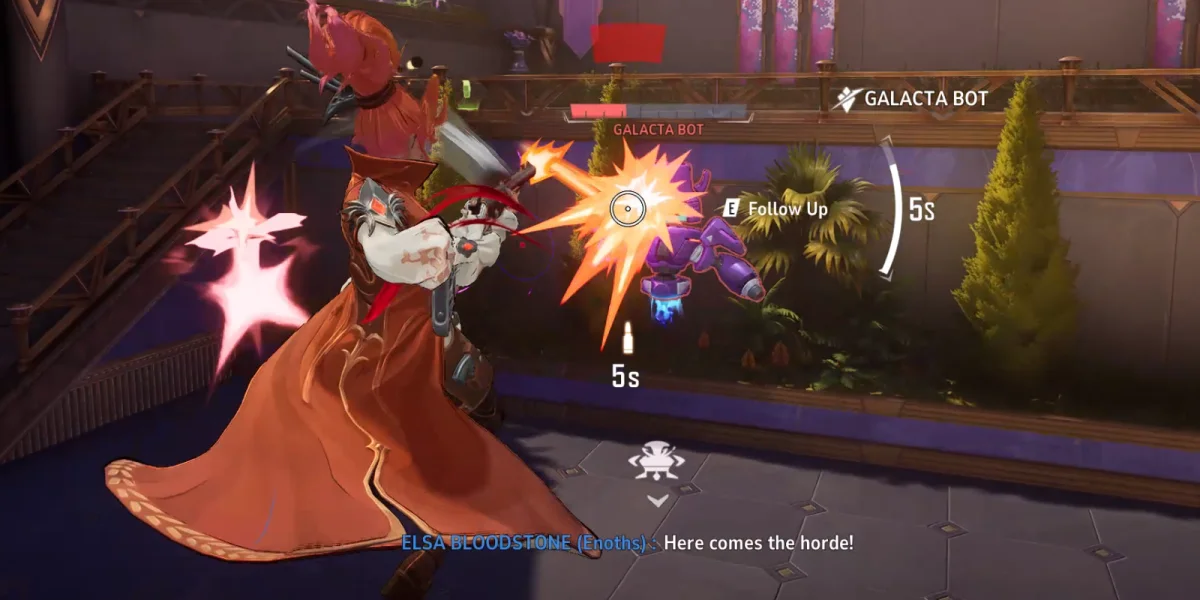
Ruthless Pursuit (E) - 8 Second Cooldown
A two stage ability that works as both an engagement tool and a combo starter.
Stage 1: Elsa dashes forward, gains Bonus Health, and launches enemies she hits into the air. This uppercut launch disrupts targets and leaves them completely vulnerable for a few seconds, opening the door for follow up combos.
Stage 2 (Reactivation): After the initial dash, you can reactivate the ability to fire a Double Barrel Blaster shot. This shot propels Elsa backward and applies a Slow to enemies hit.
Both stages empower your next primary attack, transforming it into Monster Piercer. So the full sequence plays out like this: the launch disrupts your target's positioning, the follow up slows them, the backward propulsion creates distance for safety, and the resulting Monster Piercer shot lands heavy damage. It's a natural combo starter that flows directly into Elsa's burst rotation.
Smoky Snare (F) - 12 Second Cooldown
Smoky Snare tosses out a trap containing the monster Diablo. Once you place it, the trap goes invisible and invulnerable, so enemies can't spot or destroy it before walking into it.
When someone triggers the trap, Diablo activates and immobilizes them while dealing damage over time. You can also dash directly to Diablo's location to pile on damage while the enemy is stuck. They can break free by destroying Diablo, so you need to move fast once you see the trap go off. Don't hesitate.
Living Bullet (Right Click) - 8 Second Cooldown
Living Bullet fires a projectile that splits on impact and sends smaller rounds seeking nearby enemies. Each enemy hit by the split projectiles gets marked with a Spectral Sigil.
Landing a Double Barrel Blaster or Monster Piercer shot on a marked target gives Elsa a brief speed boost, which is great for keeping up pressure and repositioning between fights. Living Bullets also deal extra damage to shields and Bonus Health, making the ability especially effective against Vanguards and other tanky heroes. In group fights, firing one into a cluster of enemies marks multiple targets at once, giving you speed boosts from every follow up shot you land.
Inherited Instinct (Passive)
This passive is the engine behind Elsa's aggressive playstyle. As you deal damage, your Hunting Instinct meter fills up (visible just below the health bar). The meter has three bars, and the more you fill, the shorter Helix Advance's cooldown becomes. At max Instinct, you can chain dashes and Monster Piercer shots at a ridiculous pace, creating a snowball effect where damage fuels more damage.
A few important details:
- Any damage you deal fills the meter
- Killing enemies caught by Smoky Snare gives extra Instinct
- Securing an elimination instantly fills one of the three bars
- Dying resets all Instinct stacks to zero
Apex Predator (Q) - Ultimate
Elsa's Ultimate summons a massive creature called the Glartrox that charges forward in a straight line. Any enemies in its path get bitten, grabbed, and dragged along, completely locked out of attacking or escaping.
When the Glartrox slams into terrain like a wall, it delivers a devastating bite that deals heavy damage to everyone it's carrying.
The Recall: Pressing Q again while the Glartrox is active sends it charging back toward Elsa with any captured enemies still in tow. Once it reaches you, it slams them down and bites, dealing heavy damage and giving you a clean opening to unload your combo.
- The Glartrox keeps going until it hits a wall, so open areas let it travel further and drag enemies longer
- If you walk backward while recalling it, the creature chases your position, which can drag enemies an enormous distance across the point (as long as nothing blocks the path between you and the Glartrox)
- You can still shoot enemies while they're being dragged, so don't just stand and watch
- Aiming toward a cliff or map edge can score environmental kills, since captured enemies get tossed off the boundary (similar to Jeff the Land Shark's Ultimate)
- To isolate a target, send the Glartrox out to grab someone, then recall it to drag them back to your team for a quick elimination
How to Play Elsa Bloodstone
Understanding the Role
Elsa is a burst Duelist who switches between weapons on the fly. She has strong mobility that lets her dart in and out of fights, and she's dangerous at both close and long range.
Mobility is her bread and butter. Every dash doesn't just reposition her; it also switches her to the elephant gun for one empowered shot. That connection between movement and damage drives everything she does.
Her core gameplay loop looks like this:
- Use a movement ability (Helix Advance or Ruthless Pursuit) to unlock a Monster Piercer shot
- Fire the empowered shot for big damage
- Deal damage to fill Inherited Instinct, which reduces Helix Advance's cooldown
- Repeat
The longer you keep this loop going without dying, the faster it cycles and the more lethal you become.
Positioning Above Everything
With 275 HP and no self sustain outside of her Team Up, Elsa goes down fast when she's caught in the open. Learning when to engage and how to initiate are the two most important skills for any Elsa player, and her dash abilities tie both together.
Helix Advance and Ruthless Pursuit work as both engagement tools and escape tools. The backward propulsion from Ruthless Pursuit's second stage is particularly good for creating space after you commit to a fight. Use it to get out before the enemy team can collapse on you.
Elsa doesn't want to sit in extended brawls against melee characters. She thrives on dashing in, dumping burst damage, and getting out before enemies can hit back. If you're standing still and trading shots for more than a couple of seconds, something has gone wrong.
Core Combo
Elsa's combo centers on the Ruthless Pursuit uppercut, which launches an enemy and opens a chain window. Focus on keeping weapon switches active throughout the sequence, since Monster Piercer only comes online after movement abilities. Here's the full input sequence:
Full Burst Combo Sequence
F (optional) > E > Left Click > Reactivate E > Left Click > Right Click > Shift forward > Left Click > Finish with basic shots. This takes practice. Weapon switching happens automatically based on ability usage, so you need to feel out the timing for each shot. Spend some time in the practice area to build muscle memory before bringing it into real matches.
Step by step:
- F (Smoky Snare, optional): If a nearby trap has been triggered, dash to the trapped enemy to start. This step is situational.
- E (Ruthless Pursuit, Stage 1): Dash forward and uppercut the enemy into the air. This opens the combo.
- Left Click: Fire your Monster Piercer shot (granted by Ruthless Pursuit).
- Reactivate E (Ruthless Pursuit, Stage 2): Fire the follow up blast that propels you backward and slows the target. This also grants another Monster Piercer shot.
- Left Click: Fire the second Monster Piercer.
- Right Click (Living Bullet): Mark the target with a Spectral Sigil for speed boosts on your next hits.
- Shift (Helix Advance): Dash forward again, granting a third Monster Piercer.
- Left Click: Fire the third Monster Piercer.
- Clean up with basic Double Barrel Blaster shots.
Building and Maintaining Hunting Instinct
The Instinct meter below your health bar is critical to how effective Elsa feels in a match. To fill it up quickly:
- Deal damage constantly with both weapons
- Alternate between guns to maximize burst output
- Go for final hits on enemies whenever you can (kills instantly fill one of three bars)
- Kill enemies caught by Smoky Snare for bonus Instinct
There's a real tension here between aggression and survival. You want to push hard to build Instinct, but overextending and dying erases everything you've built. Finding that balance is what separates good Elsa players from great ones.
Advanced Tips and Strategies
Go After Vanguards First
Elsa is one of the better Duelists for shredding tanky frontliners. Living Bullets deal extra damage to shields and Bonus Health, so heroes like Venom who depend on those mechanics are prime targets.
Taking down the bulkiest enemy on the other team plays to Elsa's strengths and rips open the frontline so your teammates can reach the squishier targets hiding behind it.
Smart Smoky Snare Placement
Drop your traps on contested objectives, high traffic chokepoints, and the flanking routes enemies are most likely to use. Since the trap goes invisible after you place it, there's no way for enemies to know it's there unless they've spotted you placing it.
Once it triggers, react immediately. Dash to the trapped enemy and start dealing damage before they can destroy Diablo and break free. The immobilize window is short, so don't wait.
On defense, placing Smoky Snare on a flanking path behind your team can catch overaggressive enemies trying to get behind your formation. It buys your team time to turn and deal with the threat.
Headshots Make or Break Your Damage
Just like with Hawkeye, Hela, or Black Widow, consistently hitting heads makes a massive difference on Elsa. This matters most with Monster Piercer shots, where the gap between a body shot and a headshot can decide if a target dies or escapes with a sliver of health.
Getting the Most Out of Your Ultimate
Environmental Kills: Aim the Glartrox toward map edges or cliffs. Any enemy it captures gets tossed off the boundary when the creature reaches the edge.
Isolating Key Targets: Send the Glartrox into the enemy team to grab whoever is causing the most problems, then recall it to drag them back to your squad. From there, your team can pile on for a quick kill.
Combo Follow Ups: After recalling the Glartrox, immediately use Helix Advance or Ruthless Pursuit to get a Monster Piercer shot ready. Firing Living Bullets at this point is also strong, since the split projectiles will bounce off multiple damaged targets, marking them for speed boosts and potentially finishing off anyone at low health.
Defensive Use: The Glartrox's forward charge pushes enemies far from your team. You can use this to clear an objective or create breathing room when a fight is going badly.
The Extended Drag: If you walk backward while recalling the Glartrox, it chases your position and drags enemies further across the map. As long as no obstacles block the path, this stretches the lockdown duration and gives your team more free damage time while you keep shooting the dragged targets.
Best Team Compositions
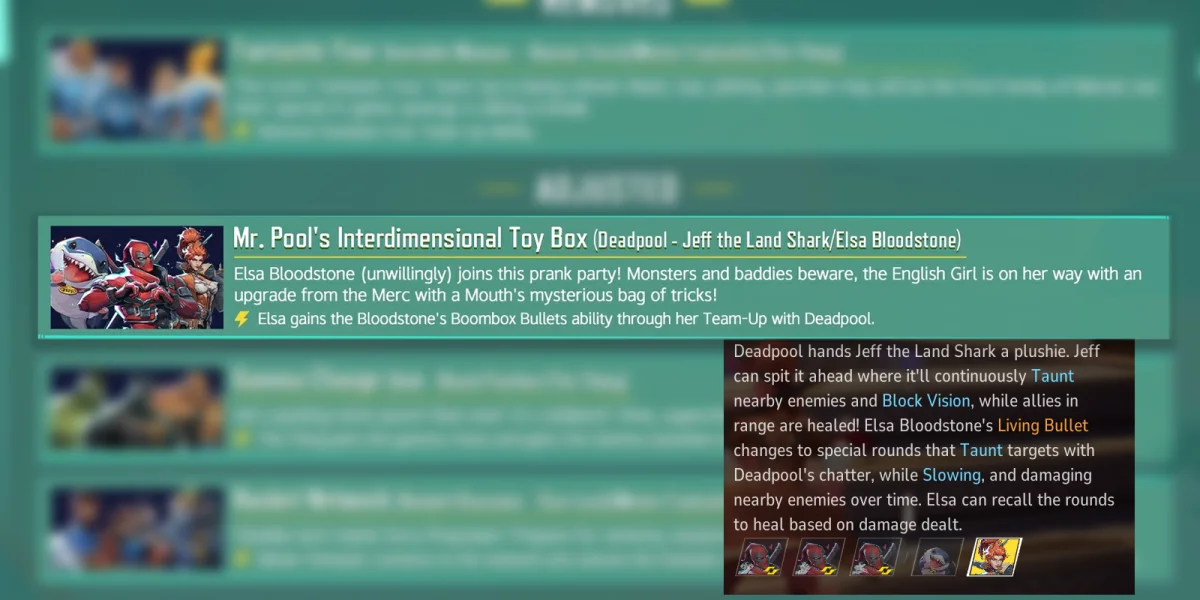
Team Up: Bloodstone's Boombox Bullets
Elsa's only current Team Up is with Deadpool and Jeff the Land Shark, plugging into the existing "Mr. Pool's Interdimensional Toy Box" Team Up.
Elsa's side (Bloodstone's Boombox Bullets): Her Living Bullets transform into special rounds that Taunt targets with Deadpool's chatter, making parts of the affected enemy's UI almost impossible to read. These enhanced bullets also Slow and damage nearby enemies over time. Elsa can also recall the bullets to heal herself based on damage dealt, which is one of her only ways to recover health on her own.
Jeff's side of the Team Up: Jeff gets a special healing field plushie he can place down. It sprays healing water that heals allies and damages enemies at the same time, while taunting affected enemies to blind them.
Recommended Teammates
A few heroes work especially well alongside Elsa:
| Hero | Synergy |
|---|---|
| Deadpool | Required for the Team Up. The Taunting and Slowing effects from enhanced Living Bullets add a ton of crowd control, and the self heal from recalling bullets helps cover Elsa's biggest weakness. |
| Jeff the Land Shark | Completes the Team Up and brings healing plus his own crowd control. Having Jeff on your team also means the enemy can't use their own Jeff to counter your Glartrox Ultimate. |
| Moon Knight | His bouncing darts and Elsa's Living Bullets both hit multiple enemies. Together, they give your team strong multi target DPS in group fights. |
| Peni Parker | Brings web snares and mines that stack with Elsa's Smoky Snare. Running both creates a minefield of trapping threats that punishes any enemy who pushes too hard. |
| Mantis | Offers a damage boost that can push Elsa's Monster Piercer into one shot range against certain targets. With Mantis buffing her, the elephant gun becomes absolutely deadly, even against tankier heroes. |
How to Counter Elsa Bloodstone
Knowing Elsa's weaknesses helps whether you're playing against her or trying to shore up your own vulnerabilities while playing as her.
Her biggest problems are a low health pool (275 HP), no self sustain without the Deadpool Team Up, and a rough time in close range melee duels. She also needs enemies on the ground for her best combos to connect, so airborne or highly mobile characters give her trouble.
| Counter Hero | Why They Counter Elsa |
|---|---|
| Blade | Tears through Elsa at close range. His melee combos hit fast and hard, and Elsa can't sustain through a prolonged fight. This is one of her worst matchups. |
| Deadpool | Can shred through targets regardless of health pool size, and Elsa's 275 HP doesn't last long. His mobility lets him close the gap quickly, too. |
| Hawkeye | Matches or outranges Elsa and brings burst damage plus a stun trap. He can catch her before she has time to react and overpower her from distance. |
| Spider-Man | A nightmare for Elsa because her combos rely on grounded targets. Spidey's constant swinging and aerial movement make him incredibly hard to pin down, and she'll struggle to land clean combo chains against him. |
| Jeff the Land Shark | Has an Ultimate that directly shuts down the Glartrox. Jeff can swallow it mid charge, then spit out any teammates it had captured, completely wiping out Elsa's Ultimate value. |
Quick Reference Summary
- High burst damage through Monster Piercer chains
- Strong anti-tank tools via Living Bullets
- Creature crowd control with Smoky Snare and Glartrox
- Snowballing Instinct passive rewards aggressive play
- Low HP (275) with no built in self sustain
- Vulnerable to melee brawlers in close range
- Loses all Instinct stacks on death
- Combos rely on grounded targets