
Cracking Ultron's Code on Arakko
Welcome to Arakko, The Corrupted Isle
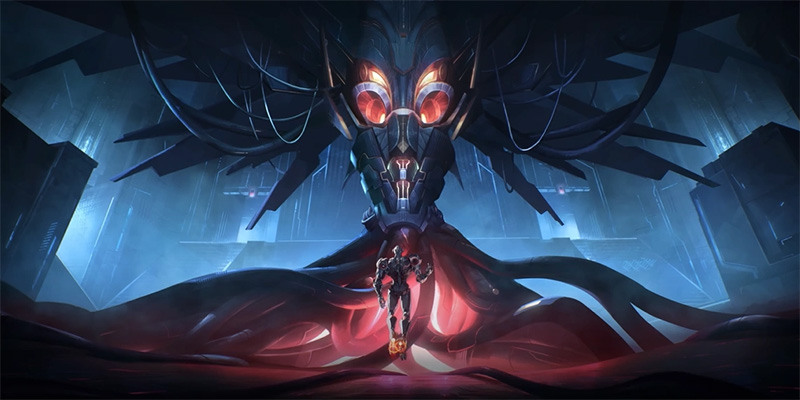
Arakko, the latest Convoy map introduced to Marvel Rivals in Season 2.5, presents a formidable challenge to even seasoned players. This battleground is steeped in lore, once the vibrant sister island to Krakoa, now twisted by the villainous Ultron into a "cold, merciless, mechanical world" devoid of its natural vitality. This transformation is immediately apparent in its visual design, a stark landscape dominated by Ultron's signature aesthetic: imposing metal walls, pervasive machinery, and an omnipresent, ominous red glow. This thematic choice by Ultron to create an almost sterile, repetitive environment is not merely cosmetic; it directly contributes to one of the map's primary gameplay hurdles – player disorientation.
A Map of Contrasts
Player reception to Arakko has been notably mixed. While some appreciate the unique visual themes that align with Ultron's takeover, many find it to be one of the most confusing maps in the game. The "samey" architecture and a distinct lack of memorable landmarks frequently lead to players feeling lost, struggling to navigate its metallic corridors or rejoin their teams after an elimination. This difficulty in wayfinding is a direct consequence of the map's lore-driven design. However, for those willing to delve into its complexities, Arakko offers a rewarding experience, as mastery of its intricate layout can provide a significant tactical edge. The map's full title, "Hellfire Gala: Arakko," evokes a stark contrast. The Hellfire Gala is traditionally a symbol of mutant prosperity and celebration. Its association with Arakko's current corrupted, lifeless state underscores a narrative of loss and sets the stage for a player-driven reclamation, a theme subtly reinforced by in-game mechanics.
Mastering Arakko's Chaos
This guide aims to demystify Arakko, providing clear, actionable strategies to navigate its challenging terrain, understand its unique environmental mechanics, and ultimately dominate its Convoy objectives. The inherent confusion of Ultron's design can be overcome, and its complexities can be transformed into tactical advantages with the right knowledge and approach.
Terraform and Environmental Intel
The Avatar of Krakoa's Journey
Arakko utilizes the Convoy game mode. The attacking team's primary goal is to escort the payload, known on this map as the "Avatar of Krakoa," through two crucial checkpoints. Their journey culminates at the final destination: the Great Ring. Defenders, conversely, must use every tactical advantage to halt this progression. Standard Convoy mechanics apply: the Avatar moves faster when more attackers are in its vicinity, and while defenders can push the payload backward by recapturing it, they cannot regress it beyond an already secured checkpoint.
The "Digital Ecosystem" Awakens
A key environmental mechanic on Arakko is tied to the "Digital Ecosystem" achievement. As the attacking team successfully captures each checkpoint, a terraforming process initiates, visually restoring pockets of vegetation to Ultron's mechanical landscape. Players will observe an animation signifying this change, with trees sprouting and grass spreading across the metallic surfaces.
This transformation is more than just a visual flourish. The restored vegetation can subtly alter the battlefield by creating new forms of cover, potentially obscuring previously clear sightlines, or opening up new, unexpected angles of attack. Attackers progressively benefit from this shift towards more "natural" cover, which might favor heroes adept at utilizing softer concealment or breaking line-of-sight. Defenders, in turn, must remain vigilant and adapt their defensive postures to this evolving environment. This dynamic rewards the attacking team's progress with a tangible, albeit subtle, shift in the map's tactical balance, moving from hard, predictable angles to a more varied playspace.
The "Lava Hazard" Debrief & Other Dangers
The actual environmental hazards on Arakko are more passive but equally lethal:
- Death Pits/Lethal Passageways: Numerous locations exist where an unwary hero can fall to their demise. These pits are often not clearly demarcated visually, making map awareness paramount. These static hazards rely on player error or forced displacement rather than timed map events, contrasting with active threats like lava.
- Confusing Corridors: While not a direct damage source, the labyrinthine and repetitive nature of Arakko's corridors can easily lead to players becoming isolated, out of position, or ambushed. This inherent disorientation is a constant environmental pressure.
Destructible Environments: The Robot Wailing Wall
A significant interactable element on Arakko is the "Robot Wailing Wall". Its precise location has slightly varied descriptions: some sources place it as easier for defenders to find, located after the second checkpoint for attackers, while another mentions it under a bridge near the third attacker spawn, primarily for the "Whispers in Pieces" achievement. Regardless of the exact pinpoint, its existence and function are key. Players can shatter the inactive robots mounted on this wall.
The strategic impact of destroying these robots is notable: it can open up entirely new pathways or significantly alter existing ones. This introduces a micro-objective that can dramatically shift late-game rotations and chokepoint dynamics. Teams with good map knowledge can coordinate the destruction of these robots to create unexpected flanking routes or bypass heavily defended areas, particularly crucial as defenders become more entrenched around the second and final checkpoints.
| Feature | Description & Location | How it Changes Gameplay | Strategic Use |
|---|---|---|---|
| Digital Ecosystem (Terraforming) | Triggered by Attackers capturing checkpoints. Vegetation (trees, grass) appears, altering the mechanical landscape. | Gradually introduces softer cover, potentially changing sightlines and engagement angles. | Attacker: Leverage new cover for safer advances. Defender: Adapt to evolving cover. |
| Robot Wailing Wall | Wall with destructible robots. Located after CP2 for Attackers/near Defender areas or under a bridge near final Attacker spawn. | Shattering robots can open new pathways or alter existing routes. | Both: Create surprise flank routes, bypass chokepoints, or force enemies through specific areas. |
| Death Pits | Various unmarked locations across the map where players can fall to their elimination. | Instant elimination for those falling in. Can be exploited with knockback abilities. | Both: Use abilities to knock enemies into pits. Maintain positioning awareness near edges. |
Checkpoint Strategies & Rotations
General Navigation: The Guiding Blue Line
Given Arakko's notorious "samey" architecture and lack of distinct landmarks, navigation can be a significant hurdle. A crucial tip for maintaining orientation is to look for the large blue path painted on the floor; this line runs throughout the entire map and can serve as a vital guide if players become disoriented.
Checkpoint 1: Teleporter Turmoil & The Initial Breach
The first section of Arakko leading to Checkpoint 1 is characterized by initial chokepoints and a network of teleporters. These teleporters are available to both teams and offer rapid transit across portions of this area.
- Rotations: Safe rotations involve sticking close to the payload and utilizing team cover. More aggressive rotations leverage the teleporters for surprise attacks or employ high-mobility heroes to secure off-angles. Reports suggest that "sneaky DPS divers" are particularly effective at breaching the first point, with heroes like Iron Fist or Adam Warlock capable of disrupting defensive formations.
- Attacker Focus: Coordinated pushes are paramount. Controlling teleporter exits and using dive compositions to break entrenched defenses can pave the way to capturing the checkpoint.
- Defender Focus: Holding natural chokepoints, maintaining vigilance over teleporter exits, and utilizing poke damage to stall the payload are key defensive strategies.
Checkpoint 2: The Bridge Barricade & High Ground Dominance
As teams approach the second checkpoint, a prominent central bridge becomes the focal point of conflict. This area often forces a strategic shift for the attacking team.
- Defender's High Ground: The second checkpoint inherently grants defenders a powerful central high ground position on the bridge. Controlling this bridge provides "a massive view to take down enemies" and is critical for effective defensive holds. Attackers cannot simply push the payload; they must address this vertical threat.
- Attacker Strategies for Seizing Control: Overcoming this defensive advantage requires coordinated efforts. This can involve focused dives onto the high ground, utilizing heroes with strong vertical mobility to access the bridge from unexpected angles, or employing long-range abilities to dislodge entrenched defenders.
- Flank Routes & Vulnerabilities: While Arakko's confusing layout can make flanking difficult, side paths may exist that offer angles onto the bridge or allow teams to bypass the main confrontation. However, these routes can be predictable if overused or lead to players becoming isolated. The proximity of the Robot Wailing Wall (if located after CP2 as per some sources) means its destruction could open vital new routes for attacking or defending this critical juncture.
Final Checkpoint: Storming the Great Ring
The final push to the Great Ring is arguably Arakko's most challenging phase for attackers.
- Layout Overview: The path narrows, and defensive positions become more concentrated.
- Attacker Focus: Success often hinges on decisive, ultimate-heavy engagements. The goal is to quickly eliminate defenders and maintain a strong presence on the payload. Coordinated team-wipe scenarios or abilities that can zone out respawning defenders for crucial seconds are often necessary.
- Defender Focus: Defenders should leverage their short spawn distance for rapid re-contests, staggering their deaths to maintain a constant defensive line. Focus firing attackers on the payload is essential.
- Robot Wailing Wall (Alternate Location): If the Robot Wailing Wall is located near the final attacker spawn, as one source suggests ("Immediately after leaving attacker spawn [presumably for the 3rd point] you come across a bridge...Under the bridge...destructible robot bodies"), breaking these could provide crucial, last-minute alternative pathways for the final assault.
| Checkpoint | Key Feature(s) / Hazard | Attacker Focus | Defender Focus | Pro Tip / Key Hero Archetype |
|---|---|---|---|---|
| Checkpoint 1 | Multiple teleporters for both teams; can be disorienting. | Control teleporter exits; coordinated dives; utilize flankers. | Hold chokepoints; watch teleporter exits; poke damage to stall. | Divers/Flankers (e.g., Iron Fist, Adam Warlock). Master teleporter routes to avoid disorientation and create surprises. |
| Checkpoint 2 | Defenders gain strong central high ground (bridge). | Seize high ground control; vertical assaults; dislodge defenders with range. | Maintain bridge control; utilize sightlines; watch for flanks. | Vertical Mobility/Ranged DPS (e.g., Pharah-like heroes, snipers). Must neutralize or capture the high ground. |
| Final Checkpoint | Extremely close defender spawn to the objective. | Decisive, ultimate-heavy pushes; quick eliminations; maintain payload presence. | Rapid re-contests; stagger deaths; focus fire on payload pushers. | Burst Damage/Area Denial Ultimates (e.g., heroes with team-wipe potential). Overwhelm defenders before they can respawn. |
Arakko Must-Know Survival Tips
Navigating the "Sameness": Finding Your Way
The "samey" architecture and lack of obvious landmarks are persistent challenges on Arakko. Beyond relying on the "blue path" on the floor, players should actively work to create their own mental maps. This involves learning callouts for even minor features (e.g., "the Wailing Wall tunnel," "the teleporter near the broken pillar"). While initially a hindrance, mastering Arakko's subtle differences can turn the confusing layout into an advantage, allowing knowledgeable players to exploit the disorientation of others who have not invested the time to learn the map's intricacies.
Effective Flanking (and Countering It): The Art of Surprise
Arakko's design, with its "many platforms and alleyways," theoretically offers opportunities for flankers and flyers to apply pressure. However, the confusing layout is a double-edged sword: it can aid sneaky maneuvers but also lead to flankers getting lost or cut off from their team. Some players have even found traditional horizontal flank routes to be "useless".
Effective flanking on Arakko may rely less on long, telegraphed routes and more on exploiting verticality and the brief windows of opportunity created by chaotic engagements, teleporter usage (especially around Checkpoint 1), or newly opened paths via the Robot Wailing Wall. For flankers, learning specific, less-obvious vertical routes, communicating intent, and having clear escape plans are crucial. To counter flanks, teams should maintain awareness, utilize heroes with area denial (like Peni Parker's nests covering entry points), or employ detection abilities. The map is often described as favoring "sneaky DPS divers".
Controlling Verticality: Masters of the High Ground
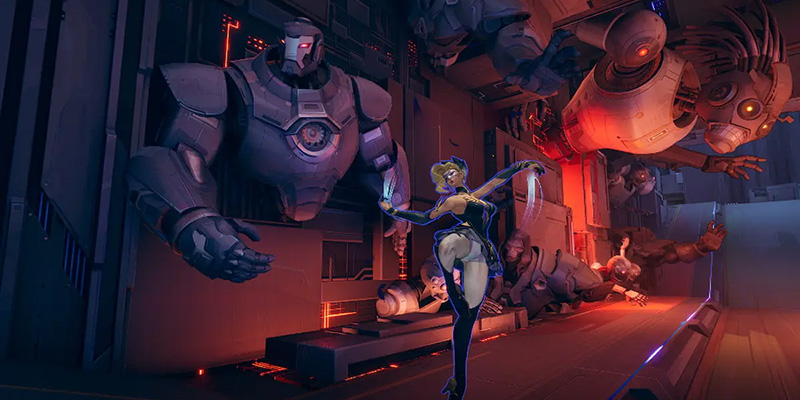
Arakko features significant vertical elements, including the "central high ground" at Checkpoint 2 and generally a "good amount of vertical height" throughout. Heroes possessing flight (like Iron Man or Ultron), enhanced jumps (Hulk), or grappling abilities (Spider-Man) can gain substantial advantages by accessing and controlling these elevated positions. High ground offers superior sightlines for dealing damage and providing support, often dictating the flow of engagements. However, even for highly mobile heroes like Spider-Man, the map can present challenges due to its combination of open spaces and narrow sightlines, which can make effective maneuvering difficult.
Exploiting Destructibles: More Than Just Rubble
The primary known destructible element that significantly alters pathways is the Robot Wailing Wall. Teams should prioritize understanding its locations and the strategic advantages gained by its destruction. While other minor pieces of cover might be destructible, the Wailing Wall offers the most impactful environmental alteration currently detailed for Arakko.
Team Composition Considerations
While general hero tier lists exist, map-specific viability is key on Arakko. Archetypes that tend to thrive include:
- Divers/Flankers: Essential for navigating Arakko's complex routes and disrupting enemy formations, especially at Checkpoint 1.
- Vertical Mobility Heroes: Crucial for contesting and controlling the numerous high-ground positions, particularly around Checkpoint 2.
- Area Control/Denial: Useful for managing chokepoints, teleporter exits, and denying space to the enemy (Peni Parker's strategic nest placement is a good example).
Conversely, some heroes may struggle. For instance, some Spider-Man players have voiced frustration with the map's layout, finding it difficult to utilize his kit effectively despite his mobility. This highlights how player experience and hero choice heavily influence the perception of Arakko's design, perhaps more so than on more straightforward maps.
- Dive heroes with high mobility
- Vertical mobility specialists
- Area denial controllers
- Heroes with teleportation abilities
- Ground-locked heroes without mobility
- Heroes relying on clear sightlines
- Long-range specialists in cramped areas
- Heroes dependent on landmark navigation
Becoming an Arakko Apex Player
Key Intel for Arakko Domination
Mastering Arakko requires a specific understanding of its unique mechanics and layout. Key takeaways include: recognizing the terraforming changes at checkpoints initiated by attackers; mastering teleporter usage around Checkpoint 1; prioritizing high-ground control at Checkpoint 2; preparing for intense, attrition-based fights at the final point due to close defender spawns; strategically utilizing the destructible Robot Wailing Wall to create new pathways; and always using the blue floor line for orientation when lost.
The Path to Mastery: Practice and Adaptation
There is no substitute for experience. Players are encouraged to spend dedicated time on Arakko, perhaps utilizing custom games if available, to thoroughly learn its nooks, crannies, and routes. Adapting hero choices and team strategies to Arakko's distinct, and sometimes polarizing, design is paramount for success. While the map can be initially frustrating for many due to its confusing nature, familiarity will breed confidence and tactical competence. The strong community opinions on Arakko suggest that a player's attitude and willingness to learn its intricacies can significantly impact performance, potentially outweighing raw mechanical skill that might suffice on more intuitive maps.
Final Thoughts: Reclaim Arakko!
Arakko, in its Ultron-corrupted state, presents a unique battlefield. It challenges players to overcome not just their opponents, but an intentionally disorienting environment. For those who invest the effort to understand its rhythms, exploit its verticality, and navigate its mechanical maze, Arakko can transform from a source of frustration into a rewarding arena of strategic depth. Go forth, and reclaim Arakko from Ultron's metallic grasp.