
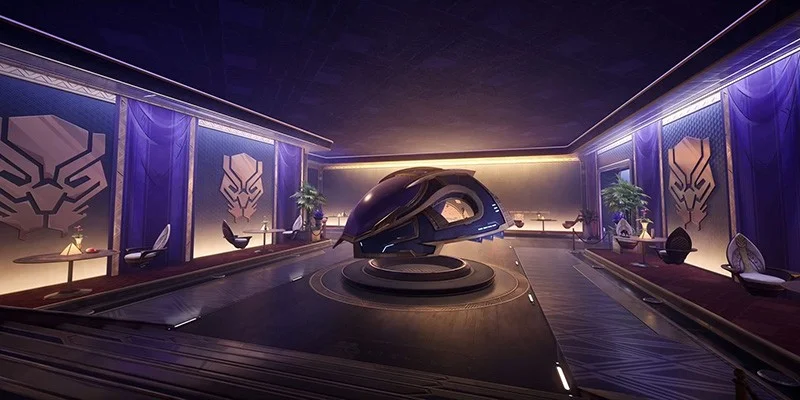
The Hall of Djalia stands as one of Marvel Rivals' most strategically diverse Convoy maps, set within the technologically advanced Intergalactic Empire of Wakanda. This battleground tells the story of Wakanda's cosmic expansion - from a single Vibranium meteorite that elevated the nation to greatness, they have now discovered the very source of that transformative material at the galaxy's heart. Despite their technological supremacy, Wakanda's true power remains rooted in the strength of its people.

Hall of Djalia operates as a Convoy-type map, distinct from Birnin T'challa (which uses Domination mechanics). Players frequently confuse these two Black Panther-themed maps, but understanding their differences is crucial for optimal performance. This comprehensive guide will equip you with the strategic knowledge needed to dominate every phase of this three-section battlefield.
Map Overview and Mechanics
Hall of Djalia follows the standard Convoy format, featuring three distinct phases that each require different tactical approaches:
- Capture Phase: Teams fight for initial control of the convoy objective
- Escort Phase: The attacking team must guide the payload through predetermined checkpoints
- Final Push: The convoy must reach its destination within the Hall itself
While Hall of Djalia represents the most straightforward of all Convoy maps in Marvel Rivals, this apparent simplicity masks numerous strategic opportunities and tactical nuances. Each section offers multiple approach routes, flanking opportunities, and defensive positions that can dramatically influence match outcomes.

Capturing the Convoy
Primary Battlefield Layout
The opening phase takes place in an expansive courtyard environment that immediately presents teams with multiple strategic options. This open-area design creates dynamic engagement opportunities while providing sufficient cover and alternative routes to prevent stagnant gameplay.
Attacking Route Analysis
Standard Approach (Primary Route)
The most commonly utilized path leads directly toward the objective through the central courtyard area. This route sees the highest player traffic in most matches, making it both the most contested and predictable option. While direct, this approach often results in intense team fights that can determine early momentum.
Stealth Flank (Left Side Route)
A more secluded pathway leads toward the edge building structure, offering attackers a concealed approach that significantly reduces defender visibility. This route's primary advantage lies in its ability to mask team movements, preventing defensive teams from making timely rotations or adjustments. The path provides multiple egress options once reaching the building perimeter.
Central Pressure Route (Garden Platform)
This intermediate path cuts through a garden-like elevated platform positioned between the spawn area and primary objective. While this route doesn't provide unique positional advantages, it places attackers in an optimal position to punish overly aggressive defenders who push beyond their established defensive lines during the opening engagement.
Right Side Pressure (Secondary Standard Route)
The second most popular attacking route wraps around the far right side of the spawn area, creating pressure on the objective from an eastern approach angle. This path connects directly to the central building structure, providing both immediate objective pressure and access to elevated positions for sustained engagements.
Advanced Tactical Considerations
Garden Platform Positioning
The garden platform route, while not immediately obvious to new players, creates excellent opportunities for punishing defensive overextension. Teams utilizing this route can establish crossfire positions with their primary force, creating multiple angles of attack that overwhelm defensive positioning.
Edge Building Exploitation
The secluded left-side route offers three distinct tactical options upon reaching the edge building:
- Bridge crossing for elevated approach angles
- Direct window/glass entry for surprise engagements
- Building circumnavigation for rear-objective pressure
Central Building Utilization
The central building accessed via the right-side route contains an underutilized destructible wall element. Breaking through this barrier creates additional sightlines toward the objective while preventing defenders from focusing fire on traditional doorway chokepoints. Flying characters can utilize the building's upper portions for discrete objective approaches without requiring wall destruction.
Defensive Positioning Recommendations
Defenders should establish overlapping coverage of all four primary approach routes while maintaining flexibility for rapid rotations. The central courtyard's open design favors defensive setups that can quickly respond to flanking maneuvers while maintaining primary objective security.
Convoy Movement
Escort Dynamics and Route Management
Once captured, the convoy begins its predetermined movement path through the map's middle section. This phase typically sees the most sustained combat as teams fight for incremental positional advantages while the payload progresses toward its next checkpoint.
Primary Escort Route
The convoy follows a clearly defined central path that most players naturally follow. This route becomes the primary battleground for objective-focused team fights and requires constant attention from both attacking and defending teams.
Advanced Flanking Options
The left and right flanking routes from the first phase remain viable but evolve to provide different tactical advantages during the escort phase. The central alternative route continues to offer discrete movement options for teams seeking to avoid primary engagement zones.
Underutilized Strategic Positions
Eastern Building Complex (Left Flank)
This building structure remains one of the most underutilized strategic assets on the entire map. While many players eventually discover the building's later sections, the initial access point provides numerous flanking opportunities along with crucial health pack resources. These healing stations make the building complex an ideal retreat location for dive characters seeking to reset between engagements.
Elevated Vantage Points
The building complex features two critical elevated positions that provide commanding oversight of the escort route:
- Primary Elevated Position: Characters with climbing abilities, such as Loki and Punisher, can reach the building's highest points to establish sustained pressure positions. These locations force opposing teams to divide their attention between ground-level objective contests and elevated threats.
- Secondary Ledge Position: A smaller ledge structure provides just enough space for deployable abilities like Peni Parker's Spider-Nest or Loki's clone projections. This position also serves as an excellent ambush point for dive characters waiting for optimal engagement opportunities.
Loki's climbing abilities and clone projections make him perfect for exploiting elevated positions and creating multiple angles of pressure.
Western Flank Route (Right Side)
The right-side flanking route wraps around the building complex to provide eastern-approach pressure. Flying characters and mobility-focused heroes like Spider-Man can utilize an additional hidden pathway that crosses above standard ground routes, creating completely unexpected engagement angles.
End-of-Section Strategic Elements
Central Building Traverse
Near the second section's conclusion, a pathway cuts through the building structure to provide access to an upper bridge position. While this bridge can be destroyed during combat, the route remains valuable even without the intact crossing. The building's upper levels provide alternative positioning regardless of bridge status.
Overlooking Defensive Position
An underutilized balcony position overlooks the section's endpoint, creating an exceptional defensive stronghold for characters like Namor or Punisher. This elevated position can apply tremendous pressure to the objective area while remaining relatively protected from ground-based threats.
Final Approach
Terminal Phase Dynamics
The map's culminating section requires the convoy to enter the Hall structure itself, fundamentally changing the engagement dynamics from the previous open-area combat. This interior environment creates more focused engagements with limited approach options, favoring defensive positioning.
Exterior Approach Analysis
Standard Convoy Route
The payload follows its predetermined path toward the building entrance, creating the primary battle line for final-phase engagements. Teams typically concentrate their efforts along this route due to its direct objective access.
Alternative Approach Vectors
Consistent with previous sections, left and right flanking routes provide alternative approach angles, while a central cutting route offers discrete movement through interior spaces.
Advanced Positioning and Hidden Routes
Left-Side Corridor System
The most underutilized route in this section cuts through a hallway system along the building's left perimeter. This pathway concludes at an elevated ledge position, restricting access to characters with wall-scaling or climbing abilities. Heroes capable of reaching this position gain access to unique engagement opportunities unavailable to ground-based characters.
Concealed Vantage Point
Upon successfully navigating the left-corridor route and scaling the terminal ledge, players discover a door opening obscured by a cylindrical obstacle. This position offers two distinct tactical options:
- Destruction of the concealing object creates a vantage point with sightlines extending to the final objective room
- Descent to ground level provides access to the flanking route for surprise engagements
Interior Navigation and Final Room Access
Multi-Path Convergence
All alternative routes eventually converge with the primary convoy path as teams approach the final objective room. This convergence creates intense chokepoint battles as defensive teams attempt to prevent final-phase completion.
Upper-Level Alternative Route
A pathway cuts through a small interior room featuring a staircase system. Teams utilizing this route can navigate through connected hallways to enter the final objective room from an eastern angle. Alternatively, bypassing the staircase allows teams to reconnect with the convoy route at ground level.
Final Room Dynamics
The Hall's terminal chamber positions the objective at the room's center, with the converging flanking routes providing the only viable entry points. This limited access heavily favors defensive positioning, as the defending team's spawn location sits directly behind the back wall, allowing for rapid reinforcement and sustained defensive pressure.
The room's elevated balcony areas provide excellent positioning for both defensive characters seeking sustained firing positions and dive characters waiting for optimal engagement timing.
Strategic Recommendations
Team Composition Considerations
Characters like Spider-Man and flying heroes gain significant advantages on Hall of Djalia due to numerous elevation changes and alternative route options.
Long-range characters such as Punisher and Namor can effectively utilize the map's various vantage points for consistent pressure application.
Heroes with deployable abilities like Peni Parker can take advantage of numerous ledges and concealed positions for strategic asset placement.
Route Priority System
| Priority | Route Type | Strategic Value |
|---|---|---|
| 1st | Primary Routes | Essential for objective control but highly contested |
| 2nd | Flanking Routes | Critical for breaking defensive deadlocks and creating multi-angle pressure |
| 3rd | Discrete Routes | Valuable for repositioning and surprise engagements |
Timing Considerations
Each section's pacing allows for strategic route utilization, but teams must balance exploration of alternative paths with maintaining objective pressure. Overcommitment to flanking maneuvers can result in insufficient objective presence during critical moments.
Conclusion
Hall of Djalia's apparent simplicity masks a wealth of strategic depth that separates casual players from those who achieve consistent success. Mastering the map's numerous routes, vantage points, and positional advantages provides teams with the tactical flexibility needed to adapt to any opponent's defensive strategy.
Success on this Convoy map requires understanding not just where these routes and positions exist, but when and how to utilize them effectively. Teams that combine thorough map knowledge with coordinated execution will find themselves consistently outmaneuvering opponents regardless of individual skill disparities.
"The Hall of Djalia stands as a testament to Wakanda's strength through unity - and your team's success will similarly depend on coordinated utilization of every strategic advantage this remarkable battlefield provides."