
Strategic Overview
The Intergalactic Empire of Wakanda: Birnin T'Challa represents one of Marvel Rivals' most dynamic map experiences, featuring three distinct battlegrounds that rotate throughout your match. This Domination-mode experience takes players through the Imperial Institute of Science, Warrior Falls, and Stellar Spaceport, each presenting unique tactical opportunities and environmental hazards.
The lore behind these battlefields tells of Wakanda's cosmic expansion, where the nation's technological prowess has led them to discover the origins of their power - the homeland of the Vibranium meteorite that first elevated their civilization. Despite their galactic reach, Wakanda's core strength remains unchanged: the unity and determination of its people.
Each location operates on identical principles with symmetrical design, ensuring balanced competitive play while offering multiple strategic approaches. The randomized rotation system prevents predictable patterns, requiring adaptability across all three environments.
Imperial Institute of Science
Core Layout and Central Mechanics
The Imperial Institute of Science centers around a massive rectangular chamber dominated by an illuminated pillar that serves as both landmark and tactical element. This central structure can be completely destroyed, fundamentally altering the battlefield dynamics by creating an underground passage beneath the capture point while simultaneously erecting protective barriers on opposite sides of the objective.

Spawn Area Navigation
Upon leaving your team's spawn chamber, three distinct doorways present different strategic approaches:
Primary Route (Blue Path): The most direct and commonly used approach, this passage efficiently delivers players to the main objective area. Expect heavy traffic and potential chokepoints during team fights.
Secondary Route (Yellow Path): While leading to the same destination as the primary route, this pathway provides optimized access to the bounce pad mechanism, allowing for rapid vertical positioning changes.
Flanking Route (Red Path): A completely separate corridor system that accesses the "red rooms" - a series of interconnected chambers that position players behind the main objective for surprise attacks.
Advanced Routing Options
Beyond the initial spawn exits, several branching paths offer tactical flexibility:
Secondary Red Access: From the main chamber reached via blue/yellow routes, players can access an alternative entrance to the red room network, providing backup flanking options when primary routes become contested.
Exterior Green Route: This pathway branches from the blue route, leading to the map's open exterior front section, offering long-range positioning opportunities and alternative approaches.
Red Room Network Analysis
The red room system converges at a critical junction offering two distinct advantages:
Direct Objective Access: A ground-level entrance provides immediate access to the main capture point, ideal for coordinated team pushes.
Elevated Teal Route: This elevated pathway leads to a specialized chamber adjacent to the objective, featuring destructible glass panels that can be shattered to create new firing angles into the capture zone.
Elevated Chamber Tactics
The teal route chamber serves multiple strategic purposes:
- Destructible Glass Panel: Breaking the central glass barrier opens direct sightlines to the objective from an elevated, side angle
- Health Kit Access: Emergency healing supplies are positioned within this chamber
- Defensive Positioning: The elevated position makes it difficult for ground-level enemies to counter-attack effectively
Exterior Front Section
The map's exterior area provides diverse tactical options:
Upper Balcony Access: The green route can be followed to reach an elevated balcony directly overlooking the objective, perfect for ranged DPS heroes and support characters requiring protected positioning.
Lower Grass Terrain: A downward route through landscaped areas provides ground-level access to the objective's lower entrance. A health kit is concealed behind large planter decorations in this area.
Jump Shortcut: A black-marked pathway offers rapid descent to lower levels without following the full green route.
Lower Level Dynamics
The map's lower exterior section features specialized movement mechanics:
Grassy Slope Access: Green pathways wind through landscaped slopes, providing concealed approaches to the objective room's lower entrance.
Purple Jump Pad Route: A bounce pad mechanism launches players directly to the upper balcony position, enabling rapid vertical repositioning during combat.
Upper Balcony Strategic Considerations
The elevated balcony position offers significant tactical advantages:
- Objective Oversight: Complete visual coverage of the capture point and surrounding areas
- Difficult Counter-positioning: Ground-level enemies struggle to effectively engage elevated targets
- Destructible Platform Warning: The platform extending from the doorway can be destroyed, creating fall hazards for extended positioning
- Health Kit Supply: Emergency healing available within the chamber behind the floor opening
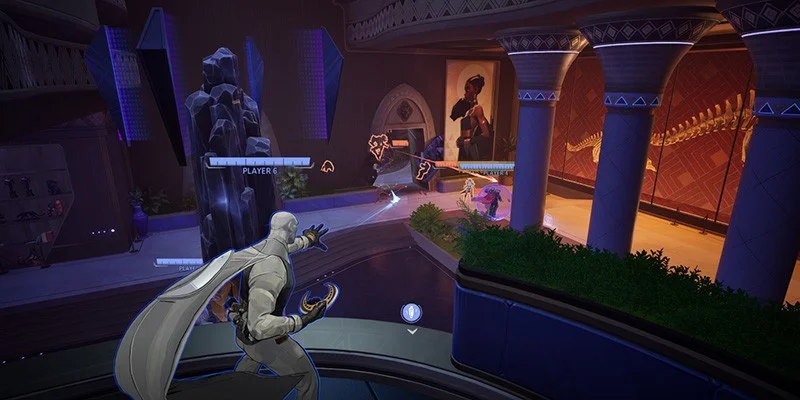
Central Objective Area
The main capture point features several important tactical elements:
Three-Path Convergence: All initial spawn routes merge in this area, creating natural chokepoints and team fight locations.
Protected Corner Position: A small corner area tucked behind tall wall coverage provides excellent positioning for Rocket's respawn station deployments.
Destructible Staircase: The yellow route's stairway can be destroyed, potentially cutting off elevated access and forcing players to use the elevated doorway approach.
Underground Access Systems: Multiple pathways cut beneath the objective area, accessible once the central pillar is destroyed.
Underground Network
When the central pillar falls, new tactical options emerge:
Dual Door System: Two entrance points lead to stairway access at the corridor's end
Jump Pad Mechanism: A bounce pad provides rapid access to the lower exterior area
Central Health Kit: Emergency healing positioned in the corridor's center, crucial for desperate situations after the terrain transformation
Hidden Achievement Location
Within one team's spawn area, players can discover an interactive achievement opportunity. A blue computer screen near a wall panel triggers audio content from Shuri when activated, unlocking the corresponding achievement. Note that only one team per match has access to this feature, potentially limiting achievement opportunities.
Warrior Falls
Base Configuration and Destructible Elements
Warrior Falls positions both teams in a V-shaped formation converging on the central objective. This map's defining characteristic is its extensive destructible terrain system, allowing players to fundamentally reshape the battlefield throughout the match.

Initial Routing System
Three primary pathways extend from each spawn point:
Direct Blue Route: The most straightforward path to the objective, heavily trafficked by most players seeking immediate engagement.
Upper Red Route: Initially underutilized due to limited advantages, this pathway gains significant value after terrain destruction creates new shortcut opportunities to the objective.
Elevated Green Route: Provides access to the objective's upper levels, offering tactical positioning advantages for ranged combat and oversight.
Central Area Branching
The blue route leads to a central staging area offering additional tactical options:
Yellow Flanking Route: An underused pathway that circumnavigates the objective's front side, providing unexpected approach angles for surprise attacks.
Jump Pad Access: A bounce mechanism marked in the central area provides rapid vertical transportation to upper levels, connecting with red and green route systems.
Terrain Destruction Mechanics
The map's transformation system requires destroying three specific structural elements:
Destruction Sequence
Destroy all three structures to trigger ceiling collapse and open new tactical routes.
Triple Structure Destruction: Eliminating all three marked structures triggers a ceiling collapse that fundamentally alters available routes and tactical opportunities.
Wall Opening Creation: Destroyed walls become open firing positions, but the central staircase becomes blocked, forcing route adaptation.
New Upper Pathway: Fresh elevated routes become accessible in previously blocked areas.
Post-Destruction Route Changes
After terrain transformation, significant tactical shifts occur:
Hidden Floor Opening: A new drop-down access point appears along the yellow branch route, providing direct access to upper pathways without using jump pad mechanisms.
Pillar Destruction Benefits: Two pillars on the objective can be destroyed at their base, causing them to topple and create ramp access to upper red routes without requiring jump pad usage.
Interactive Environmental Elements
Warrior Falls features unique reactive elements:
Dynamic Statue System: Two statues within the map respond to capture point ownership, with the controlling team's statue assuming a victory pose while the losing team's statue displays defeat. Ownership changes trigger immediate statue repositioning.
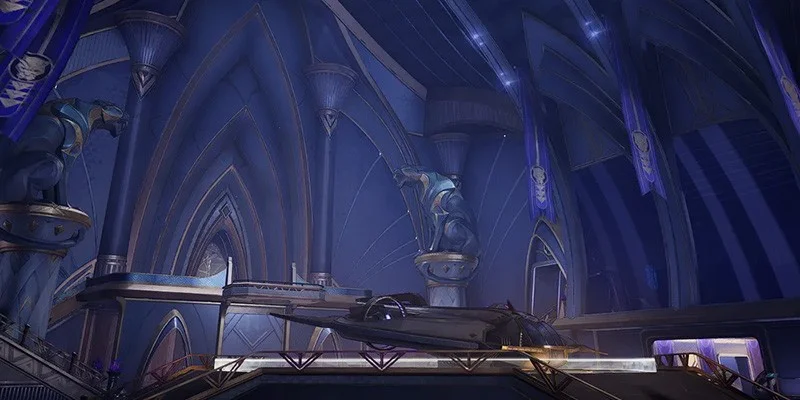
Stellar Spaceport
Layout Philosophy and Design
Stellar Spaceport maintains the V-shaped team positioning while offering a more straightforward battlefield experience. Unlike other Wakanda locations, this map lacks major destructible elements, focusing instead on tactical positioning and route optimization.
Primary Pathway Analysis
Two main routes branch directly from the spawn chamber:
Teal Direct Route: Provides the most efficient path to the objective, suitable for rapid engagement and direct assault strategies.
Red Elevated Route: Leads to an adjacent upper area overlooking the objective, ideal for ranged positioning and overwatch tactics.
Upper Room Systems
The red route connects to a substantial chamber that serves multiple purposes:
Central Map Access: Direct pathway to the battlefield's heart, positioning players immediately behind the objective for flanking opportunities.
Health Kit Resources: A small chamber within this area contains emergency healing supplies for sustained combat operations.
Objective Rear Area
The space behind the capture point offers diverse tactical options:
Standard Teal Approach: The typical route most players utilize from spawn areas.
Underground Green Networks: Multiple chamber systems positioned beneath the teal pathway, providing concealed movement and alternative positioning.
Adjacent Yellow Route: Cutting back into an elevated chamber next to the objective, offering side-angle engagement opportunities.
Aerial Tactical Considerations
The objective area's elevated perspective reveals critical strategic elements:
Map Edge Hazards: Three marked zones along the battlefield's perimeter present opportunities for environmental eliminations using displacement abilities like Jeff's Ultimate or Invisible Woman's force push attacks.
Health Kit Positioning: Healing supplies positioned above the central hazard zone create natural patrol areas for heroes like Invisible Woman.
Indestructible Cover Elements: Glass-adjacent objects provide permanent positioning opportunities, particularly effective for Loki clone deployments and protected vantage points over passing enemies.
Hidden Accessibility Features
Stellar Spaceport contains concealed route modifications:
Destructible Staircase Secret: Shooting specific stair sections reveals hidden pathways providing access to lower green route networks.
Upper Doorway Connection: A specialized passage at the staircase summit connects to the yellow pathway chamber, offering additional flanking routes for objective assault.
Achievement Completion Guide
The Wakanda map set includes multiple achievement opportunities:
Available Achievements
Achievement Strategy Considerations
Focus achievement hunting during matches where your team maintains strong map control, as many unlocks require specific positioning or extended time in certain areas. The Shuri audio interaction in Imperial Institute of Science represents the most clearly defined achievement opportunity, requiring team coordination to ensure access to the correct spawn area.
Advanced Strategic Principles
Map Rotation Adaptation
Since location order randomizes between matches, successful teams must maintain tactical flexibility across all three environments. Develop hero compositions that function effectively across the varied terrain types, from Imperial Institute's destructible elements to Stellar Spaceport's simplified layout.
Environmental Awareness
Each map's unique features require specific tactical considerations:
- Imperial Institute: Prioritize central pillar destruction timing for maximum tactical advantage
- Warrior Falls: Coordinate team destruction of structural elements to create optimal routing for your composition
- Stellar Spaceport: Focus on map edge control and elevated positioning for environmental elimination opportunities
- Symmetrical design ensures fair competition
- Multiple route options prevent stale gameplay
- Destructible elements add tactical depth
- Randomized rotation requires adaptability
- Complex route systems require map knowledge
- Terrain destruction can backfire if mistimed
- Achievement access limited by spawn position
- Environmental hazards punish poor positioning
Team Coordination Strategies
Effective Wakanda gameplay requires coordinated approach selection, whether utilizing direct assault routes or complex flanking maneuvers through alternative pathway systems. Communication becomes critical when terrain destruction fundamentally alters available routes, requiring rapid tactical adaptation.
The symmetrical design ensures balanced competitive play while rewarding teams that master the subtle tactical advantages each route and positioning opportunity provides. Success in Wakanda's domains demands both individual mechanical skill and comprehensive team coordination across these diverse and dynamic battlefields.
"The strength of Wakanda lies not in our technology, but in our unity as a people."