Picking the right league starter in Path of Exile 2 can make or break your early progression. Those first few hours set the pace for your entire journey. You're stuck with weak gear, almost no currency, and basically zero crafting options. You need a build that works without expensive items or perfect rolls, clears Acts fast, and gets you to maps ahead of the crowd so you can start farming valuable drops while everyone else is still struggling.
This guide covers the strongest league starters for The Last of Druids patch, organized by class and playstyle. Each build includes detailed setup information, key mechanics, and progression strategies.
What Makes a Good League Starter
A successful league starter needs to check several boxes: low gear dependency that works with basic rares and common uniques, strong campaign performance that clears Acts efficiently and handles story bosses, natural scaling that improves as you find gear, clear speed that kills packs quickly, and single target capability for taking down bosses without wasting time.
The builds covered here excel in these areas while offering different playstyles to match your preferences.

Ranger Builds
Lightning Arrow Deadeye
Lightning Arrow Deadeye is still one of the strongest league starters even after some minor adjustments. The build delivers massive screen-wide chaining damage through Lightning Arrow's natural mechanics, plus shock scaling for consistent damage boosts. Herald of Thunder and ward-based defenses took some hits, but the core clearing power is basically untouched.
Deadeye gives you unmatched early-game speed and reliable single-target burst with some of the best natural defenses for dex-based characters. The rotation flows smoothly, gearing stays simple, and damage ramps automatically through frenzy charge generation and lightning penetration.
Core Mechanics
Lightning Arrow chains between enemies, creating cascading damage that scales with both your base damage and shock application. You'll hit roughly 129% movement speed, making this exceptionally fast for mapping. You can swap between clearing skills (Lightning Arrow/Tornado Shot) and bossing skills (Lightning Rod/Barrage) depending on what you're doing.
For bosses, transition from Lightning Arrow to Lightning Rod or Barrage. Lightning Rod provides consistent damage through overlapping pulses, while Barrage delivers concentrated hits for burst damage windows. The build maintains high uptime on bosses through instant responsiveness and ranged positioning.
Defense and Survival
Deadeye provides natural evasion scaling and movement speed for positional defense. High movement speed lets you dodge mechanics, instant repositioning through ranged attacks keeps you safe, frenzy charge generation sustains combat, and flexible skill swapping handles different encounter types.
During campaign and early mapping, prioritize flat lightning damage on weapons and jewelry, attack speed for faster clear, critical strike chance once you reach maps, lightning penetration for damage consistency, and life with resistances for survivability.
If you want to switch things up, Ice Shot Deadeye got buffed and works similarly with cold damage scaling instead of lightning. The swap needs minimal passive tree changes since both builds use projectile and elemental damage nodes.
Poison Burst Pathfinder
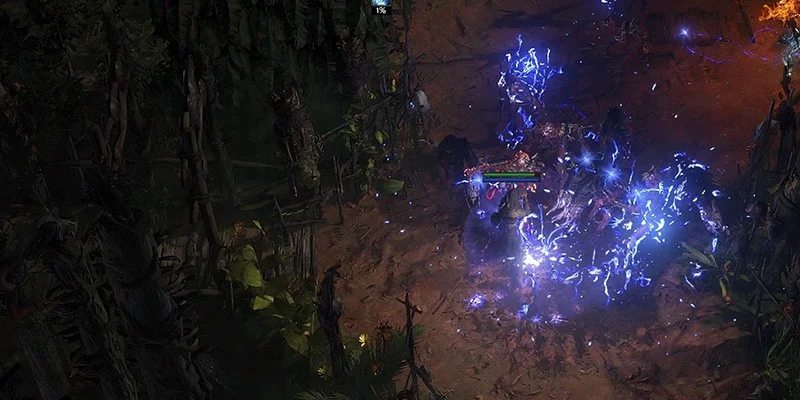
Poison Burst Pathfinder is shaping up to be one of the strongest bow builds in the patch and overall one of the strongest builds in the entire game. Pathfinder got massive buffs and poison received really nice buffs too. This build can easily reach 20-40 million DPS and insta-kill bosses.
For mapping, this is a one-button build. All you do is cast Poison Burst Arrow and that's it. Early on when you're undergeared, you might need to use Toxic Growth, but you'll quickly do enough damage where Poison Burst becomes a one-button clear similar to Lightning Arrow.
For single target and bosses, Toxic Growth summons pods that explode when dealt enough poison damage. You trigger this with Gas Arrow for automatic explosions. Place down your Gas Arrow and spam your pods for a very simple, really strong single target rotation.
Major Buffs
Alli's Fang Support currently gives 30% more hit damage (effectively 30% more poison damage since poison is based off hit damage). Going to 40%. Free 10% more damage. Already the best support or one of the best supports in the build and it's getting buffed.
Karui's Resolve got a massive buff. Currently requires using a supported skill once every 20 meters, making it pretty much unusable. In next patch, this downside is getting completely removed and replaced with your critical strike chance is capped at 50%.
For bow builds, this isn't really a downside because you never get above 50% crit since bows have really bad critical strike chance. This is pretty much pure upside. We're getting Tangle Tongue functionality on bows. It's completely broken. The support will probably be expensive, but this represents a massive endgame buff for this build with tons of damage.
Surpass introduces a new mechanic where every 100% surpass chance gives you plus one arrow. New surpass nodes are being added to the skill tree. This could be beneficial, but the exact numbers aren't known yet.
Hyrri's Ire now has 50% more base evasion and 25% damage with extra cold. This buffs any evasion-based build that can use this chest. It's a very strong chest this patch. As a tier one unique, it might be somewhat expensive. The build doesn't need it, but it's a solid buff.
Pathfinder Changes
The ascendancy is getting changed significantly.
Losing poison proliferation from ascendancy. Actually a big buff because this was two ascendancy points and you get free proliferation already if you just use Herald of Plague for 30 spirit with bigger range too. For 30 spirit you're saving two ascendancy points. Two ascendancy points is definitely worth more than 30 spirit.
Running Assault now also has can't be stunned while sprinting. This is going to cause the sprint meta next patch. Sprinting will be extremely fast and expect a lot of people to play Pathfinder as sprinter. Will have 50% less move speed penalty when using skills. Makes you faster while attacking and can't be knocked down while sprinting.
One notable Pathfinder node is now only two points to reach instead of four, representing an overall extremely good buff. Previously, you had to spend four skill points to reach certain nodes because Practical Remedies (which provided immunity to shock, freeze, or ignite) sat in the path. This node has been removed in the patch, and while the immunity effect had some value, it wasn't worth two ascendancy points for most builds.
Potential Nerfs
Lowering percent ES on skill tree (confirmed by GGG but don't know how much). Unless it's around 50%, shouldn't be a big deal. Even going from like 2k ES to 1.5k is fine.
Ghost Dance remains extremely strong despite the nerf.
Rune limits don't hurt this build much since you already had multiple good rune options and didn't stack plus one arrow runes anyway.
Herald of Blood Tech
People have been doing this for multiple patches. Extremely strong and effectively gives you chain-like explosion with infinite chain if there's monsters to continue it.
The whole tech uses a bleed support for 100% chance to inflict bleed and Herald of Plague. You also want 100% chance to bleed with poison support. Herald of Blood on a poison-based build creates infinite chain reactions, making it extremely effective for clear. The satisfying multiple pops across maps make the playstyle feel very rewarding.
Skill Setup
- Poison Burst Arrow for clear
- Toxic Growth for single target
- Gas Arrow triggers pod explosions
- Vine Arrow provides bonus damage (not needed if you don't want to press it)
- Herald of Plague gives 1.8m poison proliferation
- Wind Dancer stays always strong
- Ghost Dance remains one of your best supports despite nerf
For last utility gem, use either Despair or Storm Caller Arrow for boss damage. Despair you pre-cast on cursed ground before boss is active. Storm Caller Arrow you use after boss is active but gives more damage than Despair. Use either one depending on preference. Once you get endgame gear, you don't use any of these. You literally insta-kill every single boss in the game.
Damage Scaling
Expect this build to have roughly 20-30% or more damage next patch, possibly even higher because of how poison works with Karui's Resolve. This support alone might provide around 50% more damage.
Poison in PoE2 has a cap. You can have 100 poisons on enemy, but only your six most damaging poisons will deal damage. When you're playing a crit build, it doesn't matter if you only have 30-40% crit because if you hit the boss 20 times and only eight of them crit, your six most damaging poisons will effectively be eight crit poisons. This makes crit and Karui's Resolve extremely strong for a build like this, allowing you to use the support to maximum effectiveness.
Cold Infusion Spark Pathfinder
Cold Infusion Spark Pathfinder (dubbed "Sparkfinder") represents an experimental but promising build using recent buffs to both Cold Infusion and Pathfinder ascendancy. While not as proven as other league starters, the build offers interesting scaling potential through Pathfinder's unique mechanics.
Recent changes make Pathfinder extremely desirable. Travel Node System works like Scion, allowing point allocation from different tree sections (Sorceress area or Warrior area). Movement Speed provides big bonuses plus can't be heavily stunned while sprinting. Efficiency makes skills and defenses more efficient through ascendancy bonuses. Flexible Pathing opens access to nodes normally far from Ranger start.
Core Mechanics
Spark fires projectiles that bounce off terrain and pierce enemies. Cold Infusion converts damage to cold, enabling freeze mechanics and benefiting from cold damage scaling. The combo provides excellent clear through bouncing projectiles, freeze for crowd control, scaling through elemental damage nodes, and potential to path to Sorceress area for extra spell nodes.
Pre-buff versions of similar builds pathed to Sorceress area and performed very well with strong clear speed. Single-target was slightly weak but can be supplemented with Comet or other burst skills. With recent buffs, expect improved performance across both clear and boss damage.
Defense and Survival
Pathfinder provides movement speed for dodging, can't be stunned while sprinting, efficient defense through ascendancy scaling, and access to both ranger and sorceress defensive nodes.
Pivot Options
Since Pathfinder is Ranger-based, you can pivot to Deadeye Lightning Arrow if Spark underperforms, Deadeye Ice Shot for cold damage focus, or other bow builds using similar passive tree locations. This flexibility makes Pathfinder a reasonably safe choice despite the experimental nature.
Prioritize spell damage on weapons, cold damage bonuses, projectile speed for better coverage, cast speed for smooth gameplay, critical strike chance for scaling, and life/ES with resistances for survival.
Explosive Shot Deadeye
Explosive Shot is one of the most powerful skills around, performing well across multiple league starts. It ranks in the top three for damage while providing excellent clear speed. The biggest advantage? Minimal gear dependency. You can hit high damage with basic equipment.
Explosive Shot plants arrows that explode after a short delay, dealing area damage. The skill's base damage at low gem levels is absurdly high, letting you delete bosses and clear packs before other builds even come online. Stack multiple arrows on single targets for overlapping explosions and massive burst damage.
- Huge early damage spikes
- Almost zero gear requirements
- Smooth progression
- Top-tier single target
- Cheapest to get running
- Mana management issues
- Delayed damage
- Requires positioning
- Endgame costs spike
Mana Management
Mana management is your main concern, especially when scaling plus levels to gems. Once you push into endgame content, mana costs spike hard. Mana regeneration on gear and passives helps, along with reduced mana cost modifiers, mana leech sources, and spirit investment in mana-focused support options. Solve the mana issue and you've got one of the most solid builds that absolutely wrecks all content.
Progression Path
Start with basic Explosive Shot and gradually add support gems that boost damage without excessive mana cost increases. Focus on arrow count increases for better single target, add area damage for improved clear, scale elemental damage based on your weapon choice, and invest in critical strike chance once you have mana sustain.
Defense Strategy
Deadeye provides high movement speed and long-range combat, keeping you safe through positioning. Wind Dancer adds damage reduction, Flash Grenade provides blind application (if using grenade variants), high spirit uptime enables defensive auras, and evasion-based gear handles physical mitigation.
Grenade Deadeye
Grenade Deadeye is one of the most recommended builds, staying consistently dominant across multiple league starts. The build keeps its strength through pure numerical advantages. Grenades got no direct nerfs and continue providing overwhelming damage output.
Grenades deliver enormous area damage with excellent coverage. You throw grenades into packs for instant clears and concentrate them on bosses for rapid kills. The playstyle focuses on positioning and timing rather than complex rotations.
The build provides insane clearing power through large area coverage, really solid single target damage concentration, no numerical changes in recent patches, proven performance across multiple league starts, and reliable scaling from campaign through endgame.
Mana Concerns
Like Explosive Shot, mana issues show up when adding plus levels to skills. Grenade costs scale significantly. Prioritize mana regeneration on jewelry and gear, use reduced mana cost modifiers where available, consider mana leech if your build allows it, and balance spirit investment between damage and sustain.
Gearing Priority
Early game focuses purely on grenade damage and area coverage. Add support gems that multiply damage effectively, scale elemental damage matching your grenade type, invest in critical strike chance for endgame scaling, and balance offensive and defensive passive selections.
Defense Approach
Grenades provide natural safety through range and area control. You stay distant from threats while dealing damage. Movement speed helps repositioning, evasion-based gear adds defense, Wind Dancer reduces incoming damage, and utility grenades provide crowd control.

Warrior Builds
Shield Wall Titan
Shield Wall Titan delivers insane damage for a shield-focused build while maintaining excellent defense. This build works particularly well in trade leagues, though it performs great in Solo Self-Found Hardcore too. Your damage and a big chunk of your defense come directly from your shield rather than needing weapon scaling.
Drop one or two walls depending on the situation, then use War Cry to explode them across the screen. This combo delivers crazy damage through multiplicative scaling. The build focuses entirely on shield stats, making gearing straightforward. You only need to find one good piece of equipment for both offense and defense.
Combat Flow
Combat follows a simple pattern. Position for optimal wall placement, drop Shield Wall(s) in enemy paths, activate War Cry to explode the walls, then repeat while maintaining positioning. The rotation stays consistent for both clearing packs and fighting bosses, though you'll adjust wall placement for different situations.
Defensive Layers
Your shield provides base armor for physical damage reduction, block chance for hit negation, life bonuses from shield stats, and additional defensive modifiers like resistances. The Titan ascendancy adds more tankiness through life regeneration, armor scaling, and endurance charge generation.
Mana Considerations
You'll deal with mana issues once you hit later parts of the game. Plan for mana sustain through mana regeneration on gear, reduced mana cost modifiers, passive tree investment in sustain nodes, and spirit allocation for mana-focused supports.
Witch/Sorceress Builds
Arc Stormweaver
Arc Stormweaver is the best Sorceress build for league starting because it delivers everything you want from a caster without needing rare gear or complex mechanics. Arc provides massive screen-wide chaining damage with shock scaling and effortless clear, while Orb of Storms adds consistent single-target damage through overlapping pulses and Unleash bursts.
The build offers massive screen-wide chaining damage through Arc's natural mechanics, shock application for damage amplification, effortless clear speed without targeting requirements, consistent single-target through Orb of Storms, early defensive layers from Energy Shield, and surprising tankiness with roughly 13,000 effective health on starter gear.
How Arc Works
Arc chains between enemies automatically, needing minimal targeting. Each chain can shock enemies, boosting all damage they take. This creates scaling damage as fights progress. Early chains shock targets, later chains benefit from those shocks.
Orb of Storms provides stationary damage output. Place it on or near bosses and it pulses repeatedly, with extra bursts from Unleash support. This combo handles single-target encounters while Arc manages clearing.
Defense Strategy
Your defenses come online early through high Energy Shield values from gear and passives, layered charge generation (power and frenzy charges), easy resistance capping, Sigil of Power uptime for damage reduction, and natural range keeping you distant from threats.
The Energy Shield focus means you prioritize ES on gear rather than life, simplifying gearing decisions during the campaign.
Combat Patterns
For clearing, cast Arc into packs, let chains handle damage spread, and move forward while Arc clears behind you. For bosses, place Orb of Storms on target, cast Arc repeatedly, reposition Orb of Storms as needed, and use Unleash charges for burst windows.
Gearing Priorities
Focus on these stats during progression: increased spell damage on weapons, Energy Shield on all possible gear slots, resistance capping (especially lightning), cast speed for smoother gameplay, and critical strike chance once you reach maps.
Path toward Energy Shield nodes and spell damage clusters. The Stormweaver ascendancy provides shock effectiveness and lightning damage scaling, so you don't need excessive investment in these areas from passives. Prioritize ES pool increases, spell damage multipliers, cast speed for comfort, and critical strike chance with multiplier for endgame.

Essence Drain Contagion Lich
Essence Drain Contagion (ED Contagion) gives you one of the smoothest leveling experiences in Path of Exile 2. Despite minor adjustments to monster density (which affects all builds), the core mechanics stayed unchanged. ED Contagion got no direct nerfs and benefits from general class buffs, making it an extremely reliable league starter.
The build provides one of the smoothest leveling abilities in the game, cost-effective gearing requirements, easy gameplay with minimal button presses, excellent scaling from campaign through endgame, and strong defensive options through Lich ascendancy.
Spreading Mechanics
Contagion applies a damage-over-time debuff that spreads to nearby enemies. Essence Drain applies a separate, stronger DoT effect. When you cast Essence Drain on an enemy affected by Contagion, the Essence Drain debuff also spreads, creating cascading damage across entire packs.
This spreading mechanism means you only need to target one enemy per pack. The debuffs handle the rest automatically.
Campaign Progression
In Act 1, start with Contagion as your main clearing skill, add Flame Wall for igniting Gas Arrow clouds from Skeletal Snipers, pick up Skeletal Snipers from the side quest (provides huge single-target burst when combined with Flame Wall), and get Essence Drain after killing the Rust King (becomes your primary damage source).
For Act 2, add Withering Presence spirit gem for automatic Wither application, continue using Skeletal Sniper plus Flame Wall combo for single target, start upgrading Essence Drain gem levels as priority, and consider dropping Un-Earthed minion skill after Act 1 if you want.
Act 3 brings major additions. Add Dark Effigy at level 9 skill gem (major single-target boost), get Despair curse (reduces chaos resistance), pick up Blasphemy support to automatically apply Temporal Chains curse, and add support gems to Dark Effigy (Poison and Withering Touch).
By Act 3, your skill bar includes Essence Drain plus supports (primary damage), Contagion plus supports (spreading mechanism), Dark Effigy plus supports (single-target amplifier), Blasphemy plus Temporal Chains (automatic slow aura), Despair curse (for boss damage), and Withering Presence (automatic debuff application). This setup carries you through campaign and into endgame with minimal changes.
Boss Strategy
For bosses and tough rares, apply Despair curse to reduce chaos resistance, place Dark Effigy on the ground near boss, apply Essence Drain to boss, spam Chaos Bolt from Withered Wand to apply Wither stacks, recast Dark Effigy as needed (lasts limited duration), and maintain Essence Drain uptime.
Dark Effigy fires projectiles at nearby enemies. Attack speed scales with YOUR cast speed (not the effigy's stats), and it fires more projectiles based on number of chaos debuffs on target.
You want multiple chaos debuffs active: Essence Drain (chaos DoT), Despair with Decaying Hex support (additional chaos debuff), Poison (if using Poison support), and Wither stacks (from Withering Presence or Chaos Bolt). More debuffs equals more Dark Effigy projectiles equals more damage.
Gearing Through Campaign
Throughout campaign, prioritize plus chaos spell levels on wand (check vendors every level), spell damage on wand and focus, cast speed for smoother gameplay, movement speed on boots (massive quality of life), life and resistances on other gear, and Energy Shield for defense (Lich uses ES).
Vendors refresh inventory every time you level up. Check them regularly for Withered Wands with plus chaos spell levels, boots with movement speed, and gear with life, ES, and resistances. You can use regex (regular expressions) in vendor search windows to highlight desired items automatically.
For Act 1, prioritize cold resistance. Act 2 needs lightning resistance. Act 3 requires fire resistance, then balance all three.
Ascendancy Choices
For your first Ascension in Act 2 Trial, pick between Eldritch Empowerment (offensive) which gives 30% damage increase for all abilities by sacrificing ES, making you less tanky but speeding up progression, or Soulless Form (defensive) which provides major mana regeneration and tankiness, recommended for newer players or safer playthroughs.
Most players complete the first Ascension around level 25 in Act 2, making the trial easier rather than attempting it right after getting access.
Three-Link Priority
In Act 3, you get your first Lesser Jeweler's Orb for three-link skills. Priority order goes Essence Drain (most important), Dark Effigy (major single-target boost), Blasphemy plus Despair (amplifies all damage), then Contagion (less important since spread matters more than its direct damage).
Advanced Techniques
Once you find a Chiming Staff with Sigil of Power, equip it on weapon set 2. Swap to it before fights, cast Sigil of Power for a damage buff, then swap back to your main weapons. This gives you a free damage boost for every encounter.
The low-life version of ED Contagion Lich got an indirect buff regarding movement speed. With the limit of one rune per item, low-life Lich stays as one of the few builds that can use both movement speed rune and Tecrod's Gaze unique (10% movement speed on boots while on low life). This makes low-life variants exceptionally fast compared to other builds after the rune changes.

Mercenary Builds
Leveling Mercenary (Grenades)
The Mercenary leveling build excels as a starter because it delivers huge early damage spikes with almost zero gear requirements and smooth progression from Act 1 through maps. Explosive Grenade, Gas Grenade, and Galvanic Shards provide absurdly high base damage at low gem levels, letting you delete bosses and clear packs before other classes come online.
The build offers huge early damage spikes with minimal investment, almost zero gear requirements for basic function, smooth progression path from Act 1 to maps, high base damage at low gem levels, and affordable operation with minimal currency needs.
Grenade Varieties
Use multiple grenade types depending on situation. Explosive Grenade serves as your primary clearing tool with large area damage. Gas Grenade provides DoT damage for sustained boss damage. Galvanic Shards add additional burst for single target. The combination provides both clear speed and boss damage without needing complex rotations.
Defense Strategy
Despite low defensive stats, you stay safe through Wind Dancer (damage reduction support), Flash Grenade (blinds enemies for miss chance), high spirit uptime for defensive auras, and long-range combat positioning. Your ranged playstyle naturally keeps you distant from threats, while Wind Dancer and Flash Grenade add extra layers when needed.
Gearing Priority
Prioritize flat elemental damage on weapons, attack speed for faster grenade throws, life and resistances for basic survivability, movement speed for positioning, and critical strike chance once you reach maps. The build needs almost no currency investment to work effectively, making it excellent for racing through campaign and starting early endgame farming.

Druid Builds (New Class)
Lunar Ice Wolf Oracle
The Lunar Ice Wolf build focuses on the Oracle ascendancy of the Druid class, using werewolf form with Talisman weapons. The build goes for critical strikes and cold elemental damage based on revealed ascendancy nodes. While untested, the theory crafting looks extremely promising.
Talisman Weapons
Talismans serve as the weapon type for werewolf form. Based on revealed information, they have lower base damage compared to other two-handed weapons, faster attack speed to compensate, solid critical strike chance base, and scale with Strength and Intelligence attributes.
The faster attack speed means wolf skills feel responsive and smooth rather than clunky. Most werewolf skills have good attack speed, allowing for combo-based, fast-paced gameplay. This isn't a one-button playstyle. Expect to use multiple skills in rotation.
Oracle Ascendancy
The Oracle ascendancy path provides critical strike scaling and cold elemental damage bonuses. Two nodes look particularly powerful.
Traveller's Wisdom is game-changing. This ascendancy node lets you allocate non-keystone passive skills in a medium radius around allocated keystone passive skills WITHOUT being connected to your tree. It works like special jewels but needs keystones allocated first.
The medium radius circle reaches significantly further than a small radius would, giving you access to many more powerful nodes.
Resolute Technique prevents critical strikes, but we're building for crits. The solution uses Timeless Jewel (Ahuana or Amanamu variant) to transform keystones, transform Resolute Technique into "Sacrifice of Flesh" keystone, which provides damage mitigation similar to Blood Mage ascendancy's Grasping Wounds.
If using Harmony Within jewel, you can allocate different keystones for additional benefits.
The Man Path opens gearing options for the wolf on the top left side of the tree. This matters a lot because most cold and crit passive nodes sit on the right side of the tree, far from Druid starting location.
Force Outcomes provides inevitable critical hits functionality (similar to existing support gem). Useful when using tons of skills since it saves one support gem slot across all skills. Value depends on final numbers.
Harmony Within Alternative opens very interesting defensive layers through mana-based defense.
Wolf Skills
Multiple wolf skills have been revealed, though some lack numbers. Expect to press more than one button and use most skills together.
Cross Slash looks like the strongest skill available. Provides both excellent AoE clear and strong single-target damage. This skill will likely form the core of your rotation.
Lunar Blessing is a tier 13 skill gem providing 52% damage gained as cold. Use on cooldown for the buff. Hits enemies if you use it on top of them. Great for quick burst damage. Consider scaling cooldown reduction to make this more useful.
Lunar Assault serves as your primary mapping skill. It only deals 40% attack damage (relatively low). Main use is freezing enemies. After freezing, use Wreck to knock off ice fragments, then explode fragments with Cross Slash.
Pounce sockets mark skills. Showcased with Freezing Mark but multiple options exist. Potentially works as execution skill. Summons companions when used. Mark enemies, then Cross Slash triggers the marks.
Summon Wolf is a companion skill providing additional wolves. Combines with companions from Pounce. Pairs well with Stone Hearth unique for defensive layers and crit chance. Fulfills fantasy of hunting in a pack.
Combat Flow
For mapping, use Lunar Blessing on cooldown for damage buff, Lunar Assault to freeze enemies, Wreck to knock off ice fragments, and Cross Slash to explode fragments and clear.
For single target, use Lunar Blessing for buff, Pounce with mark skill, Cross Slash to trigger marks, and maintain positioning and combo rotation.
Better gear in endgame reduces button requirements. More damage means fewer skills needed per pack.
Mana Defense Option
Alternative defensive approach uses Sacrifice of Mind keystone (from Timeless Jewel).
Mana Overflow Keystone brings mana to 1.5x higher than cap. Combined with Harmony Within jewel, this gives 100% Mind Over Matter against hit damage. Needs mana rolls on gear to maximize effectiveness. Damage over time mitigated by Energy Shield instead.
Wave Shapers grants percentage of maximum mana as armor. Since build scales Strength and Intelligence, you also scale ES and armor. Creates triple defense layer: Life, ES, Mana.
Going for mana as defensive layer enables mana recoup investment for sustain, leech for ES and mana recovery, and tanking mechanics through multiple resource pools.
Experience from triple recoup setups (life, ES, mana) suggests this combo works well for surviving incoming damage.
Attributes and Gearing
Talisman weapons need Strength and Intelligence. This means you must invest in both attributes, can't focus purely on right side of tree (risky due to attribute requirements), get natural synergy with ES scaling (Intelligence), natural synergy with armor scaling (Strength), and enables mana-based defense through INT stacking.
Expect to grab all three attribute clusters to avoid problems.
During campaign, prioritize Strength and Intelligence to meet Talisman requirements, cold damage for scaling, critical strike chance, life and resistances, and mana rolls if using Harmony Within defense.
For endgame, focus on critical strike chance and multiplier, cold damage and penetration, attack speed for smooth gameplay, defensive stats (life, ES, mana depending on build variant), and resistances capped.
Backup Plans
If wolf form lacks single-target damage, you can easily swap to Frost Bolt for boss killing. Since you're playing cold crits, Frost Bolt needs minimal adaptation. You already have cold damage scaling, already have crit investment, can swap for bosses and use wolf for clearing, and this is a proven strategy from previous patches.
Tactician offers an alternative ascendancy with solid persistent buff notes, 50% less reservation cost, pain notes for additional benefits, more immobilization buildup (works for freeze), and Polished Tier node (good defensive option). Tactician could work well for ice wolf, but final choice depends on passive tree layout.
Shaman focuses on bear form with interesting rage node benefits. More suitable for bear form than wolf. Less synergy with cold crit approach.
Unseen Path has no information available until data mine (one or two days before patch).
Nothing's concrete until passive tree releases. The plan may change based on passive node locations for Druid, attribute requirement practicality, actual skill damage numbers, and ascendancy node final values.
Be ready to pivot to Oracle if it's strong, or adjust to Tactician/Shaman if Oracle underperforms.

Rampaging Bear Druid
The Rampaging Bear Druid focuses on bear form using stomping abilities, rage generation, and aura procs through Herald of Ash or Herald of Ice. While untested, the build concept shows promise for both clearing and single-target damage through Maul abilities.
Core Mechanics
The build uses Stomping Ability as primary clearing tool through area damage, Rage Generation to sustain buffs and boost damage, Herald Procs from Herald of Ash or Herald of Ice depending on progression stage, and Maul for single-target damage in bear form.
The combo provides area clear through stomps and herald explosions, while Maul handles boss damage.
Defensive Strategy
Bear form naturally provides higher base health pool, increased armor from form bonuses, Strength scaling for additional defense, and rage sustain for offensive and defensive benefits.
Gearing Approach
Since specifics stay unclear until release, prioritize Strength for bear form scaling, look for rage generation and sustain, scale physical damage for Maul, consider elemental conversion based on herald choice, and maintain life and resistance caps.
Build Viability
Despite experimental status, Druid is the new class for this patch, bear form offers different playstyle from wolf, rage mechanics provide engaging gameplay, the creator has proven builds with update commitment, and players may discover unexpectedly strong synergies.
Expect this build guide to get frequent updates as players test actual mechanics and numbers.
Choosing Your League Starter
Decision Framework
Consider these factors when picking your build.
For experience level, brand new players should try ED Contagion Lich or Arc Stormweaver. Players with some experience can handle Lightning Arrow Deadeye or Shield Wall Titan. Experienced players will enjoy Explosive Shot or Poison Burst Pathfinder. Those with an experimental mindset can explore any Druid build or Sparkfinder.
For playstyle preference, ranged combat players can pick any Deadeye or Mercenary build. Melee combat suits Shield Wall Titan or Druid forms. Spellcasting works with Arc Stormweaver, ED Contagion, or Sparkfinder. Pet class fans will like ED Contagion (has minions) or Druid wolves.
For complexity tolerance, simple rotations include ED Contagion (2-3 buttons) or Shield Wall Titan. Moderate complexity covers Lightning Arrow and Arc Stormweaver. Complex rotations involve Lunar Ice Wolf Druid (multi-button combos).
For budget concerns, ultra-low budget options are Mercenary Grenades or Explosive Shot. Low budget includes ED Contagion or Shield Wall Titan. Moderate budget covers Lightning Arrow or Arc Stormweaver. Scaling investment benefits Poison Burst Pathfinder (benefits greatly from investment).
For endgame goals, fast mapping suits Lightning Arrow or Poison Burst Pathfinder. Boss killing works with Explosive Shot or Poison Burst Pathfinder. Balanced content fits ED Contagion or Arc Stormweaver. Experimental fun comes from Druid builds or Sparkfinder.
Risk Assessment
| Risk Level | Builds | Recommendation |
|---|---|---|
| Safest Choices | ED Contagion Lich, Lightning Arrow Deadeye, Arc Stormweaver, Shield Wall Titan | Proven performance across patches |
| Moderate Risk | Explosive Shot (mana issues), Grenade Deadeye (mana issues), Poison Burst Pathfinder (needs understanding) | Strong but with caveats |
| Higher Risk | Lunar Ice Wolf Druid, Rampaging Bear Druid, Cold Infusion Spark Pathfinder | Experimental/new mechanics |
General Advice
First-time league starters should begin with ED Contagion or Arc Stormweaver. Both provide smooth progression, minimal gearing requirements, and forgiving gameplay that lets you learn encounter mechanics without dying repeatedly.
Returning players from previous patches will find Lightning Arrow Deadeye offers familiarity with minor adjustments. The build still performs exceptionally well despite changes.
For racing to endgame, Mercenary Grenades or Explosive Shot provide the fastest campaign clear with minimal investment. These builds delete bosses before mechanics matter and zoom through acts efficiently.
To enjoy new content, try a Druid build to experience the new class. Have a backup plan (Shaman vs Oracle) based on data mine information that releases one to two days before patch.
For long-term investment, Poison Burst Pathfinder scales incredibly well into endgame with 20-40+ million DPS potential. If you plan to invest heavily, this build rewards that investment more than others.
Final Thoughts
Path of Exile 2's 0.4 patch introduces big changes while keeping proven league starters viable. The builds featured here represent the strongest options based on current information, offering different playstyles and complexity levels to match various player preferences.
Remember that league starts are about consistent progression rather than perfection. Pick a build that matches your experience level and playstyle preferences, then focus on reaching maps quickly to begin farming. Most builds become powerful with investment, but league starters succeed by working well with minimal gear.
The Druid class adds exciting new options but carries extra risk due to untested mechanics. If you prioritize stability, stick with proven builds. If you enjoy experimentation and don't mind potential adjustments, Druid offers fresh gameplay experiences.
Whatever you choose, focus on learning encounter mechanics, capping resistances, and upgrading gear gradually. Even the strongest build needs good execution to succeed in Path of Exile 2's challenging endgame content.

