
What Are Challenge Modes and Why They Matter
Challenge Modes in Mists of Pandaria Classic are the original timed dungeon content that laid the groundwork for today's Mythic+ system. These are pure skill checks where gear won't save you. You and your group race against the clock to clear dungeons as fast as possible, while all your raid gear gets scaled down to level the playing field.
Unlike regular heroics where you can steamroll content with better equipment, Challenge Modes strip away gear advantages completely. Success comes down to mechanical skill, smart routing, and tight coordination. You can't brute force your way through these runs.
How the Scaling System Works
Gear Gets the Equalizer Treatment
Every piece of gear above item level 463 gets automatically scaled down to match 463 stats. This means your shiny 500+ item level raid gear provides zero advantage over someone wearing crafted 463 pieces. The system affects everything: weapons, armor, and trinkets all get the same treatment.
Gear at or below 463 keeps its full power. So there's no point chasing higher item levels for Challenge Mode prep.
Hit Rating Stays Intact
One major exception to the scaling involves hit rating. If you're hit capped before entering a Challenge Mode, you'll stay hit capped after the system scales your gear down. The game automatically adjusts your other secondary stats to maintain your hit accuracy while reducing everything to appropriate levels.
This makes pre planning crucial. You need to check your hit status after entering Challenge Mode but before starting your timer.
What Gets Disabled
Several powerful systems get completely shut off in Challenge Modes:
- Tier Set Bonuses: All your raid set bonuses stop working entirely.
- Sha Touched Gems: These high end gems provide zero benefit.
- Legendary Cloak Procs: The base stats work fine, but special effects don't trigger.
- Mass Resurrection: This spell is banned. If you die and release, you're running back from the entrance.
What Still Works
Not everything gets neutered:
- Enchants and Regular Gems: These work at full strength, making them absolutely critical.
- Consumables: Food, potions, and other consumables maintain full effectiveness.
- Profession Bonuses: All profession perks and items work normally.
- Talent Swapping: You can respec and change glyphs mid run while out of combat.
Dungeon Requirements and Time Limits
Challenge Modes include nine dungeons, all available from the start. Each has specific time requirements and minimum enemy kill counts you must meet.
Complete Dungeon Breakdown
| Dungeon | Gold Time | Silver Time | Bronze Time | Required Kills |
|---|---|---|---|---|
| Gate of the Setting Sun | 13 minutes | 22 minutes | 45 minutes | 25 enemies |
| Mogu'shan Palace | 12 minutes | 24 minutes | 45 minutes | 20 enemies |
| Scarlet Halls | 13 minutes | 22 minutes | 45 minutes | 50 enemies |
| Scarlet Monastery | 13 minutes | 22 minutes | 45 minutes | 40 enemies |
| Scholomance | 19 minutes | 33 minutes | 55 minutes | 35 enemies |
| Shado Pan Monastery | 21 minutes | 35 minutes | 60 minutes | 32 enemies |
| Siege of Niuzao Temple | 17 minutes 30 seconds | 30 minutes | 50 minutes | 65 enemies |
| Stormstout Brewery | 12 minutes | 21 minutes | 45 minutes | 25 enemies |
| Temple of the Jade Serpent | 15 minutes | 25 minutes | 45 minutes | 45 enemies |
Enemy Kill Requirements Matter
You can't just skip all the trash and rush to bosses. Each dungeon requires a minimum number of enemy kills alongside beating the timer. This forces strategic decisions about which packs to fight while maintaining efficient clear speeds.
Rewards Worth Fighting For
Gold Medal Rewards
Complete all nine dungeons within Gold time limits to earn the Challenge Conqueror: Gold achievement and unlock multiple reward tiers.
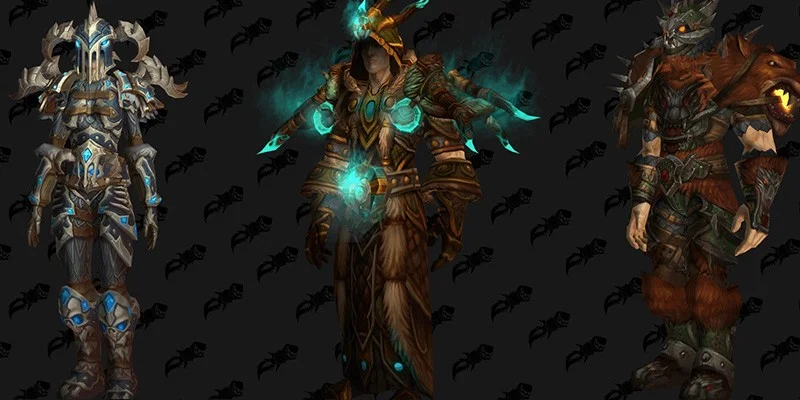
Class Transmog Sets
Each class gets a unique eight piece cosmetic armor set. These are purely visual but feature some of the game's most elaborate designs. Many include special animations like glowing effects or particle systems:
These transmog sets are account-wide and remain exclusive to Challenge Mode completions.
Dungeon Teleports
Each Gold completion gives you a teleport spell for that specific dungeon. These have eight hour cooldowns but save tons of travel time:
- Path of the Black Ox: Siege of Niuzao Temple
- Path of the Jade Serpent: Temple of the Jade Serpent
- Path of the Mogu King: Mogu'shan Palace
- Path of the Necromancer: Scholomance
- Path of the Scarlet Blade: Scarlet Halls
- Path of the Scarlet Mitre: Scarlet Monastery
- Path of the Setting Sun: Gate of the Setting Sun
- Path of the Shado Pan: Shado Pan Monastery
- Path of the Stout Brew: Stormstout Brewery
Guild Achievement
Complete Challenge Conquerors: Gold - Guild Edition by earning Gold medals on all nine dungeons while in a group with at least three guild members to unlock the Thundering Serpent Hatchling pet for your entire guild. You don't need more than three guild members in each run to get guild credit.
Silver Medal Rewards
Earn Challenge Conqueror: Silver by clearing all nine dungeons within Silver times. This gets you an Ancestral Phoenix Egg that you can trade to Kai Featherfall in Vale of Eternal Blossoms for one of four phoenix mounts:
These mounts have unique models and stay character bound. Each character can only get one phoenix mount through this system.
Bronze Medal Rewards
Get Challenge Conqueror: Bronze by finishing all nine dungeons within Bronze times to earn The Undaunted title.
Preparation Strategies
Gear Selection
Since anything above 463 gets scaled down anyway, there's no point hunting for higher item level pieces. Focus on getting solid 463 gear instead of wasting time on raid upgrades that won't help.
Trinket Strategy
Trinkets work differently than other gear. While their base stats get scaled to 463 levels, their proc effects stay active and scale proportionally. Look for trinkets with strong stat procs rather than on use effects. Darkmoon trinkets punch above their weight class and work great in Challenge Modes.
Secondary Stats
Get hit capped before entering Challenge Mode dungeons. Reforge your gear set specifically for Challenge Modes and double check your stats after zoning in but before starting your timer.
Consumables You Need
Emergency Healing
- Restorative Amber: Emergency heal for clutch moments
- Golden Carp Consomme: Food buff for sustained healing boosts
Crowd Control
- Embersilk Net: Extra CC for dangerous pulls
- Rod of Ambershaping: Alternative crowd control tool
Damage Boosters
- G91 Landshark: Engineering device for serious damage
- Nearly Full Vial of Polyformic Acid: High burst damage consumable
- Battle Horn: Group damage buff for burn phases
Execution Strategies
Bloodlust Timing Per Dungeon
Smart Bloodlust usage can shave significant time off your runs. Here's where to use it in each dungeon:
| Dungeon | Best Usage | Alternative |
|---|---|---|
| Gate of the Setting Sun | Saboteur Kip'tilak fight | Raigonn during Weak Spot phases or Phase 2 |
| Mogu'shan Palace | Large opening pull for AoE damage | Xin the Weaponmaster fight |
| Scarlet Halls | Houndmaster Braun fight | Flameweaver Koegler fight |
| Scarlet Monastery | Thalnos the Soulrender fight | High Inquisitor Whitemane during both boss phases |
| Scholomance | Instructor Chillheart fight | Lilian Voss for quick burn OR save for Darkmaster Gandling |
| Shado Pan Monastery | Gu Cloudstrike during Phase 1 or Phase 2 | Taran Zhu fight |
| Siege of Niuzao Temple | Vizier Jin'bak fight | Wing Leader Ner'onok fight |
| Stormstout Brewery | Stormstout Brewhall area to trigger Ook Ook spawn | Yan Zhu the Uncasked fight |
| Temple of the Jade Serpent | Opening pull and/or first boss fight | Sha of Doubt fight |
Role Specific Focus Areas
AoE damage, burst cooldowns, and mobility matter most. Classes with strong cleave and movement abilities excel in the fast paced environment where you're constantly moving between large pulls.
Mana management becomes critical since you rarely get breaks to drink. You need to balance aggressive throughput with resource conservation throughout sustained encounters.
Survivability during massive pulls while keeping enemies grouped for cleave damage. You're walking a tightrope between aggressive pulling and keeping the group alive.
Class Synergy
Classes with crowd control, movement buffs, AoE stuns, and burst windows provide exceptional value. But group coordination and communication usually matter more than perfect class composition.
Damage and Mechanical Changes
Challenge Mode encounters hit significantly harder than their heroic versions. Abilities that you might ignore or heal through in heroics become lethal threats requiring precise execution.
Take Armsmaster Harlan's Blades of Light as an example. In heroics, you might survive getting clipped by this ability. In Challenge Modes, it'll likely kill you outright. This damage scaling makes mechanical skill the determining factor regardless of your gear or healing output.
Practice and Reset System
You can reset Challenge Mode dungeons unlimited times with no daily or hourly restrictions. This lets groups practice specific encounters, refine their routes, and immediately try again after mistakes.
The unlimited reset system supports the skill based nature of the content. You can analyze what went wrong, adjust your strategy, and jump right back in for another attempt.
Leaderboard Competition
All completion times get recorded on realm and guild leaderboards, creating ongoing competition beyond just getting the rewards. These rankings provide long term goals for groups wanting to push their performance and earn recognition in their communities.
Even after you've collected all the rewards, the leaderboards give you reasons to keep running Challenge Modes and refining your times.
Gold Medal Preparation Checklist
- Gem all equipment with appropriate gems (skip Sha Touched gems)
- Enchant every piece with the best enchants available
- Reforge to hit cap and secondary stat priorities
- Verify no gear exceeds 463 item level or accept the scaling
- Select trinkets with strong proc effects that work well after scaling
- Invisibility options for positioning and skips
- Group buff items to cover missing class buffs
- Emergency healing consumables
- Movement enhancement items
- Crowd control tools for dangerous situations
- Damage boosters for burst phases
- Memorize routes for each dungeon attempt
- Track enemy counts to meet kill requirements
- Plan Bloodlust timing for maximum damage windows
- Identify available skips and execution methods
- Understand boss mechanics with focus on scaled damage threats
- Assign utility usage and cooldown rotations
- Set up communication for crowd control and interrupts
- Agree on pull sizes balancing speed with safety
- Plan emergency protocols for mistake recovery
- Prepare talent and glyph adjustments for specific encounters
This preparation approach gives you the best shot at Gold medal success within the demanding time limits while handling the mechanical execution needed to survive the scaled damage.