
Getting Gold in Scarlet Halls
Scarlet Halls is probably your best bet for an easy Challenge Mode Gold if you're just starting out. The dungeon follows a straight line with no complex routing decisions, so you can focus on execution instead of memorizing tricky skips.
You need to finish in under 13 minutes while killing exactly 50 enemies and all three bosses: Houndmaster Braun, Armsmaster Harlan, and Flameweaver Koegler. Miss the enemy count or timer and you'll have to start over.
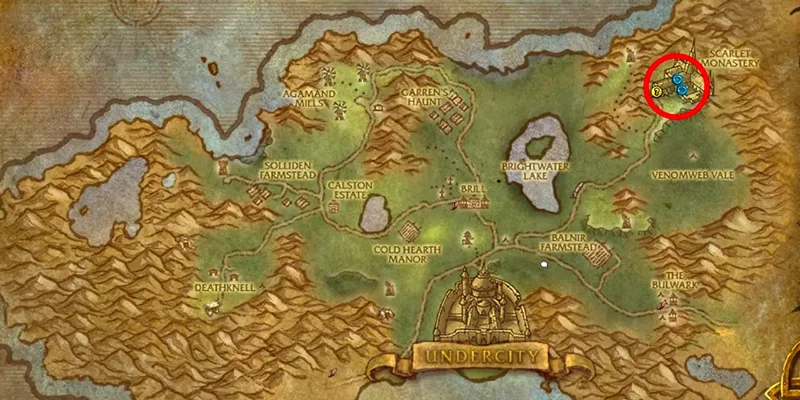
Finding the Dungeon
Head to Tirisfal Glades at coordinates 85.0, 30.0. Look for the first portal on your right when you enter the main Scarlet Monastery building.
Horde players have it easy with flight paths from Brill, The Bulwark, and Undercity all within reasonable distance. Alliance players get the short end of the stick and need to fly to Andorhal in Western Plaguelands, then make the trek over.
How Challenge Mode Scaling Works
Challenge Modes normalize everyone's gear to item level 463. If you walk in wearing higher item level pieces, they'll be scaled down to match 463 stat budgets. This prevents players from simply outgearing the difficulty.
Hit rating works differently though. Players who enter while hit capped will remain hit capped after scaling, with other secondary stats adjusted accordingly.
Building Your Group
You need three key things in every successful run:
For specific encounters, Armsmaster Harlan works better with ranged DPS, though melee can still get Gold with proper positioning. Flameweaver Koegler demands reliable interrupts and at least one dispel like Purge or Spellsteal.
Route and Major Time Savers
Courtyard Shield Run
The opening courtyard can make or break your time. Your most mobile player grabs the shield and books it across as fast as possible. Everyone else follows behind the shield bearer but don't stack on top of them.
Dog Food Strategy
Buckets of Meaty Dog Food scattered throughout the dungeon are your best friends. Throw one at a Vigilant Watchman and their dogs will kill them before falling asleep.
Don't wake the sleeping dogs afterward or you'll have unnecessary fights on your hands.
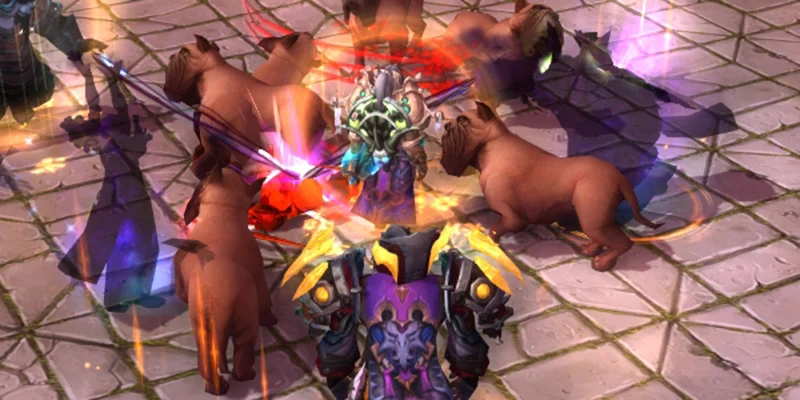
Houndmaster Braun's Dogs
This seems backwards, but don't kill the dogs during the Houndmaster Braun fight. The more dogs alive when Braun dies, the faster they'll chew through the barricade blocking your path forward.
Kill the dogs and you'll waste valuable seconds watching them slowly break down the barrier.
Class-Specific Tips
Scarlet Defenders between the first and second boss will disarm you. Consider enchanting a weapon with Living Steel Weapon Chain to avoid this problem. Death Knights can use Rune of Swordshattering instead.
Use line of sight against the many caster mobs throughout the dungeon.
The hallway next to Armsmaster Harlan contains the nastiest trash pull in the dungeon. Use your cooldowns here because things can go sideways fast.
Dispel Jolt from Scarlet Hall Guardians. It's a 3-second stun that you can actually remove.
Armsmaster Harlan doesn't require much healing, so you can throw in some DPS during his fight.
Gorefiend's Grasp shines in areas where you can't break line of sight easily. You can also use it as an AoE interrupt if things get messy.
Don't be stingy with Anti-Magic Shell and Anti-Magic Zone. This dungeon throws a lot of magic damage around.
When Harlan calls for reinforcements, use Multi-Shot to quickly pull them to your tank.
Use Grapple Weapon on Scarlet Scourge Hewers when they have Inquisition and Seal of Blood buffs active.
You're probably the fastest class for the shield run thanks to Tiger's Lust and Roll.
Nimble Brew removes stuns if Commander Lindon targets you while carrying the archery target.
Ring of Peace works great for grouping up all the casters in this dungeon.
Advanced technique: approach the courtyard from the side cubby with Glyph of Sprint or Nitro Boosts, then Vanish right as the section begins. This resets the gauntlet and puts you in position to interrupt Commander Lindon immediately.
Smoke Bomb forces casters to come to your group even when you can't break line of sight.
Pop Stampeding Roar for whoever's carrying the archery target.
Steal Quickened Mind with Spellsteal for some instant casts while helping your group.
Multi-Class Tips
Druids (Soothe), Hunters (Tranquilizing Shot), and Rogues (Shiv) can all remove Berserker Rage during the Harlan fight.
If you're playing a pet class, dismiss your pet before using Invisibility Potions. The potions don't make pets invisible, and they'll give away your position.
Boss Fights
Houndmaster Braun
Braun wants to wear you down with damage over time and a steady stream of angry dogs. Spread out so his abilities don't hit multiple people, and focus all damage on Braun himself while your tank holds the hounds.
| Ability | Description | Strategy |
|---|---|---|
| Piercing Throw | Throws knives at random players, applies Bloody Mess | Spread out to avoid multiple hits |
| Death Blossom | Leaps and spins with knives within 5 yards | Stay away from targeted player |
| Call Dog | Summons Obedient Hounds at 90%, 80%, 70%, 60% | Tank holds, DPS stays on boss |
| Bloody Rage | At 50% health: +50% attack speed, +25% damage | Use defensive cooldowns |
Armsmaster Harlan
Harlan's reinforcements spawn with damage reduction, so your tank needs to taunt them or use abilities like Dizzying Haze to pick them up properly.
This fight doesn't require much healing, so your healer can contribute some extra damage.
Flameweaver Koegler
Koegler requires constant interrupts and dispels to handle his magical buffs.
- Book Burner: Interrupt this every time. If one goes off, don't panic. You can survive one tick, just get out of the fire quickly.
- Dragon Breath: Everyone needs to get behind Koegler, then carefully move around his body to minimize how many ticks you take.
Tank him away from the group to give everyone room to dodge Dragon Breath. If someone gets hit, dispel the DoT immediately.

Healer Breakdown
After Challenge Mode scaling, you want these stats:
Focus on throughput over regeneration. Challenge Modes are short, intense encounters with drinking breaks between pulls. You need burst healing to keep tanks alive during damage spikes, not sustained mana efficiency.
Mana Management
Plan your drinks around natural breaks in the dungeon. The brief moment after Houndmaster Braun when the dogs are doing their thing is one option, though it might not give you enough time.
If you're running low and there's no natural break coming, ask for a quick 2-3 second stop before major encounters like Armsmaster Harlan. Your group will barely notice the delay.
Consumables
Buy Restorative Amber from Klaxxi vendors if you're Honored with them. It restores mana faster than regular food and won't break if you get pulled into combat.
Restoration Druid Specifics
Symbiosis usually goes to the Death Knight for Icebound Fortitude, but consider the Shaman if you need Solar Beam for extra interrupts.
Heart of the Wild is one of Restoration Druid's biggest advantages in Challenge Modes, though you might not find great opportunities to use it in this particular dungeon.
Advanced Strategies
Invisibility Coordination
- Don't use any potions during the Houndmaster Braun fight. You'll need them for the skip section later.
- Wait for the hounds to completely kill the Guardians before trying to sneak past. Even barely alive Guardians can one-shot you.
- Work out your invisibility procedure beforehand. A mistake here means waiting 10 minutes for cooldowns, which usually ends your Gold attempts.
- Use movement speed buffs like Stampeding Roar before clicking potions, but don't use any abilities after you go invisible.
Mob Count Tracking
You need exactly 50 enemy kills. Plan to kill four Vigilant Watchmen with dog attacks while making sure someone tags each one.
Common Mistakes
- Wrong Shield Carrier: Pick your most mobile player for the courtyard
- Missing Dog Tags: Always damage Vigilant Watchmen before their dogs kill them
- Killing Hounds: Resist the urge to AoE down Braun's dogs
- Invisibility Errors: Practice your invis procedures beforehand
- Guardian Hallway Overconfidence: Multiple Jolt stuns can lead to quick deaths
- Choose mobile classes for key mechanics
- Coordinate invisibility usage carefully
- Track mob count throughout the run
- Use cooldowns on difficult trash pulls
- Practice the route multiple times
Recovery Tips
Deaths don't automatically fail the run, but you'll need to drink to restore mana afterward. Keep Restorative Amber handy for emergencies.
Track your kill count throughout the run. Catching mob shortfalls early gives you options to fix them.
Rewards
Path of the Scarlet Blade teleport item with 8-hour cooldown. Great for getting around the world or coming back to beat your previous time.
This dungeon makes a good introduction to Challenge Modes. The straightforward route lets you focus on execution fundamentals that'll serve you well in harder dungeons later.