
Overview and Accessibility
Scholomance stands out as one of the more forgiving Challenge Mode dungeons. The 19-minute timer gives you considerably more breathing room than other Challenge Modes, which means you can approach trash pulls at a measured pace instead of constantly chain-pulling everything in sight like you'd need to in other zones.
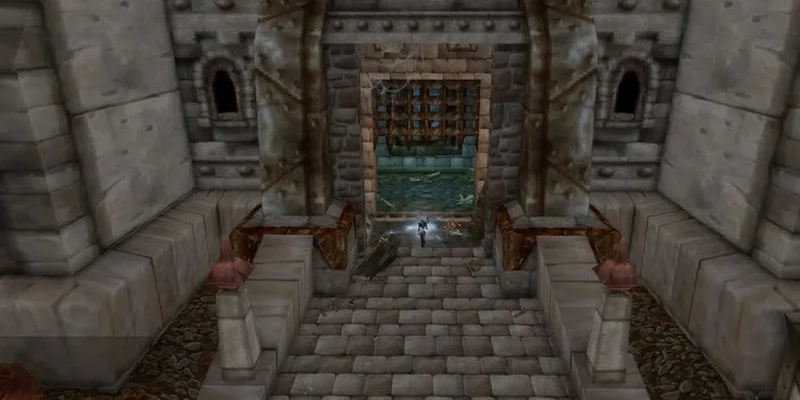
You'll find the dungeon in Western Plaguelands at coordinates 69.0, 73.0. Both factions can fly to The Mender's Stead. Horde players can also use Andorhal, while Alliance players have Chillwind Camp as an alternative.
Challenge Mode Mechanics and Requirements
What You Need to Complete
Your group needs to:
- Kill 35 enemies
- Defeat all four bosses: Instructor Chillheart, Jandice Barov, Rattlegore, and Lilian Voss
- Finish everything within 19 minutes for Gold
How Item Level Normalization Works
Challenge Mode dungeons use the same enemies and boss mechanics as Heroic difficulty. The difference is how player gear works. Everything gets normalized to item level 463, so any gear above that threshold scales down to match an item level 463 budget.
There's one exception to normalization: your Hit percentage stays the same. If you're Hit capped when you enter, you'll stay Hit capped after scaling. The system adjusts your other secondary stats to compensate.
Preparation Before You Start
The Polyformic Acid Potion Buff
Before you attempt any serious Gold run, your entire group needs the Polyformic Acid Potion buff. You'll need to run the dungeon on Normal difficulty first to get an Empty Polyformic Acid Vial. Once you have the vial, you can get the buff for your Challenge Mode run.
Group Composition
Stealth and Invisibility Options
Rogues provide huge value in most Challenge Mode dungeons through Shroud of Concealment, which gives the entire group AoE stealth. But Scholomance only has one meaningful skip opportunity, so you can get by with Invisibility Potions for everyone instead.
Ranged vs Melee
This dungeon doesn't strongly favor either ranged or melee compositions. Both work fine for Gold completion. Your comp will influence how you handle Darkmaster Gandling specifically, but both strategies work equally well.
Bloodlust Requirement
Like all Challenge Mode content, you need someone who can provide Bloodlust. This can be:
- Shaman with Bloodlust or Heroism
- Mage with Time Warp
- Beast Mastery Hunter with Primal Rage
Full Dungeon Route and Strategy
Opening: Risen Guards and Initial Trash
The opening section has Risen Guard enemies that apply Unholy Blade, a dispellable debuff that increases damage taken. It's not critically dangerous at the start, but if a Risen Guard stays alive during the Instructor Chillheart fight, healing becomes noticeably harder. Besides Unholy Blade, these guards only apply a mild DoT.
Instructor Chillheart: The Pull Technique
Understanding how to pull Chillheart properly is critical for an efficient run. When she aggros, she immediately despawns everything in her room except for Risen Guards (as long as they're not in combat). To make this work, someone needs to hit her with a ranged attack while jumping off the ledge, before you body-pull the acolyte directly below.
This fight is a great time to use Bloodlust, since you'll get at least one more use later.
Phase One Mechanics
Watch for two main abilities during Phase One:
- Frigid Grasp shows up as a shadow fissure under a player. Move out before it detonates or you'll die.
- Ice Wrath damages anyone standing near the affected player, but the radius is pretty small (just a couple of yards). You need roughly a 15-yard wide safe area, which gives enough room for three to four ranged players to spread without stacking. Everyone should keep a few yards of space to move when Frigid Grasp targets them.
Phase One doesn't deal much damage, so healers can throw in some DPS.
Phase Two: Managing the Books
Phase Two involves more damage as flying books spawn and move around. There's one spot that's mostly safe for ranged DPS. A single fire book passes through roughly every 15 seconds. You can either take one hit if your health allows, or dodge it.
Post-Chillheart Trash
After killing Instructor Chillheart, you'll typically stay in combat with any aggroed Risen Guard. Your tank can move ahead to pull the next Risen Guard in the hallway so you can fight both at once.
If you pulled the first Risen Guard deliberately for mob count, engage both guards together. This also gives your healer a combat break. In some runs, healers stay in combat continuously from the dungeon start through Jandice Barov, which can strain mana. If this happens, consider using your first Innervate (or equivalent mana ability) early so it's back up for Jandice.
Candlestick Mage Room
The next room has five Candlestick Mages (which are dangerous) plus several easier mobs. Pulling everything at once, especially with a Risen Guard still active, makes for a very tough trash pull.
A safer approach: fight two Candlestick Mages while finishing the Risen Guard, then engage the remaining three Mages separately. These mages apply a dispellable DoT called Skin Like Wax and deal heavy damage with their primary nuke.
When you split this into two pulls, the room becomes much more manageable. This is why Scholomance is less stressful than some other Challenge Modes: the generous timer lets you take safer approaches.
Try to finish the Risen Guard around the same time as the first two Candlestick Mages. Consider damaging the Risen Guard before entering this room since it has more health than other mobs.
Brittle Skeletons: These have very low health and should die instantly to AoE. If any survive and start attacking, have a DPS turn and quickly kill them.
Near Jandice's location, you'll encounter a Reanimated Corpse. This enemy doesn't pose much threat. You can finish remaining trash and take a combat break before Jandice if you want, though healing through the fight isn't difficult.
Jandice Barov: Dealing with Illusions
Some groups pull one or two Candlestick Mages into the Jandice fight. This can be useful since Death Knights can use Dark Simulacrum on Jandice's Wondrous Rapidity ability, which deals solid damage on its own and also clears any remaining trash.
Outside of illusion phases, Jandice is relatively easy. Players need to dodge Wondrous Rapidity, though tanks maximizing Vengeance (useful in Challenge Modes) might intentionally take certain abilities. Heal anyone hit by Gravity Flux, but this shouldn't create threatening situations since no other damage is happening simultaneously.

How Illusion Phases Work
The real challenge is identifying the correct Jandice during illusion phases. If your DPS can do this reliably, you'll barely need healing even during these phases. The main damage source is the explosion when you kill an incorrect illusion. This hits hard but should be manageable as long as you only kill one wrong illusion at a time.
Once your DPS get good at quickly finding the real Jandice, the fight becomes straightforward. The pulsing damage during illusion phases is relatively mild and mainly drains healer mana instead of threatening lives.
Identifying the Real Jandice
Visual Differences: The real Jandice appears mostly in black. Her tiara, hair, chestpiece, and shoulders should all be black. Any illusion with different coloring is guaranteed to be fake.
Macro Help: There are helpful macros that can assist with identification. These create a frame showing a full 3D model of your current target, with another macro keeping a Jandice model beside it for constant comparison. This makes the process much easier.
You still need to know what to compare: hair, shoulders, belt, gloves, chestpiece, and tiara can all differ between the real Jandice and illusions.
With practice, you can reach a point where you almost never attack a wrong illusion, which basically removes the healing challenge.
Bonus tip: DoTs keep ticking on Jandice even as she fades into illusions, so you get some extra damage during the transition.
Rattlegore Room: The Bone Weaver Pull
After Jandice dies, position your healer near Rattlegore's room while the tank prepares for one of the harder trash pulls in the dungeon. Your healer should drink to full while the tank starts the pull. Refresh HoTs on the tank before they begin, since they'll be pulling all the Bone Weavers in the room.
How to Execute the Pull
Several methods can make this easier:
- A Hunter can Misdirect half the room to the tank
- If your tank has a Battle Horn, that's very effective
- Without these tools, the tank needs to quickly loop the room without dying, possibly using a defensive cooldown
Dangers and Positioning
This pull can deal massive damage very quickly. Bone Weavers use a high-damage ranged attack called Bone Shards that hits in a cone and can strike multiple players if they're positioned in the same direction.
Expect heavy damage when all six Bone Weavers first turn the corner and start attacking. Barrier effects help here. Good cooldowns include Ancestral Guidance as the Bone Weavers turn the corner, followed immediately by Tranquility. The latter might not be necessary if the pull stays controlled and stuns go off properly, but it's a good safety measure.
Rattlegore: Managing Bone Armor
Rattlegore demonstrates an important principle: at the Gold level, trash is usually harder than bosses. Bosses stay essentially the same as their Bronze runs and Heroic versions, while trash difficulty scales with how aggressively you pull. This is where you gain the most time. This holds true until you start executing extremely aggressive strategies that combine trash and bosses, though those aren't necessary for Gold completions.
Core Mechanics
The most important mechanic is getting your Bone Armor buff promptly. Not having Bone Armor is an easily avoidable death. Bone Spike deals 300,000 damage in Challenge Mode before any Rusting stacks, so it'll nearly always one-shot you without protection.
Resetting Rusting Stacks
Develop a plan for resetting Rattlegore's Rusting stacks that doesn't involve someone other than the tank taunting. This prevents DPS from stopping their damage output. In typical runs, groups reset his stacks twice. With some planning, you can probably reduce this to once.
That said, using important cooldowns just to let your tank stay in longer might not be worthwhile, since those cooldowns will be more valuable for clearing the next trash room quickly.
The fight has low enough damage that healers can contribute significant DPS time. But don't use major damage cooldowns like Heart of the Wild here if you're planning to skip Lilian Voss phases, since you'll need them for that fight.
Pre-Lilian Voss Trash Room
This room has 20 total mobs: 16 Kresh'noviyan Carvers and four Flesh Horrors. It's the most ambitious pull in the standard Gold route and the most aggressive thing you'll need to execute.
Planning Your Mob Count
If you killed one extra Risen Guard during Chillheart, you'll have 15 mobs killed at this point. Clearing the entire next room brings you to exactly 35 mobs, completing the requirement. This route is fast because it avoids fighting any Bored Students in Professor Slate's room.
The Blood Debuff Mechanic
The key mechanic here involves the Kresh'noviyan Carvers' damage taken debuff. This spreads in stacks onto any number of nearby Carvers whenever one dies. The more Carvers you have clumped while damaging them, the stronger the multiplicative effect.
You want to gather as many Carvers as your group can handle, use all available cooldowns, and most importantly: don't kill all the Carvers in the front half before pulling the ones in the back half. If you do, you lose your stacked debuff.
The example run gathers the entire room at once, but slowing this down is fine given the generous timer.
Staying Alive
Use important survivability cooldowns like Shield Wall and Iron Bark as the tank gathers enemies. Also use mobility cooldowns. Stampeding Roar should go off right before the healer shifts into a healing form.
Once enemies are gathered, start your stun rotation immediately: Remorseless Winter followed by Capacitor Totem, with Army of the Dead also coming out.
Flesh Horror Mechanics: Flesh Horrors won't die until their Meat Grafts are destroyed. Just AoE them down along with everything else. This is another good spot to use G91 Landmine for uncapped AoE damage.
The Kiting Phase
As soon as stuns expire, start kiting. The Blood debuff on the Kresh'noviyan Carvers increases both their damage taken and their damage output. Once you start stacking the debuff by killing multiple Carvers near each other, your tank needs to start moving.
Ideally, Carvers should start dying around when stuns wear off, then the tank begins kiting immediately. Be careful while kiting because catching on furniture or obstacles can result in instant death.
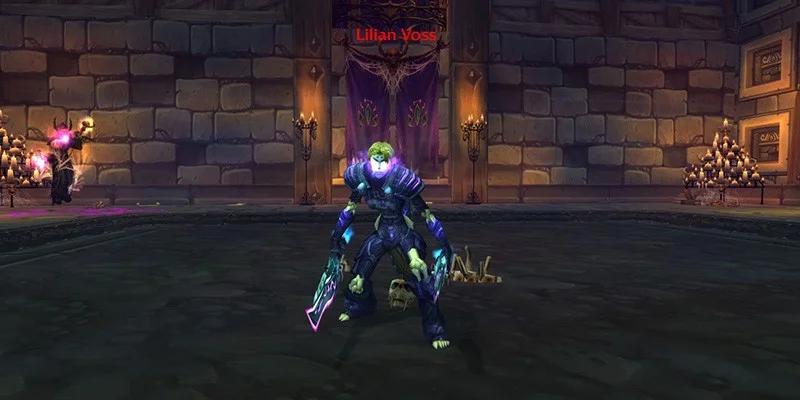
Lilian Voss: Skipping Phases Two and Three
Before engaging Lilian Voss, you need to wait for her roleplay dialogue to finish. Following standard Challenge Mode practice, the healer should drink while someone else handles any resurrections. This is especially important since the previous room can drain an entire mana bar.
Skip Goals and Timing
You want to skip phases two and three completely by dealing enough damage during the transition to phase two. The transition starts at roughly 58% health, and you need to get her down to about 1% health within roughly 30 seconds.
Save all cooldowns for this transition except damage potions, which you can't use since you'll need Invisibility Potions right after for the skip to Professor Slate's room.
Death's Grasp Timing
Lilian Voss uses Death's Grasp 30 seconds into the fight. If you can transition her before she finishes this cast, the timing is ideal. This might be very doable if your healer respecs to damage or if the group pre-applies DoTs, though these steps might not be worth the trouble.
A controlled transition in an empty corner of the room works well. Position and prepare before reaching the transition percentage.
Executing the Burn
Anyone with DoTs, debuffs that use a GCD, or other prep abilities should apply them before reaching 60% health. This lets players start casting hard-hitting abilities the moment she hits 58%.
Start Bloodlust during this prep period. Healers using damage cooldowns like Heart of the Wild should activate them now. You want all high damage abilities already active when she starts moving.
Tank her in a corner when setting up the transition. This gains extra seconds as she walks to the center. When your boss mod shows the Unleashed Anguish buff alert, you've got roughly 10 seconds left. The fight ends when you get her to 1% health.
Invisibility Potion Skip to Darkmaster Gandling
Start the invis run as soon as you're out of combat with Lilian Voss. Make sure everyone checks their combat status before drinking potions. This invis run is straightforward. It covers a short distance and is nearly impossible to mess up.
Someone needs to open the door out of the room, which breaks their invisibility. But if they press against the door while opening it, they won't aggro anything.
Darkmaster Gandling: Final Boss
Darkmaster Gandling can be a somewhat lengthy fight with several mechanics to watch.
Standard Damage Pattern
Most of the fight involves Gandling chain-casting Incinerate on the tank. This deals medium damage and requires continuous healing. He occasionally casts Immolate on the tank. Dispel this immediately. After dispelling, the damage intake doesn't change much.
Rise Mechanic and Failed Students
The unique mechanic happens when the tank or healer gets teleported into a study room. Gandling stops casting and channels Rise for the entire duration, continuously summoning Failed Students. These students explode for massive damage 8 seconds after appearing.
Two Ways to Handle This:
- Melee-Heavy Groups: Have everyone stand on the boss and do continuous AoE damage during the Rise channel, making sure each Failed Student dies within 8 seconds.
- Ranged-Heavy Groups: Position DPS on the ledge at a specific spot. Make sure someone gets aggro on each Failed Student as it appears. The students will run up the stairs and around the top balcony, timing out and exploding before reaching the group.
Healer Study Room Mechanics
For healers teleported into study rooms, the escape mechanic involves Fresh Test Subjects, which work as bombs. Detonate them by dispelling them. It takes two hits to kill any of the targets.
Try to clump all Fresh Test Subjects for the first dispel, letting them all die within two dispel casts. If they're not properly clumped, you'll need more dispels and will take longer to escape.
Post-Study Room Danger
The moment when the tank or healer finishes their time in a study room is the most dangerous part of the fight. As soon as the door opens, Gandling stops channeling Rise and returns to normal behavior, casting Incinerate. Without the tank or healer in position, you can have several dangerous seconds before they get back to their roles.
This is a good time for the tank to use a defensive cooldown or for the healer to be ready to heal other DPS temporarily.
Healing on Low Mana
After any unexpected deaths or complications, you might need to heal on low mana for the rest of the fight. This is a valuable skill for Challenge Modes since it comes up frequently after anything unexpected happens.
Looking at an empty mana bar is scary, but taking stock of your cooldowns and available resources often shows you can sustain healing much longer than you'd expect before things fall apart.
Class-Specific Tips
Mobility: Use Stampeding Roar regularly. You'll get many uses of this ability in each run.
Jandice Barov: Use Dark Simulacrum to steal her Wondrous Rapidity ability. It deals solid damage.
Lilian Voss: Use Divine Shield after being gripped to prevent spawning fire pools.
Utility: Holy Wrath can stun certain enemies in this dungeon, which is very useful.
Candlestick Mages: Smoke Bomb is particularly useful against Mages before Jandice Barov since it forces casters to come to the group even without breaking line of sight.
Risen Guard Debuff: Unholy Blade is a dangerous damage taken increase. Dispel this as a priority.
Instructor Chillheart: This fight has relatively low damage, so it's a good time to contribute DPS.
Invisibility Potions: Using an Invisibility Potion doesn't make your pet invisible. Dismiss your pet before attempting to sneak through any section.
Challenge Mode Rewards
Completing Scholomance Challenge Mode with a Gold time gives you:
- Achievement: Scholomance: Gold
- Spell: Path of the Necromancer
Time Management Philosophy
Scholomance is one of the easier Challenge Modes in several ways. While it has more threatening encounters than Gate of the Setting Sun, it also gives you more time leeway than any other Challenge Mode. You can fight trash at a somewhat normal pace and still get Gold instead of requiring the extremely aggressive multi-pulling necessary in other zones.
The strategies described above show aggressive tactics that provide significant time savings, but you probably won't need all of them to get Gold. Particularly with the Lilian Voss skip, which is more straightforward than speed tricks in most Challenge Modes, you'll have plenty of time to complete the rest of the dungeon comfortably.
Even with unexpected deaths or complications costing 30 seconds or more, groups can still finish with more than two and a half minutes to spare. This buffer means you can approach the dungeon at a challenge mode pace similar to other zones, but you've got more room for error and recovery in Scholomance specifically.