
Shado-Pan Monastery stands among the most demanding Challenge Mode dungeons in Mist of Pandaria Classic. With a 21-minute timer for Gold completion, this dungeon tests your group's coordination, route knowledge, and execution over an extended period. The dungeon requires defeating all four bosses, eliminating 32 specific enemies, and completing a unique mechanic: purifying 4 Defenders between the Sha of Violence and Taran Zhu encounters.
This guide covers everything from dungeon location and composition to detailed boss strategies and optimal routing for achieving Gold completion.
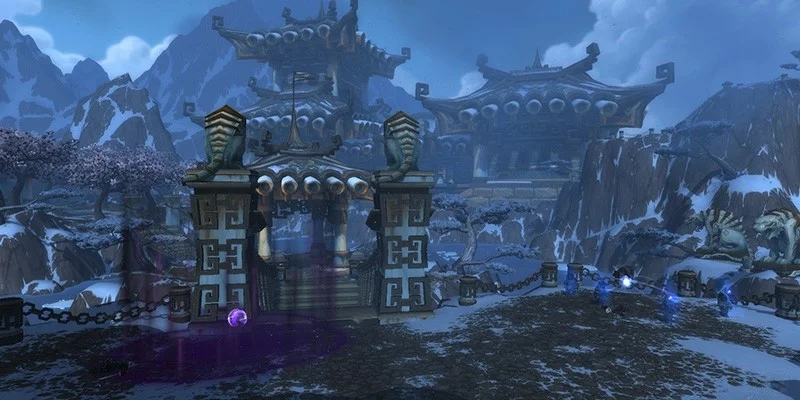
Location and Access
Shado-Pan Monastery is located in Kun-Lai Summit. The entrance portal sits on the ground floor at the end of the main road. Both Alliance and Horde players can use the Winter's Blossom flight point as their closest access point to the dungeon.
Challenge Mode Completion Requirements
To complete Shado-Pan Monastery Challenge Mode, your group must:
- Defeat all four bosses: Gu Cloudstrike, Master Snowdrift, Sha of Violence, and Taran Zhu
- Eliminate 32 designated enemies throughout the dungeon
- Purify all 4 Defenders located between Sha of Violence and Taran Zhu (this is a unique requirement for this dungeon)
Challenge Mode Scaling and Mechanics
Challenge Mode dungeons maintain the same enemy types and boss abilities as their Heroic counterparts but introduce significant changes to player power:
Item Level Normalization
All equipped gear is normalized to item level 463. Any items above this threshold will have their stats scaled down to match item level 463 budget. This creates a level playing field where execution matters more than gear quality.
Hit Rating Exception
Hit % represents a critical exception to the normalization system. If you enter the dungeon with capped Hit rating, you will remain Hit capped after scaling. The system compensates by adjusting your other secondary stats accordingly.
Increased Damage Output
Many enemy abilities have significantly increased damage compared to Heroic difficulty. Mechanics that were survivable in Heroic mode can now one-shot players in Challenge Mode. Static Field from Gu Cloudstrike exemplifies this increased lethality—standing in this ability will likely kill you instantly.
Optimal Group Composition
Essential Utility
Class-Specific Tips and Advantages
Aspect of the Pack provides crucial movement speed during the invisibility section. Remember to dismiss your pet before using Invisibility Potions as pets are not affected by stealth.
Use Anti-Magic Shell to absorb Gu Cloudstrike's substantial Magic damage and generate additional Runic Power.
Shapeshifting breaks root effects immediately, making it invaluable during the arrow gauntlet section.
Tiger's Lust and Nimble Brew both remove root effects. Mistweaver Monks should avoid using Revival during Sha of Violence as it dispels the beneficial Destructive Influence damage buff.
Dungeon Route and Enemy Count Strategy
Shado-Pan Monastery offers multiple paths to reach the 32-enemy requirement, which creates opportunities for optimization but also potential time waste. Understanding the most efficient route is essential for Gold completion.
The Defender Mechanic
The unique requirement to purify 4 Defenders between Sha of Violence and Taran Zhu significantly impacts routing decisions. Each Defender is surrounded by enemy packs that are difficult to skip. Most groups complete a substantial portion of their kill count in this section.
Boss Encounters
Gu Cloudstrike
Before the sha escaped, Gu Cloudstrike trained elite Shado-Pan spellcasters. Now corrupted, this once gentle pandaren unleashes devastating magical attacks. He has taken control of the Azure Serpent, and his students cannot withstand his lethal assault.
The encounter follows the same structure as Heroic difficulty, but avoidable mechanics will one-shot most players. Immediate movement away from abilities like Static Field is mandatory for survival.
Phase 1 Abilities and Strategy
Phase 1 - Gu Cloudstrike & Azure Serpent
Gu Cloudstrike targets a random player with moderate Nature damage. This damage also affects all players within 5 yards of the primary target. Players should maintain at least 5 yards of spacing to avoid unnecessary damage.
The Azure Serpent creates a Static Field at a random player's location, dealing heavy Nature damage to everyone within 10 yards. The field persists for 15 seconds, continuing to deal Nature damage every second. This ability can nearly one-shot players.
Phase 2 Abilities and Strategy
The Azure Serpent shields Gu Cloudstrike, making him immune to all damage. This phase focuses entirely on handling the serpent's mechanics.
The Azure Serpent applies Magnetic Shroud to every player. This effect absorbs healing cast on each affected player, deals Nature damage every second, and requires 150,000 healing to break. When broken, it heals all players within 20 yards.
- Use AoE healing abilities first to help break multiple shields
- Group up - spreading out is not viable
- Each broken shield provides healing to others nearby
- Alchemist Rejuvenation Potions can instantly break a shroud
Phase 3 Abilities and Strategy
Gu Cloudstrike periodically deals Nature damage to nearby enemies with Overcharged Soul. The frequency increases proportionally to his missing health—the lower his health, the more frequently this damage occurs.
Phase 3 becomes a damage race with steadily increasing pressure. Initial damage is manageable, but as Gu Cloudstrike's health drops, the group will start taking heavy damage rapidly.

Master Snowdrift
Master Snowdrift believes the battles between Horde and Alliance have contributed to the monastery's corruption. Heroes seeking his allegiance must first defeat his students. Only those who prevail can face Snowdrift himself, a paragon of martial arts dedicated to perfecting body and mind.
Before reaching Master Snowdrift, you must navigate an arrow gauntlet while mounted. After clearing the gauntlet, you will face groups of Snowdrift's students before the final confrontation with the master.
Arrow Gauntlet
Ice arrows fire from the sides as you begin riding. When you turn onto the bridge, you can look up at incoming arrows as you ride, making them easier to dodge. Arrow trajectories can be difficult to judge precisely.
Novice Encounter
Master Snowdrift summons 24 novice students that must be defeated. This encounter is primarily a DPS check with minimal healing requirements.
Novice Fight Strategy
Novices occasionally stand still and use Fists of Fury in a frontal cone attack. Stay loosely spread to minimize how many players must move from the same ability. Stunning novices prevents them from entering Parry Stance, improving overall DPS efficiency.
Black Belt Encounter
Two Black Belt students must be defeated before facing Master Snowdrift.
- Focus Fragrant Lotus first
- Her Fireball can kill players in Challenge Mode
- She summons a damaging staff that attacks players
- Uses Whirlwind attack with heavy damage
- Small radius makes it relatively easy to avoid
- May drop aggro and chase players
Master Snowdrift Boss Fight
Master Snowdrift Phase Breakdown
Master Snowdrift uses Fists of Fury (frontal Fire damage) and Tornado Kick (heavy Physical damage and knockback). Tanks with appropriate cooldowns can deliberately stand in Fists of Fury to generate additional Vengeance threat.
Master Snowdrift creates three copies. Two are fake illusions, one is real. Assign one DPS to each spawn position. Kill the two fake copies first—they throw fireballs. Standing behind a fake copy's spawn position protects you from its fireballs.
Master Snowdrift chases players with Tornado Slam (60% max health damage - healable). Enters Parry Stance periodically. DO NOT attack during Parry Stance—the retaliations deal heavy damage and stuns/repositioning disrupts group efficiency.
Invisibility Potion Section
After defeating Master Snowdrift, the group must use Invisibility Potions to bypass a large section of trash enemies. This represents one of the more challenging invisibility routes in Challenge Mode dungeons.
Route Execution
Follow a tight path along the right side of the hills, then proceed onto the bridge while watching for fire hazards. The fire placement on the bridge can create a complex maze that requires careful navigation.
Volatile Energy Handling
If caught early at the top of the bridge, you will face one Regenerating Sha and four Volatile Energies. Interrupt the Regenerating Sha and kill it while carefully managing Volatile Energies. As Volatile Energies approach death, have affected players move away from the group. Use stuns, knockbacks, or any crowd control to prevent their death explosion from hitting the group.
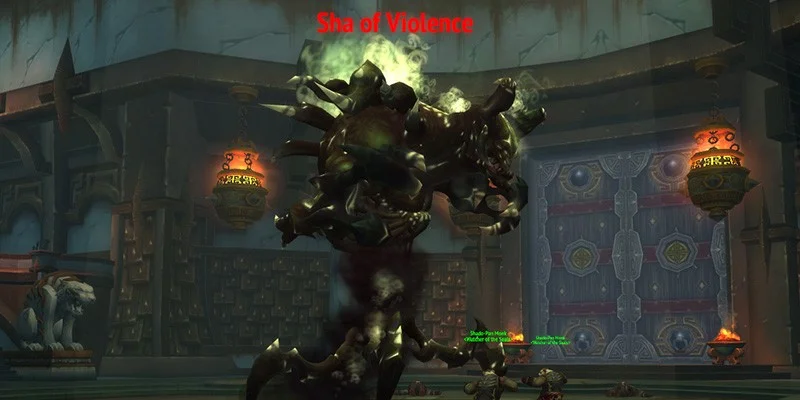
Sha of Violence
The Sha of Violence represents one of the most mechanically intricate Challenge Mode bosses, particularly for healers.
Destructive Influence Mechanic
Core Mechanics
Healer Priority Management
- Dispel tank only when Destructive Influence is inactive
- Continuously move to dodge Sha Spikes
- Keep melee DPS alive through Volatile Energy explosions
- Manage Lesser Volatile Energies attacking you with roots/snares
- Maintain healing output on the group
- Tranquilize the Enrage (if no DPS is assigned)
Trash Section: Defenders and Purification
Five trash packs lie between the Sha of Violence and Taran Zhu. These packs implement the Purified Defenders mechanic mentioned in the dungeon requirements.
Purification Mechanic Explained
Near each trash pack is a floating corpse (a Defender). Someone must purify it by clicking and channeling a 4-second ritual. Any damage or interrupting effect cancels the channel.
Enemy Abilities
| Enemy Type | Interrupt Ability | Handling Strategy |
|---|---|---|
| Vestiges of Hatred | Death Grip | Pulls channeling player into pack |
| Residual Hatred | Ring of Malice | Circular area attack blocking Defender location |
| Fragment of Hatred | Ranged Attacks | Interrupts channel from range |
| Hateful Essence | Shadow Damage Aura | Floating spheres that must be destroyed first |
Pack-by-Pack Strategy
Contains only Vestiges of Hatred with Death Grip. Relatively straightforward with proper stun coordination.
Adds Residual Hatred with Ring of Malice and Fragments of Hatred. Delay purification if Ring of Malice is poorly positioned.
After the second pack, you can jump off the side and ride back up on a small ledge to bypass this pack entirely.
Adds Hateful Essences. The nearby Hateful Essence must be destroyed before purification. Ranged DPS can attack it without pulling the pack. Use major cooldowns here—this represents the most difficult remaining trash.

Taran Zhu
The Sha of Hatred has corrupted Taran Zhu, the pragmatic and mighty Shado-Pan leader. Once devoted to protecting his home, Zhu now seethes with hatred for all life, twisting his perception of everything and everyone around him.
The fight is largely the same as Heroic difficulty, but Hatred management becomes critically important. Never allow yourself to have high Hatred when Gripping Hatreds begin pulling players.
Hatred Mechanic
Boss Abilities
| Ability | Effect | Response |
|---|---|---|
| Rising Hate | Projects Sha energy dealing moderate Shadow damage | Interrupt immediately whenever cast |
| Ring of Malice | Ring of shadows for 15 seconds, reduces movement speed by 80% | Avoid touching the ring |
| Sha Blast | Moderate Shadow damage and knockback during Ring of Malice | Only affects current target |
| Gripping Hatred | Summons manifestation that pulls all players and creates Pool of Shadows | Kill quickly and consistently |
Strategy Details
Positioning Considerations
- Ranged players should not stand at incorrect distances where they would be inside Ring of Malice
- Melee players may need to move if a Gripping Hatred spawns directly on top of them
- Ranged DPS need good line of sight to Gripping Hatreds to kill them quickly
- Station ranged DPS on different sides of the boss for better coverage
Challenge Mode Rewards
Completing Shado-Pan Monastery Challenge Mode with a Gold time grants:
Teleport directly to the dungeon entrance on demand with an 8-hour cooldown. This provides convenience for world traversal and makes returning for improved times significantly easier.
Final Execution Notes
Shado-Pan Monastery is one of the longer and more challenging Challenge Modes available. The 21-minute timer is generous enough that small mistakes throughout the run will not necessarily cause failure. However, the extended duration means more opportunities for wipes exist compared to shorter dungeons.
Preparation Approach
Learning Curve
This dungeon requires your group to develop and remember a consistent strategy, handle complications as they arise, and execute a lengthy routine. It rewards experience and coordination more than moment-to-moment mechanical skill.
Time Management
Performance Checkpoints
The timer is not so tight that it punishes minor execution errors. Focus on safe, reliable strategies for the critical moments (opening trash pull, arrow gauntlet, invisibility route, Sha of Violence, Gripping Hatreds). Small optimizations throughout the run create cushion for unexpected complications.
Key Takeaways
- Proper group composition with stealth and movement speed
- Consistent Rising Hate interrupts
- Quick Gripping Hatred kills
- Smart Defender purification strategy
- Clean invisibility potion execution
- Patience and coordination throughout 21 minutes
- Standing in Static Field during Gu Cloudstrike
- Failing arrow gauntlet navigation
- Breaking invisibility too early
- Dispelling Destructive Influence from DPS
- Allowing Hatred to get too high before Gripping Hatreds
- Poor positioning for Gripping Hatred kills