
Getting Started with Challenge Mode
What You Need for Gold
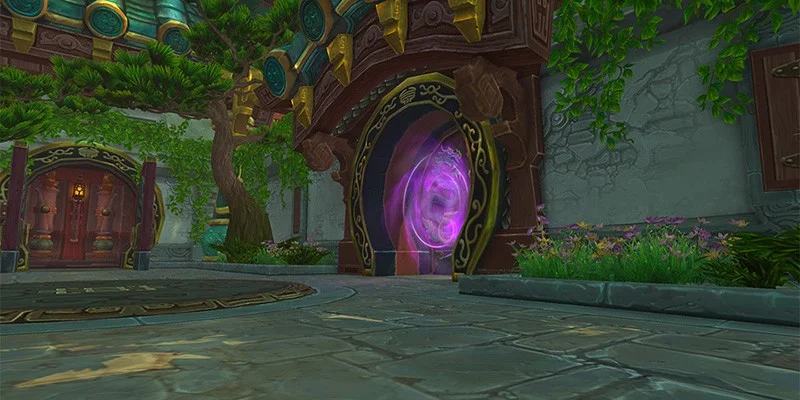
Temple of the Jade Serpent throws you into one of the more flexible Challenge Mode dungeons in MoP Classic. You'll need to kill 45 enemies and four bosses (Wise Mari, Lorewalker Stonestep's Strife and Peril encounter, Liu Flameheart, and Sha of Doubt) in under 15 minutes for that gold medal. The dungeon sits at coordinates 52.2, 57.9 in The Jade Forest, with Dawn's Blossom, The Arboretum, and the Jade Temple Grounds flight paths all roughly the same distance away.
How Gear Scaling Works
Here's the thing about Challenge Modes: your gear gets capped at item level 463. Anything higher gets scaled down, so you can't just outgear these dungeons. The one exception? Hit rating. If you walk in at hit cap, you stay at hit cap, with the game adjusting your other stats to compensate. This creates a level playing field where skill beats gear every time.
The Route That Actually Works
Boss Order and Path Planning
Temple of the Jade Serpent breaks the mold by forcing you to bounce between opposite sides of the dungeon. You'll start with Wise Mari, backtrack to Lorewalker Stonestep, then push through the Sanctum to the Terrace. Groups often describe this as their seventh Challenge Mode gold, and for good reason (it's manageable once you know the tricks).
Opening Pull to Wise Mari
Your first big test comes immediately. Pull all four Corrupt Living Waters in the hallway before Wise Mari, along with their Corrupt Droplet buddies. This pull hurts. When those Living Waters die, they each spawn three more droplets that won't share diminishing returns on stuns with their parents. Tanks and melee need to stay out of the Sha Residue pools these things leave behind (the damage in Challenge Mode will wreck you).
Some groups pull these mobs right into the Wise Mari fight during his downtime when he's spawning his own adds. It's doable but requires solid coordination and a healer who knows what they're doing.
Wise Mari Fight Breakdown
The Arena Changes Everything
Forget what you know from Heroic. In Challenge Mode, stepping outside that outer water ring kills you instantly. Your safe zone? That gap in the outer ring on the far side. Tanks and melee work this space, swapping sides to manage Sha Residue pools while keeping solid footing.
Phase One Positioning
Stack up when you run in or that first Hydrolance will nail someone. Ranged players and healers park themselves where they can avoid Hydrolance patterns hitting the entrance and side pools. You're basically camping one spot for the whole first phase if you do it right.
Those Corrupt Living Waters need to die fast since the next one won't spawn until the current one's dead. Death Knights make this easier with Death Grip when the Waters decide to be stubborn about positioning. After each Water dies, burn down the three droplets before moving on.

Phase Two Movement
Once Wise Mari hits 70%, the fight gets simpler but requires constant movement. The rotating water spout forces healers to circle constantly, but there's zero unavoidable damage if everyone dodges properly. Those fire waves will one-shot you, so pay attention. Since healers can't stop to cast much while running, DPS needs to carry this phase.
Library Section and the Skip
The Roughest Trash Pulls
After Wise Mari goes down, healers should book it ahead of the group. Sprint, dash, whatever you've got (use it to start drinking while everyone catches up). The first two library pulls hit harder than anything else in the dungeon. You're dealing with Talking Fish and Lesser Sha packs that absolutely require major cooldowns. Pop Army of the Dead here if you've got it, plus tank defensives and probably a healing cooldown like Tranquility.
Lesser Sha have this annoying short-range silence that'll mess with casters and Death Knights. Stay at max range to avoid it. Without proper cooldowns and stun rotations, these pulls will drain your healer dry.
Your One Skip
Use Invisibility Potions (or Shroud if you've got a Rogue) to skip the Songbird Queen pack. Her sleep spell is more trouble than it's worth. Remember to dismiss Hunter and Warlock pets first (they don't turn invisible with potions).
You actually need to pull the stair pack with the Crybaby Hozen, Golden Beetle, and Nodding Tiger. Why? Because you're skipping three mobs before Sha of Doubt later and need these for your count. Pull them to Lorewalker Stonestep's area and kill them during the roleplay before Strife and Peril activate.
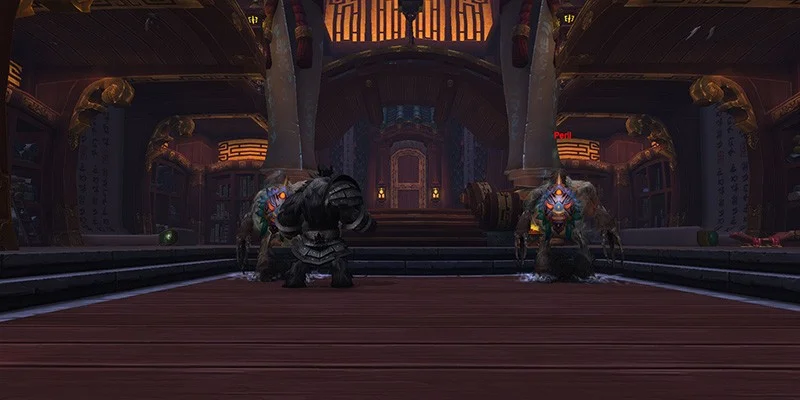
Strife and Peril Strategy
In Challenge Mode, you fight both simultaneously every time. Keep their health close so they die together. Swap targets around 6-8 stacks of Intensity. Here's the trick: stacks generate from hitting the bosses, not damage dealt. DOTs let stacks drop while maintaining damage, but something like Starfall creates constant stacks.
The boss you're targeting pulses group damage, so stack up for ground healing effects. Both reset their mechanics when you swap, so coordinate those switches.
Terrace and Liu Flameheart
Clearing the Terrace
You're clearing this entire room, no shortcuts. Minions of Doubt are your main concern with two abilities that need interrupting: Shadows of Doubt drops damaging floor zones that force melee to move, and Shattered Resolve cuts damage and healing by 75% until dispelled.
The room has three packs with one Minion each, plus two patrolling. Fighting three at once gets messy fast with interrupt and dispel demands. Consider pulling patrols separately. For dispels, only cleanse full-duration debuffs (don't waste your cooldown on ones about to expire anyway).
Liu Flameheart's Three Phases
Phase One (100-70%): Simple enough. Serpent Strike puts a dispellable DOT on the tank, then Serpent Kick spawns fire waves that one-shot anyone they hit. Just dodge the waves and dispel the tank.
Phase Two (70-30%): This is where things get spicy. Jade Serpent Strike adds a 100k healing absorption shield to that DOT, and now it can't be dispelled. Jade Serpent Kick knocks the tank back while spawning waves. Keep your tank topped off and ready with defensives. Good groups push her to phase three after just two strike combos.
Phase Three (Below 30%): Liu becomes the Jade Serpent and breathes fire at random players. You'll see green swirls first, then bright fire appears seconds later. Standing in it kills you fast. Less movement than phase two makes this easier to heal.
Liu Flameheart Phase Difficulty
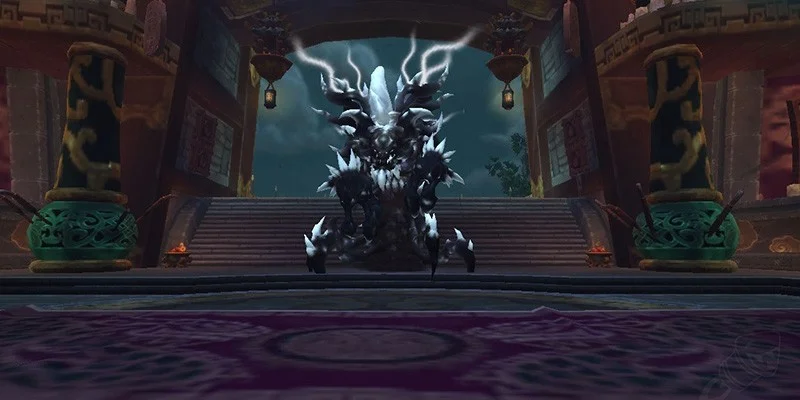
The Sha of Doubt Skip and Fight
Executing the Three-Mob Skip
This needs a Hunter (or similar class with combat drops). When Liu dies, your Hunter sprints to Sha's room and grabs three spawning Minions of Doubt. Using Deterrence, Disengage, and Feign Death (maybe Readiness too), they kite these mobs into Sha's corner while everyone else stays out of combat range. The group sneaks in, staying clear of aggro range, then the Hunter feigns once everyone's in position.
Corner Strategy for Extra DPS
Pull Sha to the corner or balcony instead of fighting in the center. When he summons Figments, he has to walk back to center before going immune, giving you extra seconds of damage. This really matters if you're close to preventing that third Figment phase.
Figment Phase Execution
Stack your group tight for Figment phases so you can AoE them down. Everyone needs to check that their personal Figment stays in the kill zone (adjust if needed). Starting from the same spot keeps Figments clustered. Back against a wall or pillar stops them from leaping backward after spawning, speeding up the burn.
Dispel Touch of Nothingness immediately. Even one tick hurts nearby players badly. Plan your healing cooldowns: Tree Form for first Figments, Tranquility with Ancestral Guidance for second. Using Bloodlust here can prevent the third Figment summon completely.
Group Composition Tips
Must-Have Abilities
You need Bloodlust, Heroism, or Time Warp from a Shaman, Mage, or Beast Mastery Hunter. Death Knights bring huge value with Death Grip for Wise Mari and Gorefiend's Grasp for trash packs (especially that triple pack before Liu).
Rogues give you Shroud for group stealth, though you really only need one skip here, so Invisibility Potions work fine without a Rogue.
- Death Knight for grips and Army
- Hunter for the Sha skip
- Shaman/Mage for Bloodlust
- Strong AoE DPS for trash
- Low mobility healers
- Single-target only DPS
- Classes without interrupts
- Pet classes without dismiss macros
When to Pop Bloodlust
Most groups save it for Sha of Doubt to skip that third Figment phase. You could also use it on the opening trash or split two uses between Wise Mari and Sha (needs careful timing with the 10-minute debuff). Test with your group to see if Bloodlust pushes you past Sha's Figment thresholds.
Class-Specific Tricks
Healers: Liu's Jade Serpent Strike shield needs immediate attention. Nature's Swiftness or similar instant-cast amplifiers can nuke it with one big heal.
Death Knights: Gorefiend's Grasp turns spread trash packs into neat little death balls.
Monks: Save Touch of Death for instantly deleting a Figment during Sha.
Paladins: Glyph of Holy Wrath gives you bonus damage against all those Aberrations and Elementals.
Rogues: Smoke Bomb forces casters to come to you when you can't break line of sight.
Druids: Stampeding Roar speeds up those long runs between pulls.
Making Your Run Smoother
Healer Mana Tricks
After every boss kill, healers should sprint ahead and start drinking while the group catches up. The library trash and Liu's phase two burn the most mana, so plan your cooldowns around those spots.
Mob Count Math
After the final terrace pack, you'll have 43-45 enemies killed. You'll finish two over the requirement, but there's no way to skip exactly two mobs anywhere else. Those extra two won't slow you down much.
Priority Targets
Must Interrupt: Shattered Resolve (75% damage/healing reduction), Shadows of Doubt (floor damage zones)
Must Dispel: Touch of Nothingness (immediately), Serpent Strike (Liu phase one only)
Positioning Dangers: Sha Residue pools, Jade Fire zones, Hydrolance paths, outer water ring instant death
Where Groups Wipe
Library trash wipes groups that try to chain pull without cooldowns. Lesser Sha silence catches healers standing too close. Liu's phase two healing absorption overwhelms unprepared healers. Touch of Nothingness during Sha stacking causes chain deaths when not instantly dispelled.
Your Rewards
Gold completion gives you the "Temple of the Jade Serpent: Gold" achievement and the Path of the Jade Serpent teleport spell. Eight-hour cooldown, takes you straight to the dungeon entrance. Great for transportation and for coming back to beat your time.
Teleports you directly to the Temple of the Jade Serpent entrance. Part of the complete Challenge Mode teleport network.
Making It Happen
Temple of the Jade Serpent tests execution over gear thanks to that 463 normalization. The 15-minute timer leaves little room for mistakes, so clean pulls and smart cooldown usage make or break your run. Practice that Hunter skip for Sha repeatedly (failed attempts cost serious time). Keep interrupt and dispel assignments crystal clear, especially during Minion packs where overlap means wipes.
Most groups report getting gold here as their seventh Challenge Mode completion, putting it somewhere in the middle difficulty-wise. Once you nail the route and understand the danger points, you'll find it flows pretty smoothly. The key moments (library trash, Liu phase two, Sha Figments) need respect, but they're totally manageable with preparation.