
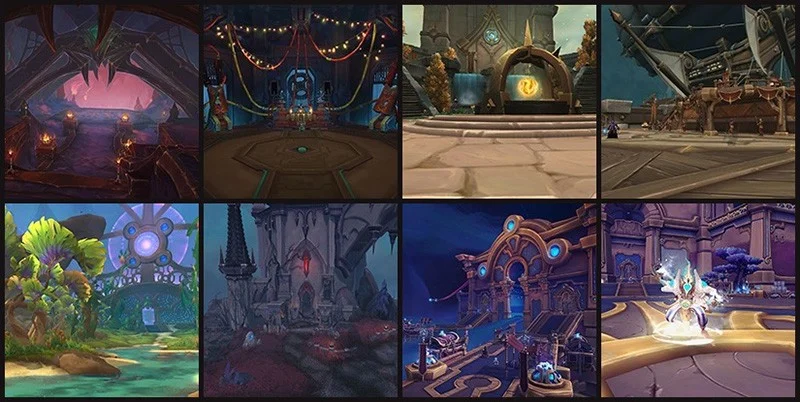
What's New This Season
Season 3 brings eight dungeons that'll test every skill you've built up in The War Within. You've got four community favorites returning from earlier this expansion (Ara-Kara, The Dawnbreaker, Operation: Floodgate, and Priory of the Sacred Flame), plus the two-part Tazavesh mega-dungeon that's been split into Streets of Wonder and So'leah's Gambit. Halls of Atonement makes its comeback from Shadowlands, and there's a completely fresh challenge in Eco-Dome Al'dani.
This season's dungeon pool rewards players who can adapt quickly. Each instance brings different mechanical demands, so mastering the fundamentals becomes more important than memorizing one perfect strategy.
Add-ons That Actually Matter
Getting your UI sorted makes the difference between smooth runs and constant wipes. BigWigs stays the gold standard for boss encounters, but you'll need LittleWigs alongside it for complete M+ coverage. Nameplate timers make the biggest difference. When you can see ability cooldowns directly on enemy nameplates, interrupt rotations become second nature.
Many include visual indicators for positioning mechanics and audio cues for high-priority interrupts. They're particularly helpful for the returning Tazavesh dungeons and new Eco-Dome encounters where muscle memory from previous seasons won't carry you.
Advanced groups benefit from Omni CD and Method Raid Tools for tracking cooldowns and coordinating defensives, though these are nice-to-have rather than must-have tools.
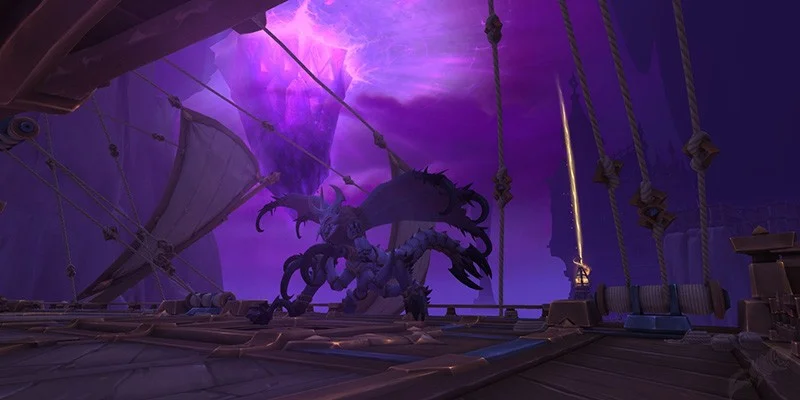
Tazavesh: So'leah's Gambit
First Area: Murloc Management
Every Murloc in this opening section will flee when low on health. That sounds harmless until they start chain-pulling half the dungeon. Your crowd control toolkit becomes crucial here. Ursol's Vortex, Ring of Peace, Binding Shot, and AoE slows like Piercing Howl all work well for containment.
- Murkbrine Shellcrushers cast Cry of Mrrggllrrgg, an enrage that affects their entire pack. You have to interrupt this or your tank will get demolished.
- Murkbrine Fishmancers stick to standard bolt-casting at random players, nothing fancy there.
- Murkbrine Scalebinders drop the infamous Invigorating Fish Stick. This creates a 25% damage reduction aura that also heals affected mobs. You can't crowd control the Scalebinder anymore, leaving two options: kill the fish stick directly (player scripts can change its color to make targeting easier) or drag mobs 20-30 yards away from the effect.
- Coastwalker Goliaths hit hard with Tidal Stomp but provide decent count. Just don't pull multiple ones together. They work great with specs that can convert AoE into single-target damage, like Arcane Mage funnel builds or Aldrachi Reaver Havoc.
Hylbrande: Console Simplified
This fight keeps most of its original mechanics but simplifies the console puzzle. Four players grab colored orbs and run them to matching consoles while someone channels the main panel. Keep that channel going no matter what. Canceling it triggers a lockout period that can cost you the pull.
Second Area: Tank Punishment Zone
This section loves beating up tanks. Deckhands enrage themselves, so fragile tanks might need to kite. Tidesages are your standard interrupt-priority casters.
Corsair Officers throw ricocheting blades that create ground circles. Multiple people in one circle means everyone takes damage, so spread out when you see them coming.
Timecap'n Hooktail: Positioning Practice
This boss demands precise movement from everyone. Tanks should take the inside track while ranged DPS and melee stack along the wall, moving parallel to avoid fire while staying in range. This setup lets tanks use Infinite Breath to clear adds effectively.
The debuff mechanic gives haste to affected players but explodes for AoE damage when dispelled. Healers should immediately dispel one person, heal the group, then dispel the second when their cooldown returns.
Anchor Toss can easily one-shot players. When you see that cast starting, hit a defensive immediately. The combination of this ability with fire effects or debuff explosions creates some of the deadliest overlaps in the dungeon.
Third Area and Star Management
Star Seers can be completely bypassed with Mind Soothe if you have it available. Otherwise, pull one with other trash and focus Pulsar Orbs immediately. You can technically outrange these, but reliable target swapping works better in practice.
Ritualists cast two abilities worth knowing: Hyperlight Bolt (standard random-target damage) and Unstable Rift (group-wide one-shot that must be interrupted). The rift cast is longer, so you can set up crowd control first, then kick.
So'leah: Two-Phase Power
Phase one revolves around Assassin spawns that need interrupts or crowd control. Ursol's Vortex can pull them back to melee range and completely cancel their casts.
Collapsing Star needs soaking throughout the fight. Unlike similar mechanics, this puts dots on all five players regardless of who soaks. Mobile ranged classes handle this best, freeing up healers to focus on the group.
At 40% health, So'leah transitions to phase two. Many groups tank her in corners, but positioning on the stage offers a huge advantage: stars travel under the stairs, making the mechanic trivial. This might get fixed eventually, but it works for now.
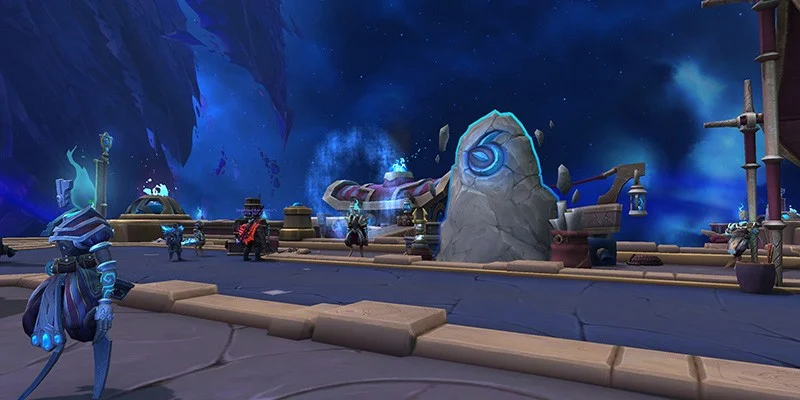
Tazavesh: Streets of Wonder
Opening Threats and Mini-Bosses
Two mini-bosses guard the entrance: Gate Warden Zo'mazz and Portal Guardian Zo'honn. Both use Radiant Pulse, which can deal 200-300% of your health as a dot. You can line-of-sight these consistently. Portal Guardian makes this easy, while Gate Warden requires specific positioning that's worth exploring on higher keys.
Support Officers use Refraction Shield, a damage reflection that must be purged immediately. This can generate the highest damage spikes in the entire dungeon if ignored. Blood Elf racial abilities shine here.
Overseers deliver heavy tank damage plus rotating beams you can jump over. Recent nerfs helped their Proxy Strike damage, but it's still dangerous for tanks without proper defensive timing.
Zo'phex: Weapons and Cages
Impound Contraband silences players and requires weapon retrieval for a damage buff. At higher key levels (15-16 range), this buff can one-shot players around 710 item level.
Interrogation and Detainment works in two parts: Detainment traps players in cages (stuns), while Interrogation makes the boss fixate and charge. Targeted players need 40-60 yards of distance before this starts.
Escape options include Anti-Magic Shell, Icebound Fortitude, Blink, pre-cast Spell Warding, and immunity effects. The mechanic plays like Soulbound Goliath from previous seasons.
Left Path: Efficient Count
Most groups go left first because the mobs provide better count value. Core Hounds, Nightclaws, and Direhorns are all manageable with proper execution. Core Hounds need interrupts on Ancient Hysteria (full heal), requiring even damage distribution. Nightclaws apply bleeds that need defensive attention. Direhorns usually pair with Nightclaws for familiar combinations.
When going left, you'll encounter Tracker Zoloross. Stay in his grip circle while dodging the spinning beams. Position DPS near the entrance, slowly moving the mini-boss forward to maintain space.
You can skip some role-play time for the Menagerie by touching the door early. This tricks the game into starting the summoning sequence.
The Grand Menagerie: Three-Boss Ballet
Additional bosses spawn at 50% health intervals. The Gluttony debuff jumps between players throughout the entire encounter.
Uber Boss: Grand Menagerie
Alcruux grips everyone in before dropping ground circles. Move immediately when these appear because even experienced players can die if they're not quick enough.
Achillite provides the fight's key mechanic through Venting Protocol. These orbs can be collected with the Gluttony debuff for 5% damage per stack (up to 20 stacks for 18 seconds). Kill Achillite against walls or in doorframes to trap orbs in corners. This lets Gluttony carriers grab 20 stacks instantly for massive damage windows.
Venza Goldfuse spawns when Achillite hits low health. Kill Achillite completely before dealing with Goldfuse to avoid overwhelming mechanics. Goldfuse's Whirling Annihilation requires 20+ yard positioning, while Chains of Damnation is a 100% slow (not a root). Ghost Wolf, freedom effects, and shapeshifting all provide escapes.
Pass Gluttony to DPS players with available cooldowns, but make sure they have defensives ready since the debuff hurts.
Postmaster: Mail Room Chaos
Three mechanics happen in sequence. Money Order is an AoE soak that can be immuned or Blessing of Protection'd. Fan Mail requires defensive cooldowns for massive group damage. The dangerous overlaps happen when these trigger together or in quick succession.
Unstable Goods involves briefcases falling from the sky that need disposal in open mail chutes. You can throw cases between players for daisy-chaining, though they leave persistent dots when soaked. Some soaking is fine (especially tanks), and Mass Dispel handles multiple dots efficiently.
Pull most mail room trash outside to group Overloaded Mailelementals better while avoiding Defective Sorter cage mechanics entirely. Defective Sorters opening cages stun the entire party, easily avoided by fighting outside.
Myza's Oasis: Musical Mechanics
Buy items from the cartel member (front-left, not the password vendor) to start. Deliver items to minimap NPCs, spawning trash with each delivery. Commerce Enforcers fixate on goods carriers, making tank carrying ideal.
Each player picks an instrument during the boss fight. Tanks typically get vocals, healers get drums, with other roles handling various patterns. The fight alternates between instrument phases (building damage buffs) and combat phases (ads, then Myza himself).
Save offensive cooldowns for Final Warning shield phases. The damage requirement is substantial, and failing to break the shield quickly can wipe the group.
So'azmi: Portal Navigation
Six portals spawn in matched pairs (triangles, circles, squares). Use portals to navigate around Shuri - expanding circles that deal lethal damage if they hit you.
Phase Slash applies party-wide bleeding. Interestingly, this debuff can be line-of-sighted, though the practical applications are limited.
At 66% and 33% health, Double Technique requires two interrupts in sequence. Time the first kick late, then kick the second as late as possible to minimize follow-up mechanics.
The arena progressively divides first in half, then into quadrants, while portal mechanics continue throughout.
Halls of Atonement
Activation Route
Destroy three Shards of Halkias to activate the first boss. The standard route goes: left shard with Bloodlust, backtrack to right shard, clear middle trash toward Halkias spawn, then front-left shard.
First Area Enemies
Vicious Gargons and Depraved Houndmasters create dangerous combinations. Vicious Gargons stack tank bleeds while Depraved Houndmasters cast Loyal Beasts. If that cast goes off, Vicious Gargons become immune to crowd control and will kill your tank quickly. Crowd control can substitute for interrupts when needed.
| Enemy Type | Key Ability | Strategy |
|---|---|---|
| Depraved Obliterators | Magic Dispel Effects | Requires removal within 12 seconds |
| Depraved Collectors | Siphon Life | Interrupt or crowd control to stop |
| Stoneborn Slashers | Interrupting Shout | Causes AoE damage and spell lockouts |
| Toiling Groundskeepers | Flee at 30% | Use Binding Shot, Ursol's Vortex, or Ring of Peace |
Halkias: Circle Management
Stay inside Halkias's circle or get feared permanently. At 100 energy, Refracted Sunlight creates four rotating beams. These can change direction mid-cast, so stay alert.
Move the boss away from existing puddles before beam phases to maximize maneuvering space.
Echelon: Imp Coordination
Undying Stonefiends spawn throughout and must be eliminated via Turn to Stone leap combinations. Position under dead imp locations before leap targeting begins. The targeted player gets heavily slowed and stunned, making pre-positioning crucial.
Non-targeted players can move away easily while the targeted player uses defensives. Priest Life Grip provides emergency extraction if the player isn't stunned yet.
Stagger imp deaths to avoid overwhelming AoE damage. Killing all six Undying Stonefiends at once creates dangerous spikes.
High Adjudicator Aleez: Ghost Hunt
Ghost mechanics dominate this encounter. Ghastly Parishioners spawn from room center and fixate on players for delivery to Vessel of Atonement cages. After the fourth cage, only slow respawning occurs, causing ghost persistence and ramping AoE damage.
Use single-target cooldowns and consider Bloodlust for faster completion. Lingering Ghastly Parishioners create increasingly dangerous healing requirements.
Inquisitor Sigar: Add Strategy
Two approaches work: kill all adds to prevent Dark Communion healing, or burst the boss between healing phases. Add elimination proves more reliable since healing scales with remaining add health.
After absorption, Manifestations of Envy spawn with fixation mechanics. Crowd control fixated souls while tanks gather initial threat.
Lord Chamberlain: Beam Management
Telekinetic Toss targets players with thrown statues (red arrows show direction). Keep the boss central for easier frontal dodging.
At 70% and 40% health, Chamberlain's Chorus arranges statues in X or + formations before launching them. The boss then channels beams toward landed statues. Players must intercept these beams to prevent group damage.
Tanks in the boss hitbox can soak multiple beams with proper defensives, reducing group damage requirements.
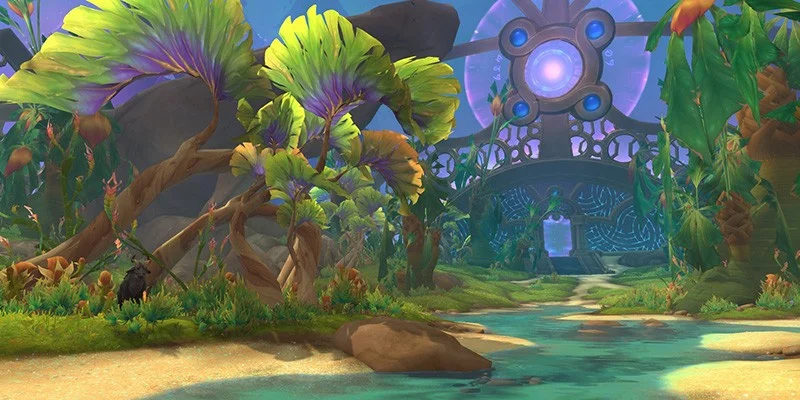
Eco-Dome Al'dani
First Area: Choose Your Fights
This dungeon features "landmine" enemies - some provide great count, others should be avoided entirely. Overgorged Mites explode on death like Bursting affixes. Ravenous Destroyers beam random players for heavy damage requiring defensive responses.
Azhiccar: Stay Close
Maintain melee range constantly or face Thrash damage. Invading Shriek spawns leaping adds that need stacking, crowd control, and quick elimination while staying near the boss.
Toxic Regurgitation targets two players with expanding circles for puddle placement away from the boss.
At 100 energy, Devour creates a death zone around the boss. Stay close enough for damage but outside the lethal center. Spawned adds slowly approach the boss - stun and AoE them before they reach him (5% healing and 15% damage per consumed add).
Second Area Navigation
Sentinels start with shields that trigger pulsing AoE on two random players when broken, plus ground effects. These are the dungeon's most dangerous enemies. Skip as many as possible - typical routes only engage two per run.
Rune Stalkers teleport behind players for beam attacks without initial damage. Farstalkers leap onto players with cleaving attacks requiring loose spreading. Their chain lightning must be interrupted.
Taah'bat and A'wazj: Mounted Combat
This boss fight features Rift Claws tank damage and Warp Strike frontal rushes. Binding Javelin affects two players - position near each other without overlapping circles for efficient cleaving.
At 100 energy, Arcane Blitz separates the bosses. A'wazj becomes immune while creating images that need charging through Taah'bat to remove immunity. Both bosses share damage, creating double-damage windows during brief stun phases.
Handle two different Warp Strike types: mounted version applies dots with cleave potential, while dismounted phase creates six immunity-removing strikes requiring careful positioning.
Final Area Challenges
Burrowing Creepers follow a specific sequence: AoE dots, immediately followed by massive Earth Shatter damage requiring survival cooldowns, then Upheaval single-target circles with knockups.
Soul-Scribe: Echo Collection
Every ability triggers pulsing AoE damage requiring constant high health. Whispers of Fate spawns ghost replicas requiring collection for damage buffs.
Eternal Weave generates massive frontal attacks while spawning three echoes per player. Static spawn locations follow counterclockwise patterns: far side first, front left second, far right third. Proper sequencing maximizes buff duration while protecting echoes from ground effects.
Echo contact with any ability creates dangerous dots dealing roughly 200% health over 6-8 seconds.
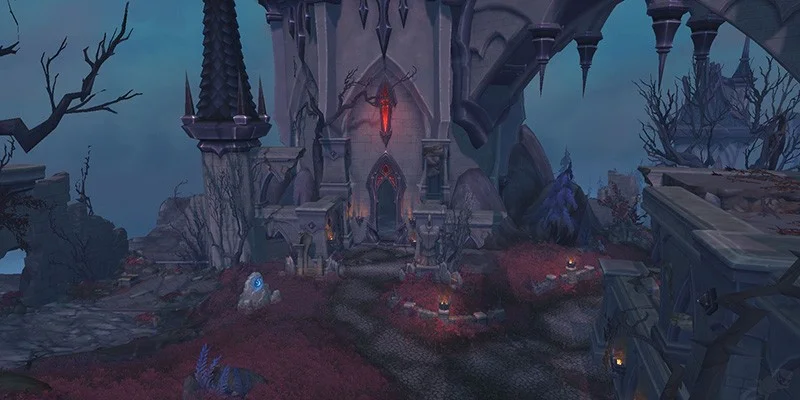
The Dawnbreaker
Season 3 Changes
Key updates from Season 1: mini-boss dot line-of-sight removal, Manifested Shadow AoE damage elimination (making them excellent count), Devoted Ritualist addition to courtyard (making it off-limits), Shadowguard Walker charge no longer functioning as tank buster, and Nightfall Commander kick immunity.
Opening Strategy
Use offensive cooldowns on the first pull (dangerous Devoted Ritualist), then Bloodlust the second pull. The first Devoted Ritualist creates pulsing AoE tethers requiring immediate focus. Interrupt adjacent casters and dispel seed effects from Devoted Ritualists.
Avoid pulling boat trash with stair packs to prevent accidentally engaging extra boat enemies.
Speaker Shadowcrown: Range Discipline
Maintain Season 1 mechanics with potentially increased bolt damage against tanks. Ranged DPS must stay at distance to avoid dropping Collapsing Night puddles on melee. The boss resists movement, so consistent positioning matters.
Burning Shadows heal absorb needs immediate dispelling due to dangerous dot application. Watch for overlaps between dispel timing and Obsidian Beam tank busters.
The 50% explosion hitbox exceeds visual range significantly.
Second Area Approach
Nightfall Tacticians now represent the area's most dangerous enemies with courtyard completely off-limits. Routes typically start with cathedral front pulls or combine mini-bosses with trash.
Standard progression: Church mini-boss → Orb mini-boss (with Bloodlust) → Grandmother's house. Allow defensives to regenerate between mini-bosses through intermediate trash pulls.
Anub'ikkaJ: Cooldown Check
This functions as a major defensive check requiring group externals. Anti-Magic Zone, Zephyr, and Mass Barrier provide exceptional value.
Dark Orb requires maximum distance baiting. Shadow Decay demands major group defensives. The sequence after the second AoE becomes critical: Dark Orb → Shadow Decay overlap creates the most dangerous moment.
Rasha'nan: Bomb Management
Phase 1: Throw Arathi Bombs at the boss front while using defensives against Erosive Spray.
Phase 2: Light defensives for Spinneret's Strands, major defensives for Rolling Acid and Erosive Spray combinations. The boss dies at 60%.
Most groups use final Bloodlust at Phase 2 start when offensive cooldowns become available.
Ara-Kara
Season 3 Updates
Changes from Season 1: Hulking Blood Guards use pulsing AoE instead of large hits, Engorged Crawler poisons stack (improving Poison Cleansing Totem value), Extraction Strike no longer heals, Drone tank busters don't root, fewer simultaneous poison debuffs on final boss, and routing changes for mid-dungeon mobs.
First Area Setup
Activate the first boss by killing three mini-bosses. Tailoring buffs can stun many enemies, extendable through Oppressing Roar. Pre-dungeon buff collection provides opening pull advantages.
Front Left mini-boss gets priority with manageable mechanics. Middle mini-boss presents the biggest challenge through large AoE casts requiring group defensives. Right mini-boss offers the easiest encounter.
Poison Cleansing Totem becomes extremely valuable due to Engorged Crawler poison stacking.
Avanoxx: Positioning Mastery
Alerting Shrill creates major group damage while summoning Starved Crawlers from visible egg locations. Position outside the boss hitbox to prevent add consumption. Tanks should pre-move near eggs for cleaving opportunities.
Gossamer Onslaught delivers major group damage while dropping ground effects on all players. Stacking before casts maintains room organization.
Second Area Management
Bloodstained Webmages alternate between Web Bolt Volley (long cast allowing crowd control cycling) and Web Bolt (standard interrupt). Hulking Bloodguards use Locust Swarm requiring defensive usage over 8 seconds.
Sentry Stagshells cast Alarm Shrill - this must be interrupted to prevent count loss and additional Hulking Bloodguard spawning.
Anub'zekt: Charge Mechanics
Infestation creates rotating dots with WeakAura prediction available. Burrow Charge targets range players exclusively. Assign mobile classes with escape abilities.
Eye of the Swarm requires group positioning within the tank-moveable circle. Failure applies dangerous dots.
Ki'katal: Blood Pool Strategy
Blood Overseers need 20-second interrupt rotations. Winged Carriers leap onto players - ensure entire group enters combat with tanks to prevent overwhelming single players.
Ki'katal the Harvester demands spreading to avoid poison wave cleaving. Use Black Blood from killed Bloodworkers for rooting during Cosmic Singularity pulls. Break roots through interrupts while avoiding early rooting that overlaps with web effects.
Operation: Floodgate
Season 3 Minimal Changes
Updates from Season 2: Bloodwarper moved away from Big Mama box, Bubbles removed, maintained "landmine" philosophy avoiding Bloodwarpers and Snipers.
Demolition Duo: Bomb Running
Run over bomb lines while using character circles for detonation. Missed bombs usually cause wipes. Gizza Quickfuse shoots players occasionally, creating danger for cloth classes.
Big Mama: Add Priority
This represents one of the season's toughest bosses. AoE hard on adds while timing kills before Damage Reduction shield activation. Boss receives 100% bonus damage when adds die.
Drone interrupts are mandatory - failed kicks result in wipes.
Swampface: Movement Coordination
Move left every time, stack on tank. Healers position opposite the group to bait Mudslide frontals while moving parallel.
Players get tethered in pairs. Razor Choke Vines create dots over 18 seconds while the boss delivers AoE hits every 30 seconds with wave mechanics.
Geezle Gigazap: Dispel Timing
Gigazap alternates between DPS and healer targeting. Turbocharge occurs 5 seconds into fights with massive group pulsing requiring one-minute defensives.
Classes with immunities can immune both Gigazap instances for themselves and partners during initial casts.
Priory of the Sacred Flame
Season 3 Adjustments
Knights and Sharpshooters received difficulty reductions. Captain Dailcry gained new spear-throwing AoE requiring ranged baiting. New checkpoint after Captain Dailcry enables corpse running past tough pulls.
Mini-Boss Combinations
Captain Dailcry shares health with encountered officers. Most routes eliminate Tainer Duelmal early when going left, leaving Elena Emberlanz for the encounter.
Elena Emberlanz features Divine Judgment (magic tank damage requiring dispelling) and Holy Radiance (pulsing AoE). Tainer Duelmal has Fireball interrupts and Emberstorm ground effects.
First Area Navigation
Arathi Footmen cast Defend requiring only interrupt prevention for free count. Sharpshooters disengage around groups, requiring melee stacking for containment.
Arathi Knights cast Interrupting Shout causing significant AoE damage. Limit pulls to two Knights maximum.
Baron Braunpyke: Coordination Required
Hammer of Purity creates fan-pattern effects requiring group stacking and movement. Sacrificial Pyre doesn't need immediate soaking since it persists. Castigation Shield affects all players - drop circles then move to pyre for tank soaking.
Vindictive Wrath amplifies all abilities: more hammers, stronger shields, five-soak pyre requirements.
Prioress Murrpray: Interrupt Timing
Phase 1 mechanics include beam running, circle dodging, and face-away requirements for Blinding Light.
Most groups avoid interrupting during Phase 1 due to dangerous sequencing. Interrupting can cause Inner Fire before Blinding Light, creating lethal combinations.
At 50%, break Barrier of Light while managing Arathi Neophytes that deal 5% health per second to themselves. Use roots, slows, and crowd control rather than damage.
Advanced Strategies
Positioning Fundamentals
Proper positioning prevents most wipes. Range players should maintain distances to avoid dropping effects on melee while ensuring healing access. Tanks need to consider interrupt angles, add cleave opportunities, and knockback mitigation through terrain usage.
Group stacking versus spreading depends on encounter requirements. Some fights need tight grouping for healing efficiency, others require spreading for individual mechanics.
Interrupt Management
Establish clear priorities for each encounter, typically focusing on AoE damage, healing effects, or enrage mechanics first. Monitor group interrupt cooldowns to ensure dangerous casts get covered.
Crowd control often substitutes for interrupts. Stuns, fears, and displacement abilities provide equivalent protection when kicks aren't available.
Defensive Coordination
Higher keys demand coordinated defensive usage rather than individual reactions. Use personal defensives proactively based on predictable patterns rather than reactive health triggers.
Coordinate group defensives and external healing for overlapping damage sources. Abilities like Anti-Magic Zone, Power Word: Barrier, and Zephyr provide exceptional value when timed properly.
Route Planning
Effective routing considers multiple factors beyond enemy count. Plan Bloodlust usage around challenging encounters or damage windows rather than arbitrary timing.
Space trash pulls to ensure defensive and offensive cooldowns align with difficult encounters. Balance count requirements with group capability and time constraints.
Conservative routing often proves more successful than aggressive attempts, especially when learning new content or pushing higher key levels.
- Conservative mob selection prioritizing familiar mechanics
- Cooldown alignment with challenging encounters
- Multiple backup plans for failed pulls
- Time buffers for learning mechanics
- Aggressive pulls without proper cooldowns available
- Ignoring group composition strengths and weaknesses
- No contingency plans for mistakes
- Rushing through unfamiliar content
Season 3 Success Framework
This season's diversity rewards both specialization in preferred dungeons and broad competency across the entire pool. The combination of familiar War Within content, returning favorites, and fresh challenges creates opportunities for different group compositions to find their strengths.
Master fundamental concepts first: positioning, interrupt coordination, and defensive usage. These skills transfer across all encounters and difficulty levels. Build encounter-specific knowledge gradually through practice and observation.
Success comes from consistent execution rather than perfect optimization. Focus on reducing mistakes before pursuing advanced strategies. The season's variety ensures that steady improvement across all dungeons outperforms narrow specialization.