
What's New in Season 3
Season 3 completely overhauls the Mythic+ rotation with fresh dungeons, updated rewards, and several quality-of-life improvements. You'll face one brand new dungeon alongside community-voted favorites, creating a mix that combines new mechanics with familiar encounters.
The biggest changes come through new systems like Dungeon Waystones and a redesigned Deserter System, both of which reshape how groups approach high-level content. If you've been grinding Season 2, expect some adjustment time as these changes affect everything from death recovery to group dynamics.
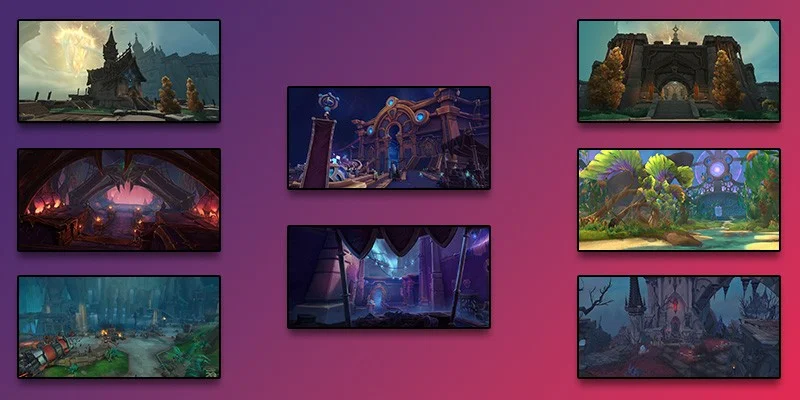
Season 3 Dungeon Pool
The Eight Dungeons
Season 3 features eight dungeons, each demanding different approaches and strategies:
- Ara-Kara, City of Echoes (30:00 timer)
- The Dawnbreaker (31:00 timer)
- Operation: Floodgate (33:00 timer)
- Priory of the Sacred Flame (32:30 timer)
- Halls of Atonement (31:00 timer)
- Tazavesh: Streets of Wonder (39:00 timer)
- Tazavesh: So'leah's Gambit (30:00 timer)
Timing Requirements for Upgrades
Each dungeon has specific timing thresholds that determine keystone upgrades. The base timer gives you completion credit, but hitting tighter windows nets you better rewards:
- +2 upgrade: Complete at 80% of base timer
- +3 upgrade: Complete at 60% of base timer
| Dungeon | Base Timer | +2 Threshold | +3 Threshold |
|---|---|---|---|
| Eco-Dome Al'dani | 31:00 | 24:48 | 18:36 |
| Ara-Kara, City of Echoes | 30:00 | 24:00 | 18:00 |
| The Dawnbreaker | 31:00 | 24:48 | 18:36 |
| Priory of the Sacred Flame | 32:30 | 26:00 | 19:30 |
| Operation: Floodgate | 33:00 | 26:24 | 19:48 |
| Halls of Atonement | 31:00 | 24:28 | 18:36 |
| Tazavesh: Streets of Wonder | 39:00 | 31:12 | 23:24 |
| Tazavesh: So'leah's Gambit | 30:00 | 24:00 | 18:00 |
Tazavesh: Streets of Wonder stands out with its 39-minute timer, making it the most forgiving for learning groups. Most other dungeons operate on tight 30-minute windows that demand efficient execution.
How Tazavesh Split Works
Originally designed as a mega-dungeon, Tazavesh got chopped into two separate Mythic+ experiences for Season 3.
Streets of Wonder covers the early portions and gets that generous 39-minute timer. The extended time accounts for the dungeon's larger scope and trickier navigation requirements.
So'leah's Gambit focuses on the climactic encounters with a standard 30-minute timer. Groups need to maintain steady pacing through its more concentrated encounter design.
Understanding the Affix System
Base Enemy Scaling
Before diving into specific affixes, you need to understand how enemy health and damage scale with keystone levels:
| Keystone Level | Modifier % | Keystone Level | Modifier % |
|---|---|---|---|
| 2 | +0% | 9 | +72% |
| 3 | +14% | 10 | +84% |
| 4 | +23% | 11 | +102% |
| 5 | +31% | 12 | +122% |
| 6 | +40% | 13 | +145% |
| 7 | +50% | 14 | +169% |
| 8 | +61% | 15 | +196% |
This scaling affects all enemy health and damage output, creating the baseline difficulty that affixes then modify further.
Level 4: Xal'atath's Bargain Rotation
Starting at keystone level 4, one of four rotating Xal'atath's Bargain affixes becomes active each week. Each requires specific strategies to handle properly:
Every minute or so, Xal'atath spawns 10 Orbs of Ascendance that start casting Cosmic Ascension. Let them finish their casts and nearby enemies get +20% movement speed and Haste, making fights considerably more dangerous.
Stop the orb casts through interrupts, displacement, crowd control, or purging, and you'll earn +2% movement speed and Haste per orb stopped. Max out at +20% movement speed and Haste for 30 seconds.
During combat, Xal'atath summons a Void Emissary that empowers nearby enemies with Dark Prayer. Kill the Emissary quickly and everyone gets +30% ability cooldown rate and +20% Versatility for 30 seconds.
Let the Emissary survive until its cast finishes, and nearby enemies receive increased damage output and reduced damage taken based on how much shield strength remains.
Xal'atath creates pulsar orbs that tether to and orbit around players for 15 seconds. You need to absorb the Void Pulsar before time runs out.
Collect all pulsars properly and everyone gets increased Mastery and Leech for 30 seconds. Miss any pulsars and enemies gain +10% damage and 20% damage reduction per missed orb.
Xal'atath periodically casts Devouring Rift, applying shield debuffs to all five group members. You can remove these shields through healing or any dispel type. Unlike healing absorption effects, healing both counts toward removal and restores health.
Remove a shield and you get one stack of Rift Essence, providing +2% maximum health and +4% Critical Strike for 30 seconds. Leave shields unremoved and enemies heal for 10% of their maximum health.
Level 7: Tyrannical and Fortified
At keystone level 7, the classic Tyrannical and Fortified affixes enter rotation, alternating weekly:
- Dungeon bosses get 30% more health
- Boss damage increases by 15%
- Emphasizes precise boss mechanic execution
- Rewards consistent damage output and cooldown management
- Non-boss enemies get 20% more health
- Non-boss damage increases by up to 20%
- Emphasizes efficient trash strategies
- Rewards strong AoE capabilities and crowd control
These affixes swap positions weekly. When Tyrannical hits level 7 one week, it'll be active at level 10 the next week while Fortified takes the level 7 slot.
Level 10: Double Trouble
At keystone level 10, both Tyrannical and Fortified become active simultaneously. This creates the first major difficulty spike where all enemies throughout dungeons gain increased health and damage output. You need to excel at both trash efficiency and boss execution.
Level 12: Xal'atath's Guile
At keystone level 12, Xal'atath removes her bargains and introduces Xal'atath's Guile instead. This affix fundamentally changes how you approach player deaths.
Loot and Reward Breakdown
Item Level Progression
Here's what you can expect for rewards at each keystone level:
| Keystone Level | End of Dungeon | Crest Rewards | Great Vault |
|---|---|---|---|
| 2 | 684 (Champion 2/8) | Runed Ethereal x10 | 694 (Hero 1/6) |
| 3 | 684 (Champion 2/8) | Runed Ethereal x12 | 694 (Hero 1/6) |
| 4 | 688 (Champion 3/8) | Runed Ethereal x14 | 697 (Hero 2/6) |
| 5 | 691 (Champion 4/8) | Runed Ethereal x16 | 697 (Hero 2/6) |
| 6 | 694 (Hero 1/6) | Runed Ethereal x18 | 701 (Hero 3/6) |
| 7 | 694 (Hero 1/6) | Gilded Ethereal x10 | 704 (Hero 4/6) |
| 8 | 697 (Hero 2/6) | Gilded Ethereal x12 | 704 (Hero 4/6) |
| 9 | 697 (Hero 2/6) | Gilded Ethereal x14 | 704 (Hero 4/6) |
| 10 | 701 (Hero 3/6) | Gilded Ethereal x16 | 707 (Myth 1/6) |
| 11 | 701 (Hero 3/6) | Gilded Ethereal x18 | 707 (Myth 1/6) |
| 12+ | 701 (Hero 3/6) | Gilded Ethereal x20 | 707 (Myth 1/6) |
Great Vault Requirements
You need to complete eight Mythic+ dungeons during the weekly reset period to fill the Dungeons row of your Great Vault. Great Vault item levels are determined by your highest keystone level completed during the week, typically offering items 10 levels higher than equivalent end-of-dungeon drops.
Crest System
New Systems and Quality of Life Features
Resilient Keystones
The Resilient Keystone system prevents keystone depletion at higher levels once you've proven your competency.
- Base Protection: Once activated, your keystone never drops below level 12, regardless of failed attempts.
- Scaling Protection: The protection level increases with your achievements. Complete all dungeons at level 13 and your keystone won't drop below 13. Hit level 14 across the board and you're protected at 14, and so on.
You'll earn corresponding achievements for each tier, starting with "The War Within Season 3: Resilient Keystone 12" and continuing for each level you achieve.
Dungeon Waystones
Season 3 introduces Dungeon Waystones to improve the death recovery experience. These floating markers appear at specific checkpoint locations throughout each dungeon, clearly showing safe resurrection points.
Once you discover a Waystone, it appears on your minimap to help with navigation and planning. Waystones unlock progressively as your group advances through dungeons, with each checkpoint representing a significant milestone.

New Deserter System
The updated Deserter System tackles premature group abandonment while providing legitimate exit options.
- Groups can initiate a vote to abandon the dungeon
- You need majority agreement to proceed without penalty
- Legitimate escape routes for impossible situations
- Players who frequently leave without successful votes get marked as "leaves often" in Group Finder
- Affects their ability to join future groups
- Marked players can remove the penalty by completing dungeons without leaving
This system encourages completion attempts while providing escape routes for genuinely impossible situations.
Spec Viability and Meta Considerations
Current Meta Landscape
Season 3's meta development shows clear patterns in spec performance, particularly in high-level Mythic+ content. While raid viability often differs significantly from Mythic+ performance, the structured nature of keystone dungeons creates more defined hierarchies in spec effectiveness.
Performance at Different Tiers
Specs with Significant Challenges
- Preservation Evoker: Strong in raids but lacks sufficient single-target healing power for high-key Mythic+ content, even after recent buffs
- Holy Priest: Significantly outperformed by Discipline Priest in Mythic+ scenarios
- Mistweaver Monk: Potentially viable in specific physical damage comps with Brewmaster tanks, but faces strong competition from established healing options
- Holy Paladin: Offers better utility than the above through raid buffs and damage reduction, but still represents a lower-tier choice
- Guardian Druid and Blood Death Knight: Minimal presence in high-level testing, consistently absent from successful high-key completions
- Protection Paladin: Recent damage nerfs (around 15% reduction) significantly impact their previously strong damage output
Target Cap Problems:
- Arms and Fury Warrior: Severe target cap restrictions make them ineffective in large pack scenarios that define high-level Mythic+ strategy
- Windwalker Monk: Similar target cap issues prevent effectiveness in current pull strategies
- Outlaw Rogue: Strong consistent AoE damage becomes problematic when engaging more than eight targets
Sustained Damage Concerns:
- Subtlety Rogue: Excellent burst windows with Shadow Dance, but insufficient charges and poor damage outside cooldowns limit effectiveness
- Assassination Rogue: Offers some funnel damage potential but suffers from weak single-target performance outside AoE scenarios
Warlock Difficulties:
- Affliction Warlock: Extremely poor single-target damage creates fundamental problems even in AoE-focused content
- Destruction Warlock: Similar single-target issues despite recent buffs
- Augmentation Evoker: Continues Season 2's trend of being ineffective
Other Notable Concerns:
- Elemental Shaman: Poor single-target damage and tier set issues limit effectiveness despite some AoE capabilities
- Devastation Evoker: Competes for bloodlust utility slots dominated by Mage specs
- Unholy Death Knight: Previously meta spec faces significant nerfs while Frost Death Knight receives improvements
- Retribution Paladin: Multiple consecutive nerfs have reduced overall power compared to Season 2 performance
Niche Possibilities
Survival Hunter and Feral Druid: Both remain niche picks with low popularity, though they haven't shown significant improvement indicators in testing
Physical Damage Compositions: The theoretical "turbo cleave" composition featuring Brewmaster Monk's physical damage debuff, Protection Warrior tanking, and multiple physical DPS specs represents a fringe strategy. While this approach worked in previous seasons, current testing suggests low probability of mainstream adoption.
Group Formation Implications
Target cap limitations become increasingly problematic as pull sizes grow in higher keystones. Single-target damage requirements remain important even in AoE-focused content. Utility considerations like bloodlust, raid buffs, and damage reduction influence spec selection beyond pure performance metrics.
Class internal competition affects spec viability significantly. Examples include Frost vs Unholy Death Knight and Discipline vs Holy Priest situations where one spec clearly outperforms its counterpart.
Players committed to lower-tier specs should focus on perfecting execution and finding groups with compatible strategies rather than expecting meta status. For players seeking optimal progression paths, focusing on higher-performing alternatives typically yields better results in competitive environments.
Complete Achievement and Reward Guide
Seasonal Mount Rewards
Season 3 features Void Flyer mounts as the primary prestigious rewards:
"Twisted by the void, these winged creatures now rule the skies of K'aresh"
"Driven mad by the void, these winged creatures are a flurry of claws and teeth"
Achievement Progression
Dungeon Portal Achievements
Completing each dungeon at keystone level 10 or higher unlocks permanent teleportation portals. Thanks to Warband integration, portal achievements unlock for all characters on your account and remain available beyond Season 3.
Complete Portal Achievement List
Season 3 Success Strategies
Rating System Mechanics
Mythic+ Rating determines achievement progression and requires consistent performance across all dungeons. Your overall rating combines scores from multiple dungeons, with higher keystone levels and faster completion times contributing more points.
Achieving rating milestones requires competency across all eight dungeons rather than specialization in a few favorites. Rating accumulates throughout the season, allowing steady progression toward achievement goals.
Preparation Approaches
Progression Planning
Optimal Progression Path
Start with lower keystones to learn dungeon changes. Focus on consistency before attempting higher difficulties. Use Resilient Keystones to practice at appropriate challenge levels.
Long-term Season Goals
Achievement Targeting
Identify which rating milestone aligns with your skill level and time investment. Plan systematic progression through all dungeons rather than focusing on easiest options.
Consider portal achievements as valuable long-term investments. These remain useful beyond Season 3 and unlock for all characters on your account.
Gear Planning
Use the crest system strategically to upgrade key pieces first. Prioritize items that provide the biggest impact on your performance.
Plan Great Vault targeting for maximum weekly progression. Balance current performance needs with long-term upgrade paths.

This guide provides the foundation for success in The War Within Season 3 Mythic+ content. Understanding these systems, mechanics, and rewards helps you approach the season with clear goals and effective strategies for achieving them.