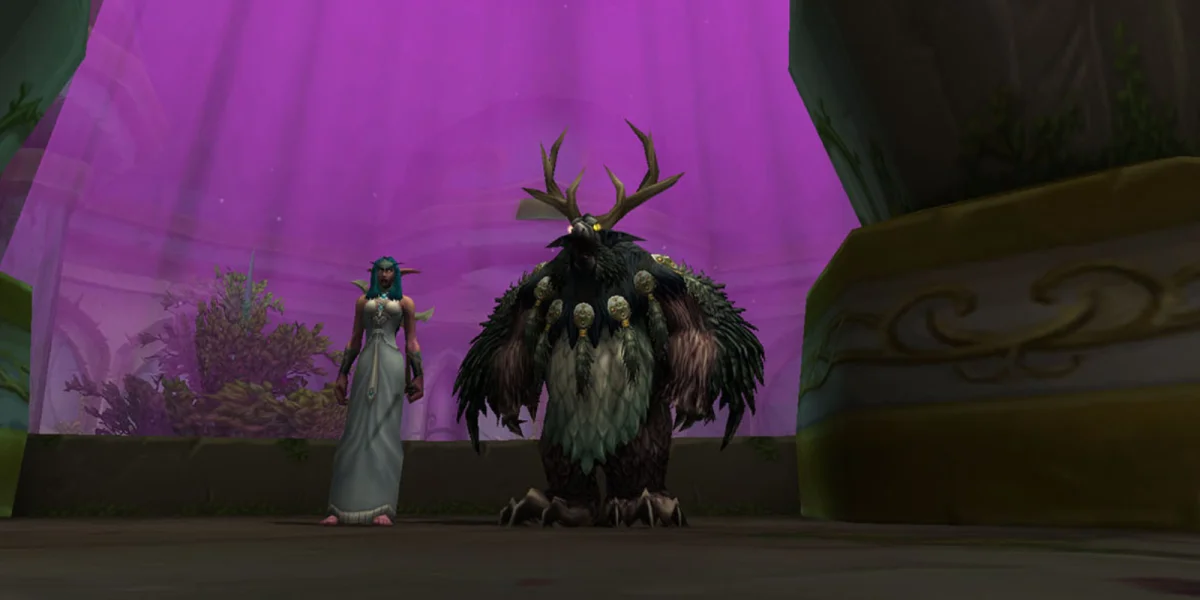
Balance Druids have a genuinely fun leveling experience in TBC Classic. You're throwing nature and arcane damage spells while benefiting from Moonkin Form's defensive bonuses, which creates a playstyle that feels both capable and versatile.
The extra armor from Moonkin Form is the standout feature here. When you're soloing without a tank, that armor bonus lets you handle situations that would drop other caster classes. You can take a few hits, finish off your target, heal up, and keep moving.
That said, mana is your constant companion and occasional nemesis. Feral Druids get to rely on energy regeneration, but you'll be sitting down to drink water between pulls regularly. Innervate helps, but a 6-minute cooldown won't save you from frequent water breaks.
Should You Level as Balance?
Balance works for any type of leveling content. You're solid both solo and in groups, with enough utility to make dungeon groups happy and enough survivability to quest on your own.
- Healing Yourself: Your self-healing keeps you going without burning through consumables or waiting around. When things go sideways, you can shift out, heal up, and get back to business.
- Flying at 68: Druids get Flight Form two levels before anyone else can buy a flying mount. Those final Outland levels go much faster when you can just take off instead of riding around obstacles.
- Dungeon Performance: Moonkin Form gives your whole party 5% spell crit. Groups actually want you around, and your utility toolkit (Mark of the Wild, Insect Swarm, Improved Faerie Fire) makes you genuinely useful beyond just damage.
- Staying Alive: Moonkin Form's armor plus the reworked Barkskin (20% damage reduction on a 1-minute cooldown) means you can survive mistakes that would kill squishier casters.
- Mana Hunger: You will drink water constantly. Lots of water. More water than you think. This slows your overall pace compared to classes that don't have to stop and regenerate.
- Damage Comparisons: Your damage output is respectable, but pure DPS classes will outdamage you. That's the price of having healing, multiple forms, and all that utility.
- No Real Resurrection: Rebirth is a combat rez with a 20-minute cooldown, not a normal resurrection. In dungeons, if your healer or rezzer dies and you can't save them with Rebirth, everyone's running back from the graveyard. Try to group with a class that can actually resurrect.
The 47/0/14 Talent Build
For PvE leveling, you'll put 47 points into Balance and 14 into Restoration. This setup maximizes your damage while giving you the mana sustainability you need to actually function.
Balance Tree (47 Points)
Your Balance investment makes Starfire, Moonfire, and Insect Swarm hit harder and cost less mana. Every talent here serves either damage or efficiency.
Balance of Power improves your spell hit and reduces your chance to get hit. Dreamstate gives you mana regeneration based on Intellect. Moonkin Form is why you're here—armor bonus, party crit buff, the whole package. Wrath of Cenarius adds bonus damage to Starfire and Wrath based on your spell damage stat.
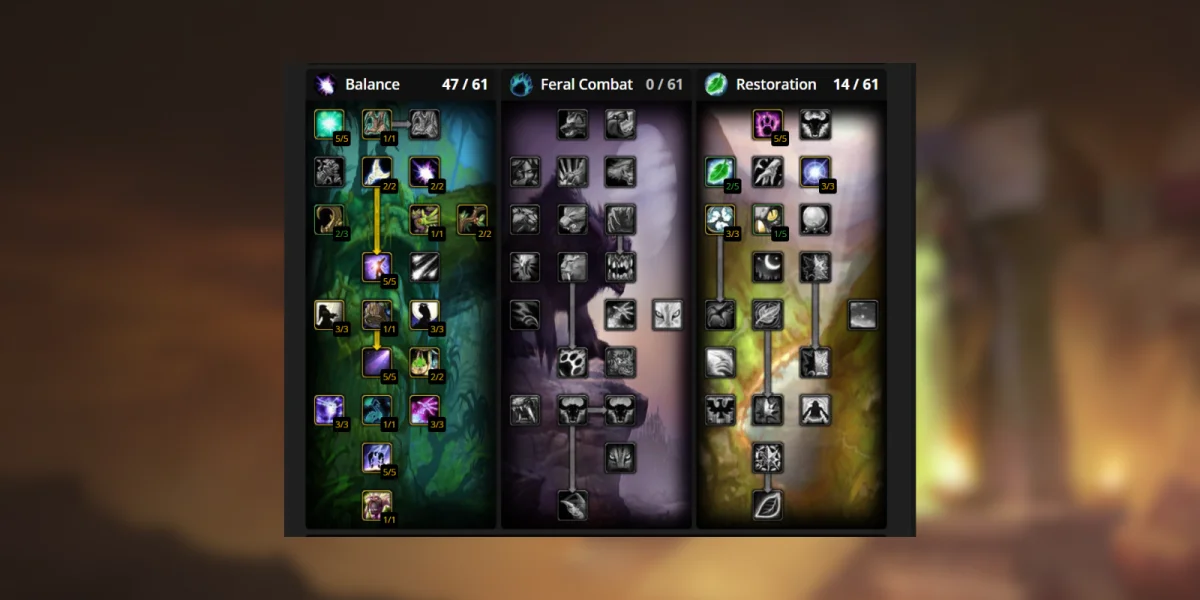
Restoration Tree (14 Points)
Your Restoration points solve mana problems and improve quality of life.
- Intensity lets your mana regeneration continue while casting. For a class with mana issues, this is huge.
- Natural Shapeshifter reduces the mana cost of shifting forms.
- Improved Mark of the Wild makes your primary buff stronger for you and your group.
Which Abilities to Train
Gold matters while leveling, so knowing what to train and what to skip saves you money for important purchases.
| Level | Always Train | Purpose |
|---|---|---|
| 61 | Wrath (Rank 9) | Your main spell gets an important upgrade |
| 63 | Moonfire (Rank 11) | Your instant DoT stays relevant |
| 64 | Thorns (Rank 7), Lifebloom | Passive damage on attackers plus a new healing tool |
| 66 | Faerie Fire (Rank 5) | You need this for group content |
| 67 | Starfire (Rank 8) | Your big nuke gets significantly stronger |
| 69 | Rebirth (Rank 6), Rejuvenation (Rank 13) | Combat rez upgrade and better HoT healing |
| 70 | Cyclone, Hurricane (Rank 4), Insect Swarm (Rank 6), Moonfire (Rank 12), Mark of the Wild (Rank 8) | These prepare you for endgame |
Train If You Have Gold
- Level 62: Healing Touch (Rank 12)
- Level 65: Dash (Rank 3) for faster Cat Form, Regrowth (Rank 10)
- Level 68: Entangling Roots (Rank 7)
- Level 69: Wrath (Rank 10) and Healing Touch (Rank 13)
- Level 70: Soothe Animal (Rank 4), Tranquility (Rank 5)
- After 70: Gift of the Wild (Rank 3) and Swift Flight Form once you've got the gold.
Only If You Use Those Forms
Cat Form: Shred (Ranks 6 and 7), Ferocious Bite (Rank 6), Rake (Rank 5), Pounce (Rank 4), Ravage (Rank 5), Claw (Rank 6), Rip (Rank 7), Mangle Cat (Rank 3), Cower (Rank 5)
Bear Form: Demoralizing Roar (Rank 6), Maim (Rank 1), Swipe (Rank 6), Frenzied Regeneration (Rank 4), Lacerate (Rank 1), Maul (Rank 8), Mangle Bear (Rank 3)
How to Deal Damage
Your rotation changes based on how many enemies you're fighting.
Single Target
Single target combat comes down to keeping your debuffs up while casting Starfire. You can usually fit about three Starfire casts between debuff reapplications.
Priority Order
Faerie Fire only when grouped with players who benefit from it (melee, hunters, tanks). Since Improved Faerie Fire only affects melee and ranged hit, not spell hit, don't bother with it when you're solo or with pure casters.
Insect Swarm stays active on your target. Good damage, relatively mana-efficient.
Moonfire if your mana can handle it. This is the first thing you drop when mana gets tight.
Force of Nature if you took the talent. Watch where you summon them because you lose control immediately and they might pull extra mobs.
Starfire fills the rest of your time. This is where most of your damage comes from.
Multiple Targets
Hurricane handles groups of three or more enemies. Just be aware of the mana cost because you can drain yourself fast if you spam it.
Gear Worth Getting
These pieces come from quests and dungeons as you level. They'll help bridge the gap until you start farming pre-raid gear at 70.
Classic Dungeons (Levels 22-42)
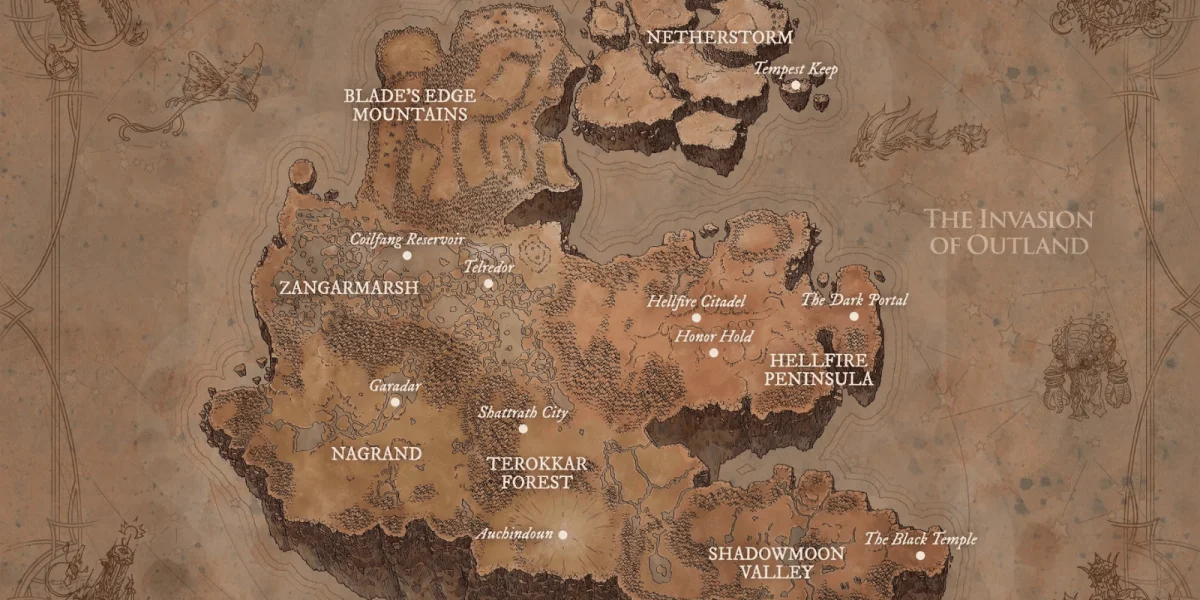
Hellfire Peninsula (Levels 58-61)
- The Staff of Twin Worlds (Level 58) comes from quests in Felspark Ravine and The Path of Anguish. A strong starting weapon for Outland.
- Mana-Etched Gloves (Levels 59-61) drop from Omor the Unscarred in Hellfire Ramparts.
- Mindfire Waistband (Levels 59-61) drops from Keli'dan the Breaker in The Blood Furnace.
- Ancient Crystal Talisman (Levels 59-61) is a quest reward from "A Spirit Ally?" in Zangarmarsh.
- Manaspark Gloves, Starlight Gauntlets, and Luminous Pearls of Insight (Levels 61-62) all come from The Underbog.
Mid-Outland (Levels 62-66)
- Terokkar Tablet of Vim (Levels 62-63) is a quest reward from "Torgos!" in Terokkar Forest.
- Glowing Crystal Insignia (Levels 62-63) comes from the "Overlord Gorefist" quest in Zangarmarsh.
- Auchenai Anchorite's Robe (Levels 64-65) is a quest reward from "Everything Will Be Alright" in Auchenai Crypts.
- Haramad's Leggings of the Third Coin (Levels 64-65) comes from "Undercutting the Competition" in Mana-Tombs.
- Natasha's Ember Necklace (Levels 64-65) is a quest reward from "The Hound-Master" in Blade's Edge Mountains.
- Ogre Slayer's Cover (Levels 66-67) comes from "Cho'war the Pillager" in Nagrand.
Approaching 70 (Levels 67-70)
Spaulders of Oblivion (Levels 67-68) drops from Murmur. Shattrath Jumpers (Levels 67-68) is a quest reward from "Into the Heart of the Labyrinth." Brooch of Heightened Potential (Levels 67-68) drops from Blackheart the Inciter.
Druidic Helmet of Second Sight (Levels 67-68) is a quest reward from "Teron Gorefiend, I am..." Evoker's Mark of the Redemption (Levels 67-68) comes from "Dissension Amongst the Ranks..."
Mag'hari Ritualist's Horns (Levels 67-68) comes from "Hero of the Mag'har."
Runesong Dagger (Levels 67-68) drops from Warbringer O'mrogg. Ivory Idol of the Moongoddess (Levels 67-68) drops from Grand Warlock Nethekurse. Warpstaff of Arcanum (Levels 69-70) drops from Warp Splinter in The Botanica. Lamp of Peaceful Radiance (Levels 69-70) drops from Harbinger Skyriss in The Arcatraz.
Picking Professions
Your profession choice depends on whether you want gold now or gear later.
Gathering for Gold
- Herbalism is fantastic for Druids specifically because you can gather herbs in shapeshift forms. No other class can do this, making you the most efficient herb farmer in the game.
- Mining provides materials that sell well and feeds multiple crafting professions.
- Skinning gives you passive income from beasts you kill while questing.
Crafting for Endgame
- Tailoring gives you access to powerful caster gear at 70. If you're serious about raiding, this is your best bet.
- Leatherworking works as an alternative. The bonus here is drums, which some raid teams require.
Consumables That Matter
Managing your supplies properly makes a real difference, especially for a class that burns through mana like you do.
What You Actually Need
Water is non-negotiable. Stock up from vendors or Mage friends and always carry more than you think you need. Running out means standing around waiting for mana to regenerate, which wastes a ton of time.
Mana Potions save you in tough fights. Super Mana Potions are ideal, but cheaper alternatives work fine for leveling.
For Maximum Speed
If you're pushing hard for fast leveling, these help:
- Brilliant Wizard Oil goes on your weapon for spell damage and crit bonuses.
- Elixir of Draenic Wisdom gives you Intellect and Spirit.
- Dark Rune and Demonic Rune convert health to mana when your potion is on cooldown.
Tips That Actually Help
Using Your Utility Right
Improved Faerie Fire only affects melee and ranged hit, not spell hit. When you're alone or grouped with casters, applying it wastes your time and mana. When you've got melee, hunters, or tanks in your group, keeping it up speeds up kills noticeably.
Making Peace with Mana
Don't fight reality. You're going to drink water constantly, so build your routine around it:
Building Your Dungeon Network
Finding groups takes time. When you run dungeons with people doing similar content, add them to your friends list. These connections mean more group invites later and less time spent looking for groups.
Trainer Visits That Matter
You don't need to visit trainers every level, but some milestones give you important new tools:
| Level | Milestone | Why It Matters |
|---|---|---|
| 10 | Bear Form | A real survival boost |
| 20 | Cat Form | Faster travel and melee options |
| 30 | Travel Form | Much faster getting around until your level 40 mount |
| 40 | Dire Bear Form | Improved survivability in bear |
| 68 | Flight Form | Fly two levels before anyone else can buy a flying mount |
After You Hit 70
Your 47/0/14 build works for raiding without major changes. Start running heroic dungeons and building reputation for pre-raid gear.
Groups want you around. Moonkin Form's party crit buff and your Improved Faerie Fire talent make you valuable even before your gear catches up. Lean on your utility while you farm upgrades.