
Grinding dungeons from level 60 to 70 is one of the fastest and most rewarding leveling methods in The Burning Crusade. Instead of competing with hundreds of players over quest mobs in Hellfire Peninsula, you can lock yourself into instanced content with four other players and blaze a path to max level while building faction reputation you'll need for heroic keys and raid attunements.
This guide covers everything you need to plan and execute an efficient dungeon leveling strategy: the best dungeon route from 60 to 70, how to weave in your Karazhan attunement along the way, and two detailed group compositions (one physical damage, one spell damage) so you can pick the approach that fits your roster.
Why Dungeon Grinding?
Faction reputation from the start. Every dungeon you clear awards reputation with a specific Outland faction. These reputations gate access to heroic dungeon keys, pre-raid gear from faction vendors, and critical attunement quest chains. Players who quest to 70 typically have to go back and grind dungeons at max level to catch up on reputation anyway. Dungeon leveling lets you knock out both goals at the same time.
No competition for spawns. Outland zones, especially Hellfire Peninsula during launch, are packed with players fighting over the same quest objectives and mob spawns. Dungeons are instanced, meaning your group has the entire dungeon to yourselves with no outside interference.
Fast and consistent XP. Dungeon enemies give solid experience, and because you're clearing every enemy in the instance (which you should always do, never skip mobs even if you can), you get a steady flow of XP per run. Combine that with dungeon quests that award large chunks of experience, and the overall pace rivals efficient solo questing or beats it outright.
Gear upgrades along the way. Dungeon bosses drop meaningful gear throughout the 60-70 journey. Physical damage groups in particular can target specific dungeons for powerful weapon drops, which is harder to plan for when you're questing solo.
Dungeon Route: 60 to 70
Planning your route in advance matters. You don't want your group stopping mid-session to debate which dungeon to run next, whose quest to complete, or which boss drops the item someone needs. Agreeing on a route before you start keeps things moving and makes sure you hit all the important reputation and attunement milestones along the way.
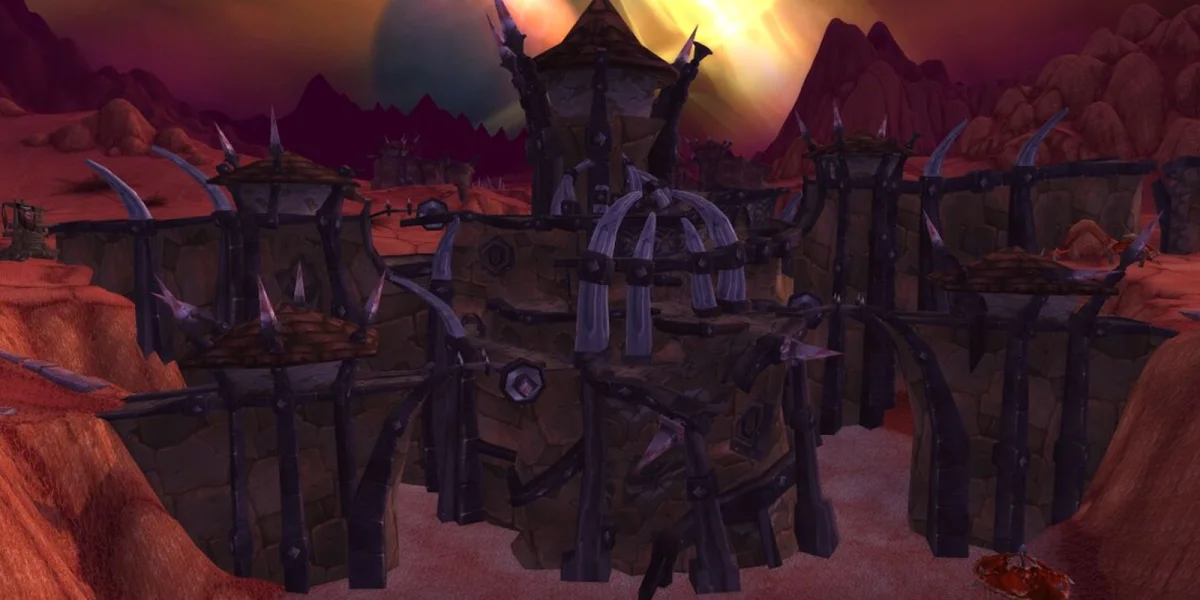
The Blood Furnace (Level 60 to 61)
Location: Hellfire Citadel, Hellfire Peninsula
Reputation: Thrallmar (Horde) / Honor Hold (Alliance)
Your dungeon journey starts in Hellfire Citadel, and The Blood Furnace is the dungeon you want, not Hellfire Ramparts. Blood Furnace has more total enemies per run, which means more experience and more reputation per clear. It is a bit harder than Ramparts, though, so if your group is undergeared and struggling with wipes, Ramparts is an acceptable fallback until you pick up a few upgrades.
Establish this habit early: Clear every single enemy in every run. This applies to your entire leveling grind, not just Blood Furnace. Even if you can skip a pack of mobs, don't. The extra experience and reputation add up significantly over dozens of runs.
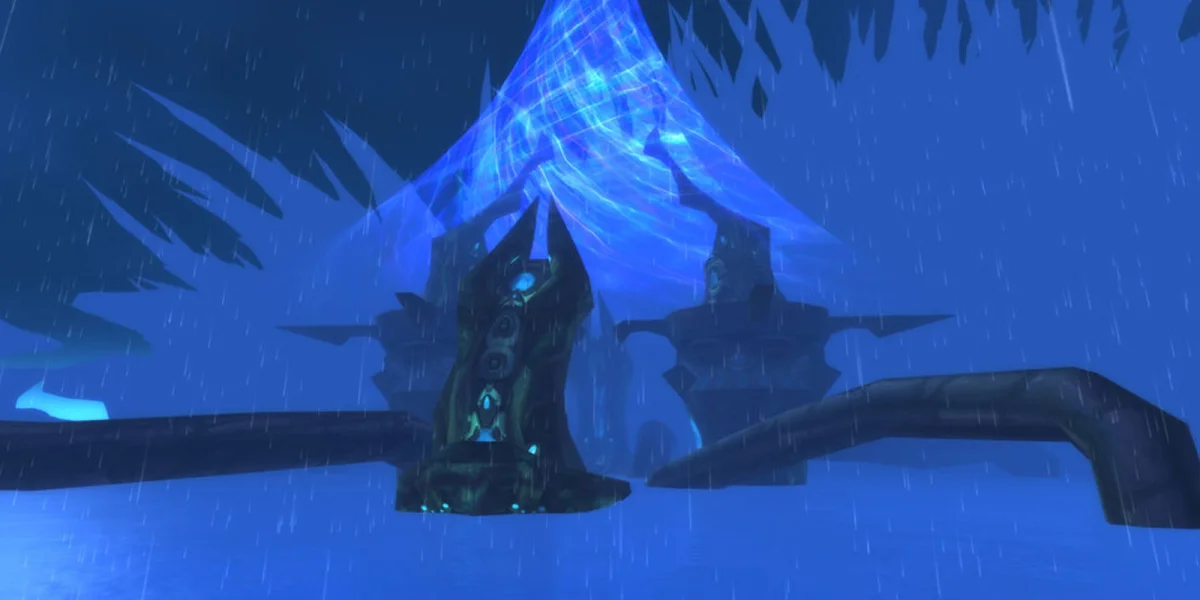
The Slave Pens (Level 61 to 65)
Location: Coilfang Reservoir, Zangarmarsh
Reputation: Cenarion Expedition
The Slave Pens is your home for a big stretch of the grind. It's picked over The Underbog (the other Coilfang Reservoir dungeon available at this level) for the same reason Blood Furnace beats Ramparts: more enemies per instance means more experience and reputation per clear.
You'll be spending roughly four levels here, so settle in. Runs should get smoother as your group gears up and develops a rhythm together.
Mana-Tombs (Level 65 to 66)
Location: Auchindoun, Terokkar Forest
Reputation: The Consortium
Mana-Tombs is a shorter stop, but there are a few quests worth grabbing right outside the dungeon entrance before your first run.
Quests to complete:
- Safety Is Job One (available outside the dungeon, completable during your first clear)
- Undercutting the Competition (also available outside, completable alongside Safety Is Job One)
- Someone Else's Hard Work Pays Off (an escort quest that unlocks after finishing Safety Is Job One, pick it up on a follow-up run)
All three give a solid chunk of experience and don't require you to go out of your way during normal clears.
Sethekk Halls (Level 66 to 68)
Location: Auchindoun, Terokkar Forest
Reputation: Lower City
Right next door to Mana-Tombs, Sethekk Halls is your next stop. You'll spend two levels here before breaking away to start your Karazhan attunement.
Two enemy types to watch for in Sethekk Halls:
- Some mobs have crowd control abilities that can incapacitate your party members (polymorph, fear, etc.), which can cause chaos during pulls if you're not ready.
- Certain mobs transform into ghosts when they die and keep attacking your group after their physical form goes down. Be ready to deal with these spirits quickly.
These mechanics can catch groups off guard on larger pulls. Don't over-pull until you know which enemies have these abilities.
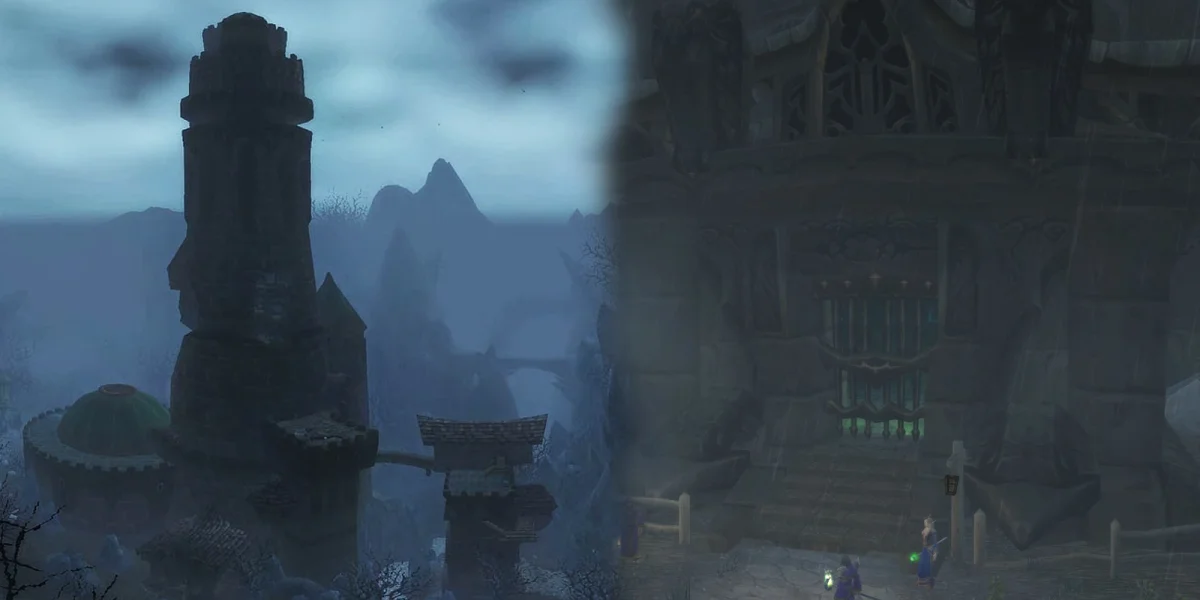
Karazhan Attunement Break (Level 68)
At level 68, pause dungeon grinding to start the Karazhan attunement quest chain. This isn't optional. Karazhan is the first raid of The Burning Crusade, and completing this attunement is a priority for endgame progression.
What to do:
- Travel to Karazhan in Deadwind Pass and pick up the quest Arcane Disturbances outside the tower.
- Follow the quest chain until you're directed to visit Khadgar to retrieve key fragments.
- Once you have the quest Entry Into Karazhan, head back to dungeons. The remaining key fragment quests happen inside specific dungeons later in your route.
This break should be quick. You're just pushing the quest chain far enough that the next steps happen inside dungeons you're going to run anyway.
Return to Sethekk Halls (Level 68 to 69)
After progressing the Karazhan attunement far enough, go back to Sethekk Halls and keep grinding until you reach level 69. You already know the dungeon well at this point, so runs should be fast.
Old Hillsbrad & The Black Morass (Level 68 to 69)
Location: Caverns of Time, Tanaris
Reputation: Keepers of Time
This detour applies mainly to physical damage groups. If your group has melee damage dealers, two powerful items drop in The Black Morass worth farming:
- Latro's Shifting Sword (a strong melee weapon)
- Hourglass of the Unraveller (a powerful melee trinket)
- You need to complete The Caverns of Time quest first, which is a slow escort quest that grants access to the Caverns of Time dungeons.
- You need to clear Old Hillsbrad Foothills at least once before The Black Morass unlocks.
If nobody needs items from The Black Morass, skip this entirely and keep running Sethekk Halls to 69.
Shadow Labyrinth (Level 69)
Location: Auchindoun, Terokkar Forest
Reputation: Lower City
Shadow Labyrinth sits right next door to Sethekk Halls and serves double duty: solid experience at level 69, and it contains the First Key Fragment for the Karazhan attunement quest chain (Entry Into Karazhan).
Your goals here:
- Pick up the First Key Fragment for your Karazhan attunement.
- Keep running the dungeon until you reach Revered reputation with Lower City.
- After collecting the First Key Fragment, turn in that quest step and pick up the follow-up, The Second and Third Fragments, before moving on.
The Steamvault (Level 69 to 70)
Location: Coilfang Reservoir, Zangarmarsh
Reputation: Cenarion Expedition
The Steamvault is your final dungeon for the leveling grind. You'll most likely ding 70 before reaching Revered reputation with Cenarion Expedition, but keep running it until you hit Revered. This reputation milestone is too important to skip.
Your goals here:
- Reach level 70.
- Pick up the Second Key Fragment for your Karazhan attunement.
- Reach Revered reputation with Cenarion Expedition.
After Level 70
Hitting 70 is a big milestone, but the work isn't done. You still need to finish the Karazhan attunement quest chain, which requires entering The Arcatraz (a dungeon in Tempest Keep, Netherstorm).
You have two ways to get inside The Arcatraz:
- Complete the Key to the Arcatraz quest chain in Netherstorm.
- Bring a Rogue with max-level Lockpicking to bypass the locked entrance entirely, saving your group the time of completing the key chain.
Beyond the Karazhan attunement, you may want to keep running dungeons to reach Revered or Exalted with factions where you still need reputation for heroic keys or vendor gear.

Building Your Group
You can follow the route above with any functional dungeon group: a tank, a healer, and three damage dealers of whatever class. If you want to push your clear speed further, you can build your group around a specific damage type and stack synergistic buffs, just like raid groups organize their parties around melee and caster compositions.
The core idea is straightforward. Because dungeon groups cap at five players, you can't fit every useful buff into one group. So commit to either physical damage or spell damage and stack the buffs that benefit your chosen damage type. Mixing damage types weakens your buffs. A Warrior's Battle Shout does virtually nothing for a Mage, but that same buff is a big damage increase for a Rogue or Feral Druid.
Below are two fully detailed compositions with distinct strengths and weaknesses.
Physical Damage Group
How It Plays
A physical damage group's biggest strength is minimal downtime. Very few members rely on mana, so you can move from one pack to the next with barely any pause. On the flip side, this group has fewer crowd control tools, so if you accidentally pull too many enemies at once, recovery can be rough.
Buff Classes and Damage Dealers
Classes that provide physical damage buffs: Shaman, Warrior, Feral Druid, Paladin, Hunter
Classes suited as physical damage dealers: Enhancement Shaman, Arms Warrior, Fury Warrior, Feral Druid, Retribution Paladin, Rogue
Class Breakdown
The Shaman is the single most important class in a physical damage group because of Windfury Totem. This totem gives a massive damage boost to every melee attacker in the party, and nothing else replicates it. You can fill this slot with a Restoration Shaman as your healer or an Enhancement Shaman as a damage dealer. Going Enhancement also gives the group Unleashed Rage, which further increases melee attack power.
One limitation to plan around: Shamans don't learn Bloodlust (Horde) or Heroism (Alliance) until level 70, so you won't have access to it during the leveling grind.
Feral Druids bring Leader of the Pack, increasing melee critical strike chance for the whole party. As damage dealers, they lack strong AoE compared to Warriors (Whirlwind) or Rogues (Blade Flurry), so they're generally better positioned as the group's tank. That said, bringing one as a DPS is perfectly fine since the Leader of the Pack buff alone makes them worth including regardless of role.
All Druids also provide Innervate (restoring a big chunk of mana to a party member, great for your healer) and Faerie Fire (reducing the target's armor, boosting all physical damage against it).
Warriors are valuable in any role here. Every spec provides Battle Shout, increasing attack power for all nearby party members. It's one of the strongest physical damage buffs available.
Arms Warriors bring Blood Frenzy, increasing all physical damage dealt to targets affected by the Warrior's bleeds. Fury Warriors get Sweeping Strikes, letting them hit an additional enemy with each melee attack for a short time, which is great for burning down groups of mobs.
All Warriors can also apply Sunder Armor, reducing an enemy's armor. This is especially useful against bosses and other high-health targets that live long enough for the debuff to really matter.
Paladins can fill any role in a physical damage group (tank, healer, or DPS) and still provide valuable Blessings. Blessing of Might boosts attack power for the whole group, and Blessing of Kings increases all stats by a percentage. Multiple Paladins means multiple different Blessings stacked at once.
One thing to watch: Paladins use mana. If you include too many mana-dependent classes in what should be a low-downtime physical group, you'll find yourself stopping for mana breaks more often than you'd like, and that undercuts one of this composition's main advantages.
Rogues don't bring many party-wide buffs, but they make up for it with raw damage and strong utility. Expose Armor on boss enemies significantly reduces their armor, helping the whole group kill them faster. Reliable stuns and spell interrupts lock down dangerous enemies and reduce incoming damage to the party, indirectly speeding up your runs.
Combat Rogues shine in dungeon content thanks to Blade Flurry, which lets them hit a second nearby enemy with every attack for a period of time. Great for shredding through groups of mobs.
Hunters provide useful buffs depending on spec: Beast Mastery Hunters give Ferocious Inspiration (a party damage increase after crits), Marksmanship Hunters give Trueshot Aura (attack power for the group), and Survival Hunters give Expose Weakness (attack power against targets the Hunter crits).
All Hunters can use Hunter's Mark on a single target. With the Improved Hunter's Mark talent, this adds 110 attack power to both melee and ranged attackers hitting that target.
Hunters are a solid pick, but not the most desirable for a fully tuned physical group. They don't benefit as much from the key buffs being stacked (Windfury Totem, Unleashed Rage, Battle Shout) compared to a melee damage dealer who gets full value from all of them.
Example Physical Damage Group
You can swap in any of the classes above and still do well. This is one strong configuration:
| Role | Class and Specialization |
|---|---|
| Tank | Feral Druid |
| Healer | Holy Paladin |
| Damage Dealer | Enhancement Shaman |
| Damage Dealer | Arms Warrior |
| Damage Dealer | Combat Rogue |

Spell Damage Group
How It Plays
A spell damage group's biggest strength is devastating AoE. Multiple casters firing off area spells at the same time can melt large groups of enemies much faster than a physical group ever could. The downside is that every member of this group burns through mana constantly, meaning you'll need to stop and drink more often. Managing mana consumption and including classes that help regenerate mana for the group is critical to keeping things moving.
Buff Classes and Damage Dealers
Classes that provide spell damage buffs: Priest, Shaman, Mage, Balance Druid, Warlock, Paladin
Classes suited as spell damage dealers: Shadow Priest, Elemental Shaman, Mage, Balance Druid, Warlock
Class Breakdown
The Shadow Priest is the most important class in a spell damage group, playing a similar role to the Shaman in a physical group. Shadow Priests solve the composition's biggest weakness, mana dependency, through Vampiric Touch, which restores mana to the group based on the Shadow Priest's damage output. In a group where every member is burning mana constantly, this passive regeneration is a huge deal and directly reduces downtime.
Shadow Priests also apply Misery to their targets, increasing all spell damage those enemies take. This amplifies the output of every other caster in the party.
They also have Power Infusion, castable on one party member every three minutes for a significant temporary boost to casting speed and damage. Power Infusion is strong on its own, but the three-minute cooldown means it only affects a small portion of your total dungeon time. A buff with lower individual impact but permanent uptime, like Totem of Wrath from an Elemental Shaman, may provide similar or better value to overall clear speed.
A Shaman provides Mana Spring Totem, passively regenerating mana for all nearby party members. In a mana-hungry spell damage group, this noticeably reduces how often you need to stop and drink.
Elemental Shamans add Totem of Wrath, which increases spell critical strike chance and spell hit chance for all party members. This is a persistent damage increase that benefits every caster on every cast.
Like with physical groups, Shamans don't learn Bloodlust or Heroism until level 70, so it won't be available during the leveling grind.
Balance Druids pull double duty as damage dealers and buff providers through Moonkin Aura, which increases spell critical strike chance for the whole party. This stacks well with other spell damage buffs and benefits every caster in the group.
All Druids provide Innervate, which can restore a large amount of mana to a single target. In a caster-heavy group where mana is the primary bottleneck, Innervate is incredibly useful, especially for your healer or whichever damage dealer is running lowest.
Mages bring two critical things to a spell damage group: unmatched AoE damage and practical group utility.
On the damage side, Mages have access to a deep AoE toolkit. Arcane Explosion, Cone of Cold, and Dragon's Breath (Fire Mages) let them shred through packs of enemies. Frost Mages offer exceptional enemy control through Summon Water Elemental (which has its own Frost Nova), Improved Blizzard (which slows everything caught in it), and the base Frost Nova spell. With careful kiting, pulling enemies into Blizzard while keeping them frozen or slowed, a Frost Mage can sometimes wipe out entire packs without the enemies ever reaching a party member. That reduces tank pressure significantly.
For utility, Mages provide Arcane Intellect (more intellect means more mana) and can conjure free food and water for the group. In a composition that stops to drink frequently, unlimited conjured water is a real convenience. Polymorph and Frost Nova also work as emergency crowd control if a pull goes sideways.
Warlocks provide Curse of the Elements, which increases all spell damage taken by the cursed target. This is a huge buff that amplifies every caster in the group.
There's a notable limitation during the leveling grind, though: Warlocks don't learn Seed of Corruption until level 70. Their AoE toolkit while leveling is limited to Hellfire (which also damages the Warlock) and Rain of Fire. Both work, but they're more situational than a Mage's AoE options.
Destruction Warlocks partially offset this with Shadowfury, a targeted AoE stun that deals damage and briefly incapacitates all enemies in the area. It has a short cooldown, making it available for most large pulls, and the stun component gives you both damage and crowd control in one ability.
Paladins are an excellent fit as either the tank or healer in a spell damage group.
Protection Paladins are especially well-suited here because they excel at generating threat on multiple enemies at the same time. Since this entire composition revolves around pulling large groups and melting them with AoE, a tank that can hold threat on many targets at once is exactly what you need.
Paladins provide several valuable Blessings: Blessing of Wisdom restores mana over time (directly addressing the group's main weakness), and Blessing of Salvation reduces threat generation (letting casters go harder on AoE without pulling enemies off the tank). Blessing of Protection can be thrown on a squishy cloth-wearing caster who pulls aggro, making them immune to physical damage for a short time and potentially saving their life.
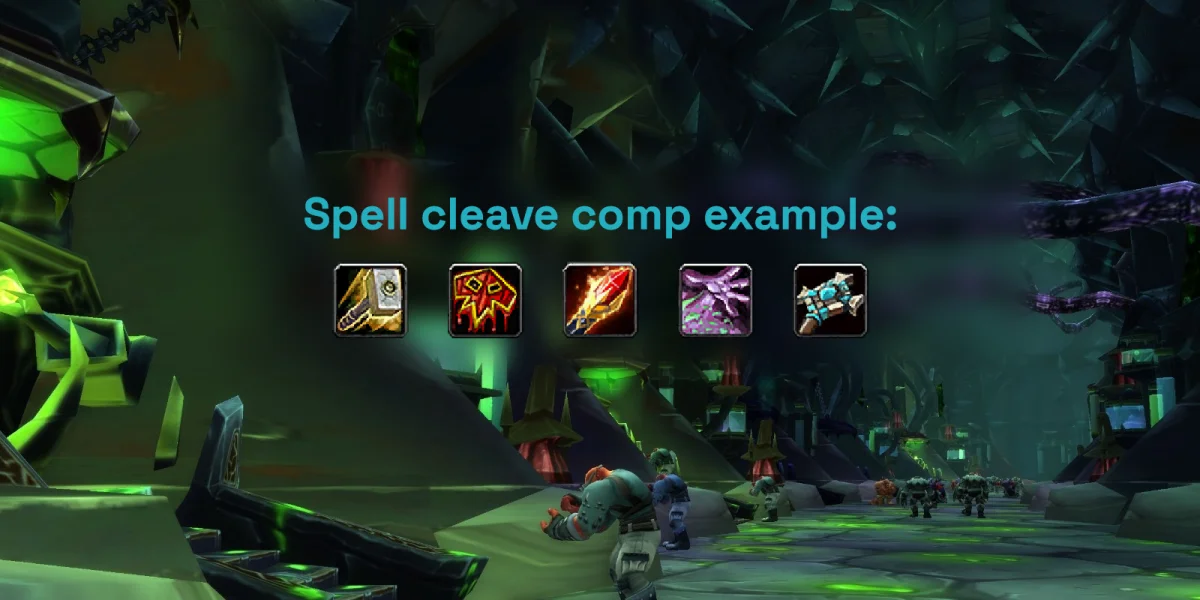
Example Spell Damage Group
You can swap in any of the classes above and still do well. This is one strong configuration:
| Role | Class and Specialization |
|---|---|
| Tank | Protection Paladin |
| Healer | Restoration Shaman |
| Damage Dealer | Shadow Priest |
| Damage Dealer | Fire Mage |
| Damage Dealer | Destruction Warlock |
Physical or Spell Damage?
Both compositions clear the dungeon route efficiently. Your choice comes down to what classes your group has available and what playstyle you prefer.
- Your available players are mostly melee classes
- You want minimal downtime between pulls (less mana dependency)
- You prefer a steady, consistent pace
- Your available players are mostly casters
- You want to pull large and burn everything down with AoE
- You're comfortable with periodic mana breaks in exchange for faster individual pulls
You don't need a perfectly tuned composition to dungeon grind effectively. Any group with a tank, healer, and three damage dealers can follow this route and reach 70 without issues. These compositions just help you get the most out of your group's time.
Final Thoughts
More important than your composition or your route is playing with four other people who share your goals and pace. Make sure everyone agrees on the plan before you start, commit to clearing every enemy in every run, and keep things moving. Do that, and you'll be level 70 and well on your way to Karazhan before you know it.
If you'd rather skip the grind entirely, Boosting Ground offers TBC Classic leveling and dungeon boosting services to get you to 70 and geared up fast.