Why Feral Druid?
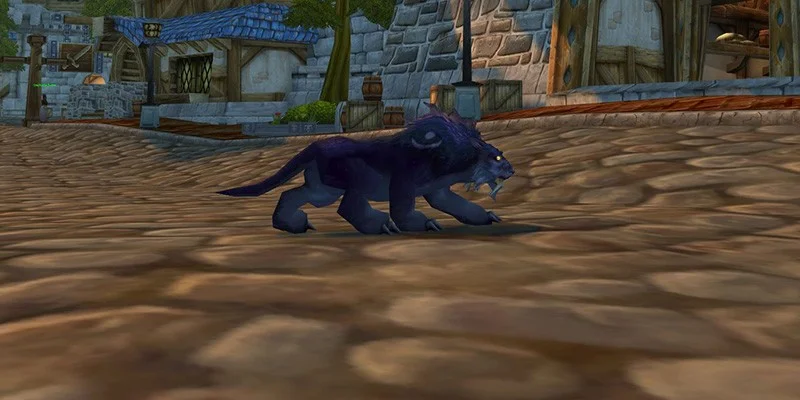
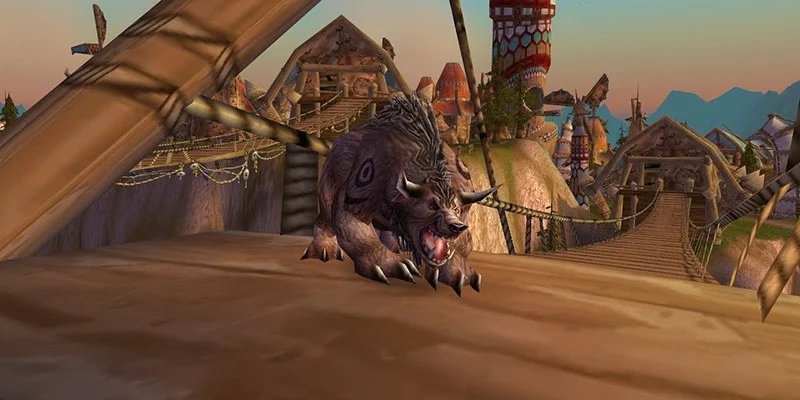
Feral Druids are one of the most self-sufficient leveling specs in The Burning Crusade Classic. You can switch between dealing damage in Cat Form and tanking in Dire Bear Form whenever you need to, giving you flexibility that pure DPS classes can't match. This guide focuses on Cat Form DPS for open-world leveling, though the builds and strategies here work just as well when you need to tank dungeon runs.
The Burning Crusade expansion gave Cat Form a major upgrade with the Mangle talent. This spammable ability scales well with gear and gives Feral Druids reliable damage they lacked in Classic. Add in your ranged pulling abilities, healing spells, and multiple escape tools, and Cat Druids can handle almost any solo situation.
This guide covers everything from level 1 to 70 with actionable advice you can use right away.

Cat Form Strengths and Limitations
Before getting into builds and rotations, you should understand what Cat Form does well and where it struggles. This shapes your entire approach to leveling.
Where Cat Form Shines
Sustainable Single-Target Damage: Cat Druids perform best when killing enemies one at a time. Your Energy regenerates passively while you run between targets, so you can keep a steady pace without stopping to drink or eat. You burst down a mob, run to the next while your Energy refills, and repeat. This rhythm keeps you moving forward constantly.
Zero Downtime: Unlike mana-dependent classes like Mages or Elemental Shamans, your primary resource regenerates on its own. When your health gets low, shift out of Cat Form and heal yourself back up. By the time you need to heal again, your mana will have regenerated. You can level for hours without ever sitting down.
Fast Movement: The Feral Swiftness talent gives you 30% extra movement speed while outdoors in Cat Form. Getting between quest objectives faster means faster leveling overall, and you keep this speed bonus even during combat.
Utility for Days: Druids have tools for almost every situation. You can pull from range, root enemies in place, stun them, or just run away when things go sideways. This means fewer deaths and less time corpse-running.
Where Cat Form Falls Short
No AoE: Cat Form damage is entirely single-target. You don't have any abilities that hit multiple enemies at once. This becomes a problem in dungeons where groups pull big packs and burn them down with cleave and AoE.
Weak Dungeon DPS: Because dungeon pulls typically involve multiple enemies dying together, Cat Form underperforms compared to classes built for AoE. If you want to run dungeons while leveling, tank in Dire Bear Form instead.
Struggles with Multiple Mobs: Pulling two or three enemies at once can get dangerous. Your single-target damage just can't kill multiple mobs fast enough to avoid taking heavy damage, which breaks your sustainable leveling rhythm.
Limited Defensive Cooldowns: You have tools to escape bad situations, but you lack the powerful defensive abilities some other classes have. Your survivability comes from avoiding damage through smart play and crowd control rather than absorbing it.
- Zero downtime between kills
- 30% movement speed in Cat Form
- Self-healing without stopping
- Can tank dungeons with same spec
- Multiple escape and utility tools
- No AoE damage abilities
- Weak in dungeon DPS role
- Struggles against multiple enemies
- Limited defensive cooldowns
The Leveling Talent Build (1/46/14)
The recommended build puts 1 point in Balance, 46 in Feral Combat, and 14 in Restoration. This matches what you'd use for Feral PvP at level 70, and that's intentional. The utility talents that make you effective in PvP are just as valuable when dealing with unpredictable open-world situations.
Why These Talents Work
The build includes several talents that pure PvE guides might skip, but they provide real leveling value:
Nature's Grasp (Balance tree): Roots enemies that hit you in melee. When you accidentally aggro extra mobs or need to escape, Nature's Grasp gives you a reliable way to immobilize pursuers while you create distance.
Brutal Impact (Feral Combat tree): Increases Bash stun duration. Longer stuns mean more time to heal, escape, or finish off a dangerous enemy.
Primal Tenacity (Feral Combat tree): Reduces fear duration and gives you a chance to resist stuns. Both crowd control types show up frequently in the open world, and resisting them keeps you alive.
Nurturing Instinct (Feral Combat tree): Increases your healing based on your Agility. Since you wear DPS gear with high Agility while questing, your self-heals become noticeably stronger. The synergy between your damage gear and healing is especially good for solo play.

Dungeon Compatibility
Even though this build is tuned for open-world content and PvP, it includes all the core PvE talents for both tanking and dealing damage. You don't need to respec to tank dungeons or contribute meaningful DPS in groups.
Talent Order from Level 60 to 70
When you enter Outland at 60, spend your points like this:
- Level 61: Omen of Clarity. Your attacks now have a chance to make your next ability free, which adds up over time.
- Level 62: Nature's Grasp in the Balance tree for the crowd control.
- Levels 63-64: Shredding Attacks to reduce Shred and Lacerate energy costs.
- Levels 65-67: Primal Tenacity for fear and stun resistance.
- Levels 68-70: Natural Shapeshifter to reduce shapeshifting mana costs.
Starting from Level 1
If you're leveling a fresh Druid, focus entirely on the Feral Combat tree first. Your goal is reaching Mangle as quickly as possible because this ability transforms your damage output.
To get there faster, skip Shredding Attacks and Primal Tenacity temporarily. They're useful, but Mangle matters more. After you get Mangle, switch to the Restoration tree and invest in Furor (to start combat with Energy in Cat Form) and Naturalist (for faster heals).
Abilities to Train
Knowing which abilities to train and which to skip can save you a lot of gold. The lists below separate core abilities from optional ones.
Core Abilities (Levels 61-70)
Train all of these as they become available:
| Level | Ability | Notes |
|---|---|---|
| 61 | Shred (Rank 6) | Primary damage when behind enemies |
| 62 | Demoralizing Roar (Rank 6) | Reduces enemy attack power |
| 62 | Maim | New finisher that stuns and interrupts |
| 63 | Ferocious Bite (Rank 6) | High damage finisher for extra combo points |
| 63 | Rejuvenation (Rank 12) | Core HoT for sustain |
| 64 | Lifebloom | New efficient stackable heal |
| 64 | Thorns (Rank 7) | Passive damage to attackers |
| 64 | Rake (Rank 5) | Bleed damage over time |
| 64 | Swipe (Rank 6) | Bear Form AoE for tanking |
| 65 | Dash (Rank 3) | Emergency sprint cooldown |
| 65 | Regrowth (Rank 10) | Direct heal plus HoT |
| 65 | Frenzied Regeneration (Rank 4) | Bear Form emergency heal |
| 66 | Lacerate | Bear Form bleed for tanking |
| 66 | Faerie Fire (Feral) (Rank 5) | Ranged pull that reduces armor |
| 66 | Pounce (Rank 4) | Stealth stun opener |
| 66 | Ravage (Rank 5) | High damage stealth opener |
| 67 | Maul (Rank 8) | Bear Form primary attack |
| 67 | Rip (Rank 7) | Combo point bleed finisher |
| 68 | Flight Form | Instant-cast flying at 68 |
| 68 | Mangle (Bear) (Rank 3) | Bear Form attack that buffs bleeds |
| 68 | Mangle (Cat) (Rank 3) | Your most important Cat damage ability |
| 69 | Cower (Rank 5) | Threat reduction for dungeon DPS |
| 69 | Rejuvenation (Rank 13) | Upgraded HoT |
| 70 | Shred (Rank 7) | Final rank of your main damage ability |
| 70 | Cyclone | CC that makes enemies immune but helpless |
| 70 | Mark of the Wild (Rank 8) | Buff for you and party members |
| 70+ | Swift Flight Form | Epic flying speed after a quest chain |
Optional Abilities
These have niche uses but aren't core to Feral gameplay. Skip them while leveling to save gold:
| Level | Ability | When It's Useful |
|---|---|---|
| 61 | Wrath (Rank 9) | Finishing fleeing enemies at range |
| 62 | Healing Touch (Rank 12) | Big slow heal, mostly redundant with HoTs |
| 63 | Moonfire (Rank 11) | Instant ranged damage for tagging |
| 66 | Faerie Fire (Rank 5) | Caster version, you already have the Feral one |
| 67 | Starfire (Rank 8) | Long cast, rarely used |
| 67 | Claw (Rank 6) | Worse than Mangle |
| 68 | Entangling Roots (Rank 7) | Outdoor CC, situational |
| 69 | Rebirth (Rank 6) | Battle res, valuable in groups |
| 70 | Soothe Animal | Very niche against beasts |
| 70 | Tranquility (Rank 5) | Group healing channel |
| 70 | Hurricane (Rank 4) | AoE channel, rarely used as Feral |
| 70+ | Gift of the Wild (Rank 3) | Group buff, train when you have gold |
Open World Rotation
Your questing rotation looks nothing like a dungeon or raid rotation. Efficiency and sustainability matter more than raw DPS here. You should also skip powershifting (rapidly shifting in and out of form to restore Energy) because your mana is better spent on healing.
One major difference from group content: you're always facing enemies from the front while solo. This locks you out of Shred, which needs you behind the target. Your damage relies almost entirely on Mangle.
Kill Sequence
- Keep Your Buffs Up: Before pulling, make sure Mark of the Wild, Thorns, and Omen of Clarity (once you train it at 61) are active. These passive benefits add up over hundreds of kills.
- Pull with Faerie Fire (Feral): This ranged ability lets you start fights from distance, controlling when and where combat happens. The armor reduction also bumps your damage slightly.
- Spam Mangle (Cat): Once the enemy reaches you, hit Mangle repeatedly. This is your bread and butter for solo content. When you're low on Energy, just wait for it to tick back up. The delay is minimal.
- Ferocious Bite at 5 Combo Points: If you build 5 combo points and the enemy is still alive, spend them on Ferocious Bite for burst damage. Most regular mobs die before you hit 5 points.
- Heal Between Pulls: When your health drops low, shift out of Cat Form and use your healing spells. Lifebloom, Regrowth, and Rejuvenation together can get you back to full efficiently. Your mana regenerates while you keep killing, creating a sustainable cycle.
The secret to efficient Feral leveling is understanding how your resources work together:
- Kill mobs using Energy (which regenerates fast)
- Take gradual damage over multiple fights
- When health is low, spend mana on healing
- Keep killing while mana regenerates passively
- By the time you need healing again, mana is full
This loop breaks when you take too much damage too fast, which is why you should avoid pulling multiple mobs.
Gear Worth Getting
These pieces represent major upgrades from quests and dungeons. Prioritize them as you level through each zone.
Classic Content (Levels 15-58)
| Level Range | Item | Source |
|---|---|---|
| 15-20 | Smith's Trousers | "The Everstill Bridge" quest in Redridge Mountains |
| 15-20 | Trailblazer Boots | "Horde Presence" quest in The Barrens |
| 20-30 | Orc Crusher | "Tharil'zun" quest in Redridge Mountains |
| 20-30 | Warsong Boots | "Warsong Supplies" quest in Ashenvale |
| 30-40 | Servomechanic Sledgehammer | "Sunken Treasure" quest in Arathi Highlands |
| 40-50 | Gryphon Rider's Leggings | "Saving Sharpbeak" quest in The Hinterlands |
| 40-50 | Rune of the Guard Captain | "Job Opening: Guard Captain of Revantusk Village" in The Hinterlands |
| 50-58 | Gloves of the Pathfinder | "Winterfall Activity" quest in Winterspring |
| 50-58 | Strength of the High Chief | "Words of the High Chief" quest in Winterspring |
Hellfire Peninsula (Levels 58-63)
Grab these three items from Hellfire Peninsula first. They'll last you to 70:
From the "Overlord" quest (Alliance) or "Cruel's Intentions" quest (Horde).
Drops from Keli'dan the Breaker in The Blood Furnace.
From the "Colossal Menace" quest in Hellfire Peninsula.
Other Hellfire gear:
| Level Range | Item | Source |
|---|---|---|
| 59-60 | Ursol's Claw | Vazruden in Hellfire Ramparts |
| 63-64 | Terokkar Tablet of Precision | "Torgos!" quest in Terokkar Forest |

Nagrand (Levels 64-67)
Nagrand has several good pieces, but one stands out:
Other Nagrand gear worth grabbing:
| Level Range | Item | Source |
|---|---|---|
| 64-65 | Nomad's Woven Cloak | "Bring Me The Egg!" quest |
| 65-66 | Earthen Mark of Razing | "Gurok the Usurper" quest |
Both items are close to pre-raid best-in-slot, so they're worth the extra questing even if you're skipping other content.
Blade's Edge Mountains (Levels 67-68)
A lot of players skip Blade's Edge, but one item makes it worth visiting:
Clefthoof Hide Leggings: These leather pants work great for both Cat DPS and Bear tanking. The quest chain is worth the trip.
Dungeon Gear (Levels 68-70)
| Level Range | Item | Source |
|---|---|---|
| 68-69 | Mantle of Perenolde | Epoch Hunter in Old Hillsbrad Foothills (Caverns of Time) |
| 69-70 | Hourglass of the Unraveller | Temporus in The Black Morass (Caverns of Time) |
Professions
Your profession choices during leveling come down to a trade-off between gold now versus performance later.
Gathering for Gold
Herbalism, Mining, and Skinning work well during leveling. You'll run into gathering nodes and skinnable corpses naturally while questing, so you can accumulate materials without going out of your way.
Early in The Burning Crusade, gathering materials sell for premium prices because players need them for endgame crafting. Selling what you gather can net you solid gold.
Druids also get a unique Herbalism advantage at level 68 when you learn Flight Form. Flying before most other classes means you can reach high-level herb nodes that ground-bound players can't access yet.
Raiding Professions
If you're planning to raid seriously, Engineering and Enchanting provide the strongest bonuses for Feral Druids at 70. But if you level with gathering professions, you'll need to level these from scratch later.
Consumables for Outland
Stocking up before entering Outland can speed up your leveling. This list goes from must-have to nice-to-have:
Must-Have
- Major Mana Potion: Emergency mana when you need to heal but your pool is empty.
- Major Healing Potion: Emergency health when you can't afford the time to shift out and cast heals.
Recommended
- Smoked Desert Dumplings: Food that gives a Strength buff, directly increasing your attack power.
For Speed-Levelers
- Elixir of the Mongoose: Battle elixir with Agility and crit chance. Noticeable DPS increase but pricey.
- Dense Weightstone: Temporary weapon buff that adds flat damage.
- Swiftness of Zanza: Movement speed increase that stacks with your other speed bonuses. Good for covering large distances.
Advanced Tips
Movement Speed Math
From 60 to 70, you have three movement options:
- Cat Form with Feral Swiftness: 30% speed increase, instant
- Travel Form: 40% speed increase, instant
- Epic Ground Mount: 100% speed increase, 3-second cast
The mount's cast time means it only saves time over longer distances:
- Under 78 yards: Cat Form is faster
- 78-98 yards: Travel Form is faster
- Over 98 yards: Mount is worth it
Get in the habit of eyeballing distance before choosing. Mounting for short runs actually wastes time.

Your Survival Toolkit
Druids have a lot of ways to handle bad situations. Know your options:
Entangling Roots: Root enemies from range. Use this when you accidentally grab extra mobs to keep them locked down while you finish your current target.
Nature's Grasp: When talented, this buff roots enemies that hit you. Activate it before engaging or when you need to run, then let pursuers root themselves as you escape.
Dire Bear Form: Shift to Bear for emergency survival. Your armor and health jump up significantly. Use Bash to stun dangerous enemies or Frenzied Regeneration for emergency healing.
Dash: Your emergency escape. Save it for when you need guaranteed distance.
Form Shifting Removes Snares: Changing forms clears movement-slowing effects. If a caster slows you while you're trying to run, just shift to any other form to break free.
Pulling Multiple Mobs: Your sustainable rhythm depends on taking gradual damage. Pulling two or three enemies at once depletes your health fast, forcing emergency heals and breaking your efficiency.
Powershifting While Solo: While this boosts DPS in groups, the mana cost isn't worth it during questing. Save your mana for healing.
Fighting Higher-Level Enemies: Mobs above your level hit harder and take longer to kill. Plan your questing route to fight enemies 1-2 levels below you when possible.
Tips for Fresh Druids (Levels 1-60)
If you're starting from scratch rather than bringing an existing character through Outland, these extra tips will help.
Get Your Forms ASAP
Bear Form Quest Chain: Starting with "Heeding the Call" at level 10, complete this immediately. Your leveling speed from 10-20 jumps up once you can shapeshift. You can still use Wrath to pull from range, but your melee damage in Bear Form far outpaces your caster damage.
Aquatic Form Quest Chain: A lot of Druids put this off because Aquatic Form seems less useful for land questing. Do it anyway. Underwater quests pop up throughout leveling, and having Aquatic Form ready prevents annoying detours later.
Pick Your Fights
Since Feral Druids aim for sustained killing with no downtime, fighting lower-level enemies is actually more efficient than fighting equal-level ones. Lower-level mobs die faster and deal less damage, making your sustainability loop easier to maintain.
Plan your zones so you're typically 1-2 levels above the enemies you fight.
Stealth for Speed
Prowl lets you bypass groups of mobs blocking quest objectives. Killing enemies gives experience, but quest completion XP is way higher. Use Prowl to reach objectives quickly, complete them, and move on rather than clearing everything in your path.
Solo Group Quests
Elite enemies meant for groups can often be killed solo in Bear Form. Your armor and health pool let you outlast them through attrition. When your health gets low, Bash the enemy, shift out, heal yourself, then shift back and keep fighting.
This lets you complete group quests without waiting around for party members.
After Level 70
Once you hit 70, these open-world strategies give way to endgame content. Your talent build transitions well into PvP or dungeon tanking, and with some adjustments, you can tune it for raid DPS.
Boosting Ground offers guides covering Feral Druid stat priorities, group rotations, and best-in-slot gear for both DPS and tanking.
Summary
Feral Druids offer a leveling experience built on self-sufficiency and adaptability. Your ability to heal yourself, escape danger, and maintain consistent damage with zero downtime makes solo questing highly efficient.
The core principles:
- Kill enemies one at a time for sustainable rhythm
- Use mana for healing, not powershifting
- Avoid multi-mob pulls that break your efficiency
- Use your utility toolkit when things go wrong
- Focus on quest completion over grinding mobs
Follow the builds, rotations, and strategies in this guide and you'll progress through TBC content efficiently while enjoying one of the game's most versatile specs.


