
Why Level as a Feral Druid Tank?
Feral Druids stand apart from other tank classes in The Burning Crusade Classic. Warriors and Paladins lock into a single role, but Feral Druids share their talent tree between Dire Bear Form for tanking and Cat Form for dealing damage. You can switch between tanking dungeons and soloing quests without respeccing or hauling around extra gear sets.
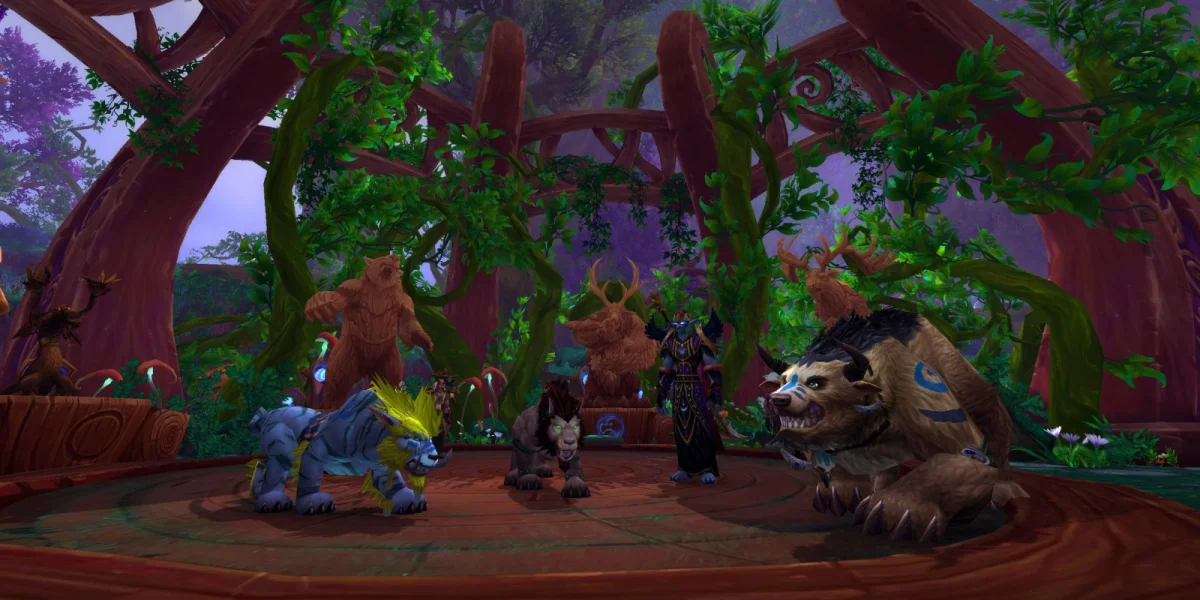
Bear Druids hit their stride when running 5-man dungeons, and plenty of Druid players level exclusively through dungeon grinding from 1 to 70. The utility you bring to groups is hard to match: Gift of the Wild buffs everyone's stats, Innervate keeps your healer or caster DPS topped off on mana, and Rebirth remains the only combat res in Classic WoW. When pulls go sideways, you're the one who can save the run.

TBC Classic made dungeon leveling feel much better for Bears. The Mangle talent gives you instant threat generation instead of waiting on that slow 2.5-second Maul swing timer. Swipe actually works for AoE threat now. You've got multiple ways to pull from range. These changes add up to a smoother tanking experience throughout the leveling process.
How the Feral Druid Plays
Flexibility Is Your Strength
Feral Druids thrive on adaptability. Queue for dungeons and you're tanking in Dire Bear Form. Head out to quest solo and you shift to Cat Form for faster kills. The talent build in this guide supports both playstyles fully, so you never have to sacrifice dungeon performance for solo capability or vice versa.
Your Tanking Toolkit
Several talents and abilities form the foundation of Bear tanking:
Mangle is your bread and butter for threat. Unlike Maul, which only fires on your slow 2.5-second swing timer, Mangle works instantly. When a DPS pulls aggro or you need to grab a mob fast, Mangle is the answer.
Faerie Fire (Feral) lets you pull enemies from range while staying in Bear Form. Before you get this talent, you waste mana casting Moonfire on every pull. Afterward, you can pull forever without shifting or drinking.
Feral Charge closes gaps and interrupts casts. Mobs running away at low health or casters sitting at range both get shut down by this ability.
Swipe handles AoE threat. It's not as powerful as Warrior or Paladin AoE, but the TBC version generates enough threat to control trash packs when you combine it with smart target marking.
Lacerate (level 66) becomes your strongest single-target threat ability. You can spam it freely because most of the threat comes from each cast, not from stacking it up. Think of it like Sunder Armor for Warriors.
Strengths and Weaknesses
- Leader of the Pack gives your whole party bonus crit chance, making you a popular tank choice for dungeon groups who care about kill speed.
- Flight Form at 68 means you're flying two levels before anyone else can buy a mount. That's a real advantage for getting around Outland's later zones and reaching dungeons faster.
- Instant Role Swapping comes naturally to Feral Druids. If your group already has a tank and needs DPS, you shift to Cat Form and go. No talent changes, no downtime.
- Barkskin reduces damage by 20% on a 1-minute cooldown. You can use it in any form, and it's reliable mitigation when things get spicy.
- AoE Threat is weaker than other tank classes. You'll rely more on target marking, CC coordination, and smart taunt usage to keep big pulls under control.
- Lacerate Comes Late at level 66. The stretch from 60 to 66 feels a bit awkward because you're missing your strongest single-target tool.
- No Real Res hurts when multiple people die. Rebirth sits on a 30-minute cooldown, so if two or three party members go down, someone's running back from the graveyard.
Talent Build: Dungeon-Focused 0/44/17
The recommended setup puts 44 points into Feral Combat and 17 into Restoration. Nothing in Balance.
Feral Combat Tree (44 Points)
This build grabs everything you need for tanking while keeping Cat Form DPS viable.
Ferocity (5/5) cuts the Rage cost on your main abilities, letting you use Mangle, Maul, and Swipe more often.
Feral Instinct (3/3) increases your Bear Form threat and improves Cat Form stealth detection.
Savage Fury (2/2) boosts damage on Mangle, Maul, Claw, and Rake. More damage means more threat.
Feral Swiftness (2/2) adds 30% movement speed in Cat Form. This saves a ton of time traveling between dungeons during the leveling grind.
Faerie Fire (Feral) (1/1) is your ranged pull in Bear Form. Grab it as soon as you can.
Sharpened Claws (3/3) increases crit chance in both Bear and Cat Forms, improving damage and threat across the board.
Primal Fury (2/2) gives extra Rage when you crit in Bear Form and extra combo points when you crit in Cat Form. Great synergy with Sharpened Claws.
Brutal Impact (2/2) extends stun duration on Bash and Pounce. During leveling, the longer stun helps you control trash packs better than the armor from Thick Hide (which endgame builds use instead). Dungeon mobs don't hit hard enough to need the extra mitigation.
Feral Charge (1/1) is your gap closer and interrupt. Non-negotiable for controlling fights.
Shredding Attacks (2/2) reduces the cost of Shred and Lacerate, improving your efficiency in both forms.
Predatory Strikes (3/3) increases attack power in Bear and Cat Forms based on your level. Free stats.
Heart of the Wild (5/5) boosts Stamina by 20% in Bear Form and attack power by 20% in Cat Form. Both bonuses are substantial.
Leader of the Pack (1/1) provides 5% crit to your whole party.
Improved Leader of the Pack (2/2) makes your crits heal you and restore mana, adding nice sustain during long fights. You can put these points in Primal Tenacity instead if you prefer.
Survival of the Fittest (3/3) reduces your chance to be crit by 3%, which means you don't need defense gear to become crit-immune against bosses.
Mangle (1/1) is the most important talent in the tree. Everything builds toward this.

Restoration Tree (17 Points)
Furor (5/5) gives you 10 Rage when shifting to Bear and 40 Energy when shifting to Cat. Starting pulls with resources available makes a huge difference.
Naturalist (5/5) increases physical damage by 10%, directly boosting your threat output.
Natural Shapeshifter (3/3) cuts shapeshifting mana cost by 30%, letting you swap forms more freely without going OOM.
Intensity (3/3) lets Enrage generate 10 Rage even outside combat. Another tool for pooling resources before pulls.
Omen of Clarity (1/1) gives your attacks a chance to make your next ability free. Passive efficiency gain.
Talent Progression: Levels 1-60
When leveling a fresh Druid, follow this progression to maximize your dungeon tanking power.
Key Milestones
Mangle at Level 50 is your top priority. Before Mangle, you're stuck with Maul as your main threat tool. Maul has poor Rage efficiency and sits on that slow 2.5-second swing timer, making snap threat nearly impossible. Once you hit 50 and grab Mangle, threat generation transforms completely. You'll notice the difference immediately.
Feral Swiftness at Level 20 gives you 30% movement speed right when you learn Cat Form. Running dungeons across Azeroth means long travel times between flight paths and instances. That speed boost adds up fast.
Faerie Fire (Feral) around Level 25-30 lets you pull mobs from range without burning mana on Moonfire. After you get this, every pull starts cleaner.
Primal Fury around Level 30-35 increases Rage generation when you crit. Against soft-hitting mobs that don't give much Rage from incoming damage, this talent keeps your abilities flowing.
Suggested Talent Order
| Levels | Talent | Points |
|---|---|---|
| 10-14 | Ferocity | 5/5 |
| 15-17 | Feral Instinct | 3/3 |
| 18-19 | Savage Fury | 2/2 |
| 20-21 | Feral Swiftness | 2/2 |
| 22-24 | Sharpened Claws | 3/3 |
| 25 | Faerie Fire (Feral) | 1/1 |
| 26-27 | Primal Fury | 2/2 |
| 28-29 | Brutal Impact | 2/2 |
| 30 | Feral Charge | 1/1 |
| 31-32 | Shredding Attacks | 2/2 |
| 33-35 | Predatory Strikes | 3/3 |
| 36-40 | Heart of the Wild | 5/5 |
| 41 | Leader of the Pack | 1/1 |
| 42-43 | Improved Leader of the Pack | 2/2 |
| 44-46 | Survival of the Fittest | 3/3 |
| 47-49 | Work toward Mangle prerequisites | — |
| 50 | Mangle | 1/1 |
| 51-60 | Finish Feral talents, then start Restoration | — |
Abilities to Train
Gold gets tight during leveling, so knowing which abilities to prioritize saves you money. This breakdown focuses on dungeon tanking.
Must-Train Abilities (Levels 61-70)
Train these immediately when you hit the required level:
| Level | Abilities |
|---|---|
| 61 | Shred Rank 6 (primary Cat Form damage) |
| 62 | Demoralizing Roar Rank 6 (reduces enemy attack power), Maim (incapacitating finisher) |
| 63 | Moonfire Rank 11 (backup ranged pull), Ferocious Bite Rank 6 (Cat finisher) |
| 64 | Thorns Rank 7 (passive damage and threat), Rake Rank 5 (Cat bleed), Swipe Rank 6 (major AoE threat upgrade), Lifebloom (efficient HoT) |
| 65 | Frenzied Regeneration Rank 4 (converts Rage to health) |
| 66 | Lacerate, Pounce Rank 4 (stealth opener), Ravage Rank 5 (big stealth opener), Faerie Fire Rank 5 (ranged pull) |
| 67 | Claw Rank 6 (Cat combo builder), Maul Rank 8 (Bear Rage dump), Rip Rank 7 (Cat bleed finisher) |
| 68 | Mangle (Bear) Rank 3 (critical upgrade), Mangle (Cat) Rank 3 |
| 69 | Rebirth Rank 6 (combat res), Rejuvenation Rank 13 (emergency healing) |
| 70 | Hurricane Rank 4 (AoE damage), Cyclone (CC), Mark of the Wild Rank 8 (party buff), Shred Rank 7 (final Cat upgrade) |
Optional Abilities
These provide utility but can wait until you have more gold at 70:
- Level 61: Wrath Rank 9
- Level 62: Healing Touch Rank 12
- Level 65: Dash Rank 3, Regrowth Rank 10
- Level 67: Starfire Rank 8
- Level 68: Entangling Roots Rank 7
- Level 69: Wrath Rank 10, Healing Touch Rank 13, Cower Rank 5
- Level 70: Moonfire Rank 12, Insect Swarm Rank 6, Soothe Animal Rank 4, Tranquility Rank 5
- After 70: Gift of the Wild Rank 3, Swift Flight Form
If you're leveling through open-world questing instead of dungeons, train all healing abilities regardless of this list.
Combat Rotations
Your rotation changes based on enemy count and your current level. Knowing when to use each ability maximizes threat generation.
Single-Target Rotation (Levels 60-65)
Before you get Lacerate at 66, focus on Mangle and Maul:
Pre-Lacerate Rotation
Hit Mangle on cooldown (every 6 seconds). Fill other GCDs with Swipe. Use Maul when you've got extra Rage to burn. Keep Demoralizing Roar up on the target. This rotation applies mainly to boss fights where you're facing one enemy for a while.
Single-Target Rotation (Levels 66-70)
Once you learn Lacerate, your rotation changes significantly:
Post-Lacerate Rotation
Hit Mangle on cooldown (every 6 seconds). Fill as many GCDs as possible with Lacerate based on your Rage. Only use Maul when you've got excess Rage after covering every GCD with Mangle or Lacerate.
Multi-Target Rotation (All Levels)
For trash packs with multiple enemies:
- Mark a Skull target for your group to burn first
- Open with Mangle on Skull to lock down threat on it
- Use Swipe on cooldown for threat on everything else
- Tab-target and hit Faerie Fire (Feral) on any mob running toward your healer or DPS
- Dump extra Rage into Maul on Skull
- Keep Demoralizing Roar active to reduce incoming damage
Accept that you won't hold perfect threat on every target. Focus on building massive threat on Skull with Mangle and Maul while using Swipe to create enough buffer on secondary targets. Your DPS can cleave freely once Skull dies.
Gear Progression
These items represent strong upgrades from dungeons and quests between 60 and 70.
| Level | Item | Source |
|---|---|---|
| 59-60 | Ursol's Claw | Vazruden in Hellfire Ramparts |
| 60-61 | Bladefist's Breadth | Overlord and Cruel's Intentions quests in Hellfire Peninsula |
| 61-62 | Vest of Vengeance | Keli'dan the Breaker in The Blood Furnace |
| 62-63 | Bogstrok Scale Cloak | Rokmar the Crackler in The Slave Pens |
| 63-64 | Skulldugger's Leggings | The Black Stalker in The Underbog |
| 64-65 | Choker of Bloodied Feathers | The Skettis Offensive quest in Terokkar Forest |
| 65-66 | Darkguard Face Mask | Exarch Maladaar in Auchenai Crypts |
| 66-67 | Staff of Beasts | The Ring of Blood: The Final Challenge quest in Nagrand |
| 67-68 | Clefthoof Hide Leggings | Showdown quest in Blade's Edge Mountains |
| 68-69 | Iron Band of the Unbreakable | Lieutenant Drake in Old Hillsbrad Foothills |
| 69-70 | Flesh Handler's Gauntlets | The Flesh Lies... quest in Netherstorm |
Professions
Best Choices for Dungeon Leveling
Engineering offers the biggest impact for dungeon tanks. Goblin Sapper Charge, a Classic item that still works in TBC, deals AoE damage that generates immediate threat on entire packs. This fundamentally changes how you handle large pulls and covers for Bear Druids' weaker AoE threat. If you're leveling with a high-DPS group, bring stacks of sappers into Outland.
Enchanting pairs naturally with dungeon grinding because you can disenchant all those Uncommon and Rare drops instead of vendoring them. The materials sell for significantly more than vendor prices. Over the course of leveling 1-70 through dungeons, this adds up to serious gold.
Long-Term Value
Engineering and Enchanting are also the best profession combo for endgame raiding as a Druid Tank. Taking them now means you won't need to drop professions and relevel later.
Consumables
These consumables from Classic WoW can travel with you into Outland. Listed from most to least necessary depending on how hard you want to push.
Baseline (Recommended for Everyone)
- Major Healing Potion for emergencies when your healer falls behind or runs dry on mana. Bring multiple stacks.
- Smoked Desert Dumplings provide Strength, which increases attack power and threat. Food buffs cost nothing to maintain and should always be active.
Moderate Investment
- Gift of Arthas makes enemies take extra physical damage. Boosts your whole group's output.
- Goblin Sapper Charge is the highest-impact tanking consumable on this list. If you can only afford one premium consumable, make it sappers. They change how you approach every trash pull.
Speed-Leveling
- Elixir of the Mongoose increases Agility and crit chance for more damage and threat.
- Elemental Sharpening Stone adds crit chance to your weapon, stacking with other crit bonuses.
- Swiftness of Zanza increases movement speed, cutting travel time between pulls and dungeons.
Dungeon Tanking Strategies
Mark Your Kill Targets
Classic WoW dungeon groups tend toward chaos. DPS players attack random targets and fire off AoE the second pulls start. Counter this by always marking a Skull and telling your DPS to burn it before going ham on AoE.
This approach lets you stack heavy threat on Skull using Mangle and Maul while Swipe builds enough buffer on everything else. Without a marked target, you'll spend the entire fight chasing loose mobs.
Pull Packs Far Back
Initiating pulls from max range helps in two ways. First, mob packs have a "social aggro" radius where they alert nearby groups. Pulling far back often lets you avoid chain pulls because you outrange this detection. Second, pulling back reduces the chance that patrols wander into your ongoing fight.
Tag packs with Faerie Fire (Feral) or Moonfire from distance, then set up your tanking position well away from other enemies.
Use Line of Sight on Casters
Caster mobs like to stand still and throw spells at whoever has highest threat (usually your healer). Just running at them means your healer takes damage while you close the gap.
The fix is line-of-sight pulling. Tag the group with Moonfire or Faerie Fire (Feral), then immediately move your party behind a corner, pillar, or doorway. Casters have to move into line of sight before they can cast, which brings them to you.
Scout each dungeon area for good LoS spots before pulling caster packs.
Pool Rage Before Pulls
Starting a pull at zero Rage means you can't use abilities early, creating a window where DPS easily rip aggro. Manage your Rage between pulls:
When you have Rage left from the last pack: Don't shapeshift (you'll lose it). Pull immediately with Faerie Fire (Feral), coordinating with your healer's mana.
When you're at zero Rage: Tag the pack in caster form with Moonfire, then shift to Bear as mobs run at you. Furor gives 10 Rage on shift. Follow with Enrage for another 10 Rage from Intensity. That's 20 Rage ready when the first mob reaches you.
Use Taunts and Stuns Constantly
Perfect AoE threat isn't happening as a Bear. Use every tool available to recover from threat loss:
Growl should fire immediately when a DPS pulls aggro. It sets your threat equal to whoever has aggro and forces the mob to attack you briefly. On mobs that will die fast, one Growl often provides enough buffer for DPS to finish the kill without you generating more threat.
Bash works as an interrupt and pseudo-taunt. Use it often, both to stop casts and to buy time when Growl is on cooldown. Stunned mobs can't run at your healer.
Challenging Roar is your emergency AoE taunt. Save it for when multiple mobs get loose, or use it to group up scattered trash packs.
Tips for Leveling 1-60
These suggestions address challenges specific to running the original Azeroth dungeons before Outland.

Grab Every Dungeon Quest
Before entering any Azeroth dungeon, collect every quest associated with it. Dungeon quest XP rewards are huge compared to normal quests. A full quest suite for a single dungeon often gives you an entire level's worth of experience, making your time investment much more valuable.
Form Chain-Running Groups
Azeroth dungeons are scattered across two continents. Travel time to reach them can take longer than the dungeon itself.
Maximize your travel investment by finding groups willing to run the same dungeon multiple times in a row. Instead of running Scarlet Monastery once then traveling elsewhere, run it four or five times with the same group before moving on.
Play All Your Roles
Feral talents support tanking, melee DPS, and (at lower levels) even healing. When you find a group that already has a tank but needs a healer or DPS, volunteer to fill the gap rather than waiting for a tank spot.
During early leveling especially, your versatility means you can join more dungeon groups than single-role classes.
Build Groups Proactively
Lower-level dungeon groups rarely get advertised in LookingForGroup because most people leveling through old content go solo. Don't just wait for posts, and don't get discouraged if your own ads don't get responses.
Use /who to find players in your level range or in relevant zones. Message them directly about running dungeons. Many solo levelers are happy to try group content but won't take the initiative themselves.
Keep a Friends List
Add good group members to your friends list. These players become your go-to invites for future runs. When you're ready for more dungeons, check which friends are online instead of starting from scratch.
This network gets more valuable as you move through less-populated level ranges where random group formation gets harder.