
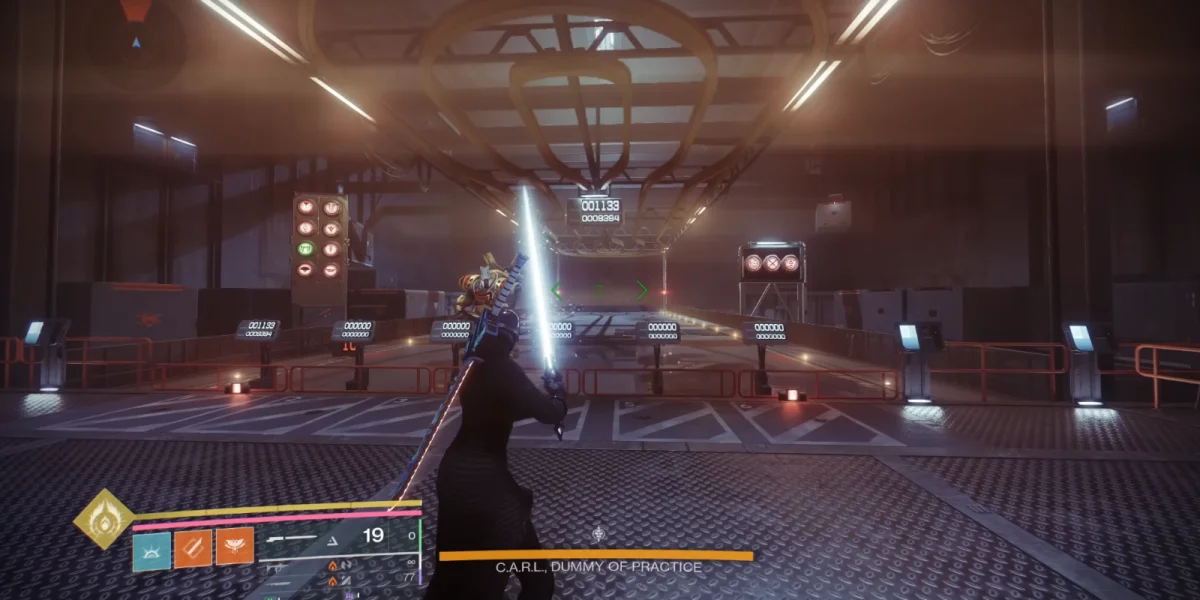
The Praxic Blade is easily one of the coolest weapons added in Destiny 2: Renegades. It's a lightsaber. An actual, throwable, projectile-deflecting lightsaber. This Exotic Sword sits in your Kinetic slot while burning Special ammo, which makes it a strange hybrid that opens up some interesting loadout options. This guide walks you through everything involved in getting the Praxic Blade and upgrading it.
Campaign Progress and Prerequisites
You'll get the Praxic Blade from the Fire and Ice mission, which is baked directly into the Renegades campaign. This isn't a separate Exotic quest you pick up after beating the story. Instead, you'll hit this mission at Quest Step 33 of 45 after talking to Aunor at the Cantina. She sends you to the Praxic Temple, and from there, Fire and Ice kicks off.
Since every player has to complete this mission to finish the campaign, everyone who beats Renegades walks away with the Praxic Blade. Players running Legendary difficulty should prepare for a rougher experience though, because the game removes all hints and guidance at that level.
Build Recommendations
Combat in Fire and Ice isn't the hard part. The real challenge comes from figuring out where to go and understanding the mechanics. That said, good survivability and add-clear make everything smoother.
Void with Contraverse Hold works great. Chaos Accelerant plus Axion Bolt grenades clear adds fast, and Feed the Void gives you Devour for steady healing.
Arc with Assassin's Cowl is solid. Tempest Strike paired with the Ascension Aspect gives you strong damage and survivability through invisibility procs.
Solar with Synthoceps or Wormgod Caress running a hammer build handles most situations well. Strong damage, decent add-clear, and good sustain.
Fire and Ice Mission Walkthrough
Getting Into Firebase Imperator
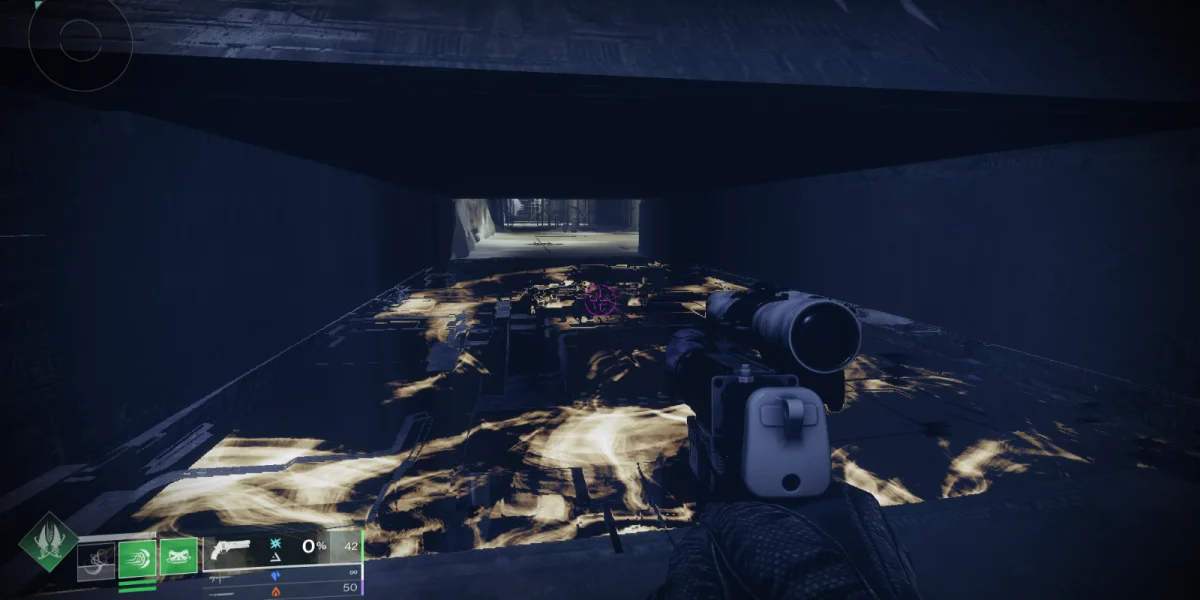
Move forward from your spawn point until you spot a tunnel entrance in the mountains. Head through. You'll run into some Cabal along the way, but you can skip them if you want.
At the end of the tunnel, go right, then left down a slope. You'll see a shield barrier ahead. Don't go straight at it. Instead, move to the right side where an Ablative Armor Scion is waiting. Kill the Scion and head through the door.
Push through the hangar, clearing out Imperium Legionaries. Around the left corner, a tankier Ablative Armor enemy guards the path. This one drops the Imperium Door Codes when killed. Grab them and use the nearby console to open the main door. It takes a few seconds.
In the next room, Taken spawn in waves. Clear them out, including a Taken Ogre. Once the Ogre dies, a boss called the Portal Keeper spawns. Kill it, and a portal opens that leads to the real meat of the mission.

The Central Pillar Room
Step through the portal and pick up the Imbalanced Octant. You'll need this later for the mechanics sections.
The room you're in now has Taken Blights scattered around and a big pillar in the center. Most players spend a few minutes here trying to figure out where to go. The path isn't obvious at all. Climb about halfway up the central pillar and look for a hole in its side. Drop through it to continue.
Wall Traversal and Push Traps
You'll eventually reach a huge wall with a narrow ledge running along it. Crouch and walk carefully. Taken push traps jut out from the wall at regular intervals and will absolutely knock you off if you're standing in the wrong spot.
Time each trap. Watch it extend, wait for it to retract, then move past. At gaps between ledges, you might need to jump around corners.
Once you reach the end of the first ledge, jump to a floating rock platform. Look for an upper ledge above your starting point. This second level has push traps too, so take your time.
The Disappearing Floor Trap
After the wall section, you'll find an area with floors marked by glowing symbols. Stepping on these symbols makes that floor section vanish.
Disappearing Platforms and Gates
The next area combines disappearing platforms with gates that pop up to block certain routes. You're solving a maze under time pressure since the floor is vanishing beneath you.
Some tips for getting through:
- Commit to a direction and move fast
- Some gates are real, others are fake
- If you hit a dead end, wait for platforms to respawn and try again
- Dying here just resets your position with no real penalty
One route that works: start on the far right, cut through the middle, then exit through the left side. Your exact path might vary, and some experimentation is probably unavoidable.
Climbing the Broken Columns
Past the disappearing platform section, broken columns stick out from the walls. Use them as platforms. Jump from one to the next, working your way up.
This section mixes crouch-walking through tight spaces with balancing on upper platforms. You'll double back over areas you already crossed. Look for a lit doorway marking the next section.
Hobgoblin snipers are positioned in this area. They're annoying during platforming, so take them out when you get the chance.
Tower Climb to the First Encounter
The final traversal section puts more disappearing platforms and push traps inside a tower structure. Work your way up by waiting for traps to retract before jumping.
At the top, you'll find an interactable node. Use your Imbalanced Octant on it to open a portal. This takes you to the first combat encounter.
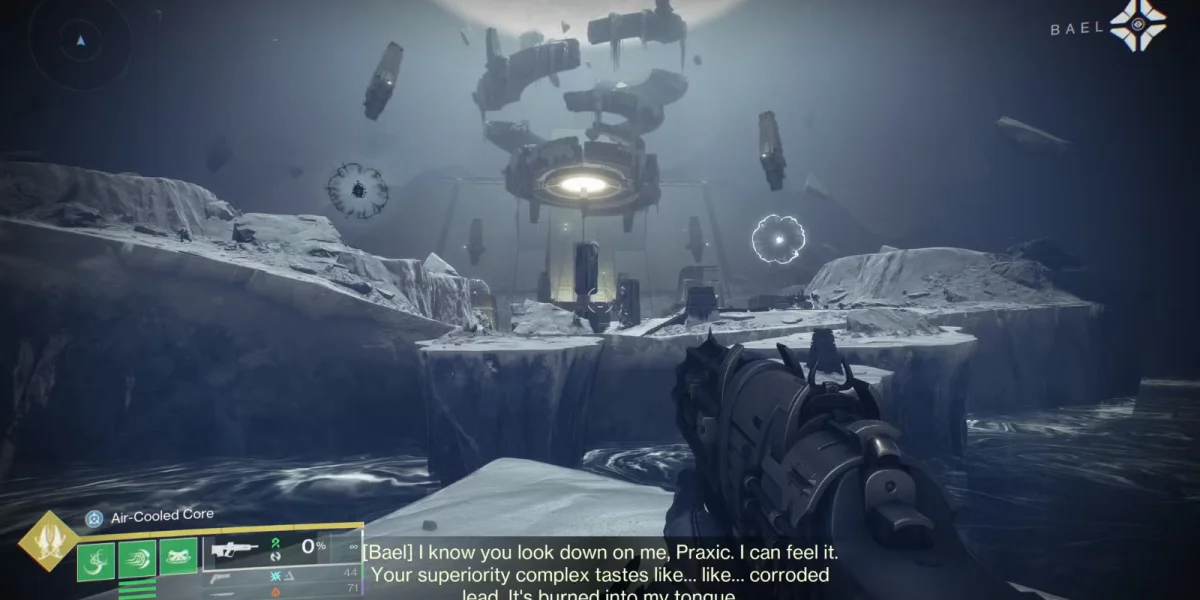
Orb Balance Mechanic Encounter
This fight teaches you the core mechanic for the rest of the mission. Understanding how it works here makes the boss fight much less confusing.
The Arena Setup
Through the portal, you'll see four Taken circles floating in the air: two white (Light) and two black (Dark). Your job is to fill all four circles by throwing matching orbs into them.
A rally flag sits at the entrance for topping off ammo and abilities.
How Orb Generation Works
You create orbs by killing enemies called Cleaved enemies. Two types spawn:
- Cleaved Imperium Centurion (regular Cabal)
- Cleaved Taken Centurion
The system runs on a two-step process:
Step 1: Get a Cleave Buff
Kill any Cleaved enemy. You'll get a buff based on what you killed:
- Killing a Taken Centurion gives you "Taken Energy Cleaved"
- Killing an Imperium Centurion gives you "Barren Energy Cleaved"
Step 2: Kill Again to Spawn Orbs
With your buff active, killing another Cleaved enemy spawns orbs. What type depends on whether you matched or mismatched:
| Your Buff | Enemy Killed | Orbs You Get |
|---|---|---|
| Taken Energy Cleaved | Taken Centurion | Light Orbs |
| Taken Energy Cleaved | Imperium Centurion | Dark Orbs |
| Barren Energy Cleaved | Imperium Centurion | Light Orbs |
| Barren Energy Cleaved | Taken Centurion | Dark Orbs |
Throwing Orbs and Keeping Balance
Walk up to orbs on the ground and interact to grab one. Throw it at the matching circle (white orbs go to white circles, dark to dark).
You have to keep things balanced. If one circle gets way bigger than its partner, the mechanic resets and you lose progress.
The safe approach:
- Throw one orb at the first white circle
- Throw the next at the second white circle
- Keep alternating until both are full
- Do the same for the dark circles
Each orb increases the sphere inside its target circle. Fill all four to complete the encounter.
Finishing Up
Once every circle is maxed out, interact with an altar in the center to calibrate the octants to balance. Pick up the balanced octant again, and a portal spawns behind you.
Head through to reach the boss.
Boss Fight: Disciple of Harrow
The final encounter against the Disciple of Harrow splits into distinct phases. The first three-quarters of the fight is straightforward damage dealing, while the last quarter brings back the orb mechanic with a twist.
Uber Boss: Disciple of Harrow
These phases follow a simple loop:
- Damage the boss with whatever you've got
- After losing one health segment, the boss teleports across the arena
- A Cabal shield with a destructible node deploys
- Break the shield node and keep dealing damage
- Repeat until the boss hits 25% health
The boss puts out serious beam damage, so keep moving or use cover. Running two Solar resistance mods makes a noticeable difference in survivability.
At 25% health, the orb mechanic comes back. This time only two circles appear (both Light or both Dark, depending on your instance).
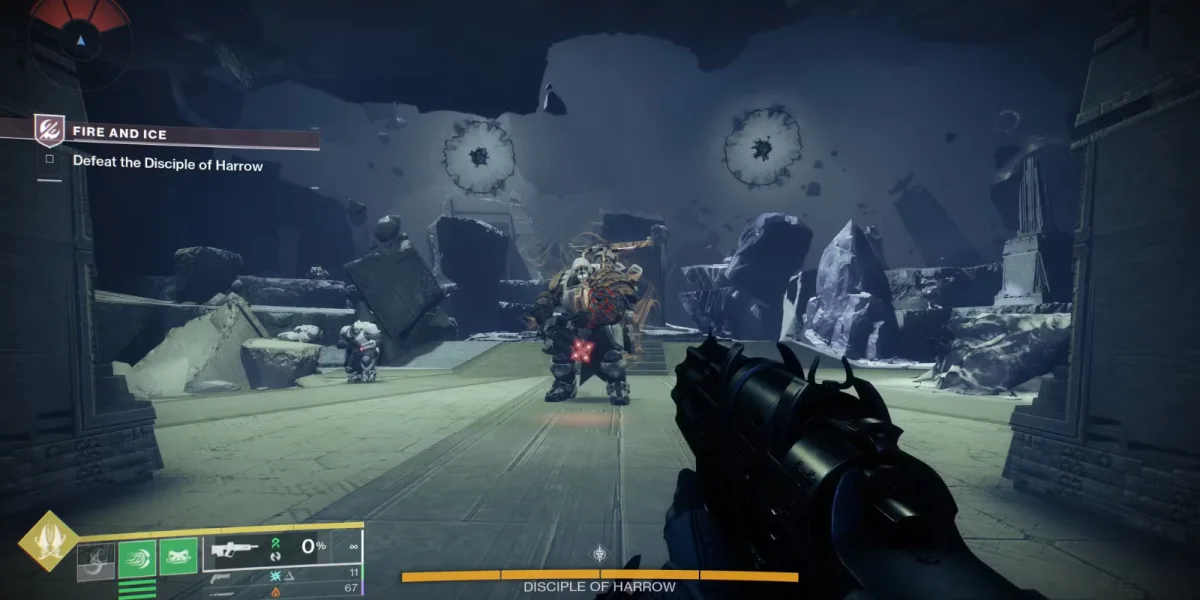
The Balance Octant Device
Both enemy types won't spawn on their own anymore. A device called the Balance Octant appears on a raised platform. Interacting with it switches which Cleaved enemy type spawns.
To finish this phase:
- Kill a Cleaved enemy to grab a buff
- If you need the other enemy type, use the Balance Octant to switch spawns
- Kill the correct enemy to generate matching orbs
- Throw orbs at the circles while alternating between them
- Fill both circles to drop the boss's shield
- Burn down the last of the boss's health
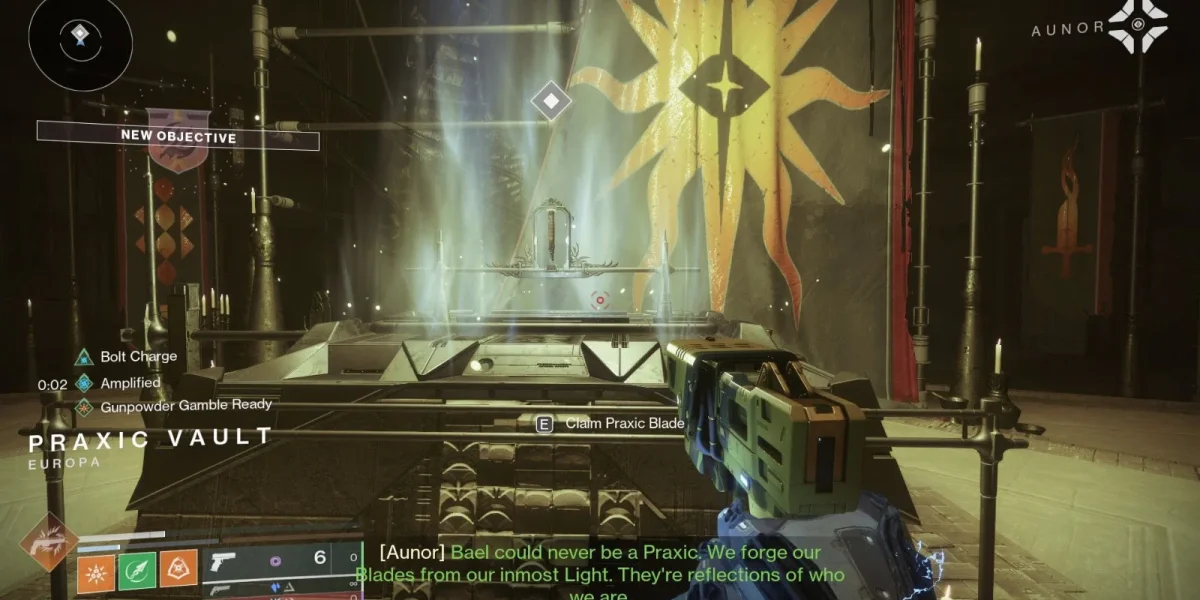
Getting Your Praxic Blade
Beat the Disciple of Harrow, then mop up the remaining adds. A teleport brings you to a special room where the Praxic Blade sits on an altar waiting for you.
Grab it. The mission then lets you run through a quick combat section against Imperium Cabal with tons of Special ammo so you can test out your new toy. After that, the mission ends and the Praxic Blade is yours permanently.
Praxic Blade Abilities
The Praxic Blade plays differently from standard swords, mixing melee and ranged combat in ways most weapons don't.
Slot and Ammo
This sword sits in your Kinetic slot while using Special ammo. That's unusual for an Exotic sword and lets you run it alongside Energy and Heavy weapons you might not normally pair with a sword.
What It Does

Upgrades and Customization
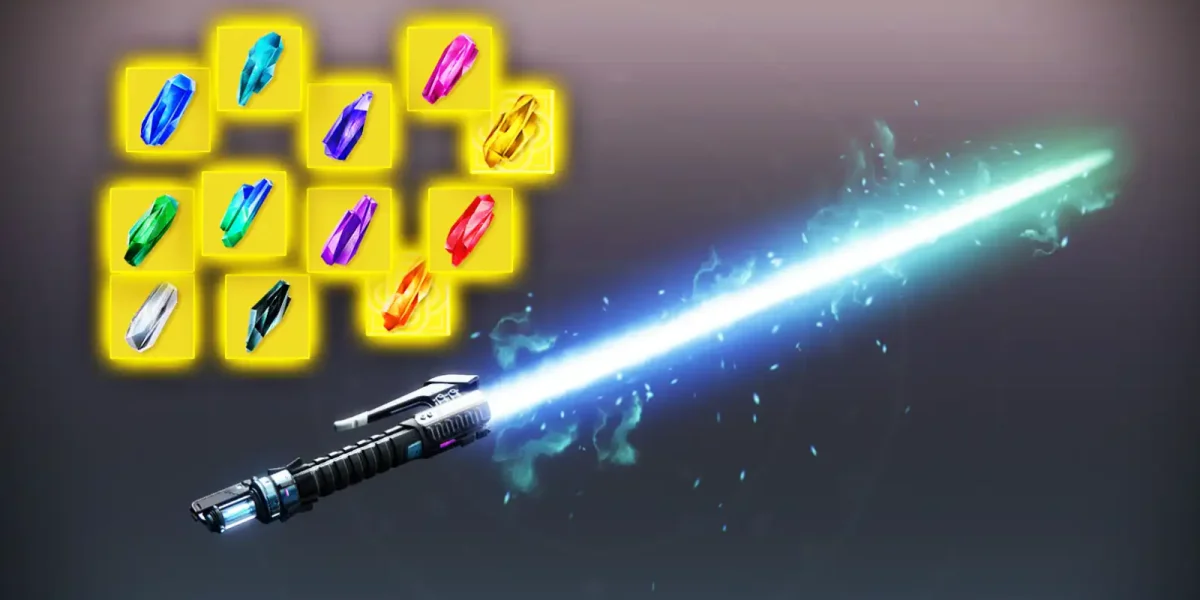
The Praxic Blade has 20 discoverable parts spread across several categories. All upgrade sources are visible directly on the weapon when you inspect it, which makes tracking your progress straightforward.
Upgrade Types
- Dark Matter Crystals (Colors): Change your blade's color. You start with green or blue, with more options available through gameplay.
- Blade Form: Visual changes to how the blade looks.
- Blade Focus: Affects how the blade performs in combat.
- Power Cores: These make bigger changes to weapon behavior. Some are sold at the Thuss Cantina.
- Mod Sockets: Stat adjustments earned through activities and faction ranks at the Thuss Outpost.
- Catalysts: Come from re-running Fire and Ice and from the associated dungeon.
Where Upgrades Drop
| Upgrade Type | Source |
|---|---|
| Dark Matter Crystals | Lawless Frontier Jobs on Mars, Lawless Frontier Invasions |
| Mod Sockets | Thuss Outpost faction rank paths |
| Power Cores | Thuss Cantina (purchasable) |
| Catalysts | Fire and Ice reruns, Dungeon |
The Praxic Path Quest
After finishing Fire and Ice, talk to Aunor again. She gives you a quest called The Praxic Path with multiple steps. Completing it rewards one of the initial upgrades for your blade.
Common Mistakes and How to Avoid Them
Navigation Problems
- Getting stuck at the central pillar
- Looping on the disappearing floors
- Missing hidden crawl spaces
- Getting knocked off by push traps
- Look for the hole halfway up and drop through it
- Find the side passage on the right instead
- Check behind retracting traps for crawl spaces
- Bait each trap, back off, then cross after it retracts
Mechanic Mistakes
- Dumping all orbs into one circle
- Killing both Cleaved enemies too fast in the boss fight
- Forgetting the Balance Octant exists
- Ignoring shield nodes
- Alternate throws between matched pairs or the progress resets
- Take your time - rushing creates the wrong orb type
- Use the device to switch spawns during the boss fight
- Breaking shields keeps your damage flowing
Staying Alive
- Traversal deaths don't really matter. No revive tokens, no darkness zones.
- The boss hits hard. Solar resistance mods help.
- Clear Hobgoblin snipers during platforming before they clear you.
- Good add-clear matters more than pure boss damage for most of this mission.
Quick Reference
Here's the short version of what you need to do:
- Progress to Quest Step 33 in the Renegades campaign
- Talk to Aunor at the Cantina
- Complete the Fire and Ice mission
- Navigate traversal sections by finding hidden paths and timing push traps
- Generate orbs by killing Cleaved enemies in the right order (same type for Light, mixed for Dark)
- Fill all circles by alternating throws between matched pairs
- Use the Balance Octant in the boss fight to control enemy spawns
- Beat the Disciple of Harrow and claim your Praxic Blade
- Talk to Aunor again to start The Praxic Path for upgrades
The Praxic Blade's upgrade system gives you plenty of reasons to keep running Renegades content. Between Lawless Frontier activities, the Thuss Outpost factions, and repeated Fire and Ice clears, there's a lot to chase if you want to fully kit out your lightsaber.