
Welcome, agents, to your comprehensive briefing on the current tactical landscapes of Valorant. As of Season 2025 Act 3 (around April 2025), the competitive map pool has seen some significant shifts, keeping both seasoned veterans and fresh recruits on their toes. This guide will navigate you through each active map, detailing their layouts, crucial callouts, strategic linchpins, meta agent compositions, and unique features that define their gameplay. We'll also touch upon how the pros approach these battlegrounds and what recent changes mean for your ranked climb.
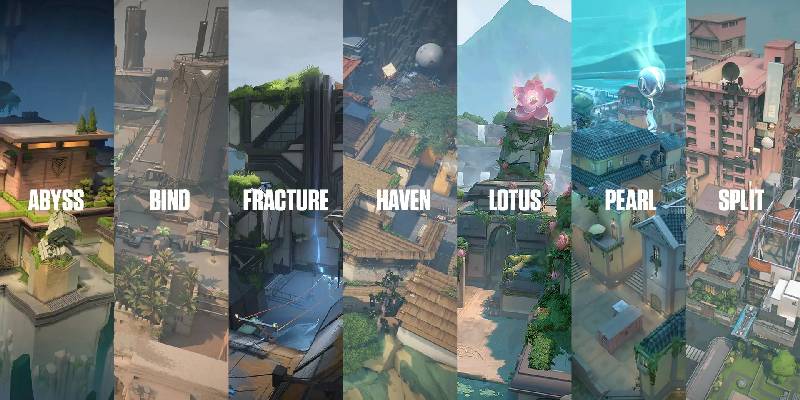
Riot Games maintains a seven-map competitive pool to help new players adjust and allow all players to refine their skills without being overwhelmed. Maps rotate periodically, often with each new Act, based on player feedback, planned updates, and the need for strategic variance. As of the latest update (Patch 10.08, April 29th, 2025), Fracture has been rotated out, making way for the return of Sunset. While Abyss, Bind, and Breeze remain out of the competitive rotation, they can still be encountered in other game modes like Unrated or Deathmatch.
- Ascent
- Haven
- Icebox
- Lotus
- Pearl
- Split
- Sunset
It's important to note that while these changes apply to Competitive, Deathmatch, and Premier modes for the general player base, the Valorant Champions Tour (VCT) often adopts map pool changes with a slight delay, typically after major international tournaments like Masters Toronto (scheduled for June 7th-22nd, 2025) to accommodate teams already competing in regional stages.
Let's dive into the specifics of each map currently in rotation.
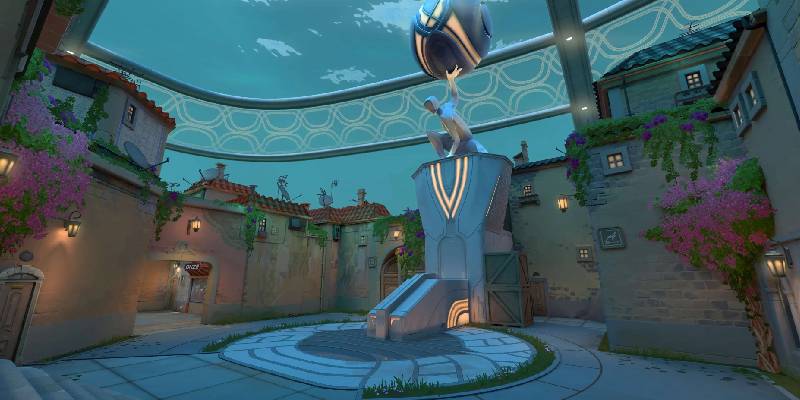
Ascent: The Venetian Stronghold
Map Overview & Setting the Scene

Ascent, a picturesque battlefield set in Venice, Italy, was introduced with Valorant's official launch and has remained a cornerstone of competitive play. Its enduring popularity stems from a classic three-lane design, a sprawling and highly contestable open mid-area often referred to as a "playground," and its signature mechanical doors. This combination makes Ascent not just a balanced map suitable for both newcomers and seasoned tacticians, but also a reliable litmus test for a team's fundamental strategic understanding and execution.
Layout & Essential Callouts
Effective communication is paramount on Ascent. Familiarize yourself with these crucial callouts:
A Site Area:
- A Main, A Lobby, A Link (the area with the mechanical door connecting to A Site)
- A Site, Generator (the large central box on A Site), Heaven (also known as A Rafters), Hell (the area directly beneath Heaven)
- Wine (the cubby in A Main), Tree (also known as A Garden, leading from Catwalk to A Site), A Switch (the button to control the A Link door)
- Double Box/Tetris (stacked boxes on A Site), Pillar (smaller box on A Site near A Main entrance)
Mid Area:
- Mid Top (top of Mid near Attacker spawn), Mid Cubby (small room off Mid Top leading to Catwalk or Courtyard)
- Catwalk (elevated walkway connecting Mid Cubby to A Tree/Garden)
- Courtyard (central open area of Mid), Pizza (small alcove near Market entrance from Mid)
- Market (area connecting Mid to B Site), Screens (area with monitors in Defender Spawn connector to Mid), Subroza (a community-coined name for the deep corner in Mid Top/Cubby often used for aggressive peeks)
B Site Area:
- B Main, B Lobby, Boathouse (structure on B Site)
- CT (Defender Spawn entrance leading to B Site), Workshop (area between B Site and Defender Spawn/Market)
- Platform/Market Stairs (stairs leading from Market to B Site), Market Doors (the mechanical door at B Market)
- Wood/Log Cubby (cubby near B Main entrance), Triple Box/Default (common plant spot on B Site), Stairs (leading down into B Site from B Main)
- Spam Box (box on B Site often wallbanged from B Main), Alley (narrow passage from B Site towards Defender Spawn), B Switch/Button (controls B Market door)
Strategic Blueprint: Attack & Defense
Attacking Strategies:
- Assaulting A Site: A typical A Site execute involves a coordinated push from A Main and Catwalk (often transitioning through Tree/Garden). Smoking off Heaven and the Defender Spawn entrance (or A Link door) is crucial. Thoroughly clearing Wine and Hell is non-negotiable. The default plant is usually behind Generator for cover from A Main, or in front of Generator if A Main control is secure.
- Breaching B Site: B Site takes often begin with establishing control of B Main, followed by smoking off the CT entrance and Market stairs. Defenders frequently hold tight angles in Boathouse and various back-site corners, making diligent clearing essential. The default plant spot is typically near the Triple Boxes. The wall between B Main and Workshop is notably penetrable, offering opportunities for "spam" damage with high-penetration weapons.
- Adaptive Rotations: Ascent's layout, particularly the mid connections, allows for swift rotations. If an initial site push meets heavy resistance, faking presence with utility and quickly redirecting the attack through Mid is a common and effective tactic.
Defensive Strategies:
- Mid Supremacy: Defenders often contest Mid aggressively. An Operator in Mid Cubby or Mid Bottom can shut down pushes, while utility can gather early information dictating rotations. Strategic use of the Market door—opening it for sound cues or closing it to delay B pushes—is a key defensive element.
- Fortifying A Site: Common defensive positions include Heaven, on or around Generator, and in Hell. Sentinels typically deploy utility to cover A Main and to alert for pushes coming from Catwalk. Retaking A Site usually involves coordinated pushes from Defender Spawn, the A Link door, and occasionally a flank through Mid.
- Locking Down B Site: Strong anchor positions can be found in Workshop, behind the Triple Boxes, or inside Boathouse. Sentinel utility is vital for holding B Main. Retakes necessitate clearing B Main thoroughly and pushing from CT and Market, always mindful of attackers holding post-plant positions in B Main.
Agent Synergies & Meta Compositions
Certain agents consistently shine on Ascent due to its specific layout and strategic demands.
Agents that Thrive:
- Omen: His ability to deploy smokes across the map (Mid, Heaven, A Main, B Main) is invaluable for controlling sightlines. Paranoia is a powerful tool for initiating site entries or retakes, and Shrouded Step allows for aggressive repositioning or accessing elevated angles.
- Jett: A premier duelist for Ascent, Jett leverages her mobility for aggressive Operator peeks in Mid or down A/B Main. Her Tailwind allows for rapid site entries, and Updraft provides access to unexpected off-angles, keeping defenders guessing.
- Sova: His Recon Bolt is exceptional for clearing deep angles in A Main, B Main, or gathering crucial information in Mid. Shock Darts can flush enemies from common hiding spots like Hell or behind Generator, and his Owl Drone is a safe way to scout during site entries. The prevalence of penetrable walls on Ascent also makes his "Sova Spam Defense" a well-known and effective tactic.
- Killjoy: Her Turret can provide early warnings in Mid or watch for flanks. Alarmbot and Nanoswarms are potent tools for denying entry through A Main or B Main, or for securing post-plant situations. Her Lockdown ultimate is a game-changer for both site takes and retakes.
- KAY/O: His ZERO/point knife offers information and ability suppression, crucial for disabling Sentinel setups. FRAG/ment is effective for post-plant denial or clearing tight cubbies, and FLASH/drive facilitates entries. The NULL/cmd ultimate is a powerful tool for coordinated site executes or retakes.
- Tejo: An increasingly popular pick in professional play, Tejo's Stealth Drone provides more covert information gathering compared to Sova's Owl Drone. His Guided Salvos can be devastating in post-plant scenarios or for dislodging entrenched defenders.
- Vyse: Mentioned as a rising meta pick, Vyse's wall can be particularly effective for establishing mid-control or segmenting sites during holds or retakes.
| Composition Type | Agents | Rationale |
|---|---|---|
| Pro Meta (VCT 2024/2025) | Jett, Omen, Sova, KAY/O, Killjoy | Classic, highly versatile comp offering strong entry (Jett/KAY/O), global smoke control (Omen), extensive info (Sova), and robust site lockdown/flank watch (Killjoy). |
| Variations | Yoru, Viper, Astra, Tejo, Vyse | Teams experiment based on player strengths and specific strategies, with Tejo and Vyse gaining traction. |
| Ranked Play Meta | Omen/Brimstone, Jett/Raze, Sova/Fade, Killjoy/Cypher, Skye/KAY/O | Provides a reliable mix of smokes, entry fragging, information gathering, and sentinel utility suitable for less coordinated environments. Fade offers easier info than Sova for some. |
Unique Map Features & Gameplay Impact
Ascent's gameplay is significantly shaped by its interactive elements:
These doors, controllable by switches (A Switch, B Switch), start open but can be closed. They possess 500 HP and can be destroyed.
Impact: These doors are central to Ascent's tactical depth. They can be used to block crucial sightlines, delay enemy pushes, gather sound cues (as closing or destroying them is audible), bait out utility, or create temporary safe zones for planting or defusing. Once destroyed, the doorway becomes a permanent, open sightline for the rest of the round.
- Destructible Panels (Mid Courtyard to A Link/B Link): The walls separating Mid Courtyard from the site links feature destructible panels, each with 400 HP. These can be shot out to create wallbang spots. Initially, these panels block both vision and bullets. However, once destroyed (their health is indicated by changing colors: blue, then yellow, then red), they open up new angles.
- Glass Window (A Window to A Garden): A destructible glass pane connects A Window (near Defender Spawn/A Rafters) to A Garden. This provides a quick, albeit loud, entry or exit point to A Rafters or A Garden.
Haven: The Triple Threat Territory
Map Overview & Setting the Scene
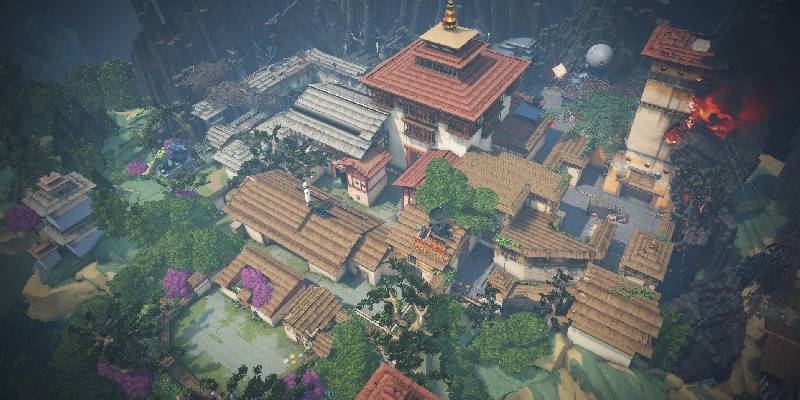
An original from Valorant's beta period, Haven immediately carved its niche with a groundbreaking feature: three Spike Sites (A, B, and C). This design, unique until the later release of Lotus, fundamentally alters the game's rhythm. Set within an ancient monastery in Bhutan, Haven's expansive layout and multiple attack vectors demand exceptional team coordination, strategic rotations, and robust communication to secure victory.
Layout & Essential Callouts
Navigating Haven's tripartite structure requires precise callouts:
A Site Area:
- A Lobby, A Short (often called Sewers), A Long
- A Site, Heaven (or A Tower, the elevated platform overlooking A Site), Hell (the area directly beneath Heaven)
- Default (common plant spot on A Site, usually behind the central boxes), Graffiti (wall near A Site entrance from Defender Spawn), A Link (connector between A and B Sites)
B Site Area:
- Mid (referring to Mid Courtyard and Mid Window which looks into B Site)
- B Site, Back B (area behind the central structure on B Site), Gong (the large metallic shield-like structure in Back B, a well-known community callout)
C Site Area:
- C Lobby, C Long, C Short (also known as Garage Connector, linking Mid/Garage to C Site)
- Garage (the large room connecting Mid to C Short and C Window), C Site
- Platform (elevated area on C Site), Cubby (small alcove on C Long), C Link (connector between C and B Sites)
- Logs (stack of logs on C Site providing cover), Grass (area outside C Lobby towards Mid), Window (Mid Window looking into Garage, distinct from the B Site Mid Window)
Strategic Blueprint: Attack & Defense
The presence of three sites makes Haven a complex strategic puzzle.
Attacking Strategies:
- Executing on A Site: A Site attacks often manifest as a split push, with players advancing through A Short and A Long simultaneously. Smoking off Heaven and the CT Connector is standard practice. Diligent clearing of Hell and the default boxes is paramount for site security.
- Taking B Site: B Site is typically assaulted via a swift push through Mid Window or a coordinated pincer movement from A Link and C Link. Smoking off both connecting Links is crucial to isolate the site.
- Storming C Site: Effective C Site takes usually involve a simultaneous push from C Long and Garage. Standard smokes are placed on the CT Connector and the Platform. Clearing Logs, the back of the site, and the C Long Cubby is critical for a successful plant.
- The Power of Fakes & Rotations: The three-site configuration makes Haven exceptionally conducive to fake attacks. Applying pressure on one site with utility and sound cues, then rapidly rotating to an alternative site through Mid or the Links, can effectively catch defenders out of position.
Defensive Strategies:
- Dispersed Defense & Rapid Reinforcements: Defenders are inherently spread thinner on Haven. A common, though flexible, defensive setup might involve two players on A, one covering B/Mid, and two on C. The ability to rotate quickly through Defender Spawn and the various Links is the lifeblood of a successful Haven defense.
- Holding A Site: Aggressively holding A Long for early information, supported by utility at A Short, is a common approach. Heaven offers a commanding overview of the site.
- Anchoring B Site: B Site is frequently held by an agent specializing in information gathering (like Sova or Killjoy) or a lurker who can capitalize on rotations. Due to its openness to multiple angles once attackers gain control, playing for a retake on B is a common defensive strategy.
- Securing C Site: Jump-spotting C Long for early information is a staple defensive tactic. Sentinel utility deployed in Garage or along C Long can significantly delay attacker pushes.
Agent Synergies & Meta Compositions
Haven's unique three-site layout heavily influences agent viability, prioritizing those who can exert map-wide influence or gather extensive information.
Agents that Thrive:
- Omen/Astra: Controllers with global or long-range rechargeable smokes are invaluable. They can control sightlines across all three sites, facilitate attacker pushes, or delay defensive rotations effectively.
- Sova: His Recon Bolt and Owl Drone are crucial for gathering information across the expansive and multi-angled sites. His ultimate, Hunter's Fury, can deny plants or defuses from safe distances.
- Jett: Her exceptional mobility allows for rapid rotations between the three sites, aggressive peeks on long sightlines like C Long or A Long, and the ability to quickly take control of elevated positions like A Heaven.
- Cypher: Cypher has risen to prominence on Haven, often replacing Killjoy in the meta. His Trapwires and Spycam are exceptional for locking down flanks or gathering crucial information on one site while the team focuses elsewhere.
- Killjoy: While Cypher is often preferred for broader information, Killjoy remains a strong pick for anchoring a specific site, particularly C or A. Her Lockdown ultimate can be decisive in clearing a site for a take or retake.
- Breach/KAY/O: These initiators excel in Haven's environment. Their abilities are designed to clear the tight angles and numerous corridors that characterize the map.
| Composition Type | Agents | Rationale |
|---|---|---|
| Pro Meta (VCT 2024/2025) | Jett, Omen, Sova, Breach/KAY/O, Cypher | This composition offers strong entry potential (Jett), global smoke control (Omen), extensive information gathering (Sova, Cypher), potent site execution/disruption (Breach/KAY/O), and flank security (Cypher). |
| Variations | Fade or Astra | Fade can substitute Sova for different info patterns; Astra can replace Omen for global presence. |
| Ranked Play Meta | Omen/Astra, Jett/Raze, Sova/Fade, Cypher/Killjoy, Skye/Breach | Similar core roles to pro play, offering flexibility for agents that might provide more individual impact in less coordinated ranked matches. Skye offers healing and easier-to-use flashes. |
Unique Map Features & Gameplay Impact
Haven's defining characteristic is its core structure, rather than interactive gimmicks:
This is the map's most significant unique feature.
Impact: This fundamentally alters the strategic calculus of a Valorant match. Defensively, teams are stretched thinner, making it more challenging to present a robust hold on any single site without conceding significant map control elsewhere. For attackers, the three sites offer a wealth of options, allowing for complex fakes, split pushes, and rapid rotations to exploit defensive weaknesses.
- Interconnected Paths & Links: The sites are connected by numerous corridors and specific link areas (A Link, B Link, C Link), as well as the central Garage and Mid Courtyard areas. These pathways are the arteries of Haven, facilitating the complex rotation strategies and lurk plays that define the map.
- Absence of Dynamic Gimmicks: Unlike maps such as Bind (teleporters), Ascent (mechanical doors), or Lotus (rotating doors, destructible wall), Haven relies purely on its intricate layout for strategic complexity. This places a heightened emphasis on fundamental Valorant skills: precise gunplay, intelligent utility usage, strategic positioning, and strong team communication.
Icebox: The Arctic Gauntlet
Map Overview & Setting the Scene
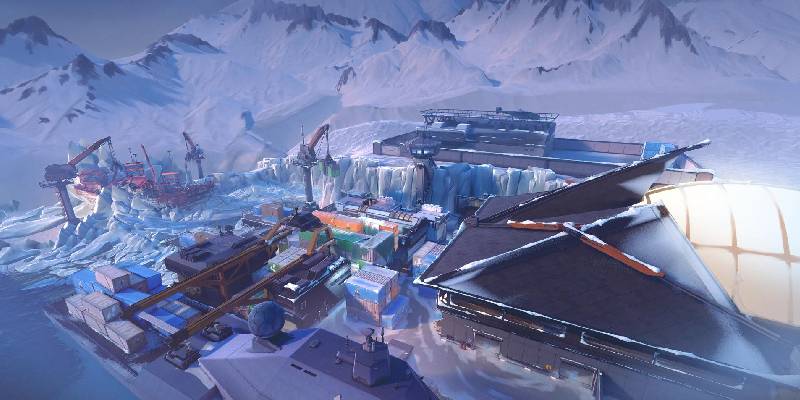
Icebox plunges agents into a frigid, industrial port facility located in Russia's Arctic region. This map is infamous for its extreme verticality, featuring numerous elevated positions, horizontal ziplines, tight corridors, and uniquely designed two-tiered bomb sites. Gameplay on Icebox is characterized by fast-paced skirmishes, a heavy emphasis on controlling vertical space, and the strategic use of its unique traversal options. It is generally considered an attacker-sided map, largely due to the advantages attackers can gain by securing plants on the upper levels of the sites.
Layout & Essential Callouts
Mastering Icebox requires a strong understanding of its vertical dimensions and specific callouts:
A Site Area:
- A Main, Belt (elevated walkway overlooking A Site), Pipes (structures providing cover and vertical angles on A Site)
- Rafters (also known as Nest, the highest platform on A Site, accessible by ropes), Screens (area connecting Defender Spawn/Mid to A Site)
- Generator (large structure on A Site), Hell (area under A Rafters/Nest), Top Site A (referring to planting on Rafters/Nest, often near the window)
Mid Area:
- Blue (large blue containers in Attacker Spawn leading to Mid), Boiler (elevated platform in Mid overlooking Tube and B entrance)
- Tube (enclosed passage connecting Mid to Kitchen, with Top Tube and Bottom Tube distinctions), Kitchen (room overlooking B Site, connected to Tube and Defender Spawn)
- Kitchen Window, Orange (the large orange container in Mid, providing cover)
B Site Area:
- B Main (also known as Green, due to the green containers), Yellow (stacked yellow containers providing cover and angles onto B Site)
- Cubby (small alcove near B Main entrance), Snowman (area at the back of B Site towards Defender Spawn, offering cover)
- Danger (corner where attackers often push into B Site), Bridge (connects Top Site B to B Halls/Kitchen area)
- Top Site B (elevated plant area on B), Default Plant B (ground level plant), Snow Pile (area near B Main offering cover, recently changed)
Strategic Blueprint: Attack & Defense
Icebox's verticality and complex site structures demand unique approaches.
Attacking Strategies:
- A Site Assaults: A common approach involves gaining control of Belt and Rafters (Nest). Planting the Spike on Top Site A (Nest/Window) is a powerful strategy because it exposes defenders attempting a defuse to multiple angles from various elevations. A Sage Barrier Orb is almost mandatory for securing this elevated plant safely.
- B Site Breaches: Successful B Site takes usually start with securing B Main (Green) and Yellow. Planting on Top Site B (often accessed from Mid/Yellow or via Sage wall) or at the default ground position are both viable. Again, a Sage wall is crucial for safe plants, especially on the exposed top site.
- Mid Dominance: Controlling Mid (Tube, Boiler, Kitchen) is vital as it opens rotation paths and allows for multi-pronged pressure on both sites. Sova's Recon Bolts are invaluable for clearing Mid and gaining information on defender setups.
- Zipline Dynamics: The horizontal ziplines on A Site (connecting Belt to Rafters) facilitate rapid movement across the site. Attackers can use them for quick rotations, aggressive peeks into Rafters, or to escape difficult situations, though their use is audibly telegraphed.
Defensive Strategies:
- Leveraging Height: Defenders must utilize the abundant high-ground positions on both sites, such as A Rafters, Top Site B, and Kitchen. Operators wielded by agents like Jett or Chamber can be particularly oppressive from these vantage points.
- A Site Anchors: Common defensive positions include playing from Rafters, behind Screens, near Generator, or utilizing the cover of Pipes. Viper utility is often used to delay pushes and create one-way smokes.
- B Site Lockdown: Defenders often hold from Snowman, Yellow, or Top Site B. Chamber is a strong anchor for B Main due to his ability to take aggressive duels and safely teleport away.
- Mid Control (Defense): Sage's Barrier Orb or Slow Orbs are effective for stalling Mid pushes. Initiator utility from Sova or KAY/O can be used to gain information or contest control of Boiler and Tube.
Agent Synergies & Meta Compositions
Icebox's unique architecture heavily favors agents who can exploit its verticality and control its chokepoints.
Agents that Thrive:
- Viper: Considered almost essential on Icebox. Her Toxic Screen and Poison Orb are unparalleled for segmenting the large, open sites, blocking multiple sightlines (especially vertical ones), and creating safe conditions for planting or denying defuses.
- Jett: Her vertical mobility with Updraft allows her to instantly access and control high-ground positions like A Rafters or the top of boxes on B Site. She is the premier Operator agent on this map.
- Sova: Information is king on a map with so many angles and levels. Sova's Recon Bolt and Owl Drone are crucial for scouting Mid, clearing complex site angles, and spotting enemies in elevated positions.
- Killjoy: Her utility is excellent for locking down key areas like Kitchen, Mid, or anchoring a site. Her Turret can cover wide angles, Alarmbot provides flank security or entry warnings, and Nanoswarms are potent for post-plant denial.
- Sage: Her Barrier Orb is arguably one of the most impactful abilities on Icebox. It's vital for guaranteeing safe plants on the exposed elevated positions of both A and B sites.
- Chamber: While nerfed from his peak, Chamber can still be a viable pick for his Operator prowess and ability to hold areas like B Site with his Rendezvous teleports for safe disengagements.
| Composition Type | Agents | Rationale |
|---|---|---|
| Pro Meta (VCT 2024/2025) | Viper, Jett, Sova, Killjoy, Sage/KAY/O | Viper is a cornerstone for area control. Jett excels with verticality and Oping. Sova provides essential recon. Killjoy locks down areas. Sage guarantees crucial top-site plants, while KAY/O offers aggressive info/disruption. |
| Ranked Play Meta | Viper, Jett/Reyna, Sova/Fade, Killjoy/Sage, Omen | Viper remains key. Jett or Reyna for dueling. An info agent is crucial. Sage for plants or Killjoy for holds. Omen provides flexible smokes if Viper is dedicated to one site or for individual plays. |
Unique Map Features & Gameplay Impact
Icebox's identity is forged by its distinct mechanics and environmental design:
The most defining characteristic. Both A and B bomb sites feature clearly distinct upper and lower planting areas.
Impact: This heavily influences agent selection, with mobile agents like Jett, Omen, and Raze thriving. The "top-site plant" is a core attacking strategy, making defuses perilous for defenders due to exposure from multiple vertical angles.
- Horizontal Ziplines (A Site): These connect A Belt to A Rafters (Nest), allowing for rapid horizontal movement across the A site. Ziplines enable swift rotations across A site, aggressive peeks into Rafters, or quick escapes. However, their use generates a distinct sound cue.
- Tight Corridors & Complex Angles: Despite some more open areas like Mid, many pathways and site entries are narrow and convoluted, leading to frequent close-quarters combat and a multitude of angles to clear.
Lotus: The Tri-Portal Sanctuary
Map Overview & Setting the Scene

Lotus, Valorant's ninth map, transports agents to an Indian-inspired, lost ancient city, radiating an aura of mystique and ancient power. Echoing Haven's design philosophy, Lotus features three Spike Sites (A, B, and C). However, it carves its own identity with a suite of unique interactive mechanics, including two large rotating doors, a destructible wall segment, and a silent drop point. The map's layout encourages early map control and frequent, decisive engagements.
Layout & Essential Callouts
Navigating the ancient ruins of Lotus requires clear communication:
A Site Area:
- A Main, A Lobby, A Root (pathway from Attacker Spawn towards A), A Rubble (area connecting A Main to A Site and A Link)
- A Stairs (leading up to A Site), A Tree (area on A Site near the rotating door), A Hut (central structure on A Site)
- A Site, A Drop (Silent Drop from A Top to ground level near A Main/Defender Link), A Door (the rotating door between A Main and A Tree)
- A Link (destructible wall connecting A Rubble to B Site area), A Top (elevated area accessible by a rope ascender at the back of A Site)
B Site Area:
- B Main (direct path from Attacker Spawn/Mid to B Site), B Site, B Pillars (multiple pillars providing cover on B Site), B Upper (small elevated platform on B Site)
C Site Area:
- C Main, C Lobby, C Mound (large, elevated earthen structure leading to C Site and the rotating door to B)
- C Site, Waterfall (area behind C Site), C Hall (connector from C Site to Defender Spawn)
- C Link (path connecting C Site to B Site), C Gravel (area near C Lobby), Platform (elevated section on C Site)
- CT Upper (elevated defender access to C), CT Box (box near CT entrance to C)
Strategic Blueprint: Attack & Defense
Lotus's three sites and dynamic elements create a complex tactical environment.
Attacking Strategies:
- Assaulting A Site: A Site executes often focus on controlling A Main and A Rubble. Attackers can push through the A Door towards A Tree or attempt a split by breaking the A Link wall to pressure B simultaneously. Smoking off A Stairs and A Hut is common.
- Breaching B Site: B Site is typically hit with a fast push from Attacker Spawn/Mid directly down B Main. Due to its tight angles around the Pillars, significant utility is required for a safe entry. B Site is vulnerable to flanks from both A Link and C Link if not properly watched.
- Storming C Site: C Site attacks often involve a coordinated push from C Main and C Mound. Smoking off the CT entrance and the Waterfall area is standard. Gaining control of the C Platform is a key objective.
- Rotations & Deception: The rotating doors on A and C provide fast, albeit noisy, rotation options between sites. A prevalent tactic is to activate a door to create sound cues and fake a site presence, drawing defenders away from the true target site.
Defensive Strategies:
- Early Map Control: Defenders often prioritize contesting A Main/A Rubble and C Mound to gain early information and delay attacker advances. Sentinels frequently deploy utility in these areas to stall pushes or gather intel.
- Holding A Site: Defensive setups on A often involve players positioned in A Tree, A Hut, or utilizing the A Drop for retake angles. Utility is crucial for stalling pushes through the A Door.
- Anchoring B Site: B Site is often defended more passively, with a focus on playing for retakes due to its central location and multiple entry points (B Main, A Link, C Link).
- Securing C Site: C Site is commonly anchored by agents with strong stalling utility (like Killjoy or Vyse) to control pushes from C Main and C Mound. The rotating door at C Mound can be used for quick information gathering or to facilitate rapid retakes towards B Site.
Agent Synergies & Meta Compositions
Lotus's unique blend of three sites and interactive elements calls for specific agent strengths.
Agents that Thrive:
- Raze: Her explosive kit is invaluable for clearing Lotus's numerous tight chokepoints, cubbies, and confined site areas. Paint Shells can deny large areas, and Blast Pack mobility allows her to quickly take space or reach unexpected angles. She is considered unmatched on Lotus by some analyses.
- Omen/Astra: Controllers with global reach or rechargeable smokes are vital for managing three sites and adapting to dynamic rotations. Omen's Paranoia is highly effective in Lotus's narrow corridors, and his teleports offer repositioning advantages.
- Fade/Sova: Initiators are crucial for information. Fade's Prowlers excel at clearing close angles, and her Haunt can provide reconnaissance across sites. Her Seize ability can also be potent in chokepoints.
- Killjoy/Cypher/Vyse: Sentinels play a critical role in watching flanks, anchoring sites, and providing post-plant security. Killjoy's Lockdown ultimate can be a round-winner. Vyse's Vine (Razorvine) is particularly strong for stalling pushes in narrow chokepoints like C Mound or through the rotating doors.
- Breach: His flashes, stuns, and aftershocks are highly effective in Lotus's tight passages, for breaking Sentinel setups, and for initiating site executions.
- Tejo: A strong and increasingly popular initiator pick on Lotus. His comprehensive utility kit offers excellent information gathering, site entry support with flashes, and powerful post-plant denial with his missiles.
| Composition Type | Agents | Rationale |
|---|---|---|
| Pro Meta (VCT 2024/2025) | Raze, Double Controller (Omen/Astra + Viper), Initiator (Fade/KAY/O/Tejo), Sentinel (Killjoy/Vyse) | Raze for entry/space. Double controllers manage 3 sites & complex smokes. Initiator for info/disruption. Sentinel for anchor/flank. Tejo & Vyse are increasingly common due to their strong utility for Lotus's specific challenges. |
| Ranked Play Meta | Raze/Jett, Omen/Astra, Fade/Skye, Killjoy/Cypher, Breach | Similar core roles. Jett offers an alternative duelist. Skye provides easier-to-use flashes and healing, beneficial in less coordinated environments. |
Unique Map Features & Gameplay Impact
Lotus is rich with interactive elements that define its strategic landscape:
These large stone doors can be activated from either side using a toggle button. They rotate 180 degrees over approximately 10 seconds, creating a temporary passage. They make a distinct sound when activated and will destroy any deployable utility placed in their rotation path.
Impact: These doors are central to Lotus's dynamic gameplay. They create chokepoints that can be temporarily opened or closed, influencing rotation paths and timings. The sound cue provides information to both teams, allowing for potential baits, fakes, or counter-plays.
- Destructible Wall (A Main to A Link/B): A specific wall segment between A Main (near A Rubble) and A Link (leading towards B site) can be damaged and eventually destroyed. It has health indicators (blue -> yellow -> red) to show its status. Once destroyed, it creates a permanent opening for the rest of the round.
- Silent Drop (A Site to Defender Spawn area): Located at the back of A Site, players can use a rope ascender to reach A Top. From A Top, they can drop down to A Drop (near A Main and a connector to Defender Spawn) silently, provided they don't run or land too far from the designated silent drop area.
- Third Ultimate Orb (Mid): Unlike Haven (the other three-site map), Lotus features a third ultimate orb located in the B Main/Mid area, in addition to the standard orbs near A and C Attacker spawns. This makes control of the B Main/Mid area even more contested, as securing this orb can significantly accelerate a team's ultimate economy.
"The combination of three sites with these dynamic interactive elements results in a battlefield that is constantly evolving. Pathways can open and close, sound cues provide crucial information, and control of specific mechanics can unlock new strategic avenues."
Pearl: The Underwater Metropolis
Map Overview & Setting the Scene
Pearl, introduced as Valorant's eighth map, submerges players into a vibrant, sprawling underwater city located off the coast of Portugal. Unlike many of its predecessors, Pearl eschews dynamic gimmicks like teleporters, mechanical doors, or ziplines, opting instead for a more traditional, defensively oriented two-site, three-lane layout. Its complexity arises from a labyrinthine mid-section with numerous interconnected corridors, long sightlines that favor precise aim, and tight chokepoints that demand strategic utility usage. Control of Mid is often cited as paramount to dictating the flow of rounds on Pearl.
Layout & Essential Callouts
Navigating Pearl's depths requires clear communication:

- A Main, A Link (connector from Mid to A Site)
- A Site, Flowers (area with planters on A Site)
- Dugout (low ground cubby on A Site)
- Secret (small passage from A Site to Defender Spawn/A Link)
- Art (area with artwork near A Main/A Link entrance to site)
- Mid Plaza (central open area of Mid)
- Mid Doors (double doors connecting Mid Plaza to B Link)
- Shops/Stores (area connecting Attacker Spawn to Mid Plaza)
- Connector (general term for paths linking Mid to sites)
- Water (low-lying area in Defender Spawn side of Mid)
- Museum (large open space in Mid near Defender Spawn)
- B Main (long corridor leading to B Site)
- B Ramp (ramp leading up to B Site from B Main)
- B Site, Tower/Heaven (elevated structure overlooking B Site)
- Hall (connector from B Site to Mid Doors/Defender Spawn)
- Screens (large screens on B Site providing cover)
- Tunnel (underpass connecting B Site to Defender Spawn area)
Strategic Blueprint: Attack & Defense
Pearl's intricate layout offers diverse strategic possibilities.
Attacking Strategies
- Allows pressure on A Link or B Link/Doors
- Splits defender attention effectively
- Enables more convincing fake executes
- Provides rotation opportunities between sites
- Requires significant utility investment
- Multiple angles to clear and hold
- Vulnerable to defender flanks
- Can become a utility drain if contested heavily
- The Mid Equation: Establishing control over Pearl's complex Mid area is often a precursor to successful site takes. Mid control allows attackers to pressure A Link or B Link/Doors, split defender attention, and execute fakes more effectively. Smokes and damage utility play a significant role in gaining and holding Mid.
- Assaulting A Site: Attacking A Site generally involves navigating A Main and potentially splitting through A Link from Mid. Smoking off Flowers and Secret is a common tactic to limit defender sightlines. Clearing Dugout and Art is crucial. Post-plant, holding A Main and A Link is common.
- Breaching B Site: B Site is often approached via the long B Main corridor. Smoking off Tower (Heaven), Left-Hall, and Tunnel is standard procedure for an execute. Flashing high onto site is important due to the elevated Tower position. Planting on the top left corner of the site, outside Left-Hall, is a common default.
Defensive Strategies
Defenders often prioritize holding Mid to prevent attackers from gaining easy access to either site link. A Site is considered more defender-sided if played correctly, with multiple strong positions in Flowers, Dugout, and Secret. B Site defense relies heavily on controlling the long B Main corridor, often with an Operator due to its extended sightline.
Agent Synergies & Meta Compositions
Pearl's layout, characterized by long sightlines, tight corridors, and a complex mid-section, favors agents who excel at area control, information gathering, and dueling.
| Agent | Role | Why They Excel | Key Abilities |
|---|---|---|---|
| Astra | Controller | Global presence perfect for Pearl's complex layout | Nebula smokes, Gravity Well, Cosmic Divide |
| Jett | Duelist | Mobility for long corridors and aggressive Operator angles | Tailwind, Updraft, Operator plays |
| Killjoy | Sentinel | Excellent for locking down sites and gathering intel | Turret, Alarmbot, Nanoswarms |
| Fade | Initiator | Information gathering across long sightlines | Haunt, Prowlers, Seize |
| Viper/Harbor | Controller | Line smokes for cutting off long sightlines | Toxic Screen, High Tide, Cascade |
Unique Map Features & Gameplay Impact
Pearl's mid-section is not a single, large open area. Instead, it's a network of multiple smaller corridors and spaces (Mid Plaza, Shops, Connectors, Mid Doors, Art, Museum, Water) that link to both Attacker and Defender spawns, as well as both bomb sites.
This intricate mid makes control of this central zone exceptionally crucial and highly contested. Teams must use smokes and other utility strategically to gain and maintain control over these interconnected passages.
The map features several small windows or openings in walls, such as on A Site and between Mid and A Long. These openings create unique sightlines and opportunities for unexpected plays, especially for high-mobility agents like Jett or Raze who can use them for quick peeks, off-angle shots, or to pass utility through.
Split: The Vertical Divide
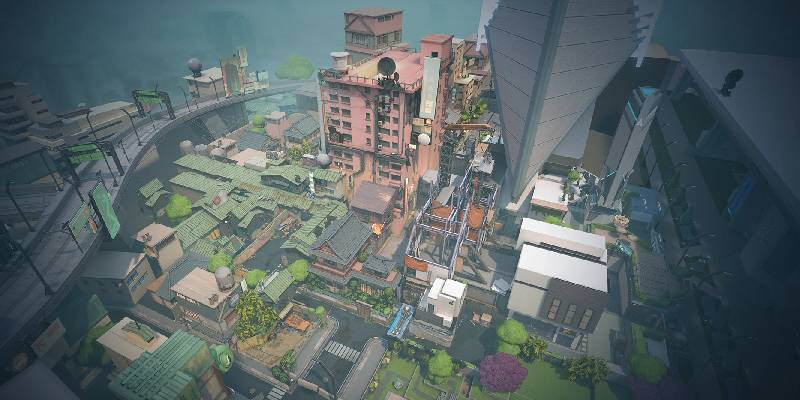
Map Overview & Setting the Scene
Split, one of Valorant's inaugural maps, is set in a futuristic, Tokyo-inspired megacity and is renowned for its significant emphasis on verticality. The map's defining features include multiple levels, rope ascenders for quick vertical transit, and tight, narrow corridors leading to compact bomb sites. Control of the elevated Mid area, which connects to both A and B "Heavens" (towers), is often the key to unlocking attacking routes and facilitating swift defensive rotations. Split generally favors defenders due to its narrow chokepoints and strong high-ground positions.
Strategic Blueprint: Attack & Defense
Attacking Strategies
- Mid Control is Paramount: Securing Mid (Mail and Vents) is often the primary objective for attackers. Control of Mid Top allows access to B Heaven via Mail, and Mid Bottom/Vents provides a route to A Site via Elbow/Sewer. Smokes on Mid Doors and Vent entrance are crucial.
- A Site Executes: Typically involve a split push through A Main and A Ramp, or a coordinated push through A Main combined with pressure from Vents/Elbow. Smoking off A Heaven and Screens is standard. Clearing Under Heaven and Rafters is vital.
- B Site Executes: Often a fast push through B Garage/Main, sometimes supported by players from Mid Mail taking B Heaven. Smoking B Heaven and the CT entrance is essential. Clearing B Backsite and Rafters is key.
- Rope Plays: Using ropes for quick vertical repositioning can create off-angles or allow for unexpected flanks into A Heaven or B Heaven. However, ropes are noisy and predictable if not used carefully.
Defensive Strategies
- Strong high-ground positions in A and B Heaven
- Narrow chokepoints favor utility usage
- Quick rotations via rope ascenders
- Multiple crossfire opportunities
- Mid control loss opens multiple attack routes
- Heaven positions vulnerable to coordinated utility
- Rope rotations create audio cues
- Retakes require clearing vertical angles
Agent Synergies & Meta Compositions
| Composition Type | Agents | Rationale |
|---|---|---|
| Pro Meta (VCT 2024/2025) | Raze, Omen, Skye/Breach, Cypher, Astra/Viper/Sage | Raze for entry/space. Omen for primary smokes & Heaven control. Skye or Breach for initiation in tight spaces. Cypher for info/flank watch. Flexible fifth slot for additional control or utility. |
| Ranked Play Meta | Raze/Jett, Omen/Brimstone, Skye/KAY/O, Cypher/Killjoy, Sage | Similar core roles with more self-sufficient options. Sage provides strong chokepoint denial and team healing. |
"If you want to go far, you'll have to go up"
Unique Map Features & Gameplay Impact
Located in Mid Vent (connecting Mid Bottom to A Sewer/Elbow), B Tower/Heaven (connecting B Site ground level to B Heaven), and near B Garage exit (B Hell - community callout).
Impact: Ropes are the primary mechanic for vertical movement on Split. They allow quick ascent/descent between levels, enabling rapid rotations and unexpected flanks. However, rope usage generates significant sound, making players vulnerable if anticipated.
Both A and B sites feature prominent elevated areas known as "Heaven" or "Tower," which overlook the main planting areas and approach routes. Mid also has distinct upper (Mid Top) and lower (Mid Bottom) sections.
Impact: This multi-level design creates numerous vertical angles and crossfires. Controlling high-ground positions provides significant tactical advantages with better sightlines and cover.
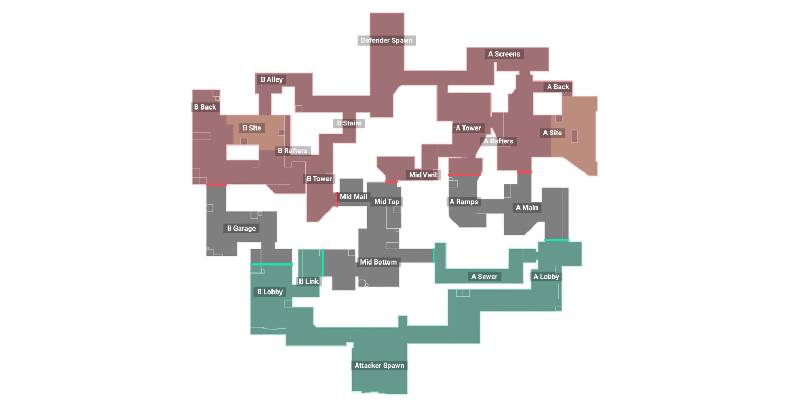
Sunset: The LA Showdown
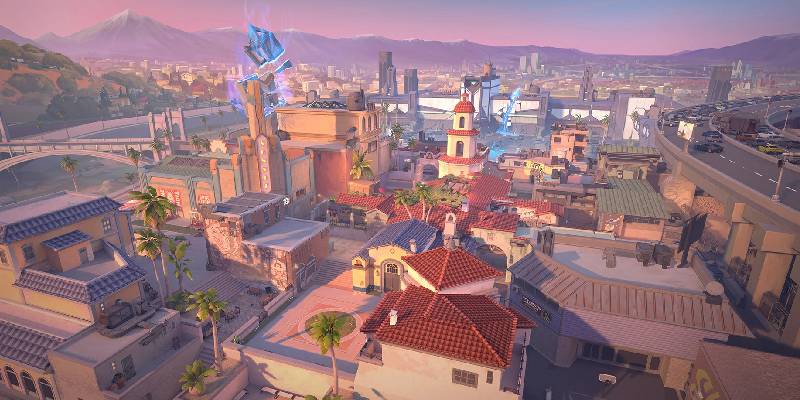
Map Overview & Setting the Scene
Sunset, one of the newer additions to Valorant's competitive rotation (rejoining in Season 25 Act 3, April 2025, replacing Fracture), transports players to the sun-drenched streets of Los Angeles. It features a classic three-lane, two-site (A and B) structure, reminiscent of traditional tactical shooter maps. The map is characterized by its emphasis on mid-control, several narrow corridors, and a unique destructible door in the Mid Market area. While relatively straightforward in its mechanics, success on Sunset hinges on swift movement, knowledge of safe repositioning spots, and strategic use of its chokepoints.
Strategic Blueprint: Attack & Defense
Attacking Strategies
- Mid Control is Key: Dominating the Mid section of Sunset is crucial for unlocking attacking options. Control of Mid allows for rotations to either A or B, forcing defenders to react and potentially over-rotate.
- A Site Executes: Pushes onto A Site often come through A Main, with potential support or flanks from A Link via Mid Top. Clearing Elbow and Gen is vital. Utility should be used to block vision from Alley and A Link.
- B Site Executes: B Site takes often involve a push through B Main. Controlling Market and using the destructible door strategically can be impactful. Coordinated executes are necessary as B Site can be locked down if defenders control Mid.
- Utilizing Height and Angles: Sunset offers various boxes, generators, and other objects that can be used for vertical plays by agents with movement abilities to catch opponents off-guard.
Defensive Strategies
- Strong mid-control positions
- Multiple narrow chokepoints for utility
- B Site lockdown potential with Mid control
- Excellent trap and crossfire opportunities
- Mid loss opens multiple attack routes
- Narrow corridors vulnerable to explosive utility
- Destructible door creates unpredictable rotations
- A Site can be difficult to retake
Agent Synergies & Meta Compositions
| Agent | Role | Sunset Effectiveness | Key Strengths |
|---|---|---|---|
| Omen | Controller | Ideal Pick | Distance smokes for Mid control, Shrouded Step for repositioning |
| Sova | Initiator | Top Tier | Information gathering across long sightlines, Shock Bolts for clearing |
| Cypher | Sentinel | Dominant | Exceptional for narrow corridors and flank watch |
| Raze | Duelist | Strong | Explosive kit perfect for tight corners and confined spaces |
| Breach | Initiator | Effective | Abilities designed for narrow corridors and chokepoint control |
Unique Map Features & Gameplay Impact
Located in the Mid Market area, connecting it to B Site, this door can be opened, closed, or destroyed by dealing 500 HP to it.
Impact: This door is a significant tactical element. When intact and closed, it blocks vision and passage. Opening or closing it creates sound cues that provide information. Destroying it permanently opens the pathway, altering sightlines and rotation options for the rest of the round.
While not unique in the broader FPS genre, for Valorant, Sunset's adherence to a very traditional three-lane (A Lane, Mid Lane, B Lane) and two-site layout without other major gimmicks makes it feel distinct within the current map pool.
Impact: This straightforward design places a strong emphasis on fundamentals: aim, crosshair placement, utility usage, and coordinated team strategy.
Map Rotation Summary & Concluding Thoughts
The Valorant map pool is a dynamic entity, constantly evolving to keep gameplay fresh and strategically diverse. The philosophy of maintaining a seven-map rotation for competitive play aims to strike a balance: offering enough variety to challenge players while not overwhelming them, particularly newcomers. This curated selection also serves the professional scene well, allowing for strategic map bans in tournament settings without excessive repetition.
As of Season 2025 Act 3 (Patch 10.08, April 2025), the active competitive maps are Ascent, Haven, Icebox, Lotus, Pearl, Split, and Sunset. This rotation saw the re-entry of Sunset and the removal of Fracture. Maps like Bind, Breeze, and the newer Abyss, while not in the competitive queue, remain accessible in other game modes, allowing players to continue enjoying their unique mechanics.
| Map | Key Feature | Strategic Focus | Difficulty Level |
|---|---|---|---|
| Pearl | Complex Mid-Section | Mid Control & Utility Usage | High |
| Split | Vertical Gameplay | Heaven Control & Rope Plays | Very High |
| Sunset | Destructible Door | Traditional Mid Control | Medium |
The decision to rotate maps is multifaceted, driven by player sentiment, Riot's plans for map updates or reworks, and a desire to ensure strategic variance in both ranked and professional play. For instance, Fracture's removal and Sunset's reintroduction signal a potential shift in meta dynamics. Fracture, known for its attacker-friendly design facilitating pinch executes, makes way for Sunset's more traditional layout that heavily emphasizes mid-control and coordinated site takes.
Looking ahead, Valorant's map design continues to explore diverse themes and mechanics. From Ascent's classic, door-based interactions and Haven's groundbreaking three-site challenge, to Icebox's extreme verticality, Lotus's rotating gateways, Pearl's gimmick-free corridors, Split's rope-defined battles, and Sunset's traditional mid-centric duels, each map offers a distinct tactical puzzle.
As new agents are introduced and existing ones receive balance adjustments, the way these battlegrounds are played will undoubtedly continue to evolve. The maps covered in this guide represent some of the most strategically demanding environments in Valorant, each requiring specific approaches to utility usage, team coordination, and individual skill expression.
"Keep practicing, stay adaptable, and may your callouts be clear and your utility perfectly placed. Good luck, agents!"