
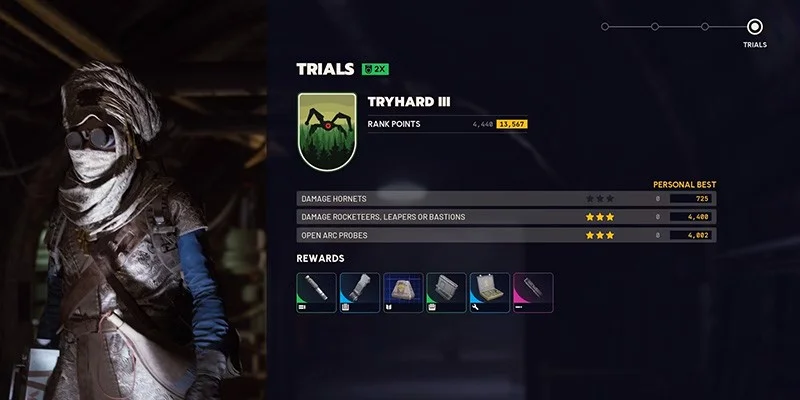
Arc Raiders from Embark Studios has a weekly Trials system that hands out guaranteed Epic items when you hit three-star completions. These rotate every week and give you a reliable way to grab blueprints, weapons, shields, and backpacks without gambling on RNG drops.
Week 6 brings five Trials ranging from simple combat tasks to exploration-heavy objectives. This guide breaks down how to finish each one efficiently, covering both quick three-star runs and leaderboard grinding strategies.
How the Trials System Works
All Trials award bonus experience based on your raid type:
- Day Raids: Standard point values (1x multiplier)
- Night Raids: Double points (2x multiplier)
- Electromagnetic Storm: Double points (2x multiplier)
- Special Events like Hidden Bunker and Prospecting Probes: Double points plus longer raid timers
This Week's Five Trials
- Damage Hornets
- Deliver Carriables
- Damage Rocketeers, Leapers, or Bastions
- Destroy Pops
- Open ARC Probes
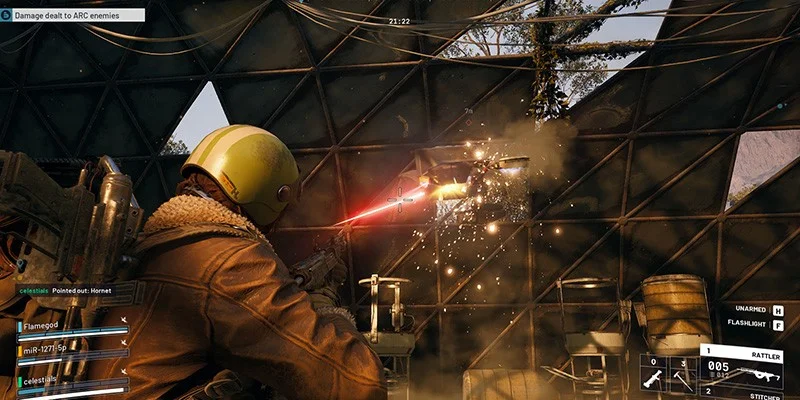
Damage Hornets
The Objective
Hornets are flying ARC enemies that patrol maps during raids. You need to damage and destroy enough of them to rack up three stars worth of points.
What You Need
During a Night Raid, you'll need to destroy around 6 to 7 Hornets to hit three stars. The 2x multiplier makes this go much faster than attempting it during the day.
Best Maps and Spots
Quick Three-Star Runs
Any map with a 2x modifier gets the job done. These spots offer consistent Hornet spawns:
Spaceport works well if you climb onto the roof of the Arrival or Departure Building. The elevation gives you clear sightlines across the map to spot flying patrols. Buried City also has solid Hornet density during Night Raids and Storms.
Blue Gate and Dam Battlegrounds both feature heavy Hornet activity. Blue Gate spawns them particularly often during storm events, while Dam has reliable spawns around elevated positions.
Pushing the Leaderboard
Blue Gate's Communications Relay in the northern section makes an excellent sniping perch. You can pick off Hornets from distance and keep attracting more enemies to your position. Dam Battlegrounds offers similar opportunities from the Control Tower, especially if you set up Ospreys as traps.
The Spaceport Hidden Bunker event is another strong option. It gives you an extra 40 minutes of raid time on top of the 2x multiplier, and reaching the Control Tower adds another 10 minutes. The catch? This event only pops once every 12 hours, so your schedule might not line up.
Loadout Recommendations
Weapons:
- Ferro: Solid damage at medium range
- Anvil: Hits hard enough to drop Hornets in a few shots
- Renegade: Accurate and fast for aerial targets
- Ospreys: These turrets engage Hornets automatically while you focus elsewhere (bring these for leaderboard attempts)
Stock up on ammo, especially if you're running Ospreys or planning long farming sessions. Make sure your gear is fully repaired before dropping in.
Fighting Hornets Effectively
Weak Points: Hornets have vulnerable rotators that keep them airborne. Destroy two of them and the Hornet crashes, counting as a kill.
Forcing More Spawns: When Hornets are scarce, shoot Snitches or throw a Snitch Scanner. Either method calls in a patrol with two Wasps and one Hornet. Running solo, this gets risky since you're pulling extra ARC to your position. But it speeds things up considerably if you need more targets.
Deliver Carriables
The Objective
Carriables are large crates you physically carry to designated receptacles. This Trial tracks how many you successfully deliver during a raid.
What You Need
Each delivery scores 500 points during the day, or 1,000 at night with the 2x multiplier. Three stars requires around 4,000 XP, so you're looking at 4 deliveries during a Night Raid.
Types of Deliveries
You can deliver carriables to several objective types:
Field Depots are standalone stations scattered across maps and your most reliable targets. Puzzle locations like the Ancient Fort require carriables for their sequences. Door mechanisms in Stella Montis also use them.
For efficient Trial completion, stick to Field Depots.
Best Maps and Spots
Quick Three-Star Runs
Dam Battlegrounds has six Field Depots spread across the map, giving you the most delivery opportunities anywhere. Each depot typically has multiple batteries (the carriables you're looking for) nearby. Reports suggest around two per depot, though this varies depending on whether other players grabbed them first.
The Spaceport Hidden Bunker event gives you 45 minutes plus double XP. Run along the perimeter wall and check near each Field Depot since carriables spawn fairly close to their destinations.
Pushing the Leaderboard
Dam Battlegrounds remains your best bet thanks to those six depots. Completing all of them with two batteries each nets roughly 12,000 points.
Things to Know
Carriables have fixed spawn locations near Field Depots, but other players might have already collected them. The respawn mechanics aren't fully confirmed, so plan for some variability.
This Trial takes more time than combat-focused ones because of the exploration and transport involved.
Damage Rocketeers, Leapers, or Bastions
The Objective
Deal damage to or destroy higher-tier ARC enemies. Any mix of Rocketeers, Leapers, or Bastions counts toward progress.
What You Need
Each kill scores just under 2,000 points during the day, or roughly 4,000 at night. Three stars takes 3 kills during Day Raid, but only 2 kills during Night Raid.
Enemy Types
- Rocketeers fly and perform strafing runs. They're heavily armored and can shred you during attack passes.
- Leapers are agile ground enemies that close distance fast.
- Bastions are big, heavily armored, and have multiple weak points you need to exploit.
Best Maps and Spots
Quick Three-Star Runs
Blue Gate's northern section around Reinforced Reception, Headhouse, and Checkpoint has strong spawn rates for all three enemy types. A Bastion almost always appears in the tunnels north of Checkpoint. Leapers or Rocketeers regularly spawn outside Reinforced Reception.
Dam Battlegrounds around Testing Annex and Hydroponic Dome Complex also delivers reliable higher-tier spawns.
Pushing the Leaderboard
The Spaceport Hidden Bunker event's 40-minute timer lets you farm Rocketeers for extended periods. Bring heavy ammo and set up with good sightlines.
Blue Gate during Storm events works well too. Set up traps at the Communications Relay. Rocketeers often roam in pairs here, giving you rapid point opportunities.
Loadout Recommendations
Consumables:
- Hullcracker Grenades: Great against all three enemy types
- Wolfpack Grenades: Stagger enemies and deal burst damage
- Blaze Grenades: Particularly effective on Leapers
- Showstoppers: Help control aerial enemies
- Traps: Set these around your farming spot for passive damage
- Deadline Mines: Drop these on Bastions
How to Fight Each Enemy
Rocketeers: Destroy the fans on their bodies to kill their mobility. Once you strip their armor plating, shots above the eye area deal bonus damage. Bring plenty of heavy ammo since they take sustained fire to drop. Watch out during strafing runs.
Leapers: Blaze Grenades exploit their fire vulnerability. Keep your distance when possible since they excel up close.
Bastions: Shoot the yellow joints on their legs to cripple them. Once they can't move well, circle behind and destroy the exposed yellow core.
Destroy Pops
The Objective
Pops are small, volatile ARC units that explode when damaged. You need to destroy them yourself for credit.
What You Need
Each Pop scores around 235 points during the day, or about 470 at night. Destroying roughly 7 Pops during a Night Raid or Storm gets you three stars.
The Credit Problem
Best Maps and Spots
Quick Three-Star Runs
Buried City has predictable Pop spawns in the tunnels leading to subway stations. Each side of a platform usually holds 2 to 3 Pops. Clear three platforms and you're done.
Stella Montis packs Pops into its interior sections. Focus on Assembly, Medical Research, and the Lobby. Be aware that Stella Montis attracts more PvP players during Night Raids, so expect some risk.
Dam Battlegrounds has a subterranean section connecting the Water Treatment Facility to the Control Tower. This underground route is loaded with Pops. You can run loops through here, checking the Control Tower's second level, basement, and roof for more spawns.
Pushing the Leaderboard
Dam Battlegrounds offers the best farming thanks to that looping underground route. Expect other players in this high-traffic area. Bring traps, deployable cover, and Door Lockers to control access points.
Combat Tips
Pops die fast, so accurate first shots matter. Prioritize them over other enemies to get credit before environmental damage blows them up.
The low point value (235 base) means this Trial needs more kills than most others to hit three stars.
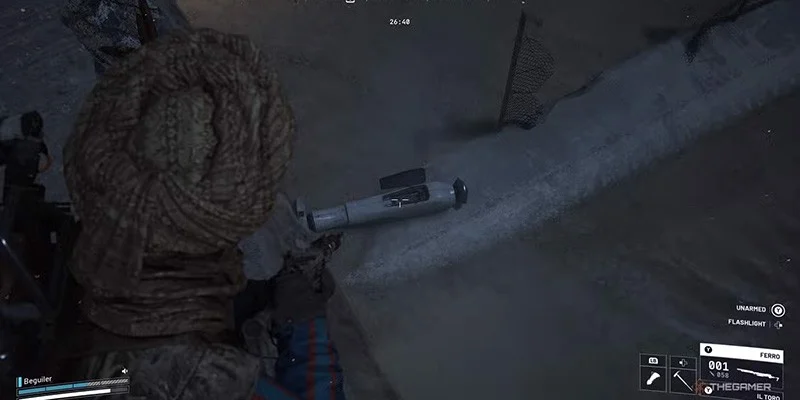
Open ARC Probes
The Objective
ARC Probes are cylindrical containers that crash-land or deploy on maps. Open them (or search already-opened ones) and extract successfully.
What You Need
You need to search 6 compartments during Day Raid or 3 compartments during Night Raid for three stars. Each compartment scores about 650 points.
Probe Types and Compartments
Standing Probes (Intact): These make an audible beeping sound and have a bright blue or yellow light on top. Each one contains three compartments, making them much more valuable per find.
Crashed Probes: Found embedded in the ground after impact with black smoke plumes visible from distance. These only have one compartment each.
Best Maps and Spots
Quick Three-Star Runs
Spaceport's tall perimeter wall gives you great sightlines for spotting smoke plumes from crashes. Running the perimeter during an Electromagnetic Storm, you can find all three required compartments in under 4 minutes.
Any map except Stella Montis at Night works fine for casual completion.
Pushing the Leaderboard
Dam Battlegrounds during Electromagnetic Storm provides good cover from hostile players while probes spawn in bunches. The poor visibility actually helps here since crashed probes are easier to farm when people can't spot you.
The Prospecting Probes event spawns probes continuously throughout the raid. Standing probes during this event have three compartments each, so you're getting maximum points per find. The tradeoff: more players means more danger. Bring a squad for Prospecting Probes attempts.
Finding Probes
Listen for the distinctive beeping from standing probes. Watch for black smoke rising from crash sites. Look for blue or yellow lights marking standing probe locations.
Approach Tips
Casual Completion: This Trial often finishes itself during normal gameplay. Any map except Stella Montis at Night gives you enough probe spawns without dedicated farming.
Competitive Ranking: Finish your other Trials first, then check how many points you still need. Choose between Storm events (safer, consistent points) or Prospecting Probes (higher ceiling, more dangerous). During Prospecting Probes, travel with squadmates since getting killed while looting a probe throws away your run.
General Strategy for Week 6
Efficient Trial Order
For the smoothest completion:
- Damage Hornets: Completes passively on most maps
- Damage Rocketeers, Leapers, or Bastions: Needs intentional hunting but pays off with high points per kill
- Destroy Pops: Clear indoor areas while traveling to other objectives
- Open ARC Probes: Natural exploration handles this one
- Deliver Carriables: Save for last since it takes the most time; skip leaderboard attempts if you're short on time
Map Selection
Dam Battlegrounds handles Week 6 better than any other map:
- 6 Field Depots for Carriables
- Strong spawns for Rocketeers, Leapers, and Bastions
- Underground Pop farming routes
- Solid probe spawn rates during events
Spaceport works best for:
- Hidden Bunker events (extra time plus 2x multiplier)
- Hornet farming from rooftops
- Probe hunting along the perimeter
Blue Gate excels at:
- Hornet density
- Higher-tier enemy spawns in the north
- Communications Relay as a farming perch
Solo vs Squad Play
- All Trial points shared among members
- Cover more ground for Carriables and Probes
- Dangerous events become much safer
- Better survival during high-traffic areas
- Full control over pacing and routes
- Not competing with teammates for kills
- More flexibility in decision-making
- No coordination required
Rewards
Three stars on any Trial guarantees an Epic-tier item. You might get weapon blueprints, weapons, shields, or backpacks. This makes Trials a solid progression path when you're low on crafting resources or tired of RNG drops.
Leaderboard Rankings
High rankings on the weekly leaderboard earn extra rewards, including double upgrade slots. To compete for top spots:
- Focus on Trials with strong points-per-action ratios (Hornets, Rocketeers/Leapers/Bastions)
- Run events with 2x modifiers whenever possible
- Squad up to maximize efficiency and reduce wipe risk
- Track your totals across all Trials to see where extra effort has the biggest impact
Quick Reference
| Trial | Three-Star Requirement (Night) | Best Map | Difficulty |
|---|---|---|---|
| Damage Hornets | 6-7 kills | Blue Gate, Dam | Easy |
| Deliver Carriables | 4 deliveries | Dam Battlegrounds | Moderate |
| Damage Rocketeers/Leapers/Bastions | 2 kills | Blue Gate, Dam | Moderate |
| Destroy Pops | ~7 kills | Buried City, Dam | Easy-Moderate |
| Open ARC Probes | 3 compartments | Spaceport, Dam | Easy |