
Winter has come to ARC Raiders, and it's brought more than just a fresh coat of snow. The Cold Snap seasonal event introduces a frostbite mechanic that will kill you if you stay outside too long. This guide breaks down exactly how frostbite works, where you can take shelter, and how to stay alive when the cold starts biting.
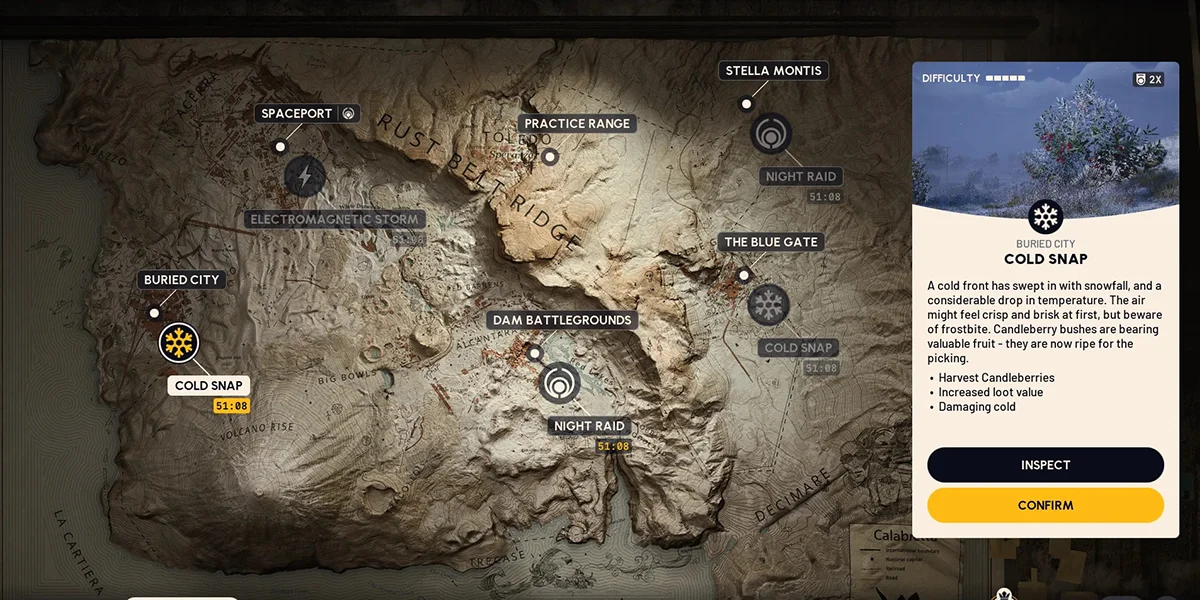
Cold Snap Map Condition
Which Maps Feature Cold Snap
Four of the five maps in ARC Raiders can appear with Cold Snap weather:
- Dam Battlegrounds
- Buried City
- Spaceport
- Blue Gate
Stella Montis stays unaffected since it's entirely indoors. You can choose whether to play Cold Snap versions or standard versions through the map selection screen, so if you'd rather skip the mechanic entirely, that option exists.
How Frostbite Works
Frostbite builds up over time rather than dealing instant damage. Here's exactly what happens when you step outside:
Phase 1: The Safe Window
You get exactly 2 minutes of outdoor exposure before frostbite starts hurting you. This timer begins the moment you spawn outside or leave shelter. After warming up indoors and heading back out, your safe window shrinks slightly to around 1 minute 35 seconds.
Phase 2: Taking Damage
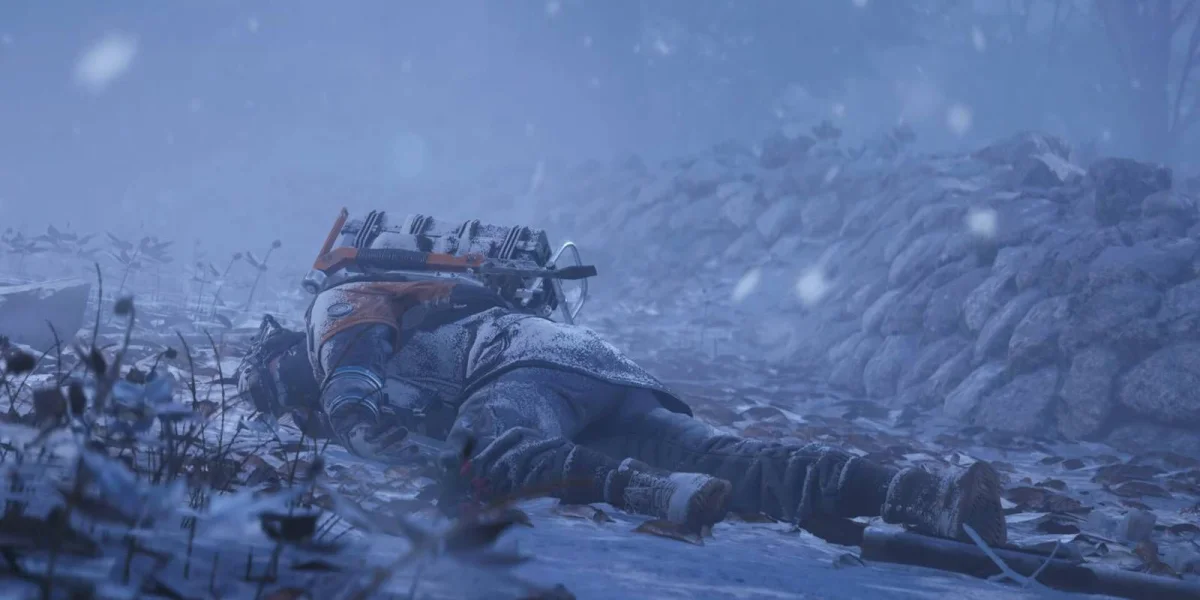
Once you hit that 2-minute mark, your health starts draining at a steady rate. The damage doesn't accelerate the longer you stay out. From full health, frostbite takes roughly 1 minute and 15 seconds to down you completely.
Warming Up Indoors
Stepping inside causes your frostbite buildup to fade, but it takes 30 seconds to a full minute before you're completely reset. There's no visible meter showing your exact frostbite level, which makes tracking tricky. Spending about 25 seconds inside gives you roughly 90 seconds of safe outdoor time afterward. For long treks across the map, plan on ducking inside every minute and a half or so.
Recognizing Frostbite
Since ARC Raiders doesn't give you a frostbite meter, you'll need to read the visual and audio indicators instead.
Visual Indicators
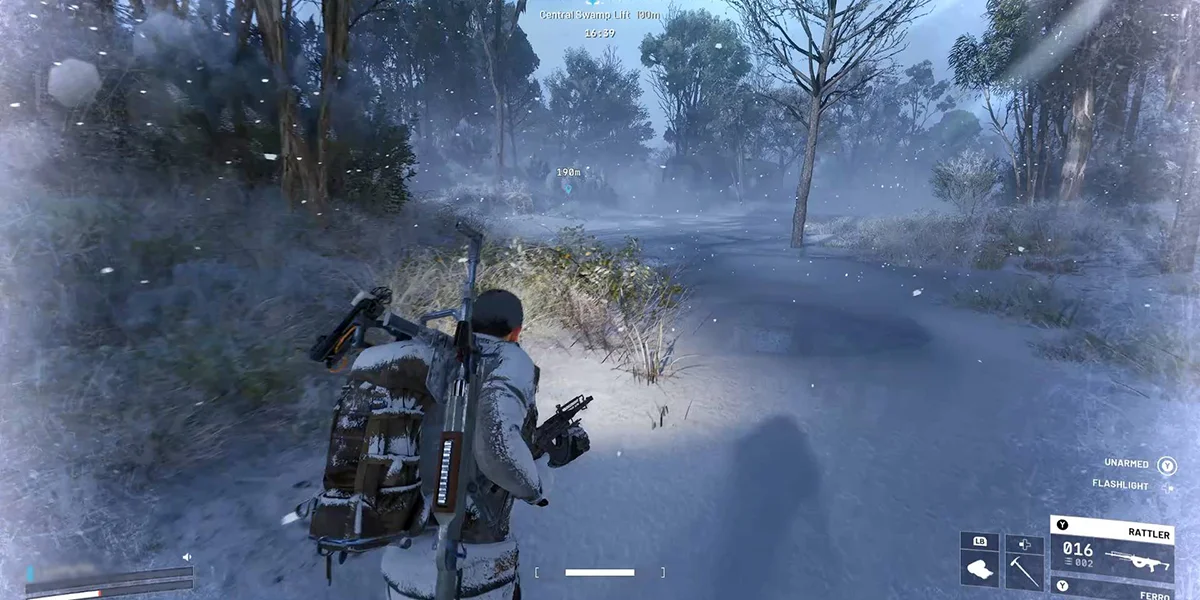
Snow on Your Character
Snow accumulates on your Raider in a predictable pattern:
- First 20 seconds: Snow appears on your head and shoulders
- 20-25 seconds: Snow starts covering your legs
- 50+ seconds: Full snow coverage (no more buildup after this)
Seeing snow on your legs means you've been outside at least 25 seconds. Full coverage means about a minute of exposure.
Screen Effects
The edges of your screen gradually turn white as frostbite builds. This effect gets more intense as you approach the damage threshold and fades when you enter shelter.
Character Animations
Your Raider shivers visibly while outdoors. With weapons holstered, they'll hold their hands in front of them uncomfortably. Both animations stop once you're in a valid shelter.
Audio Indicators
Your character makes distinct sounds that communicate frostbite status:
- Entering the cold: A noise plays when you transition from warm to cold areas
- One-minute warning: Around the 1-minute mark, your character exhales deeply
- Damage starting: Another cue plays when frostbite actually begins draining health
- Finding shelter: Your character sighs in relief when stepping into a warm area
What Counts as Shelter
Figuring out what qualifies as "inside" isn't always obvious. Some structures protect you while others that look similar don't.
Confirmed Shelter Types
Solid Buildings: Any structure with walls and a complete roof works. This is your most reliable option.
Covered Areas: Most structures with intentional roofing count as shelter even without full walls. Covered parking areas, small roofed structures, and buildings with open sides but complete overhead coverage all work.
What Doesn't Provide Shelter
Not all overhead cover protects you. Concrete tubes, random debris overhead, and some catwalks and industrial structures won't stop frostbite from building.
Problem Areas on Spaceport
The alcoves with large spherical tanks around the launch tower don't protect you despite having overhead coverage. At the base of the launch tower, standing against a wall under the catwalks might keep you safe, but stepping a few feet toward the trench edge starts your frostbite building again, even though you're under the same catwalks.
Testing for Shelter
When you're not sure if a spot counts as shelter:
- Watch for your character to stop shivering
- Listen for the sigh of relief
- Check if snow starts disappearing from your character
- See if the white screen effect begins fading
If none of these happen, you're not protected regardless of how sheltered the spot looks.
Healing and Damage Mitigation
How Healing Interacts with Frostbite
Healing items can counter frostbite damage, though they vary in effectiveness:
- Vita Spray: Outheals frostbite and gets you back to full
- Sterilized Bandages: Very effective
- Herbal Bandages: Solid option
- Standard Bandages: Good enough to counter frostbite
- Fabric Bandages: These don't cut it against frostbite
- Only use them if you have absolutely nothing else
Damage Rate Details
Once frostbite damage kicks in, the rate stays constant no matter how long you remain outside. It doesn't get worse over time, which means:
- Continuous bandage use can keep you alive indefinitely
- Better healing items put you in an even stronger position
- The real danger comes when frostbite damage stacks with combat damage from other Raiders or ARC enemies
Using Fire to Reset Frostbite
One of the strongest survival tricks in Cold Snap involves fire. Getting set on fire completely wipes your frostbite buildup and resets your 2-minute timer to zero.
How Fire Resets Work
This works no matter how close you are to taking frostbite damage. You can trigger it through:
- Fireball Burner explosions
- Environmental fire sources
- Crafted Fire Spray (used by teammates)
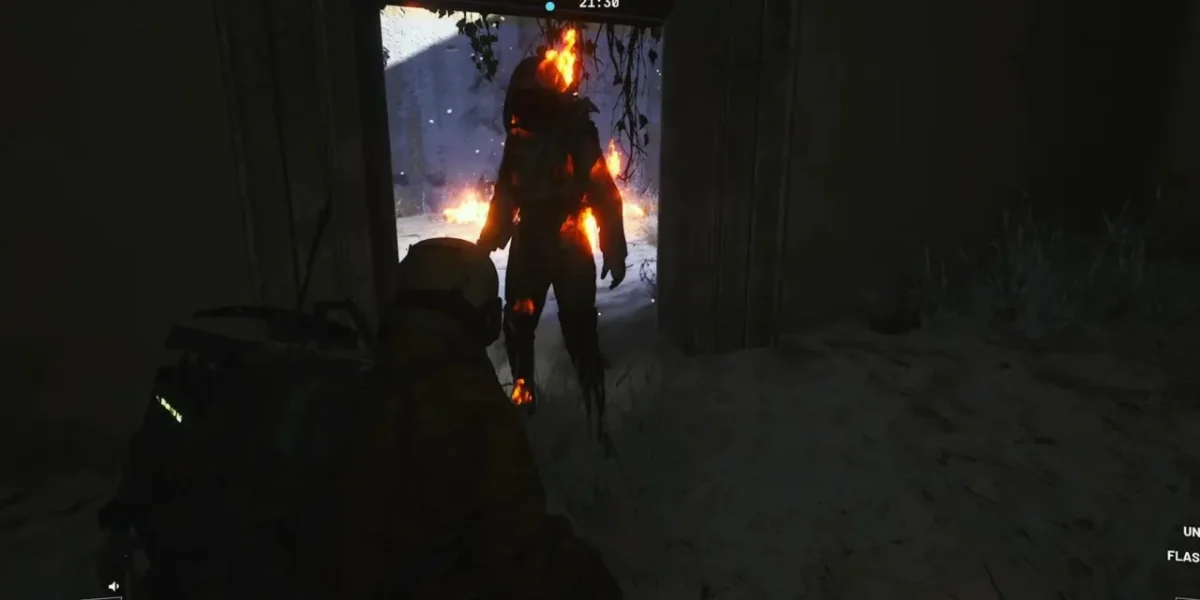
Fire Spray for Teams
Fire Spray becomes incredibly valuable in duos and trios:
Crafting Requirements
- 1 Deodorant
- 1 Fireball Burner
- Requires the in-round crafting perk
How to Use It
Spray an allied Raider for 1-2 seconds to completely wipe their frostbite buildup. Short bursts aren't as effective, so hold the spray for at least a full second. Teammates can share Fire Sprays and use them on each other. The person getting sprayed takes no damage from ally fire.
Solo Fire Reset Strategy
In desperate situations without shelter nearby, solo players can set themselves on fire intentionally:
- Find any fire source or use an incendiary item
- Take the fire damage (hits health and shields)
- Immediately heal the fire damage
- You now have a fresh 2-minute outdoor window
This trades a chunk of fire damage for resetting your continuous cold damage. Only do this when reaching shelter is impossible.
How Cold Snap Changes Gameplay
Positioning and Strategy
Frostbite fundamentally changes what strategies work in ARC Raiders:
What You Can't Do Anymore
- Extended outdoor ambushes become too risky
- Camping outside buildings to wait for targets isn't viable for long
- Prolonged standoffs against ARC enemies in the open can kill you from cold alone
Loadout Adjustments
- Close-quarters weapons gain value since most fights happen near or inside buildings
- Extra bandages become a must-have
- Fire Spray is worth the crafting slot for teams
Movement Planning
- Plot routes that pass through shelters regularly
- Identify shelter locations before crossing open areas
- Sprint efficiency matters more for covering ground between warm spots
Fighting While Frostbitten
The worst situation is taking frostbite damage while also in combat. Combined damage pressure can overwhelm even prepared players. If frostbite damage starts during a fight, try to prioritize reaching shelter over continuing the engagement if possible. Keep healing items ready during any outdoor fights, and remember that enemies face the same frostbite pressure, which might force them out of their positions too.
Movement and Environmental Effects
Stamina and Speed
Testing suggests Cold Snap doesn't affect stamina depletion, stamina recovery, or base movement speed. Adrenaline Shots remain useful for fully restoring stamina when you need to cover long distances between shelters quickly.
Frozen Surfaces
Frozen lakes and rivers have subtle ice physics. If you sprint across ice and stop suddenly, you'll slide slightly. This minor effect shouldn't impact normal gameplay much. Snow on the ground doesn't seem to affect movement at all.
Environmental Changes
Frozen Raider Caches: Standard Raider Caches on Cold Snap maps appear frozen and require breaching instead of normal interaction. Frost seals them shut.
Snowballs: Snow piles throughout Cold Snap maps let you gather snowballs. They stack up to 5, sell for 10 coins each, and deal almost no damage when thrown. They're a novelty item, not a tactical tool.
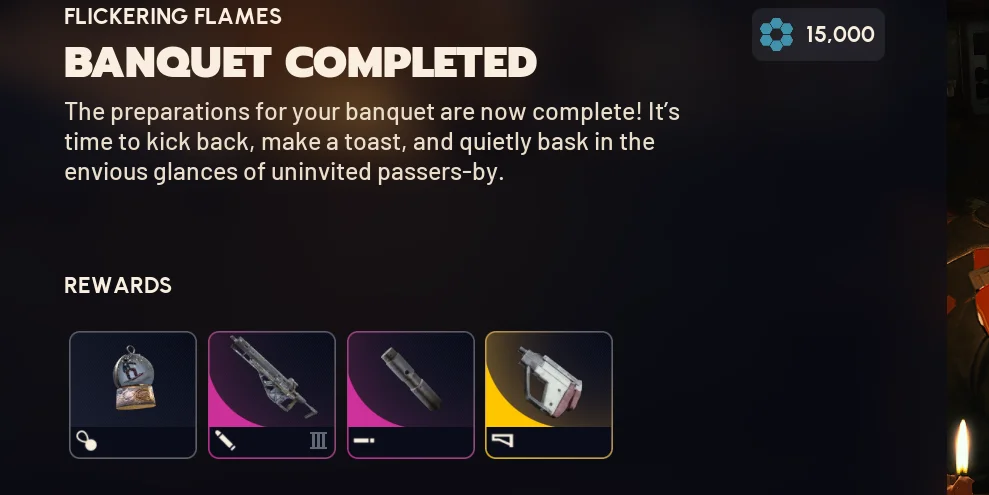
Flickering Flames Event
Beyond frostbite survival, Cold Snap brings event content with exclusive rewards.
Understanding the Event
Flickering Flames is a personal progression event running alongside Cold Snap. XP you earn during normal gameplay converts into "Merits" that fill the event reward track.
What You Can Earn
- 150 Candleberries (awarded through progression)
- Multiple exclusive cosmetics
- 300 Raider Tokens (premium currency)
- A Snow Globe backpack charm
You earn progress passively just by playing and gaining XP.
Candleberries: Where to Find Them
Candleberries are the main event currency for both Flickering Flames and the Candleberry Banquet project.
Collection Locations
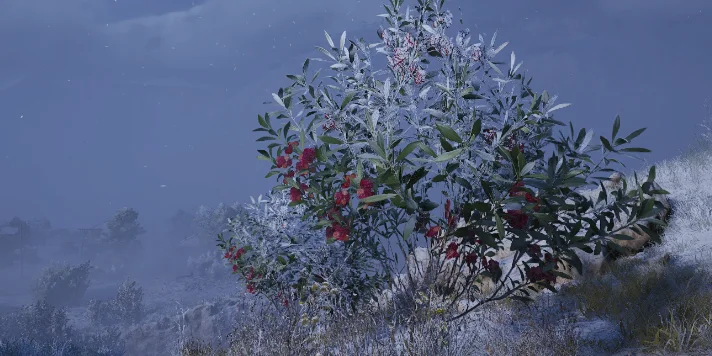
Candleberry Bushes
- Only spawn on Cold Snap map versions
- Bright red and easy to spot from distance
- Common in "Nature" areas
- Also appear in outdoor locations throughout Buried City and other maps
- Each bush gives 1-5 (possibly 6) candleberries
Baskets
- New container type on Cold Snap maps
- Found in scrap towers, scrap camps, on buses, and remote areas
- Always contain candleberries
- Scattered across all Cold Snap maps
Raider Caches
- Usually contain candleberries on Cold Snap maps (not guaranteed)
- Harder to hear over wind sounds
- Require breaching due to frost
Candleberry Banquet Project
The Candleberry Banquet project (listed as "Flickering Flames – Candlelight" in-game) has five stages. Each requires specific items plus candleberries.
Stage 1: Decoration 1/5
Required Items
- Empty Wine Bottle x1
- Plastic Parts x25
- Durable Cloth x12
- Candleberries x20
Finding the Empty Wine Bottle
Head to the Arrival Building on Spaceport. Check the red lockers on the left side from the main entrance, or search desks on the second floor.
Stage 2: Decoration 2/5
Required Items
- Candle Holder x3
- Light Bulb x3
- Industrial Battery x1
- Candleberries x50
Farming Locations
For Light Bulbs, go to the Electrical Substation on Spaceport and search the vehicle there. It's a guaranteed spawn. Run it three times.
Industrial Batteries spawn at the Hydroponic Site. Check buildings on the left side, looking on shelves and in lockers.
Candle Holders show up in residential areas. Search apartment kitchen drawers on Buried City or Blue Gate.
Stage 3: Decoration 3/5
Required Items
- Snap Blast Grenade x5
- Duct Tape x10
- Film Reel x1
- Candleberries x60
Where to Get Everything
Buy Snap Blast Grenades from the Gadget vendor or craft them at the Workshop. Duct Tape is available from Celeste (check the bottom right of her inventory). Film Reels spawn on second floor desks in the Arrival Building on Spaceport.
Stage 4: Decoration 4/5
Required Items
- Coffee Pot x2
- Fireball Burner x10
- Water Filter x2
- Candleberries x60
Farming Locations
Coffee Pots appear in kitchen cabinets in residential buildings. The Village area on Buried City has multiple buildings with kitchens on upper floors.
For Fireball Burners, farm Buried City by rotating between Hospital, Galleria, Parking Lot, and southern locations. Kill Fireball Burners and grab their cores.
Water Filters spawn at the Hydroponic Site alongside Industrial Batteries. Grab both in the same run.
Stage 5: Decoration 5/5
Required Items
- Mushroom x7
- Frying Pan x2
- Music Album x2
- Candleberries x70
Farming Locations
Mushrooms have a guaranteed spawn in the top right corner of Spaceport (3 per run). Do this about three times for all 7.
Frying Pans and Music Albums both appear in apartment drawers in residential areas of Buried City. Search everything.
Project Rewards
Completing all five stages unlocks:
- 3 usable field items
- Snow Globe backpack charm
- Merit rewards at each stage
Cold Snap Quest Chain
The Cold Snap update added six new quests spanning multiple maps.
Quest 1: A Toxic Trail
Map: Dam Battlegrounds (Water Treatment area)
What to Do
Start at the barrel and water catchment at the edge of Water Treatment (same spot as the earlier "Source of Contamination" quest). Search the Swamp area for the barrel's origin. You're looking for a truck carrying barrels. Photograph the truck, then search the driver's side for clues about the saboteur.
Reward: Spaceport Warehouse Key (bonus drop, not needed for later quests)
Quest 2: The Clean Dream
Maps: Spaceport, then Blue Gate
Part 1 on Spaceport
Enter the lower tunnels underneath Spaceport near the map center. The blown-open entrance from topside works, but expect company since it's often a hot zone with minimal cover. Loot 4 containers in the tunnels (breachable areas, desk drawers, or any interactable spawn point work; enemy loot doesn't count). Find and interact with a filtration system in the tunnels. One sits directly beneath the central tunnel opening.
Part 2 on Blue Gate
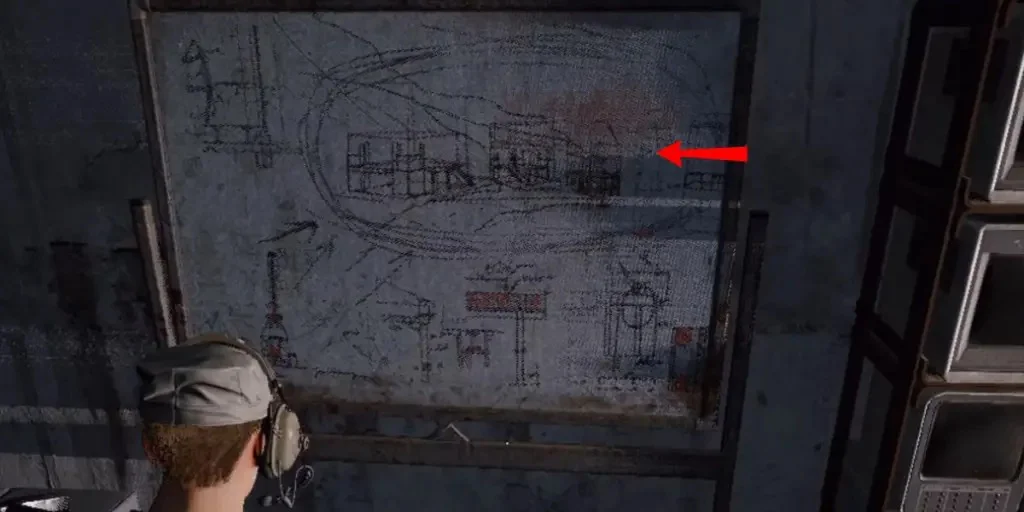
Enter the Maintenance Bunker (the underground facility near the extraction point of the same name). Use either the ladder or bunker entrance. Interact with the leftmost purification system in the main room. Head upstairs and photograph the blueprints on the desk in the back office area.
Quest 3: Paving the Way
Maps: Multiple options, then Buried City
Part 1
Locate specific research or administrative buildings. Confirmed locations include Water Treatment Control on Dam Battlegrounds, Research and Admin buildings, and the building near Maintenance Bunker extraction on Blue Gate.
Part 2
Find a notice board with a researcher's note inside one of these buildings (ground floor).
Part 3 on Buried City
Travel to Piazza Roma. Reach the top floor of the apartment building across from Grandioso Apartments (above the Convinio building). Find the "ultimate streamer setup," a desk with 18 monitors, and interact with it.
Quest 4: Deciphering the Data
Map: Spaceport only
Enter the Fuel Control building and decrypt data from a wall-mounted panel. Travel across the map to the Arrival building. On the top floor (a zipline can get you up there), find a station among the analog consoles and decrypt the data again.
Quest 5: The Stench of Corruption
Map: Spaceport only
- Enter the Arrivals building through the southwest lobby
- Find the staff locker room by taking stairs down from the ground floor, just off the southwest portion (it's not deep inside the building)
- Inspect the hazmat suits hanging near the benches by the showers
- Collect the key that drops
- Head to the tunnels under Spaceport and use the key at any flushing terminal to override the bypass protocol
Quest 6: Groundbreaking
Map: Blue Gate only
Go to Pilgrim's Peak. Enter via the southern entrance, turn 180 degrees at the reception desk, and search boxes on the ground for a spare key.
Continue down the hall to open the Communication Tower. Find a whiteboard with construction research details. Travel southeast to the Construction Site. Photograph the abandoned building project from the ridge line approaching the southernmost construction site.
Vendor Changes
Shani's New Currency
One change that flew under the radar: Shani no longer accepts Raider Tokens (premium currency). She only takes Cred now (the blue currency earned through Feats).
This makes completing Feats much more valuable than before.
Good Picks from Shani
- Silencer (great if you don't have the blueprint)
- Sterilized Bandages
Celeste still trades items for Seeds, unchanged.
Quick Reference: Survival Checklist
Before Loading In
- Bring extra standard bandages (separate stack)
- Consider close-quarters weapons
- Craft or buy Fire Spray if running with a team
- Know your shelter routes
During the Raid
- Track outdoor time (count mentally or listen for audio cues)
- Get inside every 90 seconds at minimum
- Listen for the one-minute deep breath
- Watch for snow on your legs (25+ seconds outside)
If Frostbite Damage Starts
- Use bandages while moving toward shelter
- Consider a fire reset if shelter is too far
- Avoid fighting if possible while frostbitten
For Flickering Flames
- Collect candleberries from bushes, baskets, and Raider Caches
- Hit baskets in remote locations for guaranteed berries
- Combine project item farming with candleberry runs
Conclusion
Cold Snap adds a compelling layer of environmental pressure to ARC Raiders that fundamentally changes how you approach each raid. The frostbite mechanic forces you to think strategically about shelter routes, loadout choices, and engagement timing in ways that standard maps don't require. Master the 2-minute outdoor window, learn which structures actually provide protection, and keep fire resets in your back pocket for emergencies.
Beyond survival, the Flickering Flames event and Candleberry Banquet project offer worthwhile rewards for players willing to put in the time. With 180 candleberries coming from the event track alone, you only need to actively farm around 80 to complete all five project stages. The six-quest chain provides additional content and lore while rewarding exploration across multiple maps. Stay warm out there, Raider.