
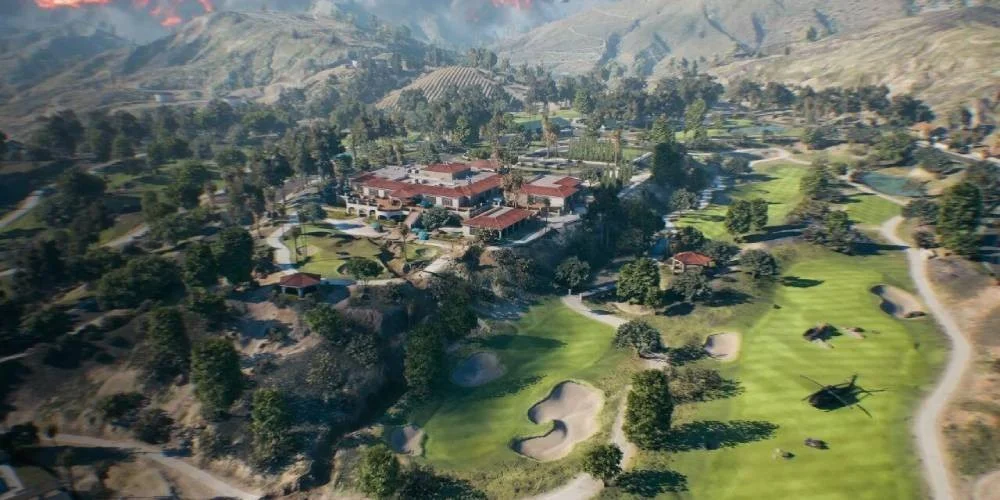
REDSEC (short for Redacted Sector) is Battlefield 6's free-to-play battle royale mode. It drops 100 players onto a sprawling map that looks like the outskirts of Los Angeles. You can jump in through the main Battlefield 6 game or download the standalone REDSEC installation. Either way, this guide covers everything you need to understand the mode and outplay rival squads.
REDSEC plays slower and more methodically than standard Battlefield 6 multiplayer. The mode has its own mission system, weapon progression mechanics, and a ring that punishes bad positioning harder than any other battle royale on the market. You'll want to understand these differences before dropping into Fort Lyndon.
How REDSEC Works
Game Modes and Squad Options
You've got three modes to pick from:
Duos pairs you with one teammate against 49 other two-player squads. Squads bumps that up to four-player teams with 25 total squads fighting it out. Gauntlet works differently. You're completing objectives to survive, running mission after mission until only one player or team is left standing.
Across all three modes, the goal stays the same: be the last one alive. Every choice you make should push toward that.
Landing and the First Few Minutes
Every match starts on a transport plane. You'll parachute down with just a pistol and a knife, so finding real weapons becomes your immediate priority. Loot crates for guns that match your class, grab grenades and airstrikes, and get yourself combat-ready.
The respawn system goes easy on you early. If you die in the opening minutes, you can parachute back into the fight after a few seconds and rejoin your squad. But eventually, everyone gets a notification that second chances are gone. After that point, death sticks, and bringing teammates back takes real effort.
The Ring of Fire Will Kill You Instantly
Here's where REDSEC breaks from other battle royales, and this difference will get you killed if you don't respect it. Most games deal gradual damage when you're outside the safe zone. You can tank it briefly, pop some heals, and make it back.
REDSEC doesn't play that game. The ring of fire downs you almost instantly. You can't heal through it. Getting caught outside means death unless you escape immediately.
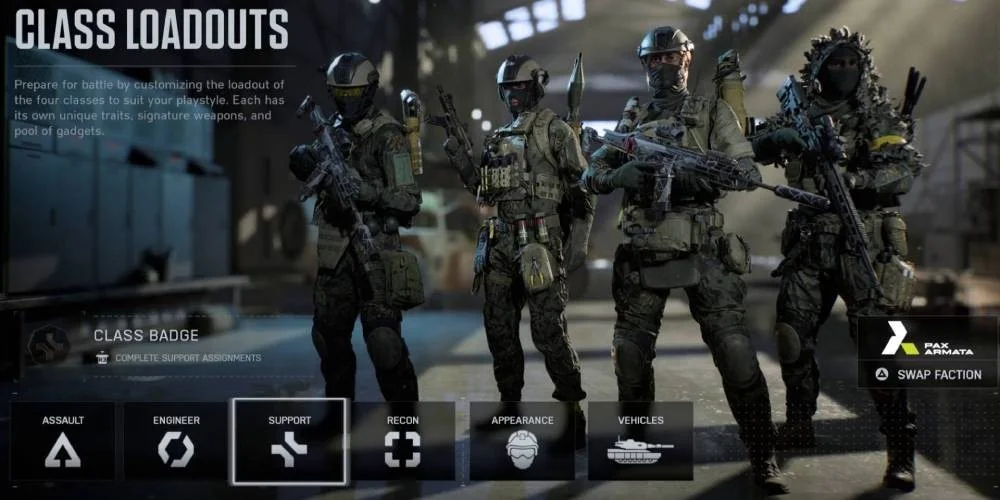
Classes and What They Bring
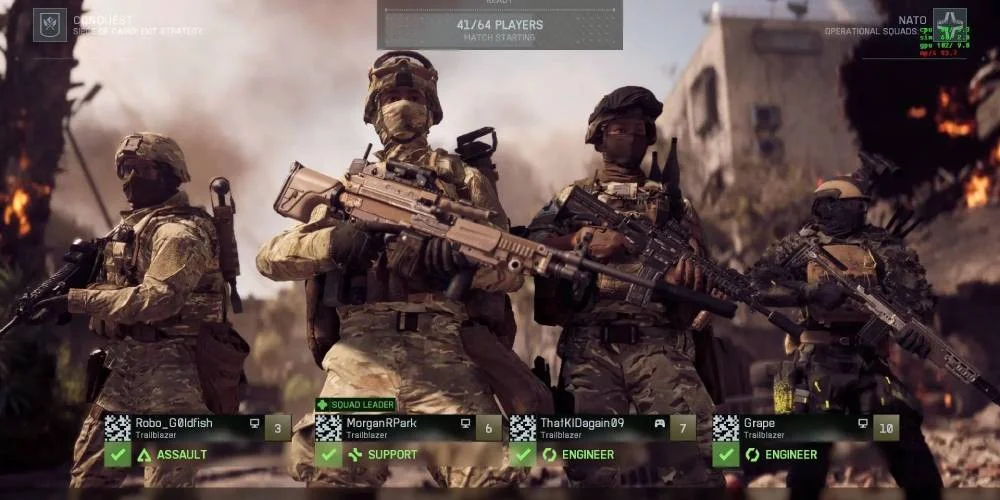
REDSEC uses the same class system as Battlefield 6, with each class keeping its core tools and focus. Picking the right one for your playstyle matters, and building a squad with different classes gives you a real edge over teams that stack the same role.
Assault
Assault hits hard. If you want to lead fights and drop enemies fast, this is your pick. The downside is you've got no tools for long-term healing or ammo recovery, so you'll depend on looted supplies and your teammates to stay topped up.
Engineer
Engineers bring utility nobody else can match. Your blowtorch opens safes that other classes can't touch, and you're the best at handling enemy vehicles. Firepower runs lower than damage-focused classes though, so you work better supporting teammates than charging in alone.
Support
Support players can instantly revive downed allies, which makes them incredibly valuable for keeping squads alive. That instant revive can flip fights that other teams would lose. You're not packing heavy offensive power, so focus on keeping friends standing rather than hunting kills.
Scout (Recon)
Scouts spot enemies and deal with campers before they can ambush your team. Reconnaissance abilities let you gather intel before any engagement. The tradeoff is weakness in close-quarters combat. Keep your distance and let teammates handle direct fights.
The Scout Drone Changes Everything
The Scout drone deserves its own section because it's one of the most powerful tools in REDSEC. Recon players get this remote-controlled gadget, and it does way more than just spot enemies.
You can fly it ahead to check buildings, compounds, and potential ambush spots before your squad commits. It's free intel without any risk to yourself.
The drone also carries a single-use bomb you can drop on enemies for solid damage. When you're done scouting, you can self-destruct it in someone's face for even more hurt.
All of this happens without giving away your position. Since the drone operates separately from you, enemies know they're being attacked but have no idea where you're actually hiding. Once upgraded, the drone can drop grenades while continuously marking enemies for your whole squad.
Weapons and Equipment
The Rarity System
REDSEC grades every weapon by color, with better guns having more attachments:
- Common (Gray) guns are what you find right after landing. They've got minimal attachments and you should replace them fast.
- Uncommon (Green) weapons perform noticeably better with some attachments added.
- Rare (Blue) guns make solid mid-game loadouts.
- Advanced (Purple) weapons are heavily upgraded and will carry you into late game.
- Superior (Gold) guns represent the best random drops, fully kitted out.
- Personal Favorite (Red) weapons are special. These are your custom loadouts from Battlefield 6's main multiplayer, complete with all your attachments and upgrades.
More attachments means better performance means higher rarity. Keep upgrading until you're holding purple, gold, or red weapons.
Finding Better Guns
Weapons spawn in containers across the map. Check crates, cases, and safes in compounds, on the ground, and in vehicle storage. Engineers can blowtorch safes open that other classes can't access.
For quick loot runs, hit ambulances, military trucks, and orange vans. These vehicles can be opened for supplies and usually have something useful.
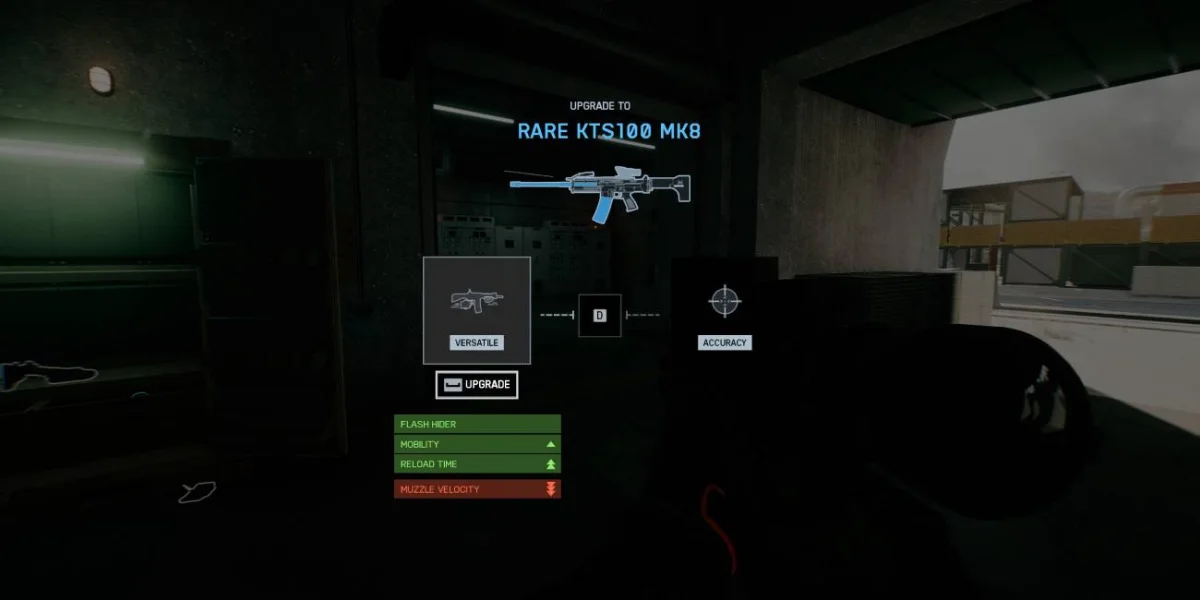
Weapon Upgrade Kits let you improve guns you've already found. The game has kits for specific weapon types (Carbine kits, Assault kits, and so on). When you've got the right kit in your inventory, select a matching weapon to use it. This adds attachments and bumps the rarity up one tier.
Each upgrade gives you choices about specialization. You might pick between reduced recoil, better range, or new optics. A common gun found early can become a gold weapon by endgame if you keep upgrading it.
Upgrade Chests work similarly. Find one, open your inventory, select the weapon you want to improve, and choose your bonuses.
Getting Your Custom Loadouts
Red weapons are the loadouts you've built and favorited in Battlefield 6's standard multiplayer. They keep all your attachments and customizations.
To grab your favorites in REDSEC, find Custom Weapon Drops on the map. These pods look like torpedoes or missiles sticking out of the ground. Interact with one to see all your favorited weapons, then pick whichever you want.
How good a red weapon is depends entirely on how much you've upgraded it in regular play. A maxed-out favorite can outperform gold drops, but a barely-touched one might actually be worse than purple or gold guns you've already found.
The Mission System
How Missions Work
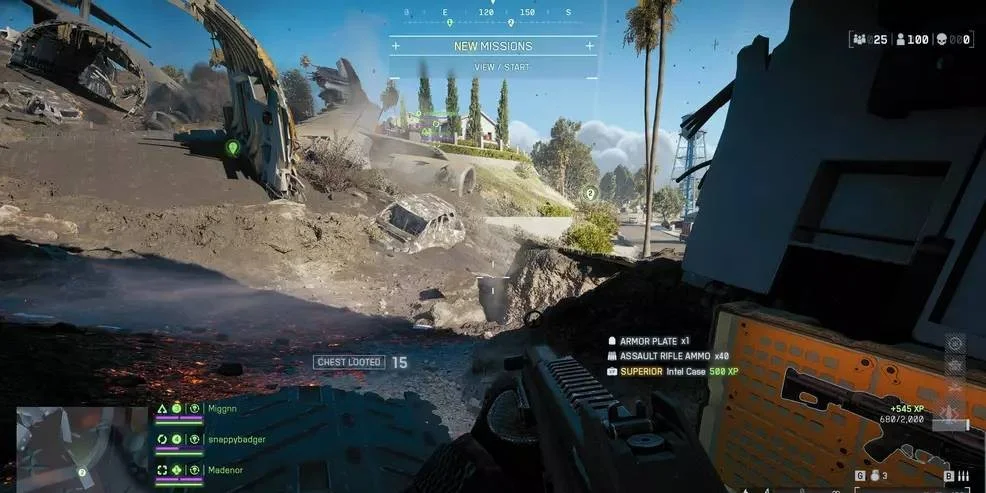
Every few minutes, REDSEC offers your squad a choice of missions. The squad leader picks one from the map screen, and then everyone works together to finish it.
Most missions send you to a specific location to do something (destroy a target, carry an item, transmit data), then move somewhere else to complete the objective. Icons on screen show where you need to go, and text explains what you need to do.
What You Get
Finishing a mission calls in an airdrop at your location. Rewards vary a lot and can include better weapons, tactical gear like airstrikes, or keycards that unlock vehicles including tanks.
Gold-tier missions specifically can drop magnetic keys for tank access, making them worth the risk for squads that want heavy firepower.
Counter-Missions Make Things Dangerous
Accepting a mission paints a target on your back. When you trigger one, nearby teams might receive "Counter-Missions" that mark your rough location on their maps. They get rewarded for stopping you.
Counter-missions usually involve hunting players and pay out generously.
Decryption Objectives
Decryption missions have a quirk worth knowing. The progress gauge fills automatically, but it fills way faster when you move slowly or stand still. If you're working on a decryption objective, stop moving to finish it quicker.
Reviving and Respawning
What Happens When You Go Down
Losing all your armor and health puts you in a downed state instead of killing you outright. A timer starts counting down, and when it hits zero, you die. REDSEC handles this state differently than regular Battlefield 6 in two important ways.
First, you can crawl while downed. You've got mobility to shuffle toward teammates or cover. Use it.
Second, you're not immune to damage anymore. Enemies can keep shooting you on the ground, and each hit dramatically cuts your bleed-out timer. They can finish you fast instead of ignoring you to focus on standing teammates.
Both of these matter: crawl toward safety immediately when you go down, because enemies will try to eliminate you before help arrives.
Early Game Respawns
The respawn system is forgiving in the opening minutes. Die early and you'll automatically parachute back into the fight after a brief delay. This lets you play aggressively without permanent consequences.
Redeploy Stations
Once the "no more second chances" announcement goes out, bringing back dead teammates gets harder. You need to travel to a Redeploy Station (also called Redeploy Towers) and stand inside the green circle to start the respawn.
This process has two major problems:
First, whoever activates the station has to stay close for around a minute. You can't start it and leave.
Second, the station blares a loud siren the entire time. Every squad nearby hears that alarm and knows exactly what it means: a reduced team stuck in one spot waiting for a respawn.
Support Class Revives
Support players can instantly revive downed teammates without needing a redeploy station. This makes Support incredibly valuable for squad survival, especially late in matches when redeploy stations become death traps.
Vehicles
What's Available
REDSEC includes the full Battlefield 6 vehicle roster, adapted for battle royale:
Tanks pack heavy armor and massive firepower. Transport helicopters reposition your whole squad fast. Jeeps cover ground quickly. Golf carts exist for basic transportation.
Vehicles serve two main purposes: escaping the ring when it's closing faster than you can run, and fighting with armor and weapons you can't carry on foot.
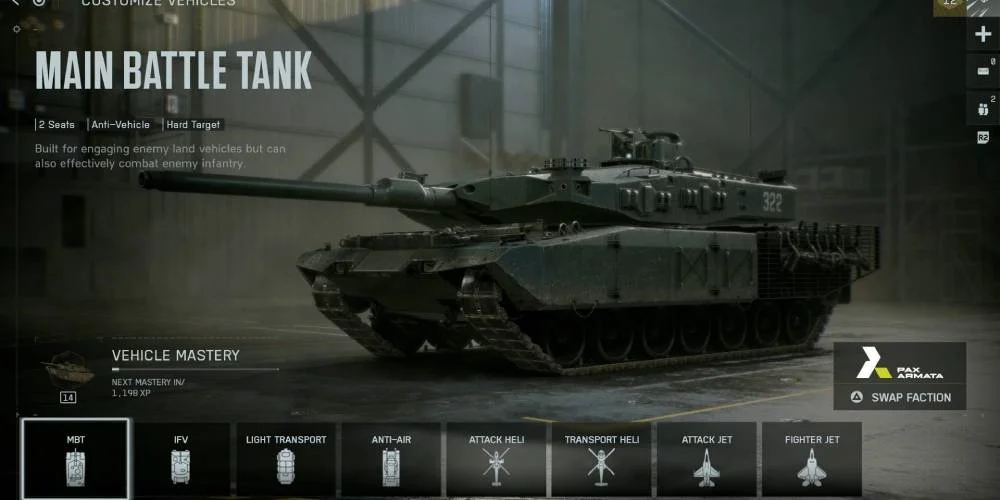
Getting a Tank
Tanks don't just spawn around the map. You need to complete a gold-tier mission first, which rewards a magnetic key.
With the key, find one of the large grey deployment trucks scattered across the map. Interact with it at the rear to start opening it. Warning: this takes a while and makes a lot of noise. Expect company.
Once you're in the tank, look for repair stations. Tanks deal massive damage but go down fast when multiple enemies focus you, especially engineers.
Dealing with Enemy Vehicles
When an enemy squad rolls up in a tank, you need anti-vehicle capability or you're dead. Rocket launchers, mines, and anti-vehicle tools don't do much against infantry, but nothing else will reliably take down armored vehicles.
At least one person in your squad should always carry explosives or anti-vehicle weapons. This might seem unnecessary for most of a match, but the moment an enemy tank shows up, you'll be grateful.
Even without proper anti-vehicle gear, you've got one option. Approach the vehicle and interact with it; your character plants a thermite charge automatically. Obviously risky, but it's something.
Map Knowledge
Destructible Structures
Several structures on the map can be destroyed for tactical advantage:
The Crane: Shoot rockets at the crane's cement counterweight to topple the whole thing. This eliminates anyone positioned on or near it, or denies enemies a useful vantage point.
The Central Skyscraper: Plant C4 on the supporting pillars to bring it down. Perfect for flushing out squads camping the roof, since they've got nowhere to go when the building drops.
Launch Towers
Big yellow launch towers can fling you across the map. They're the fastest way to rotate between zones when you need to cover serious distance. Knowing where these are lets you reposition faster than any ground vehicle.
Good Loot Spots
Beyond random container spawns, certain vehicle types reliably hold supplies:
Ambulances, military trucks, and orange vans all contain loot worth checking. Engineers should specifically hunt for safes, since your blowtorch gives you access nobody else has.

Combat Strategy
Short Fights, Fast Deaths
REDSEC has a low time to kill. Even with plate armor, focused fire drops players fast. This short kill time shapes everything about how combat plays out.
Why Ambushes Win
Because fights end so quickly, whoever shoots first usually wins. This makes stealth and surprise the dominant approach.
Move quietly. Minimize noise. Use the Scout drone to find enemies before they find you. Coordinate with your squad so you can focus fire together instead of engaging one by one. Take high ground and use cover.
Exploiting Redeploy Sirens
When you hear a redeploy station siren, you've found a vulnerable squad. They're down at least one player, stuck in a fixed position for the next minute, and can't easily pull out. Reach the station before the respawn finishes and you've got relatively easy kills.
Melee Finishers for Intel
If you've got time when an enemy goes down, execute them with a melee finisher instead of shooting. This briefly marks the rest of their squad on your map, giving you intel on remaining enemy positions.
Squad Tactics
Build a Diverse Team
Any squad composition can win, but teams with different classes start with built-in advantages. Each class brings tools the others lack. An Engineer opens safes. A Support instantly revives downed allies. A Scout spots enemies before fights start. An Assault leads the damage dealing.
Spread responsibilities across your squad instead of stacking the same class.
Drop Where Your Loadout Works
Stop asking "where's the best drop location" and start asking "where's the best drop for our squad." The answer depends on what weapons you're running.
If your team prefers SMGs and assault rifles, hit urban areas where fights happen at close range. If everyone's running sniper rifles, drop at spots with rooftops and open sightlines.
Good communication during the drop lets you plan routes toward the center circle while playing to your strengths.
Think Before Accepting Missions
Missions drop strong rewards but attract attention. Before you accept one, honestly check your squad's situation:
Are you at full strength or have you lost people? Is everyone healthy or are healing supplies low? Do your weapons actually hold up in a fight? Are you in a defensible spot or exposed?
If your squad is weakened, injured, or poorly geared, the counter-mission you trigger might bring a team that finishes you off. Missions have ended plenty of squads that weren't ready for the consequences.
Stay Ahead of the Ring
REDSEC's instant-kill ring means you need to watch your positioning more carefully than in other battle royales. You can't tank damage briefly to finish a fight or reach a better spot.
Keep an eye on the ring constantly. Start moving toward the next safe zone before the current one begins closing. If you're far from safety with the ring approaching and can't outrun it, find any vehicle immediately.
Quick Tips
Landing and Early Game
- Drop in locations with few or no other teams when possible
- Immediately search for weapons that match your class
- Use the forgiving early respawn for aggressive plays
Looting
- Check ambulances, military trucks, and orange vans for supplies
- Engineers should seek safes for exclusive access
- Upgrade weapons with kits whenever you can
- Search for Custom Weapon Drops (torpedo-shaped pods) to grab your favorite loadouts
Combat
- Strike first whenever possible
- Use the Scout drone heavily for recon
- Coordinate attacks with your squad
- Keep at least one anti-vehicle weapon in your group
Missions
- Squad leaders select missions from the map screen
- Only accept when your squad can handle counter-attacks
- Stand still during decryption objectives
- Complete gold-tier missions for tank access keys
Survival
- Respect the ring. It kills you instantly
- Crawl to safety when downed. Enemies can finish you off
- Use redeploy stations carefully. The siren attracts enemies
- Watch your class bonuses as they improve during the match
This covers what you need to compete in Battlefield 6's REDSEC mode. Diverse squads using the right weapons, completing missions at smart times, staying ahead of the deadly ring, and hitting enemies before they see you coming will consistently reach the final circles.