Boosting Ground logo

Diablo IV Penetrating Shot Rogue Endgame Guide


Introduction :

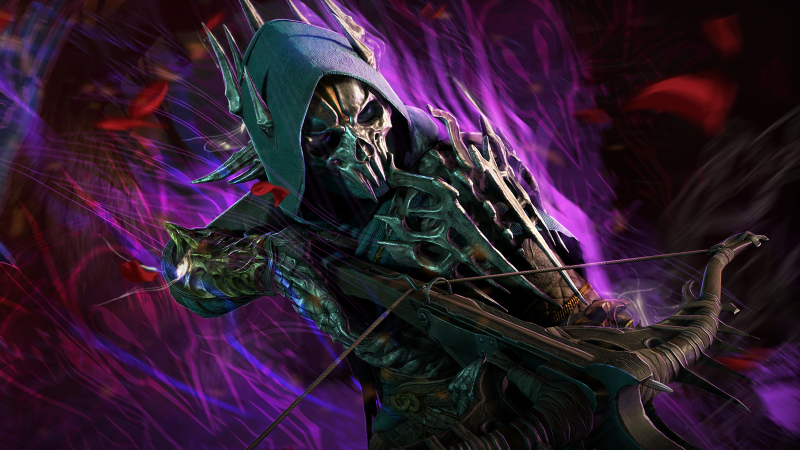
Seeking the Ultimate Ranged Annihilation? Look No Further than the ‍‍Penetrating Shot Rogue!

Ah, the thrill of obliterating everything in sight from a safe distance—it's a feeling like no other. And if that's what you're after, my fellow rogues, then the ‍‍Penetrating Shot build is your ticket to wreaking havoc and making demons cry in Diablo 4. Trust me, this playstyle is the epitome of "boom, headshot!" with a side of flashy fireworks.

Let's break it down, shall we? ‍‍‍Penetrating Shot is our bread and butter, a skill that fires a single, massive arrow capable of piercing through enemy lines like a hot knife through butter. Simple, right? But hold your daggers, my friends, because this seemingly straightforward ability becomes a true spectacle when we sprinkle in some magical Imbuements and the ‍‍‍Trickshot Aspect. Suddenly, that single arrow turns into a force of destruction, leaving a trail of demon parts in its wake. Talk about making an entrance!

Now, here's the secret ingredient to maximizing the mayhem: positioning. As with many rogue skills, the true power of ‍‍‍Penetrating Shot shines when you line up your shots, hitting as many enemies as possible in a straight line. The more foes you skewer, the more damage you dish out, and the more glorious the fireworks display becomes. Who needs a Fourth of July celebration when you can create your own demon-dismantling pyrotechnics?

But wait, there's more! This build adds an extra layer of strategy and satisfaction with ‍‍‍Combo Points. Yes, my nimble assassins, to unleash the full potential of this infernal arsenal, you'll need to play a bit more tactically and build up those Combo Points. It's all about careful planning and execution, my friends. And fear not, this doesn't mean you'll be crawling at a snail's pace. Oh no, this build still retains its agility in both battle and exploration. You'll be darting across the battlefield and traversing the vast world of Diablo 4 with finesse.

Now, before you embark on your journey of explosive arrow rain, let me assure you that this guide is here to teach you the ins and outs of mastering the endgame with ‍‍‍Penetrating Shot. From the best tactics to keep yourself safe to the optimal ways to maximize your devastation, we've got you covered. So, my fellow rogues, let the fireworks begin! Get ready to paint the world red with demon blood and bask in the sheer satisfaction of being a master of ranged annihilation. Prepare to embrace the boom, the nuke, and the sheer delight of decimating your foes from afar. The ‍‍Penetrating Shot Rogue is here to steal the show!

PROS:

If you're searching for a Rogue build that's as easy to grasp as snatching gold from a goblin's pouch, then look no further, my fellow adventurers! The Penetrating Shot Rogue is here to satisfy all your sneak-and-destroy cravings with style. Let's break it down and give you the lowdown on why this build is worth adding to your arsenal:

✔ Easy Concept: No need to consult a tome of ancient wisdom or decipher cryptic riddles to understand this build. The Penetrating Shot Rogue keeps things refreshingly simple, so even novice rogues can pick it up and start slinging arrows like a pro.

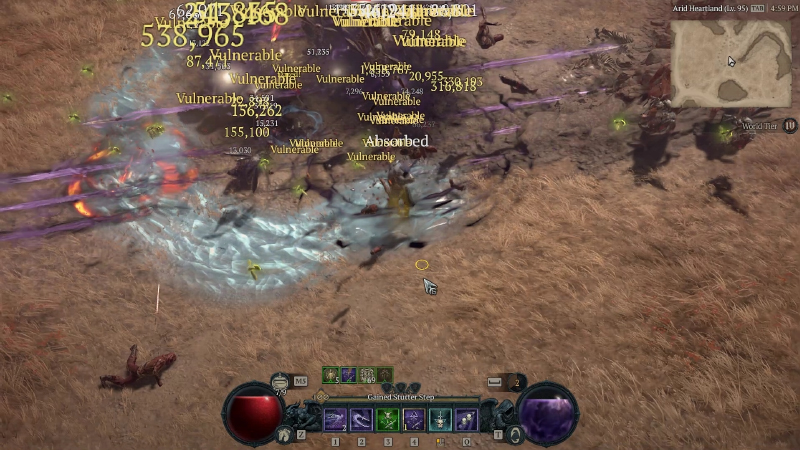
✔ Great AoE Clear: Who wants to deal with pesky enemies one by one when you can send them all to the afterlife with a single shot? The Penetrating Shot Rogue specializes in obliterating clusters of foes, making your enemies regret ever standing so close together. It's like throwing a party and inviting every demon in the vicinity—only to swiftly crash the party with a devastating rain of arrows.

✔ Long Range Sniper: Don't you just love the feeling of being able to take down enemies from afar, all while they desperately scramble to get a glimpse of the rogue who just ruined their day? With the Penetrating Shot Rogue, you'll be the master of sniping, raining death upon your foes from a safe distance. They won't know what hit 'em!

✔ Powerful Burst Damage: Picture this: You spot a fearsome boss, a worthy adversary, and you unleash your Penetrating Shot with all your might. The result? An explosion of damage that leaves your target trembling in fear and wondering how they managed to anger such a formidable rogue. The Penetrating Shot Rogue is all about those awe-inspiring moments of pure burst damage. It's like opening a treasure chest and finding a mountain of loot that's yours for the taking—except in this case, the treasure is devastation.

So, my friends, whether you're a seasoned rogue seeking a fresh playstyle or a newbie eager to dip your toes into the rogue's realm of trickery, the Penetrating Shot Rogue is ready to deliver the goods. Embrace the simplicity, revel in the satisfying AoE clears, relish the thrill of sniping from afar, and savor those moments of jaw-dropping burst damage. It's time to step into the shadows and unleash your inner rogue with the Penetrating Shot Rogue build. Get ready to make every shot count, because this rogue is all about hitting the bullseye of adventure!

CONS:

Are you ready to dive into the world of the Penetrating Shot Rogue? Hold on tight as we take a closer look at what makes this build a double-edged dagger. Brace yourself for the ups and downs, the twists and turns of this thrilling adventure:

❌ Slower-paced: If you're the type of player who likes to charge headfirst into battle, swords swinging and arrows flying, the Penetrating Shot Rogue might not be your cup of health potion. This build prefers a more calculated approach, where patience and strategy reign supreme. Think of it as a leisurely stroll through the dungeon instead of a wild, chaotic sprint.

❌ Missed Shots Hurt: Ah, the agony of the missed shot. The Penetrating Shot Rogue demands precision and accuracy, and the price for failure is paid in spades. Every missed shot is a dagger to the heart, a reminder that even the most skilled rogues can have their off days. So, if you're not one to handle disappointment well, you might want to sharpen your aim before embarking on this adventure.

❌ Juggles Cooldowns: Cooldown management can be as challenging as trying to convince a grumpy troll to lend you a hand. The Penetrating Shot Rogue requires careful timing and coordination of your abilities, as each cooldown is a precious resource to be managed wisely. Get ready for some mental gymnastics as you juggle your skills and unleash devastation at just the right moment. It's like a high-stakes performance, and you're the star of the show!

❌ Requires Positioning: In the world of the Penetrating Shot Rogue, positioning is key. You can't just waltz into battle and expect to emerge victorious. No, no, no! You need to be a master of positioning, constantly aware of your surroundings and the optimal vantage points from which to rain arrows upon your enemies. It's like a deadly game of musical chairs, except the chairs are your enemies, and the music is the sound of their defeat.

Now that you've glimpsed both the light and shadow of the Penetrating Shot Rogue, the choice is yours, brave adventurer. Will you embrace the slower pace and relish the precision required? Can you handle the pressure of juggling cooldowns and mastering positioning? If you're up for the challenge, then step into the shoes of the Penetrating Shot Rogue and let the arrows fly! Just remember to take a deep breath, steady your aim, and keep a sense of humor intact, because in the world of rogues, a little laughter can be the best antidote to a missed shot. Happy hunting!


Skills:

Penetrating Shot: Unleash Arrows of Destruction!

Get ready to rain down havoc on your enemies with the almighty Penetrating Shot! This core skill is your ticket to obliterating foes in a straight line with a colossal arrow that pierces through everything in its path. But wait, there's more! With the sneaky Trickshot Offensive Aspect, every unlucky enemy caught in the arrow's wake releases two additional shots at mind-boggling 90° angles. Talk about overkill! Say goodbye to big packs of enemies in one fell swoop!

But hold on, fearless archer, that's not all there is to your arsenal. Let's take a closer look at the supporting acts that make your performance truly spectacular:

Forceful Arrow: Building Combo Points and Applying Vulnerability

Meet Forceful Arrow, your trusty sidekick in the art of building combo points and applying the oh-so-desirable Vulnerable debuff. While it may not pack the biggest punch in terms of damage, its true strength lies in its utility. Picture this: enemies being knocked back with a satisfying force, creating the perfect distance between you and their pesky attempts at close combat. Take that, would-be attackers!

Caltrops: Dancing with Safety

When the going gets tough, Caltrops is here to lend a hand (or a well-placed spike). This nifty skill not only helps you maintain a safe distance from your enemies but also provides you with additional opportunities to multiply your damage. Talk about a win-win situation! So, scatter those caltrops, keep your enemies at bay, and enjoy the satisfaction of tactical superiority.

Dark Shroud: Cloaked in Defense

Meet Dark Shroud, your knight in not-so-shiny armor. This skill is your ultimate defense mechanism, granting you a protective cloak while also boosting your early-game movement speed. Since you prefer to keep your foes at arm's length (or arrow's length, to be precise), the number of incoming hits is minimal. Stay hidden, stay safe, and let your enemies wonder where those deadly arrows are coming from!

Poison Imbuement and Shadow Imbuement: Elemental Enhancements

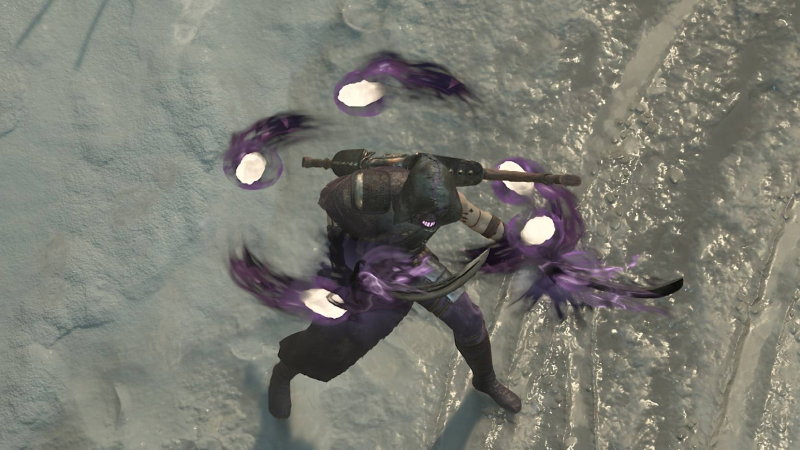
It's time to add a touch of the arcane to your arrows! With Poison Imbuement, you'll convert your damage into a toxic delight, inflicting poison damage over time to your unfortunate targets. It's perfect for cleaning up the battlefield when your Shadow Imbuement is taking a breather or for those tougher enemies who need a little extra persuasion to meet their demise.

Speaking of Shadow Imbuement, this dastardly enchantment fills your last slot, amplifying the power of your Penetrating Shot with shadowy goodness. It's a rival to Poison Imbuement and can't be used at the same time, but fear not! It's your go-to option for obliterating trash packs with ruthless efficiency and improving energy restoration. Shadowy arrows of doom, anyone?

With the power of Penetrating Shot and its supporting cast of skills, you're ready to take the stage and steal the show! Just remember, aim true, embrace the chaos you unleash, and enjoy the spectacle of your enemies' demise. Let the arrows fly and make every shot count!

Combo Points System:

Rogue Passives: Enhancing Your Sneaky Style!

Ah, the Rogues, masters of cunning and stealth. As a Rogue, you have the pleasure of choosing one out of three special passives that will take your playstyle to new heights. Now, let's dive into the thrilling world of ‍Penetrating Shot and how these passives can make you an unstoppable force (with a touch of mischief, of course).

Resource Hunger Games: Combo Points to the Rescue!

Like many Rogue builds, ‍Penetrating Shot has an insatiable appetite for resources. Energy recovery options may be limited, but fear not! We have a secret weapon: Combo Points! By opting for the high burst damage path, you'll find that ‍Combo Points synergize exceptionally well with ‍Penetrating Shot. Each point in Combo Points pumps up your damage by a sweet double dose, and if you're lucky, you might even enjoy an extra 30% hit chance boost. Talk about making your enemies feel the sting!

Building Up to the Big Boom: Forceful Arrow and the Art of Combo Points

To unleash the full potential of your devastating ‍Penetrating Shot, you must first pay your dues with the humble yet essential Basic Skill, ‍Forceful Arrow. This trusty skill serves as your ticket to building up those coveted Combo Points. Picture it as your Rogue initiation ritual—master it, and you'll be one step closer to greatness. Remember, for optimal damage-to-energy efficiency, always aim for the golden number of 3 Combo Points before releasing your glorious ‍Penetrating Shot. Anything less or more might result in subpar damage, and we can't have that, can we?

Unleash the Synergies: Condemnation and Aspect of the Expectant

As you progress on your rogue-ish journey, you'll unlock even more tantalizing synergies that make the Combo Point playstyle an absolute powerhouse. Enter ‍Condemnation and ‍Aspect of the Expectant, the dynamic duo that takes your burst damage to dizzying heights. With these tricks up your sleeve, your enemies won't know what hit them (quite literally). So, embrace the power of synergy and revel in the chaos you create!

Energy Management: The Tricky Dance of Speed and Efficiency

Ah, managing your Energy—the dance of a Rogue's existence. While ‍Rapid Aspect and attack speed rolls can accelerate your Combo Point-building process, be wary of the Energy drain that comes with it. It's a fine balancing act, my friend. Sure, faster bursts might be tempting, but if you find yourself constantly running on empty, your enemies might just catch you with your quiver down. So, choose your attack speed wisely and remember, a calculated strike is worth more than a hasty flurry.

So there you have it, the essence of the Penetrating Shot Rogue build. With your trusty Combo Points, the artful manipulation of Energy, and the thrill of synergies, you'll become a force to be reckoned with. Prepare to leave a trail of fallen foes in your wake and revel in the sheer joy of being a Rogue. Embrace the power, my sneaky friend, and let the world tremble at the sight of your arrows!

Gameplay

Long-Range Sniper: Taking Aim with Style!

Welcome to the glamorous life of a long-range Sniper. In this playstyle, you'll be channeling your inner marksman and employing clever tactics to keep those pesky enemies at a safe distance. Get ready to line 'em up, knock 'em down, and score big damage with the ‍Advanced Penetrating Shot passive. It's time to show the world that you're not just a Rogue, but a true sharpshooting superstar!

Keeping Enemies at Bay: Tools of the Trade

As a long-range Sniper, your goal is to create a safe zone between you and your foes. Use every trick in the book to achieve this. Caltrops, smoke screens, or even a well-placed decoy can keep those baddies at arm's length. Remember, it's all about maintaining that precious distance while you line up your shots for maximum impact. So, embrace your inner tactician and let the enemy dance to your tune!

Lining Them Up for Maximum Carnage: Precision is Key

Now, let's talk about the heart of your sniping prowess: lining up those shots. Your success lies in your ability to create a symphony of destruction by hitting multiple enemies with a single arrow. It's like knocking down a line of dominoes, except instead of dominoes, it's demon minions, and instead of toppling, they explode into glorious loot! So, take your time, aim true, and watch as your enemies fall like ripe fruits from a tree. The more efficient your lining-up skills, the faster you'll clear through hordes of foes and claim your well-deserved spoils.

Fashionably Deadly: The Advanced Penetrating Shot

Ah, the pièce de résistance of your sniping repertoire—the ‍Advanced Penetrating Shot passive. This little gem takes your damage-dealing prowess to new heights. With each successful shot, you'll feel the rush of power as your enemies crumble before you. But remember, it's not just about unleashing a flurry of arrows; it's about precision and timing. Each shot counts, and each successful hit brings you closer to victory. So, hone your skills, refine your aim, and let the world marvel at your deadly precision.

Sniper's Creed: Clearing Enemies and Raking in the Loot

As a long-range Sniper, you embody the perfect blend of skill, style, and audacity. Your enemies stand no chance as you strike from afar, always keeping them at a safe distance. So, embrace your role as the ultimate loot-gathering champion and make every shot count. Whether it's a distant demon or a sneaky rogue, they'll all fall before your deadly aim. Prepare to be the envy of every marksman, my friend, for you are the true embodiment of a long-range Sniper. Now, go forth, line 'em up, and leave a trail of defeated enemies and bountiful treasures in your wake!


Rotation

Mastering the Rogue Dance: Tips and Tricks for Lethal Agility!

Welcome to the world of rogues, where every move counts and survival depends on your cunning and quick feet. As you embark on your journey as a nimble assassin, it's crucial to keep a few tricks up your sleeve. Let's unravel the secrets to becoming a true master of the shadows, shall we?

Dark Shroud: Your Shadowy Sanctuary

First things first, let's talk about ‍Dark Shroud, your trusty companion in the shadows. This skill is not only your primary source of damage reduction but also grants you a burst of movement speed. But beware, my friend, for this power comes at a price—a hefty cooldown. When the shroud drops, you become as squishy as a ripe tomato, so keep those feet moving and dodge like a true acrobat. Think of yourself as a dancer, gracefully evading those nasty blows and leaving your enemies swinging at thin air.

Agility Skill: A Rogue's Best Friend

Ah, the wonders of agility! As a rogue, you possess a variety of skills to outmaneuver your foes. Let's take a closer look at some of your go-to moves:

  • ‍Caltrops: Picture this—you're surrounded by a horde of enemies, and you need some breathing room. That's where ‍Caltrops come into play. Toss those bad boys and watch as your enemies stumble and suffer additional damage. It's like a rogue's version of a well-placed banana peel!
  • ‍Dash and ‍Shadow Step: These skills are your get-out-of-jail-free cards. When you find yourself cornered or in a tight spot, dash or step your way to safety. Just remember not to trip over your own feet in the process!
  • ‍Forceful Arrow: Now, here's a skill with multiple purposes. Sure, it won't win you any DPS contests, but its utility is worth its weight in gold. It grants you ‍Combo Points, applies the Vulnerable debuff, and even has a knack for knocking back enemies. It's like having a personal bouncer at the rogue's nightclub!

The Art of Combo: Unleash the Burst!

Now, let's talk about the art of combos, where your true power lies. Here's a step-by-step guide to maximizing your burst damage:

  1. Build up 3 ‍Combo Points using ‍Forceful Arrow. Think of it as collecting ammunition for your lethal onslaught.
  2. Activate ‍Shadow Imbuement. This is your cue to go all out. The explosive damage it brings is perfect for wiping out large packs of enemies. Boom! Take that, you pesky demons!
  3. Unleash ‍Penetrating Shot. Release the fury of your well-aimed arrows and watch the chaos unfold. It's like fireworks on the battlefield, only deadlier.
  4. Mop up the leftovers with your second charge of Shadow Imbued ‍Penetrating Shot. Leave no enemy standing, my friend. Show them the true meaning of a rogue's wrath!

Imbuements: The Key to Elemental Dominance

Ah, the power of Imbuements! These enhancements take your arsenal to a whole new level. Here's the trick:

  • For tougher foes, activate ‍Poison Imbuement when ‍Shadow Imbuement is on cooldown. It's like adding an extra punch to your attacks, finishing off those beefy enemies with a touch of venom.
  • When facing single targets like bosses, swap the order and unleash ‍Poison Imbuement first. This maximizes your single-target damage, making those bosses wish they'd stayed in bed that day.

Remember, my fellow rogue, always keep an eye on your Energy reserves and avoid wasting charges on Imbued skills when unnecessary. It's all about precision and efficiency, just like a true rogue's dance.

So, my stealthy companion, armed with these tips and tricks, you're well on your way to becoming a formidable force in the shadows. Embrace your agility, keep that ‍Dark Shroud active, and dance through the battlefield with lethal grace. May your arrows find their marks, and may your enemies tremble in your presence. Now, go forth and show the world what it means to be a true master of the rogue's art!


Scaling

D A M A G E:

Unleashing Rogue's Arsenal: Strategies and Shenanigans!

Ah, the art of the Rogue, where every move is calculated and every strike hits its mark. Today, we delve into the secrets of ‍Combo Points, Critical Strikes, Vulnerability, and Crowd Controls—the pillars of your deadly repertoire. So grab your cloak and let's dive right in!

‍Combo Points: The Building Blocks of Destruction

Picture this: you're in the heat of battle, arrows flying, enemies falling like dominoes. How do you amplify your damage to epic proportions? Enter the world of ‍Combo Points. With the ‍Combo Point Specialization, you can channel the power of ‍Forceful Arrow up to three times, building up your arsenal for a devastating ‍Penetrating Shot. It's like combining three explosive arrows into one colossal blast! And that's not all—the likes of ‍Condemnation and ‍Aspect of the Expectant join the party, taking your damage to new heights. To speed up the process, embrace the ‍Rapid Aspect, allowing you to accumulate ‍Combo Points faster than a rogue slipping through the shadows. Say goodbye to downtime and hello to non-stop nukes!

Critical Strikes: Precision and Finesse

As a rogue, you thrive on the thrill of critical strikes. It's like hitting the bullseye every single time. To ensure your strikes pack an extra punch, we've got a few tricks up our sleeves. Boost your Critical Strike Chance through ‍Disciplined Caltrops, ‍Concussive attacks, ‍Precision Imbuement, Intelligence stat rolls, and the right gear. It's all about precision and finesse, my friend! Your trusty ‍Precision passive works hand in hand with high Critical Strike Damage on your Weapons & Rings, leaving your enemies in awe as they succumb to your devastating blows. And let's not forget the ‍Glyph: Combat Glyph, the cherry on top of your critical strike cake. Prepare for a symphony of crits that will leave your foes reeling!

Vulnerable: Exploiting Weaknesses with Style

Every rogue knows that exploiting weaknesses is the key to victory. And Vulnerability is your best friend in this game. With your mighty weapons, including the Crossbow base, packed with Vulnerable Damage, you can make your enemies quake in fear. How do you apply this debuff, you ask? Well, let's start with classics like ‍Forceful Arrow and ‍Puncture. But why stop there? Blend it with the shadows using the ‍Blended Shadow Imbuement, and add a dash of ‍Glyph: Exploit Glyph for good measure. Your enemies won't know what hit them as you strike where it hurts the most. It's time to exploit those weaknesses and revel in the satisfaction of victory!

Crowd Controls: Controlling Chaos with Finesse

Ah, the sweet symphony of crowd control. Nothing beats the satisfaction of controlling the chaos, and as a master of the rogue arts, you excel in this arena. When your Energy is at its peak and ‍Penetrating Shot is unleashed, it's not just about the damage—it's about the control. Your enemies will feel the full force of your wrath as they slow down, stumble, and even get knocked down. It's like a rogue's version of a never-ending dance party! To take your control to the next level, equip the ‍Glyph: Control Glyph and explore various Paragon Nodes. Embrace the power of control, my friend, and watch as your enemies become mere playthings in your deadly hands.

So, fellow rogue, armed with the knowledge of ‍Combo Points, Critical Strikes, Vulnerability, and Crowd Controls, you're ready to paint the battlefield red with your swift and deadly artistry. Go forth, dance through the shadows, and let your enemies tremble before your unstoppable might. Happy hunting, and may your arrows find their mark with style and finesse!


D E F E N C E:

Mastering the Art of Survival: Dodging, Defense, and Lightning Speed!

Picture this: you're a nimble rogue, dancing through a battlefield filled with danger and chaos. Your motto? "Don't get hit." And your secret weapon? ‍Dark Shroud, the guardian of your squishy existence. With this powerful skill, you become an elusive tank, shrugging off big hits like they're mere tickles. But remember, my friend, ‍Dark Shroud has a cooldown, so when it drops, you better channel your inner Usain Bolt and keep moving like there's no tomorrow.

Now, let's talk about defense, the name of the game when it comes to survival. Meet your new best friends: ‍Aspect of Might and ‍Aspect of the Protector. These legendary aspects have your back when the going gets tough. And if you're feeling a bit rebellious, ‍Aspect of Disobedience can spice things up, especially when you've got some sweet attack speed going on. Oh, and here's a neat trick: ‍Aspect of the Protector synergizes like peanut butter and jelly with conceited, giving you even more damage for having a strong defense. It's like having your cake and eating it too—defensive prowess and devastating blows!

But wait, there's more! Movement speed, my friend, is your ticket to survival. The faster you are, the more graceful your dodges, and the less likely you are to taste the bitter kiss of enemy attacks. So, let's stack that speed like there's no tomorrow! Embrace the ‍Wind Striker Mobility Aspect not once, not twice, but thrice! Yes, triple the speed, triple the fun! And don't forget to hunt down those glorious boots and amulets that offer movement speed stats. Become a blur on the battlefield, a phantom that leaves enemies scratching their heads in confusion.

Remember, my fellow rogue, survival is an art. So dodge, tank, and sprint your way to victory. With ‍Dark Shroud as your shield, ‍Aspect of Might and ‍Aspect of the Protector as your armor, and a trail of swift footsteps in your wake, you shall conquer all. Stay nimble, stay resilient, and let the world marvel at your mastery of survival!

Now, go forth, my friend, and show them what it means to be a true survivor!


Stats

Gear Up and Roll Out: A Rogue's Guide to Stat Priorities!

Ah, the thrill of hunting down the perfect gear for your rogue build! But let's face it, not all stats are created equal, and some are downright irrelevant for your playstyle. Fear not, my fellow rogue aficionado! I've compiled a breakdown of the essential stats and status effects for your gear, complete with a per-slot priority list. So, let's dive in and equip ourselves for success!

First and foremost, let's talk damage. We all love dealing those devastating blows, right? Stack these damage boosters like there's no tomorrow: Vulnerable Damage, Critical Strike Chance, Critical Strike Damage, and Core Skill Damage. These stats will turn you into a force to be reckoned with, leaving enemies trembling in fear.

Now, onto the core stats. Dexterity takes center stage as your main stat, so stack it like a tower of pancakes. Intelligence and Strength also deserve a spot on your priority list, but let's give Willpower the cold shoulder if possible. After all, who needs willpower when you have finesse and sheer power?

Energy Cost Reduction is a crucial stat to keep your Energy levels up for your trusty ‍Edgemaster’s Aspect. Look for this stat on Amulets and Boots, ensuring you can unleash your full potential without running out of steam.

Time to accessorize! When it comes to Armor sockets, ‍Royal Topaz is your best friend. Slip those precious gems in, as they provide excellent protection against the crowd-control mayhem that often accompanies ranged combat. As for Jewelry, ‍Royal Skull takes the crown, granting you not only protection but also a boost to your Physical Damage Reduction. How regal!

For your trusty Weapons, adorn them with ‍Royal Emeralds to amplify your damage against Vulnerable enemies. If you're not on friendly terms with Vulnerable, ‍Royal Sapphires can still do the trick, especially when it comes to Crowd Controlled foes. Variety is the spice of life, my friend!

Now, let's take a look at the best rolls for each slot, ranked in order of importance. It's like a treasure map to ultimate power!

  • Ranged: ‍Edgemaster’s Aspect (Weapon Type: Crossbow)

    1. High Damage per Second
    2. Vulnerable Damage
    3. Critical Strike Damage
    4. Critical Strike Damage with Imbued Skills
    5. Core Skill Damage
    6. Damage to Distant Enemies
    7. Damage to Crowd Controlled Enemies Socket: ‍Royal Emerald
  • Melee 1: ‍Aspect of Corruption, ‍Rapid Aspect, ‍Conceited Aspect, or ‍Aspect of the Expectant (Weapon Type: Sword)

    1. Damage doesn't matter

    1. Vulnerable Damage
    2. Critical Strike Damage
    3. Critical Strike Damage with Imbued Skills
    4. Core Skill Damage
    5. Damage to Distant Enemies
    6. Damage to Crowd Controlled Enemies Socket: ‍Royal Emerald
  • Melee 2 (Best in Slot): ‍Condemnation

    1. Damage doesn't matter

    1. Damage with Combo Points
    2. Basic Skill Attack Speed
    3. Critical Strike Chance vs Injured enemies
    4. Damage with Dual-Wield Weapons
    5. Core Skill Damage Socket: ‍Royal Emerald
  • Melee 2 (Regular): ‍Aspect of Corruption, ‍Rapid Aspect, ‍Conceited Aspect, or ‍Aspect of the Expectant (Weapon Type: Sword)

    1. Damage doesn't matter

    1. Vulnerable Damage
    2. Critical Strike Damage
    3. Critical Strike Damage with Imbued Skills
    4. Core Skill Damage
    5. Damage to Distant Enemies
    6. Damage to Crowd Controlled Enemies Socket: ‍Royal Emerald
  • Helm (Best in Slot): ‍Harlequin Crest

    1. Damage Reduction
    2. Maximum Life
    3. Cooldown Reduction
    4. All Stats
    5. Resource Regeneration Socket: ‍Royal Topaz
  • Helm (Optional): ‍Aspect of the Protector, ‍Aspect of Might, or ‍Aspect of Disobedience

    1. Life on Kill
    2. Ranks to ‍Poison Imbuement
    3. Basic Skill Attack Speed
    4. Cooldown Reduction
    5. Dexterity
    6. All Stats Socket: ‍Royal Topaz
  • Chest: ‍Aspect of the Protector, ‍Aspect of Might, or ‍Aspect of Disobedience

    1. Damage Reduction
    2. Armor
    3. Distant Damage Reduction
    4. Damage Reduction From Poisoned Enemies
    5. Damage Reduction
    6. Maximum Life Sockets: ‍Royal Topaz
  • Gloves: ‍Aspect of Corruption, ‍Rapid Aspect, ‍Conceited Aspect, or ‍Aspect of the Expectant

    1. Ranks to ‍Penetrating Shot
    2. Critical Strike Chance
    3. Critical Strike Damage with Imbued Skills
    4. Attack Speed
    5. Lucky Hit: Gain Primary Resource
    6. Dexterity
  • Pants: ‍Aspect of the Protector, ‍Aspect of Might, or ‍Aspect of Disobedience Implicit: Potion Grants Barrier

    1. Damage Reduction From Distant Enemies
    2. Damage Reduction From Poisoned Enemies
    3. Damage Reduction
    4. Armor
    5. Imbuement Skill Cooldown Reduction
    6. Maximum Life Sockets: ‍Royal Topaz
  • Boots (Best in Slot): ‍Penitent Greaves Implicit: Evade Charges

    1. Movement Speed
    2. Chilled Enemies take more Damage
    3. Crowd Control Duration
    4. Cold Resistance
    5. Slow Reduction
  • Boots (Optional): ‍Wind Striker Mobility Aspect Implicit: Movement Speed on Evade

    1. Movement Speed
    2. Dodge Chance against Distant Enemies
    3. Dodge Chance
    4. Movement Speed After Elite Kill
    5. Energy Cost Reduction
    6. Dexterity
  • Amulet: ‍Trickshot Aspect

    1. Ranks to Malice
    2. Ranks to Exploit
    3. Ranks to Weapon Mastery
    4. Energy Cost Reduction
    5. Movement Speed
    6. Damage
    7. Ranged Skill Damage
    8. Damage with Ranged Weapons Socket: ‍Royal Skull
  • Ring 1: ‍Aspect of Corruption, ‍Rapid Aspect, ‍Conceited Aspect, or ‍Aspect of the Expectant

    1. Critical Strike Chance
    2. Critical Strike Damage
    3. Vulnerable Damage
    4. Damage to Distant Enemies
    5. Damage to Crowd Controlled Enemies
    6. Damage to Slowed Enemies Socket: ‍Royal Skull
  • Ring 2: ‍Aspect of Corruption, ‍Rapid Aspect, ‍Conceited Aspect, or ‍Aspect of the Expectant

    1. Critical Strike Chance
    2. Critical Strike Damage
    3. Vulnerable Damage
    4. Damage to Distant Enemies
    5. Damage to Crowd Controlled Enemies
    6. Damage to Slowed Enemies Socket: ‍Royal Skull

Armed with this knowledge, my rogue friend, you're ready to conquer any challenge that comes your way. Choose your gear wisely, prioritize those stats, and unleash your rogue prowess upon the world! Happy hunting!


Gear:

TRANSITION FROM LEVELING TO 50

Alright, listen up, aspiring rogue! I've got some tips and tricks for you to maximize your skills and dominate the battlefield. So, grab your gear and let's dive in!

  1. Energy is your lifeline, my friend. Don't squander it like a kid in a candy shop. Aim to hit multiple enemies with each ‍Penetrating Shot. The more, the merrier! Splash that energy around and make those baddies regret crossing your path.
  2. Trash monsters? Meh, they're not worth your time. Don't waste your precious energy on those puny loners. Instead, set your sights on the big packs, the juicy targets that can really feel the sting of your arrows. Trust me, it's way more satisfying.
  3. Time to unlock the power of ‍Combo Points! Don't dilly-dally, my friend. As soon as you hit level 15, make it your top priority. These points are like little boosters for your nuke, ‍Penetrating Shot. So, always build up 3 ‍Combo Points before unleashing your devastating attack. Boom!
  4. The Codex of Power is your treasure trove, so make sure to unlock some serious firepower. Seek out ‍Aspect of the Protector, ‍Trickshot Aspect, ‍Edgemaster’s Aspect, ‍Rapid Aspect, and ‍Aspect of the Expectant. These bad boys will level up your rogue game and give you an edge over your foes. Don't be shy, grab 'em all!
  5. When you reach the endgame and start stacking some sweet Critical Strike Chance, it's time to switch things up. Say goodbye to ‍Mixed Poison Imbuement and hello to ‍Blended Poison Imbuement. It's like swapping your old rusty daggers for shiny new ones. Your enemies won't know what hit 'em!

There you have it, my sneaky friend. Follow these tips, hone your skills, and become the rogue legend you were meant to be. Now go out there and leave a trail of fallen enemies in your wake!


LEGENDARY ASPECT PROGRESSION

Ah, the quest for legendary power! Level 50 is just the beginning of your epic journey, my friend. Legendary items with the right aspects are what you need to take your build to the next level. These aspects are like the secret sauce that adds that extra oomph to your skills. Let's dive into the world of legendary aspects and the Codex of Power!

  1. Legendary Aspects: These bad boys are the stars of the show. They hold immense power and are the heart and soul of your build. Each one you acquire pumps up your strength and makes you a force to be reckoned with. If you find the perfect aspect on an unfortunate item or in the wrong slot, fear not! Extract that precious gem and imprint it onto another item at the Occultist. It's like giving your gear a makeover, turning trash into treasure.
  2. The Codex of Power: If you haven't laid your hands on these legendary goodies yet, buckle up! You'll need to embark on specific dungeon adventures to unlock them as crafts in the Codex of Power. Seek out the Oldstones in Scosglen for ‍Edgemaster’s Aspect, the Buried Halls in Dry Stepps for ‍Rapid Aspect, the Bastion of Faith in Hawezar for ‍Trickshot Aspect, and so on. It's like a scavenger hunt, but with epic rewards waiting for you at the end. Keep pushing forward, my friend!
  3. Legendary Aspects Galore: While the Codex of Power is your trusty companion, there's something special about those legendary aspects you stumble upon in random loot. They have the potential to roll higher values, giving you an extra boost of power. So, if you're craving those specific item slots, venture into PvP zones for Red Dust, join outdoor Local Events for Obols, or snatch those coveted caches from Whispers of the Dead. Fortune favors the bold, my friend!
  4. The Conceited Aspect: Ah, the pièce de résistance! This aspect is your secret weapon, synergizing perfectly with the ‍Defensive Aspect of the Protector. It grants you a massive damage bonus at the start of fights, allowing you to swoop in and one-shot situations that may have seemed impossible. It's like showing off your skills and style with a swagger that intimidates even the toughest foes.

So, my fearless adventurer, go forth and conquer! Hunt down those legendary aspects, unlock the powers within the Codex of Power, and become the stuff of legends. May luck be on your side, and may your gear shine with the brilliance of true power!


ENDGAME PROGRESSION

Ah, the magical realm of Sacred and Ancestral items! Level 50 is your golden ticket to unlock Nightmare difficulty, where the real adventure begins. You'll tread the treacherous path until you reach around level 70, at which point you'll boldly step into Torment difficulty. It's a rollercoaster ride of danger and excitement, but fear not, my brave friend!

In these mighty difficulties, you'll come across Sacred quality items that boast higher stats than your average loot. But hold on tight because the real treasure awaits you in Torment difficulty. That's where Ancestral quality items come into play, rolling even higher stats than their Sacred counterparts. It's like finding the Holy Grail of loot, but with better enchantments and sparklier gems.

Now, when it comes to upgrading your gear, remember this golden rule: prioritize the right stats over higher item power. It's like having a fabulous outfit that not only looks good but also suits your style. Your main weapon is the star of the show, so make sure it's top-notch. As for the other pieces, keep them at +2 until you gather enough materials to boost them further. It's like pampering your gear, giving it the love and attention it deserves.

And let's not forget about sockets! Those little gems can maximize your item's power like a sprinkle of magic dust. Pay a visit to the Jeweler and add sockets to your finest pieces. It's like accessorizing with flair, taking your gear to the next level of fabulousness.

Now, loot management is an art in itself. When you're out there battling hordes of enemies and snatching loot from the ground, remember to prioritize wisely. Some items are as elusive as unicorns, so keep your eyes peeled for the following:

  1. Weapons: These babies are your trusty companions in battle, your shining blades of destruction. Grab them first and feel the power coursing through your veins.
  2. Gloves: They may not be the fanciest pieces, but they can pack a punch. Plus, who doesn't love a good pair of gloves? They add a touch of style to your relentless quest for greatness.
  3. Amulets: These neck adornments hold mystical powers. They are like the cherry on top of your sundae, providing that extra boost of flavor to your build.
  4. Rings: Don't underestimate the power of a good ring. It's like a circle of destiny, binding your fate to the battles ahead. Choose wisely, my friend.
  5. Unique Items: Ah, the stars of the show! These legendary pieces are the crème de la crème of your endgame build. Once you acquire them, regular loot will pale in comparison. Look out for the mighty ‍Condemnation, a dagger that unleashes massive extra damage. And don't forget the magnificent ‍Harlequin Crest, a helm that grants you extraordinary stats and protection. Lastly, the incredible ‍Penitent Greaves will have you striding through the realms with speed and grace.

Now, for the pinnacle of gear perfection, you must aim for Best in Slot status. It's like reaching the summit of Mount Lootmore. Max out all your items with perfect stats, high item power, and the most optimized Legendary Aspects. Go for the difficult-to-obtain pieces first because rolling the perfect item can be as challenging as finding a needle in a haystack. But fear not, my intrepid adventurer, for the journey is half the fun!

To complete your gear collection, venture into the Helltide zones and seek out the elusive ‍Forgotten Souls. These precious treasures will allow you to enchant your items and upgrade them to +5 at the Blacksmith. It's like giving your gear a boost of heavenly energy, making it shine brighter than ever before.

So, my gallant warrior, equip yourself with the finest Sacred and Ancestral items, embrace the power of perfect stats, and conquer the realms with your legendary gear. May your loot be plentiful and your battles be epic!


Paragon Board

LEVEL 50 – 100 BOARD

Ah, the Paragon Board, the labyrinth of power and progression! As you journey through the levels from 50 to 100, here's a guide to help you navigate this intricate web of choices and bonuses. Buckle up, my friend, and let's embark on this thrilling adventure!

Starting board:

  • Begin by taking the path on the right side, snatching up those delicious damage nodes. We want to unleash the fury!
  • Oh, look, there's a Glyph Socket waiting for you! Make a beeline for it and claim your prize. But wait, the ultimate treasure awaits: the ‍Glyph: Combat Glyph. Pop that bad boy into the socket and watch your enemies quiver in fear. Don't forget to grab all the Intelligence Nodes nearby to activate its bonus. You need that energy boost to keep slaying!

Now, let's venture to the left side of the board. It's time to show off our skills!

  • Take the left route and nab the ‍Skillful Node. You're leveling up your skills like a pro.
  • Continue your ascent, pass through the gate, and attach the ‍No Witnesses board. Time to be stealthy like a ninja.

‍No Witnesses board:

  • Hold on tight and give that board a little spin. Let's make things interesting!
  • Head towards the bottom to find the Glyph Socket. When you stumble upon the ‍Glyph: Exploit Glyph, it's like striking gold. Place it in the socket and absorb its power. But wait, there's more! Grab all the Strength nodes nearby to activate its additional bonus. It's time to flex those muscles, both literally and metaphorically.
  • Don't forget to collect the ‍Knowledge and ‍Ruin Nodes along with the magical nodes surrounding them. This build thrives on this Glyph, so make sure to get it early on. It's like having the ultimate cheat code.

Now, let's venture forth to the left side once again. We have another board to conquer!

  • Time to rotate that board until the Glyph Socket is at the bottom right. It's all about the angles, my friend.
  • Make your way to the ‍Potent Node and grab all the magical nodes that surround it. Embrace the arcane powers!
  • Continue your journey to the Glyph Socket. Ah, there it is! When you stumble upon the ‍Glyph: Infusion, it's like finding a fountain of magical elixir. Place it in the socket and feel the surge of power. Don't forget to grab all the nearby Intelligence Nodes. We're turning your brain into a powerhouse!
  • Keep traveling northwest and pick up the ‍Ready Supply Node and the magical nodes that adorn it. You never know when you'll need a snack during your adventures.
  • Moving on, pick up the ‍Eldritch Bounty Node and then the ‍Imbuer Node. Grab all the magical nodes in their vicinity. We're embracing the mystical like a group of enchanted hipsters.
  • Lastly, take the ‍Dosage Node at the bottom, then head straight to the gate. Attach the ‍Tricks of the Trade board and let the games begin!

‍Tricks of the Trade board:

  • Give that board a spin, my friend, and place the Glyph Socket in the top left. We're shaking things up!
  • Descend straight down to grab the ‍Focused Node. We need to stay laser-focused on our goals.
  • Now, head to the right to find the ‍Glyph: Ranger. Pop it into the Glyph Socket when you find it. This glyph is essential for our build, so don't skip it! While you're at it, gather all the nearby Dexterity Nodes and snatch the ‍Lawless Node. We're walking the tightrope between chaos and finesse.
  • Time to venture top-left to the ‍Havoc Node. Don't forget to collect all the magical nodes in its vicinity. It's havoc with a sprinkle of magic, just the way we like it.
  • As you make your way to the left, approach the gate with style and attach the ‍Exploit Weakness board. We're all about turning weaknesses into opportunities!

‍Exploit Weakness board:

  • Let's give that board a twist and place the Glyph Socket at the top right. We're playing board games with a strategic mind!
  • Without delay, head straight to the Glyph Socket and slot in the ‍Glyph: Control when you find it. Gather all the nearby Intelligence Nodes and bask in their wisdom.
  • Don't forget to collect the ‍Artifice, ‍Exploit, and ‍Hunter Killer Nodes, along with the magical nodes that accompany them. We're turning this board into a playground of destruction.
  • Oh, and one more thing, grab that ‍Dosage Node like it's the last slice of pizza at a party. Can't let it go to waste!

Now, here's a little twist in the tale. We're going back to the ‍Tricks of the Trade board for a moment.

  • Pick up ‍Ranger and all the magical nodes surrounding it. We can't resist a little extra magic in our lives.

Phew! Almost there, my friend. Take a deep breath and return to the Starting board.

  • Finally, grab that ‍Resilience Node like a badge of honor. We're tough cookies, my friend, and we're ready to conquer anything that comes our way!

And there you have it! Your roadmap through the Paragon Board. May you navigate it with finesse, collect all the glyphs, and unleash your true potential. Happy leveling and may the RNG gods be ever in your favor!


LEVEL 100 ENDGAME BOARD

Welcome to the wild and wacky world of the Paragon Board! It's time to unlock your true potential while having a few laughs along the way. Buckle up, my friend, and let's embark on this thrilling journey of progression!

Starting board:

  • First things first, we're taking the high road through the damage side. We're all about unleashing havoc and mayhem!
  • As you make your way up, keep an eye out for the gate. We've got some surprises in store for it!
  • Later on, we'll add a little extra pizzazz to this board. We'll introduce the ‍Glyph and the Intelligence Nodes surrounding it. It's like a little intelligence party in a socket!

Now, let's give this board a spin and hop on the ‍Cunning Stratagem board.

  • Time to rotate the board until the Glyph Socket is hanging out in the bottom left corner. We're all about finding the perfect spot!
  • Once you've located the socket, it's time to add the ‍Glyph and all the Strength Nodes surrounding it. We're pumping those muscles and flexing our way to victory!
  • Oh, and don't forget to pick up the ‍Lawless, ‍Finisher, and ‍Dominant Nodes. They're like the cool kids at the magic school. And speaking of magic, grab all the Magic Nodes surrounding the last three. We're creating a magical fortress of doom!
  • Now, gracefully exit to the left of the board. Don't forget to give it a little wave as you go.

Onwards we go to the ‍Eldritch Bounty board! Prepare for more twists and turns.

  • Let's give this board a spin again, but this time we want the Glyph Socket to be hanging out in the bottom right. It's all about the right angles, my friend.
  • Time to bring out the big guns! Slot in the ‍Glyph and surround it with some shiny Intelligence Nodes. We're boosting our brain power!
  • Take a detour to the ‍Potent Node, grab some ‍Ready Supply, and make a pit stop at the ‍Eldritch Bounty and ‍Imbuer Nodes. They're like the secret ingredients to an enchanted smoothie.
  • Oh, and don't forget to snatch up all the Magic Nodes surrounding these nodes. We're creating a magical feast!
  • Finally, scoop up that ‍Dosage Node like it's a scoop of your favorite ice cream. Delicious!

Now, let's head over to the ‍Tricks of the Trade board. Prepare for more tricks up our sleeves!

  • Give that board another spin, my friend. We want the Glyph Socket to make itself cozy in the top left corner. It's all about finding that sweet spot!
  • It's time to introduce the ‍Glyph: Ranger and gather all the Dexterity Nodes surrounding it. We're becoming masters of finesse and precision!
  • Now, let's grab the ‍Havoc, ‍Focused, and ‍Ranger Nodes. They're like the rockstars of this board. And of course, grab all the Magic Nodes surrounding them. We're creating a magical concert of destruction!
  • Oh, and don't forget to say hello to ‍Lawless once again. It's always good to have friends on this magical journey. Now, let's make our exit to the left. Don't forget to strike a pose as you go!

Time to bring in the big guns with the ‍Cheap Shot board. Get ready for some sneaky maneuvers!

  • Spin that board until the Glyph Socket finds its home at the bottom. We're all about keeping things grounded!
  • Now, it's time to add the ‍Glyph: Control and all those lovely Intelligence Nodes surrounding it. We're taking control of the situation!
  • Let's grab the ‍Wiles, ‍Devious, and ‍Oppress Nodes. They're like the mischievous trio causing chaos in our favor. And don't forget to gather all the Magic Nodes keeping them company. We're creating a magical mischief club!
  • Straight up, we go! Snatch that ‍Safeguard Node like it's the last slice of pizza at a party. But don't forget to grab the surrounding Magic Nodes. We're adding some extra toppings to our pizza!

Now, a little word of advice, my friend. You may be tempted to venture into the ‍Spearhead Node. And while it's undoubtedly cool, let's prioritize damage reduction for now. We're going for a well-rounded setup that can take a punch while dishing out some serious damage.

Congratulations! You've conquered the Paragon Board like a true champion. Now go forth, unleash your potential, and remember to embrace the humor along the way. May the RNG gods smile upon you, my friend!


Glyphs

Ah, the magnificent Glyphs of the Paragon Boards! These little beauties are like power-packed gems that you can insert into sockets to unleash some serious mayhem. But fear not, my friend, for I shall guide you through this labyrinth of Glyphs with wit and wisdom. Let's dive in and uncover the secrets of these Glyphs, one by one!

‍Exploit: Prepare to exploit your enemies like a cunning mastermind! This Glyph is all about applying Vulnerable on those poor souls while cranking up its effect. It's like smacking them with a double whammy of pain. For maximum exploitative power, grab a trusty board like ‍Cunning Stratagem and slot in this Glyph. It's time to turn the tables on your foes!

‍Combat: Picture this: you're in the heat of battle, pulling off epic moves left and right. What could make it even better? How about a hefty dose of Critical Strike Damage? That's right, my friend! This Glyph is all about boosting your crits and making your burst style build shine brighter than a disco ball. Start things off with a bang by placing it on your trusty starting board. Energy regeneration? Check. 12% resource gain on critical strikes? Check. Let the crits rain down like confetti!

‍Control: Crowd control, my dear rogue, is your middle name. And this Glyph is your secret weapon. With ‍Penetrating Shot causing a slow effect at full Energy, you've got the power to keep those enemies in check while dishing out some serious damage. It's like being the DJ of the battlefield, controlling the tempo of the fight. Equip it on the ‍Cheap Shot board and let the dance begin!

‍Infusion: Prepare to imbue your burst shots with the power of a thousand suns! This Glyph is all about amplifying your already devastating attacks. It's like adding a spicy kick to your favorite dish. And where does it belong? Why, on the ‍Eldritch Bounty board, of course! Let the infusion commence and watch your enemies crumble before you.

‍Ranger: As a rogue, you're a master of finesse and agility. But let's face it, damage reduction isn't exactly your strong suit. Fear not, my friend, for the ‍Ranger Glyph is here to save the day! It not only grants you some much-needed damage reduction but also buffs all your attacks. It's like having a bodyguard that boosts your style. Give it a cozy spot on the ‍Tricks of the Trade board, and let the ranger within you shine!

‍Efficacy: Ah, the art of balance. Sometimes, you need a little offensive and defensive boost without going all-in on the ‍Ranger Glyph. That's where ‍Efficacy comes into play. It's like having a versatile sidekick that provides damage to elites, Dexterity, and Armor nodes in range. Put it on the ‍Tricks of the Trade board, and you've got yourself a great alternative to the ‍Glyph: Ranger Glyph. It's all about options, my friend!

Now, here's the secret sauce to leveling your Glyphs. Once they've reached level 15, it's time to take them to the next level—literally. Level them up to 21 in the same order you've acquired them. It's like nurturing your Glyphs into powerful beings, ready to unleash havoc on your foes.

There you have it, my fellow Glyph enthusiast! Let these Glyphs be your guiding stars as you navigate the treacherous world of the Paragon Boards. Level them, slot them, and watch your power skyrocket. Go forth, embrace the humor of your journey, and may the Glyphs shine brightly upon you!


Endgame:

Ah, my friend, you've reached the stage where the real fun begins! It's time to strap on your adventure boots and embark on the thrilling journey of endgame activities in Diablo 4. But fear not, for I shall be your guide, sprinkling a touch of humor along the way. Let's dive into the exciting world that awaits you!

Step 1: Farming Galore! First things first, complete your aspects like a true champion. Farm them, nurture them, and let them reach their full potential. But don't stop there! Dive into the realms of Renown, Altars of Lilith, Strongholds, and collect those precious Waypoints. It's like building your personal empire of power and glory. Get ready to conquer, my friend!

Step 2: Unleash the Endgame Extravaganza! Now that you've laid the groundwork, it's time for the real deal. Brace yourself for a variety of endgame activities, each with its own unique role and rewards. Let's take a sneak peek at what awaits you:

  • Open World Farming: Picture yourself frolicking in vast open fields, battling hordes of enemies, and reaping the sweet rewards. It's like a never-ending treasure hunt with a side of monster slaying. Grab your farming tools and get ready to sow the seeds of victory!
  • Helltide: Ah, the fiery depths of Helltide! This treacherous realm tests your mettle and rewards you with the coveted ‍Forgotten Souls. It's like a rollercoaster ride through hell, with the promise of glorious loot at the end. Are you ready to face the inferno?
  • Whispers: Shhh...can you hear them? The whispers of ancient secrets and untold power. Delve into the mysterious Whispers, solve puzzles, and uncover hidden treasures. It's like being Indiana Jones with a touch of Diablo madness. Embrace the adventure, my friend!
  • Nightmare Dungeons: Brace yourself for the ultimate challenge. Nightmare Dungeons are no walk in the park. They'll test your skills, your gear, and your sanity. But fear not, for the rewards are worth it. It's like stepping into the realm of nightmares, armed with nothing but your wit and determination. Show those nightmares who's the boss!
  • World Bosses: Gather your allies, for it's time to take on the mighty World Bosses. These colossal creatures will test the limits of your teamwork and strategy. But the rewards? Oh, they are glorious. It's like David facing Goliath, except this time you're armed with epic gear and a lot of bravery. Get ready to conquer the giants!
  • PvP: Time to show off your skills and compete against fellow adventurers in the exhilarating world of Player versus Player combat. It's like a gladiatorial showdown, where only the strongest and most cunning prevail. Sharpen your blades, hone your abilities, and let the battle begin!

Step 3: Know Your Rogue, Master of Penetrating Shot! As a Penetrating Shot Rogue, you possess a unique set of strengths and weaknesses. It's like being a skilled archer with a knack for piercing through enemy defenses. But remember, each endgame activity requires a different approach. Study your enemies, adapt your strategy, and unleash the full potential of your Penetrating Shot. The world is your target, my friend!

So there you have it, the thrilling journey that awaits you in Diablo 4's endgame. Farm, conquer, and embrace the challenges that come your way. May your loot be plentiful, your adventures epic, and your humor never-ending. Now, go forth and become the legendary hero you were destined to be!

OPEN WORLD

Ah, the vast and adventurous Open World of Diablo 4 beckons, my friend! Prepare yourself for a thrilling and humorous journey as we explore the many activities that await you. Let's dive in and uncover the secrets of this expansive realm!

The Wonders of the Open World The Open World of Diablo 4 is like a playground of possibilities. You'll have the chance to explore uncharted territories, unlock formidable Strongholds, hunt down Altars of Lilith, engage in epic battles against fearsome foes, and even partake in lively Local Events. But wait, there's more! Get ready to farm Whispers and indulge in the mysterious Helltide. It's like a never-ending buffet of adventure, with a side of demon-slaying for good measure.

The Penetrating Shot Rogue, Master of the Open World As a proud and nimble Penetrating Shot Rogue, you are the epitome of awesomeness in open world content. With your mobility and devastating nukes, you'll annihilate monster packs with a single strike. It's like being a one-person wrecking crew, leaving nothing but chaos in your wake. And let's not forget your ranged prowess, which keeps you safe from harm while you unleash your arsenal of tools to deal with those pesky Elites. You're practically untouchable, my friend!

Open World Goals: Conquer and Farm Now, let's talk about your objectives in this expansive playground of adventure. Your goals will depend on your chosen build and where you stand in your character's progression. Here's what you should aim for:

  1. Speed through Torment: Complete the Campaign and conquer the Capstone Dungeons with lightning speed. Your ultimate goal is to reach Torment and unlock its glorious challenges. Embrace the thrill of the journey, my friend!
  2. Renown and Altars of Lilith: Don't dilly-dally, my friend! Complete your Renown quests and hunt down those Altars of Lilith as swiftly as possible. Prioritize the easier quests to earn those coveted renown points and unlock extra Skill and Paragon Points. Power awaits!
  3. Crafting Materials Galore: Channel your inner blacksmith and alchemist! Farm those crafting materials to upgrade and enchant your precious gear. Enhance your weapons, armor, and accessories to become an unstoppable force. It's like playing dress-up, but with deadly consequences!
  4. The Helltide Hunt: Venture into the treacherous Helltide and gather those precious ‍Forgotten Souls. These soulful treasures will allow you to reroll your gear at the Occultist. It's like a game of chance, where fate intertwines with your desire for perfect stats. Let the soul-searching begin!
  5. Eventful Adventures: Engage in thrilling events and reap the rewards in the form of Obols. These valuable tokens of fortune can be used to gamble for Weapons, Rings, or Amulets. It's like a game of high-stakes poker, where luck and strategy collide. Will fortune favor you, my daring friend?

So, my fellow adventurer, embrace the wonders of the Open World in Diablo 4. Conquer, farm, and revel in the excitement that awaits you. May your path be filled with legendary loot, thrilling battles, and a generous dose of laughter. Now, go forth and make your mark on this fantastical realm!

NIGHTMARE DUNGEONS

Ah, Nightmare Dungeons, the pinnacle of endgame excitement in Diablo 4! These challenging and rewarding activities will test your mettle and provide you with epic loot that would make any treasure hunter swoon. But fear not, my courageous friend, for I shall guide you through the treacherous depths of these dungeons, with a touch of humor to lighten the mood!

The Sigils of Power To gain access to the Nightmare Dungeons, you'll need Sigils. How do you get them, you ask? Well, you can obtain them from the enigmatic Occultist, trade in those mystical whispers you've been collecting, or even find them as drops from other Nightmare Dungeons. It's like a game of sigil-fetching treasure hunt, and you're the daring hero seeking these elusive artifacts!

A Dance with Danger Nightmare Dungeons are not for the faint of heart. They boast scaling difficulty tiers, challenging your character to its limits. It's a test of skill, strategy, and a healthy dose of luck. But fear not, my friend, for with great challenge comes even greater rewards! These dungeons offer the best experience in the game and will level up your Glyphs, unlocking even more awe-inspiring power. It's like a fitness program for your character, but with shiny loot as the ultimate prize!

Nightmare Dungeon Tips: A Survival Guide Before you plunge headfirst into the nightmare-infested depths, let me offer you some valuable tips to keep you on the path to success:

  1. Know Thy Dungeon: Each Nightmare Dungeon comes with its own set of modifiers, objectives, and boss fights. Study them like a scholar preparing for an exam. Knowledge is power, my friend!
  2. Farming Fun: For the best balance of difficulty and experience points, aim to tackle Nightmare Dungeons that are 50-53 Tiers below your character's level. If you've reached the pinnacle of power at level 100, choose the highest Tier that you can comfortably conquer in 3-6 minutes per run. Efficiency and loot await!
  3. The Penetrating Shot Rogue Reigns: As a proud wielder of the Penetrating Shot, you are a force to be reckoned with in Nightmare Dungeons. Your ranged prowess allows you to rain destruction upon your enemies from a safe distance. Watch them cower in fear as you strike them down with precision and style. It's like a deadly archery competition, and you're the undefeated champion!

Modifiers and Mayhem Nightmare Dungeons are no walk in the park, my friend. They come with a slew of modifiers that can either make or break your run. Here are some key modifiers to keep in mind:

  • Handicap Hazards: Avoid modifiers like Monster Ranged Attacks Burn Primary Resource, which can leave you defenseless and in dire straits. Nobody wants to be caught without a way to fight back!
  • Tread with Caution: Pay extra attention to modifiers like Monsters take less Critical Strike damage, Monsters Resist Vulnerable Effect, and Monsters Unstoppable at Low Life. These can prolong fights and make enemies more resilient. It's like they're trying to outstay their welcome at the party!
  • Dungeon Survival Guide: As you ascend through the tiers, survival becomes paramount. Play it safe, my friend! Keep your Dark Shroud at 5 stacks at all times, retreat when necessary to refresh it, and avoid enemy attacks like a nimble acrobat. After all, surviving is the name of the game!

Nightmare Dungeon Pushing: A Game of Survival As the challenges intensify, you must adapt your strategies to stay alive. Consider making changes to your arsenal based on your playstyle and the specific Dungeon you're attempting. Here are some options to ponder:

  • Stealthy Engagements: Equip Stealth for safe engagement and disengagement with monster packs. It's like becoming a master of shadows, slipping in and out unnoticed.
  • Caltrops and Consistency: Harness the power of Caltrops for more consistent damage debuffs and better kiting. Those pesky foes won't know what hit them!
  • Smoke Bomb Shenanigans: Want to defuse dangerous situations in an instant? Look no further than Smoke Bomb! It's like a magical disappearing act, leaving your enemies scratching their heads in confusion.

Remember, my daring friend, personal playstyle, desired tier, and Dungeon-specific challenges should guide your choices. And don't forget to max out Dark Shroud at all costs to improve your survivability. You want to be as resilient as a stubborn adventurer who refuses to accept defeat!

So, arm yourself with courage and a touch of wit as you face the Nightmare Dungeons of Diablo 4. Embrace the challenge, savor the rewards, and let the echoes of your victories reverberate through the halls of this dark and twisted realm. May your arrows find their mark, your loot be legendary, and your adventures be filled with laughter and triumph!

WORLD BOSSES

Ah, the World Bosses of Diablo 4, the mighty titans that roam the open world, just waiting for brave adventurers like yourself to challenge them. It's like a game of boss-bashing roulette, where epic loot and Scattered Prisms are the coveted prizes. Let me guide you through this exhilarating experience with a dash of humor and some valuable tips!

Boss Bash Extravaganza World Bosses have their designated stomping grounds, and they emerge at specific times like clockwork. It's like a scheduled appointment with chaos and mayhem. When these colossal creatures appear, heroes from all corners of the realm gather to face the challenge head-on. Why, you ask? Well, apart from the sheer thrill of battle, defeating these behemoths can reward you with legendary items and Scattered Prisms, which are handy for adding sockets to your gear. It's like a wild shopping spree, where the currency is bravery and the aisles are filled with powerful upgrades.

Prism Power-Up While it's not necessary to constantly farm World Bosses, it's always wise to stock up on Scattered Prisms. Think of them as shiny gems of convenience that allow you to easily replace your gear later on. Plus, there's the occasional Whisper objective lurking around a World Boss, making them even more enticing. It's like stumbling upon a hidden bonus level in your favorite video game - unexpected, but oh so rewarding!

Gear Up, Get Ready Taking down these mighty World Bosses may require a few adjustments to your setup. You might want to beef up your defenses, increase your mobility, and focus on higher single-target damage output. After all, these beasts are no pushovers, and they demand your full attention. It's like preparing for a grand battle, complete with armor upgrades, combat training, and a healthy dose of confidence.

World Boss Tips: Mastering the Chaos As a Penetrating Shot Rogue, you possess formidable AoE capabilities, but when it comes to single-target damage on Bosses, you may need to switch things up a bit. Consider respeccing from Penetrating Shot to Rapid Fire for those intense World Boss encounters. It's like swapping your trusty bow for a rapid-firing cannon - devastatingly effective!

Now, let's dive into some additional tips to ensure your success:

  • Fashionably Early: Arrive a few minutes ahead of schedule, my punctual friend. You wouldn't want to miss the grand showdown, would you? It's like securing front-row seats to a thrilling spectacle!
  • Know Your Limits: It's important to choose World Bosses that are within your character's level range. Fighting a boss way above your capabilities is like challenging a legendary dragon with a wooden spoon - not advisable.
  • Dodge with Style: Keep a keen eye on the boss's attack patterns, and when danger looms, unleash your inner acrobat. Dodge with grace using your Evade ability. It's like a dance of death, where your nimble movements are the key to survival.
  • Dash to the Rescue: Save your Dash charges for crucial moments when you need to swiftly evade the boss's devastating blows. It's like pressing the turbo button on your adventure, propelling you to safety in the nick of time.
  • Shroud of Darkness: Always keep your Dark Shroud stacks at 5, my friend. This protective veil is your lifeline. If you find yourself getting hit a bit too frequently, take a breather and wait for its cooldown. It's like catching your breath in the midst of chaos, ready to unleash your full potential once more.

So, my valiant adventurer, arm yourself with courage, adjust your tactics, and face the World Bosses with all your might. Let their roars echo through the land as you claim victory and snatch those glorious rewards. And remember, in the midst of battles and challenges, don't forget to cherish the moments of laughter and camaraderie. After all, even in the darkest dungeons, a little humor can make all the difference!

PVP

Ah, the Fields of Hatred, where hatred grows like a bountiful crop and players engage in epic PvP battles. It's like stepping into a wild west showdown, where Seeds of Hatred are the currency of chaos and Altars serve as the stage for cleansing and gambling. Let's delve into this PvP extravaganza, sprinkled with informative tips and a dash of humor!

Fields of Hatred: Where Seeds of Chaos Sprout In these PvP zones, the Fields of Hatred, you'll find yourself amidst a fierce battleground where Seeds of Hatred can be harvested from defeated monsters... or cunningly stolen from the clutches of other players. These coveted Seeds are then cleansed into Red Dust at Altars scattered throughout the zones. And what can you do with this Red Dust, you ask? Well, my friend, it's your ticket to a gambling spree for armor pieces and exclusive Transmogs for both you and your trusty Mount. It's like a PvP casino, where the stakes are high and the rewards are oh-so-sweet.

Farming and Progression: Embracing the Chaos Now, here's the juicy part. The Fields of Hatred offer a delightful combination of high monster density and combat buffs, making it a prime spot for farming and progressing your character. It's like a frenzy of carnage and rewards, where each swing of your weapon brings you closer to becoming a true champion.

PvP: Rogue vs. World Ah, the Penetrating Shot Rogue in PvP. While it's not the most formidable adversary without some clever adjustments, fear not, my daring rogue! You may lack consistent crowd control effects and find your shots easily evaded by agile opponents, but you possess your own set of tricks up your sleeve.

Here are a few tips to keep in mind when engaging in PvP battles with this build:

  • Snipe from Afar: Keep your distance, my friend, and unleash your deadly long-range shots. It's like becoming the elusive arrow-hurling phantom, striking fear into the hearts of your opponents from the shadows.
  • Shadow Dance: Spec into ‍Shadow Step for that extra touch of mobility and an unstoppable presence. Dance around your foes, elusive and untouchable, like a mischievous spirit taunting its pursuers.
  • Strategic Retreat: Sometimes, a tactical retreat is in order. While waiting for your cooldowns to recover, gracefully disengage from the fray. It's like slipping away into the darkness, only to return with renewed vigor.
  • Conceal and Reveal: Swap out your trusty ‍Shadow Imbuement for ‍Concealment. Now you have the power to ambush or escape at will. It's like becoming a master of illusions, leaving your opponents scratching their heads as you vanish into thin air.
  • Controller's Advantage: If you're playing on a controller, rejoice! Ranged combat becomes a breeze with its lock-on target aim. Hit those moving targets with ease, my controller-wielding warrior. It's like having a guiding hand that never misses its mark.

Stay tuned for our upcoming PvP Rogue Guide, where we'll dive deeper into the art of PvP matchups and provide more valuable tips for your rogueish endeavors.

So, embrace the chaos of the Fields of Hatred, my brave rogue. Harvest those Seeds of Hatred, cleanse them into Red Dust, and revel in the thrill of PvP battles. Remember, adaptability and a touch of mischief are your greatest weapons in this chaotic realm. Now, go forth and claim victory with style!

Mechanics

Ah, the fascinating world of damage reduction buffs! Let's dive into the nitty-gritty of how they work, but fear not, my friend, we'll keep it informative, engaging, and just a touch of humor to lighten the mood.

Damage Reduction Buffs: More Defense, Less Ouch You see, damage reduction buffs are like a shield that protects you from harm, and they stack multiplicatively, meaning they work together to provide you with even more defense. It's like piling on layers of armor, making you feel invincible...well, almost.

If you want to dig deeper into the realm of damage reduction, our article "Defenses for Beginners" is a treasure trove of knowledge. It's like a crash course in the art of staying alive amidst chaos and mayhem.

Dark Shroud Scaling: Shadows of Protection Ah, the enigmatic ‍Dark Shroud, your trusted companion in the shadows. Each shadow that surrounds you adds to your damage reduction, but here's the interesting part: the increase in survivability is not just a simple sum. Oh no, my friend, it's an exponential boost! Each rank of the skill and every active shadow enhance your defenses exponentially. It's like compounding interest on your safety deposit of shadows. So, the more, the merrier...or should I say, the safer you'll be!

Penitent Greaves: A Chilling Encounter Let's talk about those Penitent Greaves, shall we? When you're wearing these stylish boots, you'll notice a chilling effect on your enemies. It's like they just can't handle your coolness! This chill effect applies roughly once per second, adding to the stagger bar of your foe. It's like a slow and steady freeze, making them more vulnerable to your attacks. And guess what? The extra damage they receive while chilled is additive with other similar sources. It's like sprinkling a little extra spice on your already delicious dish.

So, my friend, embrace the intricacies of damage reduction buffs, savor the exponential benefits of ‍Dark Shroud, and revel in the chilling prowess of the Penitent Greaves. Remember, knowledge is power, and in the world of Diablo 4, a well-informed adventurer is a victorious adventurer. Now go forth, stack those buffs, and let your enemies tremble in the face of your mighty defenses!

Summary:

Ah, behold the mighty ‍Penetrating Shot Rogue, a ranged force to be reckoned with! This build is all about obliterating monster packs with explosive nukes that require impeccable timing and strategic positioning. It's like playing a game of monster bowling, but instead of pins, you're knocking down hordes of baddies with style!

The Rogue's Arsenal: Combos, Shots, and Imbuements To unleash the true power of this build, you'll want to build up those ‍Combo Points like a skilled archer. With three ‍Combo Points carefully crafted using Forceful Arrow, you're ready to deliver the coup de grâce with a devastating ‍Penetrating Shot. It's like pulling back the bowstring, releasing it, and watching your enemies scatter like startled pigeons.

But wait, there's more! To maximize your damage potential, line up those unsuspecting monsters in front of you, creating a delicious buffet for your destructive prowess. It's like organizing a line for your special monster eradication service. One by one, they fall under the might of your arrows.

Now, let's talk about your secret weapons: ‍Poison Imbuement and ‍Shadow Imbuement. Use them in harmony, like a symphony of destruction. ‍Poison Imbuement is your go-to for single-target obliteration, while ‍Shadow Imbuement shines when facing hordes of enemies in glorious AoE carnage. It's like having two different flavors of destruction to suit your every mood.

The Protective Shadow: Dark Shroud and Agility Safety first, my friend! Always keep your ‍Dark Shroud stacks up and running. Think of it as your personal forcefield, shielding you from those pesky big hits that can ruin your day. Keep those stacks high and your worries low as you dance through the battlefield with confidence.

And let's not forget your agility skills, your trump cards in combat. Use them wisely to gain the upper hand. Whether it's clever positioning to gain tactical advantages or gracefully keeping your distance from danger, your agility is your best friend. It's like being a nimble dancer, gracefully evading danger while launching devastating barrages of arrows

So, my friend, embrace the power of the ‍Penetrating Shot Rogue. Rain destruction upon your enemies with expert timing and positioning. Revel in the joy of effortlessly conquering Nightmare Dungeons, all while having a blast. Remember, it's not just about the big booms and flashy arrows; it's about the thrill of the hunt and the satisfaction of a well-executed plan. Now go forth, shoot 'em up, and let the monsters fear the might of your nukes!

Final Thoughts And Conclusions Of Our Penetrating Shot Rogue Endgame Guide

Well, thank you for reaching the end of our guide. To sum it up - there are many things you will need to learn but if you manage to push through you will be a viable part of your team and be indestructible. You can visit our boosting page to find useful services or our guide page for other tips for your leveling journey.

Also, a quick tip, be a nice guy. Good luck in the fields of battle!

Author teodoran
Published 2023-06-09
Views 249