
Overview
The Pulverize Druid harnesses the raw power of the Werebear form to demolish enemies through devastating ground slams and toxic nature magic. This build combines the crushing force of Pulverize with the area denial capabilities of Poison Creeper, creating an efficient leveling experience that scales smoothly from early game through level 60.
Core Build Mechanics
Primary Damage Sources
Your damage output revolves around two key abilities:
 Pulverize
Your main attack delivers crushing physical damage in a wide radius. Every 12 seconds while maintaining at least 80% health, this ability triggers an automatic Overpower strike dealing bonus damage based on your current life and Fortify values. The Overpower enhancement stuns targets for 3 seconds while dealing 75% increased Overpower damage.
 Poison Creeper
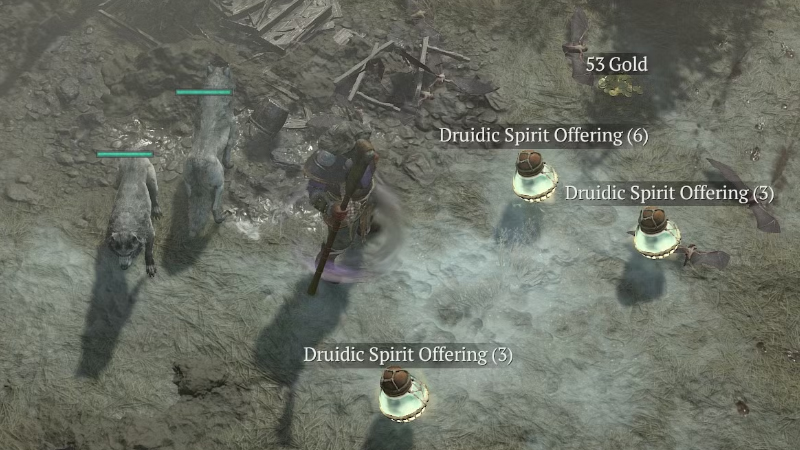
This companion provides consistent passive poison application while its activated ability creates a lethal poison field around your character, immobilizing enemies caught within. The active component represents one of the strongest area damage tools available during leveling.
Essential Legendary Modifications
Two legendary aspects fundamentally transform Pulverize's functionality:
Ursine Horror Aspect converts Pulverize into an Earth skill while spawning damaging tectonic spikes that persist for 2 seconds after each cast.
Skill Point Distribution Guide
Follow this precise allocation order for optimal power progression through 71 total skill points (59 from leveling, 12 from Renown):
- Wind Shear (Basic Skill) - Rank 1
- Enhanced Wind Shear
- Pulverize (Core Skill) - Rank 1
- Enhanced Pulverize
- Raging Pulverize
- Fierce Wind Shear
- Blood Howl (Defensive) - Rank 1
- Enhanced Blood Howl
- Innate Blood Howl
- Pulverize - Rank 2
- Pulverize - Rank 3
- Poison Creeper (Companion) - Rank 1
- Enhanced Poison Creeper
- Brutal Poison Creeper
- Wolves (Companion) - Rank 1
- Pulverize - Rank 4
- Trample (Wrath) - Rank 1
- Enhanced Trample
- Savage Trample
- Pulverize - Rank 5
- 21-23. Neurotoxin (Rank 1), Envenom (Ranks 1-2)
- 24. Envenom - Rank 3
- 25-28. Poison Creeper - Ranks 2-5
- 29-31. Call of the Wild - Ranks 1-3
- 32-34. Quickshift (Ultimate) - Ranks 1-2, Ursine Strength (Key Passive)
- 35. Quickshift - Rank 3
- 36-38. Natural Fortitude - Ranks 1-3
- 39-41. Heightened Senses - Ranks 1-3
- 42-44. Predatory Instinct - Ranks 1-3
- 45-47. Iron Fur - Ranks 1-3
- 48-50. Crushing Earth - Ranks 1-3
- 51-53. Stone Guard - Ranks 1-3
- 54-56. Safeguard - Ranks 1-3
- 57-59. Feral Aptitude - Ranks 1-3
- 60-62. Mending - Ranks 1-3
- 63-65. Defiance - Ranks 1-3
- 66-68. Circle of Life - Ranks 1-3
- 69-71. Ancestral Fortitude - Ranks 1-3
Action Bar Configuration
| Slot | Ability | Purpose |
|---|---|---|
| Slot 1 | Trample | Mobility & Spirit Generation |
| Slot 2 | Blood Howl | Healing & Spirit |
| Slot 3 | Wolves | Elite/Boss Damage |
| Slot 4 | Poison Creeper | AoE Damage & Control |
| Left Click | Wind Shear | Spirit Generator |
| Right Click | Pulverize | Main Damage |
Spirit Boon Progression
The Druid's unique Spirit Boon system unlocks at level 15 through the "Spirits of the Lost Grove" questline. After completing Túr Dúlra Stronghold in Scosglen, prioritize these boons:
- Deer - Gift of the Stag: Provides 30 maximum Spirit capacity with 10 Spirit per second regeneration
- Eagle - Scythe Talons: Grants 15% critical strike chance and 15% Lucky Hit chance
- Wolf - Pack Leader: Critical strikes have 30% chance to reset companion cooldowns
- Wolf - Energize: 15% Lucky Hit chance for full Spirit restoration (Spirit Bond selection)
- Snake - Obsidian Slam: Every 6th attack empowers next Earth skill with Overpower
Equipment Strategy
Stat Priority by Slot
- Helm (Socket: Sapphire) - Poison Creeper Ranks, Companion Skill Ranks, Willpower, Maximum Life, Spirit Per Second
- Chest (Socket: Sapphire) - Maximum Life, Spirit Per Second, Willpower, Armor
- Gloves - Pulverize Ranks, Critical Strike Chance, Attack Speed, Willpower, Critical Strike Damage
- Pants (Socket: Sapphire) - Maximum Life, Armor, Willpower, Dodge Chance
- Boots - Movement Speed, Spirit Per Second, Willpower, Dodge Chance
- Amulet (Socket: Diamond) - Movement Speed, Envenom Ranks, Critical Strike Chance, Willpower%, Resource Cost Reduction
- Rings (Socket: Diamond) - Critical Strike Chance, Attack Speed, Maximum Life, Resource Generation, Vulnerable on Hit Chance
Codex of Power Aspects
Prioritize acquiring these dungeon aspects:
- Changeling's Debt (Conclave, Kehjistan): 25-65% increased damage to poisoned enemies as Werebear
- Retaliation (Seaside Descent, Dry Steppes): 35-75% Core skill damage based on Fortify
- Crashstone (Stockades, Scosglen): 35-75% Earth skill critical damage to crowd-controlled enemies
- Ursine Horror (Belfry Zakara, Hawezar): Converts Pulverize to Earth skill with tectonic spikes
Resource Management
- Umbral (Champion's Demise, Dry Steppes): 1-8 resource restoration on crowd control
Defensive Options
- Disobedience (Halls of the Damned, Kehjistan): 0.4-0.8% armor per damage instance (25-40% cap)
- Might (Dark Ravine, Dry Steppes): 20% damage reduction for 2-10 seconds from Basic skills
- Skinwalker (Fading Echo, Kehjistan): 5-25% life gain on shapeshift
Utility Aspects
- Ghostwalker (Broken Bulwark, Scosglen): 10-30% movement speed while Unstoppable
- Quicksand (Feral's Den, Scosglen): Earth skills slow enemies 20-60% for 5 seconds
- Ballistic (Whispering Pines, Scosglen): +2 Earth skill ranks with Fortify
Tempering Priorities
Apply these tempering recipes when available:
| Category | Recipe | Effect |
|---|---|---|
| Weapon Tempering | Werebear Augments | Chance for Pulverize double hit |
| Offensive Tempering | Earth Finesse | Earth critical chance, Lucky Hit, damage, Overpower |
| Shapeshifting Finesse | Werebear Overpower damage | |
| Natural Finesse | Close/distant enemy damage | |
| Defensive/Utility Tempering | Worldly Endurance | Total armor percentage |
| Natural Motion | Movement speed | |
| Worldly Stability | Resource generation | |
| Worldly Fortune | Lucky Hit chance, crowd control duration, impairment reduction |
Notable Unique Items

- Insatiable Fury: Provides Werebear skill ranks with strong base stats
- Hunter's Zenith: Offers periodic critical Overpowers with excellent affixes
Runeword Configuration
Combine these runes in your two-handed weapon and armor:
- Poc (Ritual): Generates 5 Offering when spending 5% maximum resource
- Lum (Invocation): Restores 2.5 Spirit per 5 Offering spent
- Noc (Ritual): Generates 5 Offering on crowd control (10 for non-slow/chill)
- Gar (Invocation): Provides 2.5% critical chance per 25 Offering (25% maximum)
Season 8 Boss Powers
Main Power Selection:
- Ashava's Poison Breath: Synergizes with poison-based damage components
Modifier Powers:
- Hatred's Embrace's Haste: Attack speed enhancement
- Wandering Death's Chest Beam: Additional damage projection
- Blackmailer's Sabotage: Enemy debuffing capability
Mercenary Configuration
- Core Skill: Cleave
- Core Passive: Hysteria (attack speed bonus)
- Iconic Skill: Bloodthirst
- Iconic Passive: Bloodlust (attack speed multiplier)
- Reinforcement Ability: Crater (area control)
Combat Rotation
Execute this priority sequence:
- Poison Creeper activation on enemy clusters for maximum poison coverage
- Wolves deployment against elite targets and bosses
- Pulverize spam while tracking Enhanced Pulverize's 12-second Overpower timer
- Blood Howl for healing and Spirit generation while maintaining shapeshifting buffs
- Trample for mobility, Spirit generation, and buff maintenance
- Wind Shear as filler between Pulverizes for Spirit generation
Spirit Management System
Maintain consistent Spirit flow through:
- Wind Shear basic attacks generating per hit
- Innate Blood Howl providing burst Spirit
- Savage Trample adding Spirit on use
- Wolf's Energize boon offering Lucky Hit full restoration
- Gift of the Stag providing 10 Spirit per second baseline
- Lum runeword refunding spent resources
Paragon Board Strategy (Level 60+)
Board Progression Order
- Starting Board - Focus on raw stats and initial power
- Ancestral Guidance - Prioritize Spirit generation nodes
- Earthen Devastation - Maximize Earth damage multipliers
Glyph Placement Strategy
- Prioritize radius growth through The Pit progression
- Glyphs begin at 3 radius, expand to 4 at level 15, and 5 at level 46
- Focus early glyph experience on boards providing immediate power gains
Level-Based Progression
| Level Range | Focus |
|---|---|
| Levels 60-100 | Establish core board pathways focusing on Spirit generation and Earth damage |
| Levels 100-150 | Branch into defensive boards while maintaining offensive scaling |
| Levels 150-200 | Optimize pathing for maximum legendary node acquisition |
| Levels 200+ | Fine-tune with specific stat thresholds |
Key Stat Benchmarks
- Spirit Generation: Minimum 15 per second
- Critical Strike Chance: 40% baseline before buffs
- Maximum Life: Scale with content difficulty
- Armor: Maintain 9000+ for Torment viability
Node Priorities
- Legendary nodes on designated boards
- Rare nodes within glyph radius
- Magic nodes supporting primary stats
- Common nodes for pathing efficiency
Season 8 Specific Changes
Skill Adjustments
- Enhanced Blood Howl: Now reduces cooldown by 0.3 seconds per boss hit
- Poison Creeper: Passive damage increased to 65%, active damage to 180%
- Gift of the Stag: Maximum Spirit reduced to 30, regeneration increased to 10
Tempering Updates
- Worldly Fortune no longer provides crowd control application
- New affixes include Lucky Hit chance, impairment reduction, and crowd control duration
Bug Fixes Impacting Build
- Mending passive now functions correctly with Insatiable Fury
- Iron Fur no longer snapshots incorrectly with Insatiable Fury
Leveling Efficiency Tips
World Tier Selection
Begin in Adventurer difficulty for optimal experience gains. Increase difficulty only when acquiring powerful multipliers like high-rolled Shockwave Aspect. Each difficulty tier provides increased rewards but may reduce overall efficiency if combat becomes prolonged.
Consumable Usage
- Craft highest available Elixir of Precision for critical strike bonuses
- Alternative: Iron Skin Elixir for pushing higher difficulties
- Upgrade healing potions at levels 10, 20, 30, 40, 50, and 60
Build Flexibility Options
The build supports several customization paths:
- Ultimate skills like Petrify for burst damage windows
- Cataclysm paired with Blood Boiling Aspect for screen-clearing Overpowers
- Earthen Bulwark replacing a support skill for additional defense
- Bestial Rampage key passive for aggressive players maintaining form uptime
- Claw basic skill for enhanced shapeshifting buff maintenance
Transition to Endgame

Upon reaching level 60, focus shifts to:
- Paragon board progression for continued power growth
- Glyph leveling through The Pit activities
- Transitioning gear towards endgame-specific affixes
- Preparing for Torment difficulty mechanics
This build provides the foundation for multiple endgame paths, whether continuing with Pulverize specialization or transitioning to alternative Druid playstyles. The investment in core Werebear mechanics and Earth skill synergies creates a smooth progression curve through all content difficulties.