
Your tank choice in Mythic+ shapes everything about your dungeon runs. It affects how safely your group pulls, how much damage you bring to the table, and what kind of compositions you can build around. If you're pushing your first +10 or climbing toward the highest keys, knowing where each tank spec stands will help you pick the right one for your goals.
This guide ranks every tank spec based on testing during the Midnight Beta. Each placement comes from weighing several factors together: raw survivability, personal DPS, and the value you bring to your group through utility, mobility, and defensive tools. No single stat decides a ranking on its own.
One thing worth calling out early: the tank balance in Midnight is surprisingly healthy. There aren't any truly bad tanks right now. The gaps between tiers come down to relative advantages and specific strengths rather than any spec being unplayable. Even the lowest-ranked tank on this list falls into "average" territory, not "weak." That's great news if you're a tank main.
How the Tiers Work
Rankings are split into three tiers:
- S Tier - The tanks most likely to define the Season 1 meta. They excel across multiple categories and are the strongest overall picks in the current beta state. Tuning changes could still shift things before the season officially launches, though.
- A+ Tier - Strong, reliable tanks that perform well in virtually all content. They fall just short of S Tier in one or two areas but remain excellent choices for any key level.
- A Tier - Solid performers that can handle all Mythic+ content. They lack standout strengths compared to higher-ranked specs but don't have crippling weaknesses either.
What Matters for Tank Rankings
Before diving into individual specs, here's what goes into each evaluation:
Tank Durability covers how well the spec handles incoming damage, including physical and magical intake, self-healing, and active mitigation.
Personal DPS measures how much damage you contribute on your own, both on single-target boss fights and AoE trash packs.
Group Composition Synergy looks at how well you fit into different group setups, particularly the split between physical damage comps and magical damage comps.
Mobility factors in how effectively you can reposition, kite when needed, and deal with dungeon mechanics.
Self-Sustain is your ability to keep yourself alive independently, taking pressure off your healer.
External Party-Wide Cooldowns are defensive abilities you can use to protect your whole group during dangerous moments.
Party Buffs are passive or active buffs that boost your group's overall performance. This plays a big role in the current rankings since almost every tank brings a party buff now, with one notable exception.
Mob Control includes crowd control, interrupts, grips, and tools for managing enemy positioning and behavior.
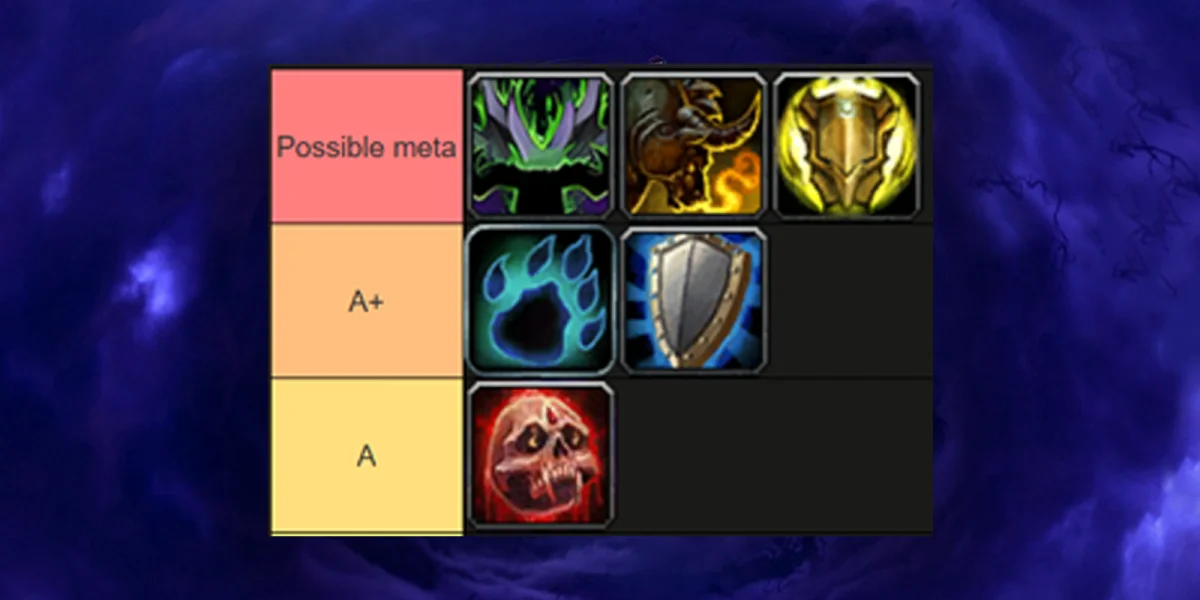
Rankings at a Glance
Tank Tier Rankings - Season 1
S Tier
The three tanks in this tier are the strongest options for Mythic+ in the Midnight beta. Each one brings a different set of strengths, and together they cover the full spectrum of group composition needs.
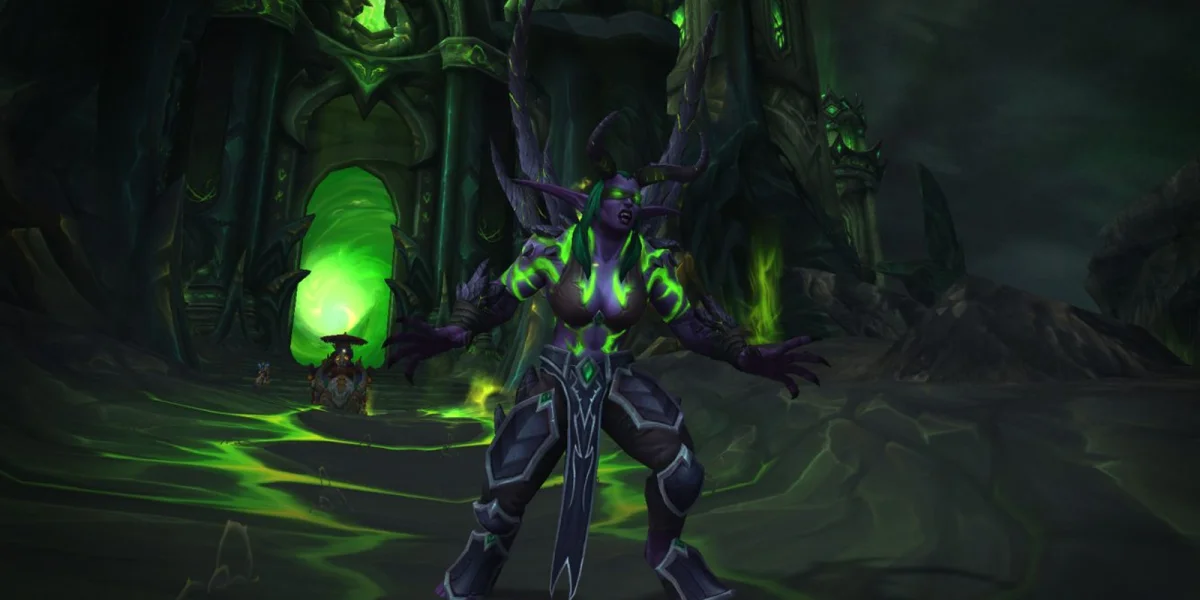
Vengeance Demon Hunter
Vengeance Demon Hunter sits at the very top of the tank rankings right now, arguably the single strongest tank in the Midnight beta. The spec delivers across nearly every category: insane sustain, insane damage, amazing party utility, and strong group utility on top of that.
A big caveat here: Vengeance currently benefits from several bugs that make the spec both tankier and higher-damage than intended. If those bugs get hotfixed, Vengeance would likely drop roughly a tier. So keep in mind that this level of dominance may not fully carry over to the live season.
Strengths
Vengeance's damage stands out among tanks. You'll put up strong sustained numbers that keep you competitive on the meters throughout an entire dungeon. Pair that with excellent self-sustain and active mitigation, and you get a very comfortable tanking experience where you can survive heavy hits while still pumping meaningful DPS.
The party utility package is one of the richest among all tanks. Chaos Brand increases all magical damage enemies take by 3%, which is a big deal for groups running magical damage dealers. On top of that, you have access to multiple forms of crowd control and disruption that give you excellent mob management.
Utility Breakdown
| Ability | Type | Effect |
|---|---|---|
| Chaos Brand | Passive | Increases magical damage taken by enemies by 3% |
| Sigil of Silence | AoE Interrupt | Silences all enemies in area, pulls casters into melee |
| Sigil of Misery | AoE Disorient | Disrupts dangerous casts, buys time during high-pressure moments |
| Sigil of Chains | Optional - AoE Grip | Pulls all enemies to center and snares them |
| Chaos Nova | AoE Stun | Core AoE stun available to all Demon Hunters |
| Darkness | Optional - Group Defensive | Party members in area have a chance to avoid damage from attacks |
| Imprison | Optional - CC | Single-target out-of-combat crowd control |
| Consume Magic | Optional - Purge | Removes one beneficial magic effect from an enemy |
Brewmaster Monk
Brewmaster Monk is one of the main contenders for the tank meta in Season 1. It combines amazing boss damage, amazing AoE output, and extraordinary tankiness into one of the most well-rounded packages you can pick.
Strengths
The durability on Brewmaster right now is something else. This is one of the tankiest versions of the spec WoW has ever seen. Brewmaster has always been known for its stagger-based damage smoothing, but the current Midnight iteration takes survivability to another level entirely. If you want to feel safe and in control while tanking, Brewmaster delivers that consistently.
Damage-wise, you excel in both scenarios that matter for Mythic+. Boss damage is amazing, so you're pulling your weight during the fights that often determine if a key gets timed. AoE output during trash packs is just as impressive, keeping you competitive on overall damage throughout the whole run.
Brewmaster is also the go-to tank for physical compositions. You bring Mystic Touch, which increases all physical damage enemies take by 5%. Stack that with physical DPS specs like Fury Warrior, Survival Hunter, or Feral Druid, and the buff's value snowballs as your whole group's output climbs.
Utility Breakdown
| Ability | Type | Effect |
|---|---|---|
| Mystic Touch | Passive | Increases physical damage taken by enemies by 5% |
| Leg Sweep | AoE Stun | 3-second AoE stun for reliable crowd control |
| Ring of Peace | Optional - AoE Knockback | Creates a zone that knocks back entering enemies |
| Tiger's Lust | Optional - Ally Support | Removes all roots and snares from a targeted ally |
| Paralysis | Optional - CC/Enrage Dispel | Single-target disorient that doubles as enrage dispel |
| Detox | Optional - Dispel | Removes all Poison and Disease effects from a targeted ally |
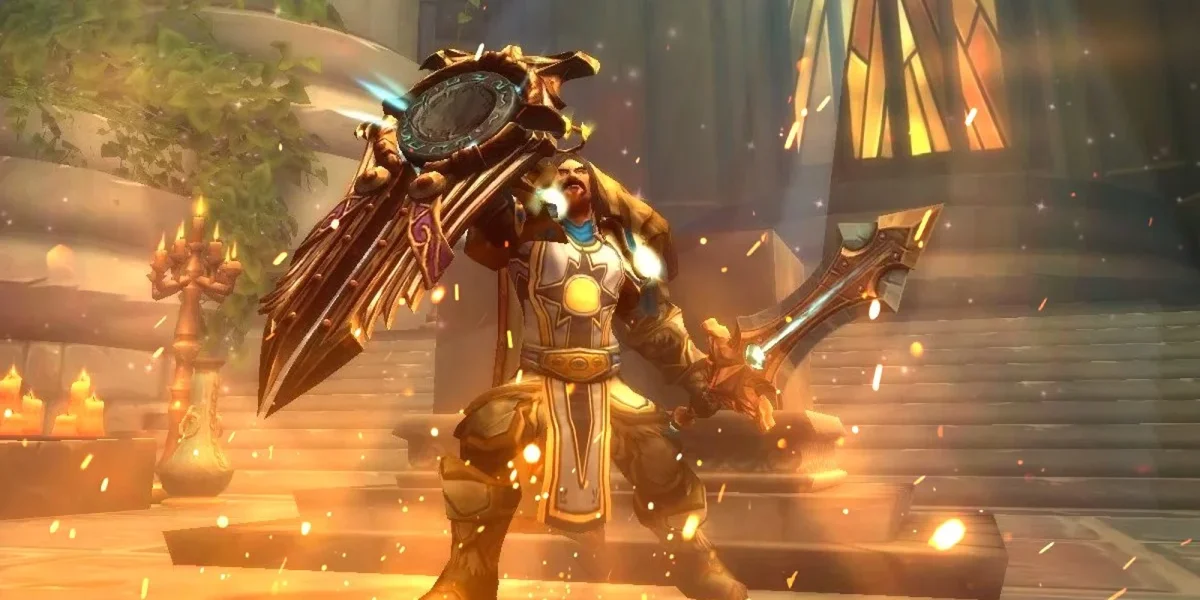
Protection Paladin
Protection Paladin closes out the S Tier with a versatile toolkit that includes everything the top tanks offer, plus the best mob control in the game. The trade-off is that it's noticeably squishier than Vengeance DH and Brewmaster Monk.
Strengths
Protection Paladin's biggest selling point is the depth of its utility package. Arguably no other tank in the game can match the sheer range of situations Prot Paladin can address: mob control tools, a combat resurrection, a full-health heal for allies, group-wide damage reduction, and multiple forms of immunity or protection for party members. You have an answer for almost everything.
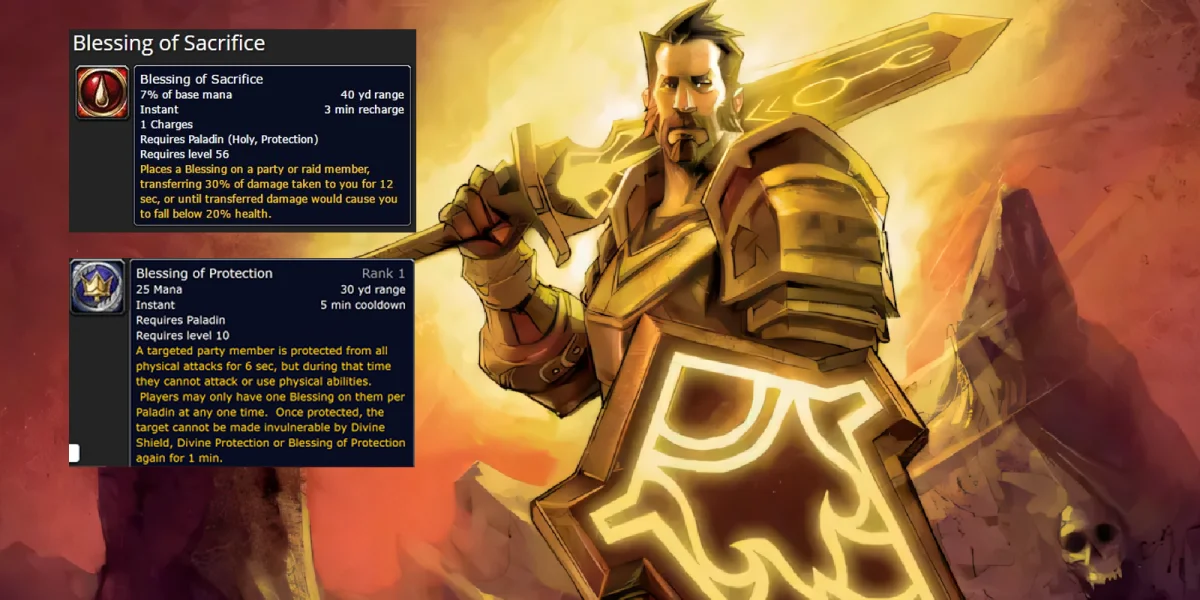
For average-level keys, Prot Paladin can feel incredibly powerful. Strong damage, excellent mob control, and the ability to save allies with Lay on Hands or Blessing of Protection makes the spec reliable and forgiving for groups that may not play perfectly.
Utility Breakdown
Protection Paladin has the most extensive utility kit of any tank:
| Ability | Type | Effect |
|---|---|---|
| Avenger's Shield | Interrupt + Silence | Extra interrupt with follow-up silence effect |
| Devotion Aura | Passive Aura | Permanent 3% group-wide damage reduction |
| Lay on Hands | Emergency Heal | Heals a party member to full health on a long cooldown |
| Intercession | Combat Res | Brings someone back mid-fight - extremely valuable in M+ |
| Hammer of Justice | Single-Target Stun | Core single-target stun ability |
| Blessing of Spellwarding | Optional - Magic Immunity | Grants magical damage immunity to an ally for 10 seconds |
| Blessing of Sacrifice | Optional - Damage Redirect | Redirects a portion of ally damage to you |
| Blessing of Protection | Optional - Physical Immunity | Grants physical immunity to a target |
| Blessing of Freedom | Optional - Movement | Immunity to movement-impairing effects for an ally |
| Cleanse Toxins | Optional - Dispel | Removes all Poison and Disease effects |
| Turn Evil | Optional - CC | Fears Undead, Aberration, or Demon enemies |
A+ Tier
The A+ Tier tanks are strong, reliable choices that perform well across all key levels. They don't quite reach S Tier heights, but they sit comfortably above A Tier and remain excellent options for any player.
Protection Warrior
Protection Warrior earns its A+ spot as the second-best tank for physical damage compositions, behind only Brewmaster Monk. What sets it apart is flexibility: Prot Warrior works better than Brewmaster in hybrid compositions, making it a versatile pick for a wider range of group setups.
Strengths
Prot Warrior's main appeal is that flexibility. While Brewmaster thrives specifically in full physical comps, Prot Warrior provides value even in groups that mix physical and magical damage dealers. Battle Shout gives a 5% attack power buff to your entire party, and that benefits any physical damage dealer in the group. Even if you have magical damage specs like Havoc Demon Hunter, they still get some value from the attack power buff for their physical damage components.
At extreme key levels, Prot Warrior can become quite tanky, especially against physical damage. Your active mitigation tools scale well with incoming damage, so the harder content hits, the more relative value you get from your defensives.
You also bring strong crowd control and group utility through Rallying Cry, Shockwave, Storm Bolt, and Intimidating Shout.
Utility Breakdown
| Ability | Type | Effect |
|---|---|---|
| Battle Shout | Passive Buff | 5% extra attack power to your entire party |
| Rallying Cry | Group Defensive | Temporarily increases the health of your whole party |
| Shockwave | AoE Stun | Core AoE stun ability |
| Storm Bolt | Single-Target Stun | Locks down specific dangerous enemies |
| Intimidating Shout | AoE Stop | Uncapped AoE stop effect - hits any number of enemies |
| Javelineer | Optional - Silence | Wrecking/Shattering Throw silences target for 3 seconds |
| Piercing Howl | Optional - Slow/Speed | 70% enemy slow; with Battlefield Commander gives allies 30% speed |
| Champion's Spear | Optional - Mass Grip | Grips all enemies to the spear's location |
| Berserker Shout | Optional - Fear Remove | With Battlefield Commander, removes fear effects from nearby allies |
| Spell Reflection | Optional - Spell Reflect | Reflects spells back at the caster in niche situations |
Guardian Druid
Guardian Druid keeps its reputation as one of the most accessible tank specs in the game. It's not quite at the S Tier level, but it's a strong and reliable choice that offers great utility and a forgiving playstyle.
Strengths
The biggest draw for many players is just how easy Guardian is to pick up. The spec has always been one of the most straightforward tanks to learn and perform well with, and that hasn't changed in Midnight. The rotation has become a bit less spammy compared to previous expansions, but overall it's still one of the simplest tanks to play.
Utility is another major selling point. You bring Mark of the Wild, Innervate, Stampeding Roar, and a wide selection of crowd control options including Typhoon, Mass Entanglement or Ursol's Vortex, and Incapacitating Roar or Mighty Bash.
Utility Breakdown
| Ability | Type | Effect |
|---|---|---|
| Mark of the Wild | Passive Buff | Increases party's Versatility by 3% (damage + DR) |
| Innervate | Optional - Healer Support | Free healer casts for 8 seconds during mana-intensive phases |
| Stampeding Roar | Optional - Group Mobility | 60% movement speed for all party members for 8 seconds |
| Soothe | Enrage Dispel | Dispels all Enrage effects from an enemy target |
| Remove Corruption | Optional - Dispel | Removes all Curse and Poison effects from allies |
| Incap Roar / Mighty Bash | Optional - CC Choice | AoE disorient or single-target stun |
| Typhoon | Optional - Knockback | AoE knockback for repositioning or interrupting |
| Mass Entangle / Ursol's Vortex | Optional - AoE Control | AoE root or vortex that pulls mobs to a central location |
A Tier
Blood Death Knight
Blood DK sits at the bottom of this list, but context matters: there are no bad tanks in the current Midnight beta. Blood DK is average across the board. Not terrible, not exceptional, just solidly middle-of-the-road in every category. If there has to be a weakest tank, Blood DK is it, but the gap between A Tier and the tiers above isn't enormous.
Strengths
Blood DK has seen design changes that make it easier to play and more approachable compared to previous expansions. If you've historically found the spec complex or punishing, the Midnight version should feel smoother.
Damage is one area where Blood DK holds its own. You'll put up decent numbers, meaning you won't feel like a liability on the meters. You'll contribute meaningfully to both boss kills and trash clear times.
The spec also keeps its signature utility tools, including Death Grip, Gorefiend's Grasp, Anti-Magic Zone, and Raise Ally.
Utility Breakdown
| Ability | Type | Effect |
|---|---|---|
| Anti-Magic Zone | Group Defensive | Extra group durability against heavy magical damage |
| Death Grip | Single Grip | Repositions a single enemy - pulls casters into melee |
| Gorefiend's Grasp | Optional - Mass Grip | Pulls all enemies near a target to that target's location |
| Raise Ally | Combat Res | Brings back a fallen party member during combat |
| Blinding Sleet | Optional - AoE Disorient | AoE disorient for crowd control |
| Insidious Chill | Optional - Passive DR | Reduces target's auto-attack speed by 5%, stacking 4x |
| Control Undead | Optional - Mind Control | Mind-controls an undead enemy to fight for you |
| Asphyxiate | Optional - Stun | 5-second single-target stun |
| Vestigial Shell | Optional - AMS Extension | Extends Anti-Magic Shell to 2 nearby allies |
The Party Buff Problem
The single biggest reason Blood DK sits below other tanks is the complete lack of a party buff. Every other tank spec in the game brings something: Brewmaster has Mystic Touch, Prot Warrior has Battle Shout, Guardian Druid has Mark of the Wild, Prot Paladin has Devotion Aura, and Vengeance DH has Chaos Brand.
Blood DK has nothing. By picking Blood DK, your group misses out on a permanent passive buff that every other tank provides. Over the course of a full dungeon, that adds up to a meaningful gap in group performance. It's the primary reason many players pass over Blood DK for tanks that bring that extra layer of group value, and it's the biggest factor keeping the spec in A Tier.
Composition and Strategy
Physical Comps vs. Magical Comps
One of the most important factors in tank selection for Midnight Mythic+ is how your choice interacts with the broader group composition. The current meta draws a clear line between physical damage compositions and magical damage compositions, and your tank sits right at the center of that decision.
Physical compositions stack physical damage buffs for maximum group output. The ideal physical comp tank is Brewmaster Monk with its 5% physical damage buff (Mystic Touch), followed by Prot Warrior with its 5% attack power buff (Battle Shout). These buffs get more valuable as you add more physical DPS to the group, creating a snowball effect where comp-wide damage output exceeds what individual spec power levels would suggest.
Magical compositions favor tanks like Vengeance Demon Hunter, whose Chaos Brand increases magical damage taken by 3%. Groups running specs like Devastation Evoker, Demonology Warlock, or Frost Mage benefit directly from this.
Hybrid compositions are where Prot Warrior really stands out. Battle Shout's attack power buff has some value for specs regardless of their primary damage type, making Warrior a safer pick when your group isn't fully committed to one direction.
| Comp Type | Best Tank | Key Buff | Ideal DPS Pairings |
|---|---|---|---|
| Physical | Brewmaster Monk | Mystic Touch (+5% phys) | Fury Warrior, Survival Hunter, Feral Druid |
| Physical (Alt) | Prot Warrior | Battle Shout (+5% AP) | Any physical DPS mix |
| Magical | Vengeance DH | Chaos Brand (+3% magic) | Dev Evoker, Demo Lock, Frost Mage |
| Hybrid | Prot Warrior | Battle Shout (+5% AP) | Mixed physical/magical |
Key Level Considerations
Your target key level should play into your tank choice:
For average to mid-level keys, Protection Paladin's deep utility kit can be game-changing. Combat res, various Blessings, and Lay on Hands to save failing situations make Prot Paladin incredibly forgiving. At these key levels, the squishiness downside is less noticeable because incoming damage is still manageable.
For high-level keys, Vengeance DH and Brewmaster Monk pull ahead. Their superior tankiness means your healer can spend more globals on DPS instead of keeping you alive, and you can play aggressively without risking death. Prot Paladin's squishiness starts to hurt more as damage ramps up.
For the highest keys, survivability becomes the top priority. Prot Warrior can carve out a niche here since it becomes quite tanky against physical damage at extreme key levels. The S Tier tanks (especially Vengeance and Brewmaster) maintain their edge through superior damage profiles combined with top-tier survivability.
Ease of Play
For players who want the smoothest learning curve:
The easiest tank to pick up and play effectively. The rotation has become a bit less spammy in Midnight, but it's still the most straightforward option.
Has become easier and more approachable in its Midnight iteration. Design changes make the spec smoother than previous expansions.
Requires understanding stagger mechanics, but the spec is well-established and fundamentals are well-documented.
Manageable core rotation, but getting the most out of the spec demands awareness of when and how to use its extensive utility kit.
Middle of the complexity spectrum. Vengeance requires good positioning for sigils, and Warrior demands solid active mitigation timing.
