Overview
Destruction is a solid leveling spec in TBC Classic, especially if you plan to run a lot of dungeons on your way to 70. It doesn't solo quite as well as Affliction, but in a group it puts out strong single-target DPS and some of the best AoE damage of any leveling spec in the game. If most of your time is going to be spent in Hellfire Ramparts, Blood Furnace, and similar dungeons, Destruction is an excellent choice.
This guide covers both recommended talent builds, every ability worth training, your leveling rotation, the best gear you can pick up through questing, good profession choices, useful consumables, and practical tips for getting to 70 without too much friction.
Is Destruction Worth It?
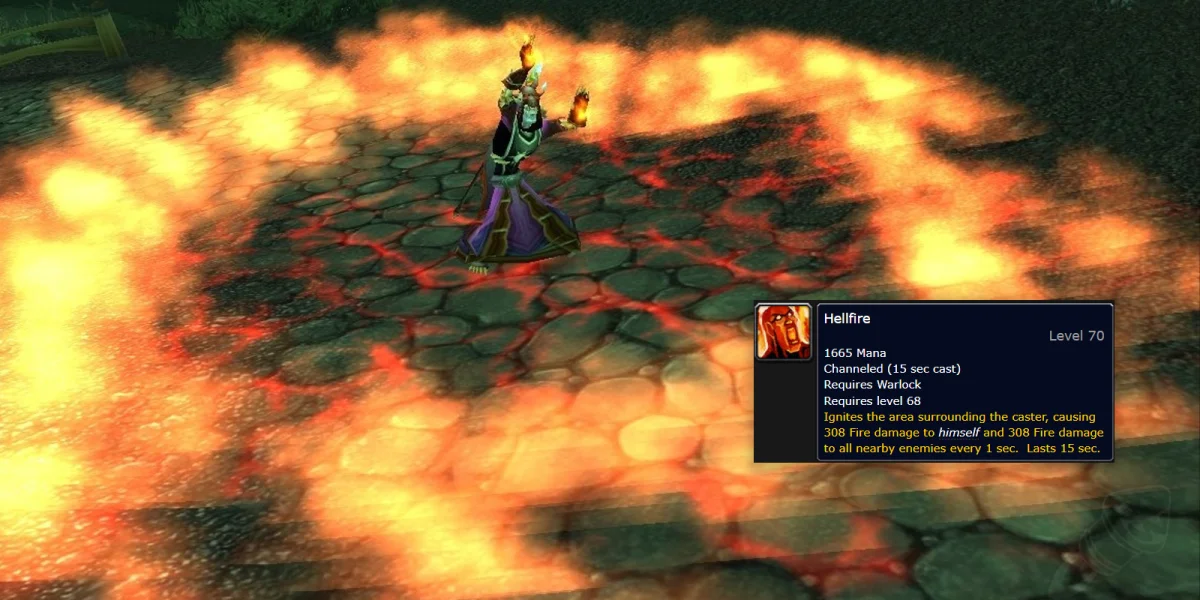
Destruction is built for group content. Where Affliction thrives on solo questing through multi-dotting and sustained pressure, Destruction leans on burst and AoE, both of which shine brightest when there's a tank holding a pack of mobs in place. In dungeon runs, you'll deal competitive single-target damage and bring serious AoE threat through Hellfire.
- High single-target DPS
- High AoE DPS
- Strong group utility through Ritual of Summoning, Create Soulstone, and Create Master Healthstone
- Very few instant-cast or movement-friendly abilities, which hurts your output whenever you need to move
- High threat generation that demands coordination with your tank
- Weaker than other Warlock specs for solo questing

Talent Builds
Two builds work equally well for leveling as Destruction. Both are built around AoE dungeon performance, but they play differently and suit different preferences.
Demonic Sacrifice / Emberstorm (0/21/40)
This build puts 21 points into Demonology to reach Demonic Sacrifice, then invests the remaining 40 points into Destruction to pick up Emberstorm. The goal is simple: maximize Fire damage, spam Hellfire, and sacrifice your demon for a passive damage boost rather than spending time managing a pet.
The Demonology side of this build is entirely in service of reaching Demonic Sacrifice (1/1), which lets you consume your active demon in exchange for a persistent buff. Sacrificing your Imp boosts your Fire damage, which feeds directly into Hellfire. Along the way you'll pick up Demonic Embrace (5/5) for extra stamina, Improved Healthstone (2/2) for stronger healthstones, and additional support talents as prerequisites.
- Improved Shadow Bolt (5/5): A strong early filler talent. Once you hit 64 and learn Incinerate, swap these points into Cataclysm.
- Bane (5/5): Reduces the cast time of Shadow Bolt and Immolate, improving your overall cast efficiency.
- Devastation (5/5): Increases the crit chance of all Destruction spells.
- Shadowburn (1/1): An instant-cast execute available mid-tree. Good for finishing off low-health enemies.
- Intensity (2/2): Reduces pushback while casting, which matters a lot when Hellfire is ticking damage back onto you.
- Destructive Reach (2/2): Extends your spell range and passively reduces threat generated by Destruction spells.
- Improved Immolate (5/5): Increases the upfront damage of Immolate.
- Ruin (1/1): Significantly increases the critical strike damage bonus for Destruction spells. One of the most important talents in the tree.
- Backlash (3/3): Gives incoming physical and spell hits a chance to proc an instant Shadow Bolt. Useful passive that adds free burst.
- Emberstorm (5/5): Increases all Fire damage dealt. This is the talent the whole build is built around.
- Conflagrate (1/1): Consumes Immolate on a target to deal instant Fire damage. Use it as a finisher.
Shadowfury (20/0/41)
The Shadowfury build also targets AoE damage, but it brings two things the Emberstorm build doesn't: flexibility between Shadow and Fire depending on your Destruction talent choices, and Shadowfury itself, which adds a burst AoE stun that can rival or outpace pure Hellfire spam in faster-paced dungeon groups.
- Suppression (5/5): Reduces the chance enemies resist your Affliction spells, keeping your DoTs reliable while leveling.
- Improved Corruption (3/5): Moves Corruption's cast time toward instant, letting you spread it across multiple targets faster.
- Improved Drain Soul (2/2): Increases the mana you recover from Drain Soul.
- Improved Life Tap (2/2): More mana per Life Tap, improving your overall mana efficiency.
- Fel Concentration (2/5): Reduces spell pushback while channeling, helping you sustain Hellfire through incoming damage.
- Nightfall (1/2): Gives Corruption and Drain Life a chance to grant an instant Shadow Bolt proc (Shadow Trance), adding some burst to your rotation.
- Shadow Mastery (3/5): Increases Shadow spell damage, making this build viable when you build Shadow in the Destruction tree.
The first 40 points follow the same path as the Emberstorm build. The 41st point goes into:
- Shadowfury (1/1): An instant AoE that stuns all nearby enemies for up to 3 seconds. Use it to open pulls, buy your tank time to build threat, and weave it between Hellfire casts whenever it's off cooldown. In fast-killing groups, its burst can match or beat straight Hellfire spam.
Shadowburn and Conflagrate are both available in this build and work well as finishers once a pull is winding down.

Abilities to Train
Train These
| Level | Spell |
|---|---|
| 62 | Fel Armor (Rank 1) |
| 62 | Drain Life (Rank 7) |
| 62 | Shadowburn (Rank 7) |
| 64 | Incinerate (Rank 1) |
| 65 | Searing Pain (Rank 7) |
| 65 | Corruption (Rank 8) |
| 66 | Soulshatter |
| 66 | Create Firestone (Rank 5) |
| 66 | Create Spellstone (Rank 4) |
| 67 | Health Funnel (Rank 8) |
| 67 | Curse of Agony (Rank 7) |
| 68 | Ritual of Souls (Rank 1) |
| 68 | Life Tap (Rank 7) |
| 68 | Create Healthstone (Rank 6) |
| 68 | Hellfire (Rank 4) |
| 68 | Death Coil (Rank 4) |
| 69 | Curse of the Elements (Rank 4) |
| 69 | Shadow Bolt (Rank 11) |
| 69 | Fel Armor (Rank 2) |
| 69 | Drain Life (Rank 8) |
| 69 | Immolate (Rank 9) |
| 69 | Rain of Fire (Rank 5) |
| 70 | Shadowburn (Rank 8) |
| 70 | Seed of Corruption (Rank 1) |
| 70 | Incinerate (Rank 2) |
| 70 | Curse of Doom (Rank 2) |
| 70 | Create Soulstone (Rank 6) |
| 70 | Searing Pain (Rank 8) |
Skip to Save Gold
These abilities have situational value but won't meaningfully affect your leveling speed. Skip them if gold is tight.
| Level | Spell |
|---|---|
| 61 | Curse of Weakness (Rank 7) |
| 63 | Drain Mana (Rank 5) |
| 64 | Soul Fire (Rank 3) |
| 67 | Drain Soul (Rank 5) |
| 69 | Curse of Weakness (Rank 8) |
| 69 | Curse of Recklessness (Rank 5) |
| 70 | Soul Fire (Rank 4) |
| 70 | Drain Mana (Rank 6) |
| 70 | Demon Armor (Rank 6) |
Leveling Rotation
Your approach changes based on how many targets you're fighting.
Single-Target
- Apply and maintain your assigned curse. In dungeons, Curse of Agony is the standard choice.
- Apply Corruption, as long as you have at least one point in Improved Corruption.
- Apply Immolate.
- Cast Shadow Bolt or Incinerate as your main filler, depending on whether you're playing Shadow or Fire.
- Refresh DoTs before they fall off.
- Use Shadowburn, Conflagrate, or Death Coil to finish off enemies.
AoE
- Open with Shadowfury if you're in the Shadowfury build. The stun gives your tank time to build threat and sets up the rest of the pull.
- Apply Corruption and Curse of Agony across multiple targets as you move into position.
- Channel Hellfire and keep it going until the pull dies. Re-cast Shadowfury whenever it comes off cooldown.
- Clean up survivors with Shadowburn, Conflagrate, or Death Coil.
Best Gear While Leveling
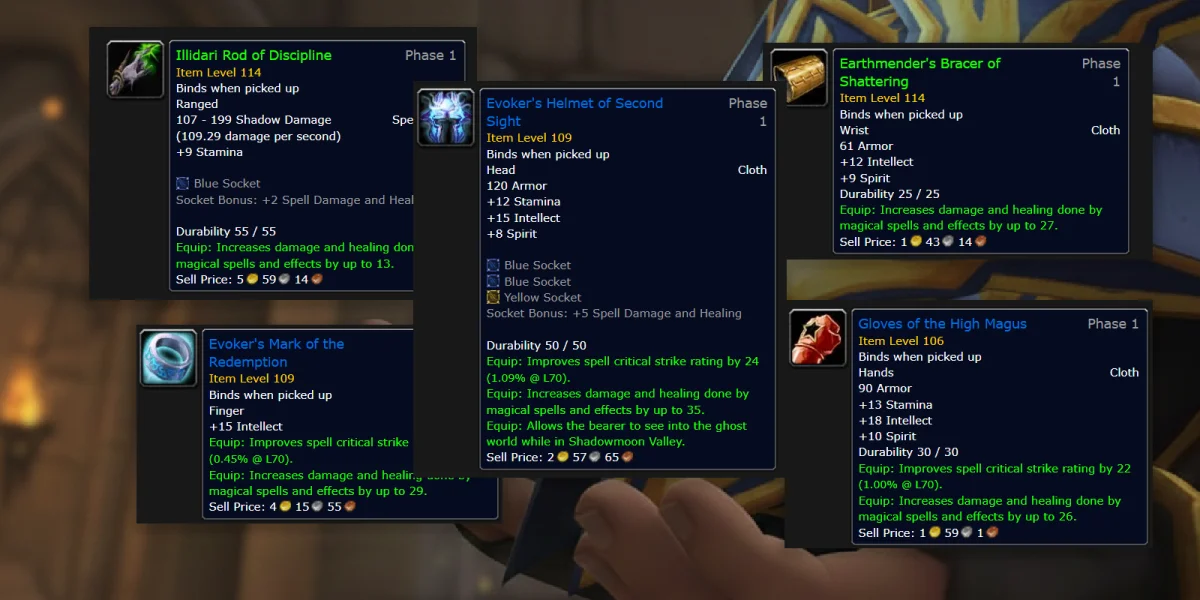
A few quest rewards from Outland are worth going out of your way for. Evoker's Helmet of Second Sight is a strong pre-BiS helmet you'll use until you craft Spellstrike Hood. Spaulders of the Torn-heart is a reliable shoulder piece from the Shadowmoon Valley quest chain.
| Level | Item | Source |
|---|---|---|
| 63 | Terokkar Tablet of Vim | Torgos! quest in Terokkar Forest |
| 65 | Ogre Slayer's Cover | Cho'war the Pillager in Nagrand |
| 65 | Ethereal Sash | Gava'xi in Nagrand |
| 65 | Natasha's Ember Necklace | The Hound-Master quest in Blade's Edge Mountains |
| 67 | Kirin Tor Apprentice's Robes | Destroy Naberius! quest in Netherstorm |
| 67 | Heap Leggings | It's a Fel Reaver, But with Heart quest in Netherstorm |
| 67 | Manastorm Band | Shutting Down Manaforge Ara quest in Netherstorm |
| 67 | Evoker's Helmet of Second Sight | Teron Gorefiend, I am... quest in Shadowmoon Valley |
| 67 | Earthmender's Bracer of Shattering | Escape from Coilskar Cistern quest in Shadowmoon Valley |
| 67 | Illidari Rod of Discipline | Subdue the Subduer quest in Shadowmoon Valley |
| 67 | Gloves of the High Magus | News of Victory quest in Shadowmoon Valley |
| 67 | Evoker's Mark of the Redemption | Dissension Amongst the Ranks... quest in Shadowmoon Valley |
| 68 | Ameer's Impulse Taser | Nexus-King Salhadaar in Netherstorm |
| 68 | Spaulders of the Torn-heart | The Cipher of Damnation - The Third Fragment Recovered in Shadowmoon Valley |
| 68 | Boots of the Nexus Warden | The Flesh Lies... quest in Netherstorm |
| 68 | Starkiller's Bauble | The Horrors of Pollution quest in Netherstorm |
Professions
Tailoring is one of the strongest profession picks for casters in TBC Classic, and Warlocks get especially good value from it. Several pre-BiS and BiS items come from Tailoring recipes, including the Spellstrike Infusion set and Warlock-specific sets like Shadow's Embrace and pieces from Wrath of Spellfire. Some of these require a specific Tailoring specialization to equip, while others just need Tailoring trained to access the set bonuses.
Engineering is worth considering if you want extra utility. Field Repair Bot 110G handles gear repairs mid-dungeon, Goblin Jumper Cables XL gives you a shot at rezzing a fallen party member, and Rocket Boots Xtreme Lite partially compensates for Warlock's lack of a movement speed ability. Ultrasafe Transporters to Gadgetzan and Toshley's Station also add convenient travel options that help with the general tedium of moving around Outland.
Consumables
If you have the gold, these consumables will meaningfully cut down on downtime and push your damage higher:
- Flask of Supreme Power: Increases spell damage for a full hour and persists through death.
- Brilliant Wizard Oil: Apply to your weapon for a temporary spell damage and crit bonus.
- Poached Bluefish or Blackened Basilisk: Food buffs that grant bonus spell damage.
- Super Mana Potion: Emergency mana recovery during long pulls.
- Super Healing Potion: Emergency self-heal to avoid deaths and unnecessary downtime.
Also worth leveling First Aid. Heavy Netherweave Bandages let you heal up between pulls without spending mana, which means less time Life-Tapping and waiting for health to come back.