
Riot Games hasn't released an official macOS version of Valorant, and they don't have plans to change that. But Mac users who want to play aren't completely out of luck. You can run Valorant on your Mac by installing Windows through Boot Camp. Performance won't match a dedicated gaming PC, but this workaround makes the game playable if you're willing to put in some setup time.
Why Boot Camp Is Your Only Option
Riot Games uses Vanguard, their anti-cheat system, which needs kernel-level access to your operating system. Virtualization apps like Parallels Desktop or compatibility layers like Wine can't provide the system access Vanguard requires. If you try running Valorant through these methods, it simply won't work because Vanguard refuses to function in a virtualized environment.
Boot Camp works differently. It creates a genuine Windows installation on a separate partition of your Mac's hard drive. When you boot into Windows through Boot Camp, your Mac runs Windows natively rather than through emulation. This gives Vanguard everything it needs, and Valorant launches without issues.
Hardware Requirements
Not every Mac supports Windows installation through Boot Camp. Before you start, make sure your model appears on this list.
Compatible Mac Models
- MacBook Pro and MacBook Air models from 2012 or later
- iMac models from 2012 or later
- All iMac Pro models
- Mac Mini models from 2012 or later
- Mac Pro models from 2013 or later
- MacBook models from 2015 or later
System Specifications
Your Mac also needs enough resources to run both Windows and Valorant smoothly.
Complete Installation Process
Installation happens in stages: downloading Windows, configuring Boot Camp, installing the operating system, and finally installing Valorant.
- Download Windows 10 ISO file from Microsoft's official website
- Open Boot Camp Assistant from Applications > Utilities
- Create a Windows partition with at least 150 GB of space
- Follow the installation prompts to install Windows
- Install Valorant through the official website
Stage One: Getting Windows 10
Go to Microsoft's official Windows ISO download page. Click the "Download Tool Now" button, and when prompted, choose to download the ISO file directly. Save it somewhere easy to find since you'll need it for Boot Camp setup.
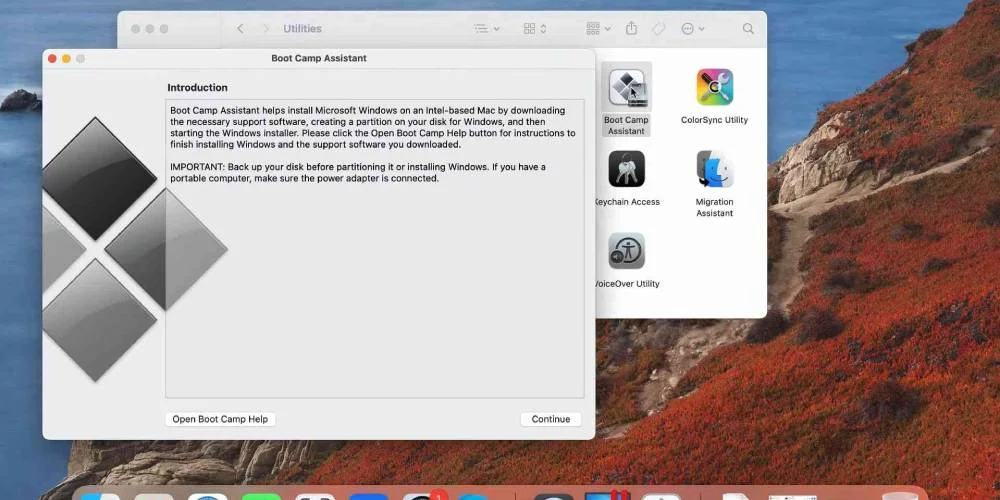
Stage Two: Opening Boot Camp Assistant
Boot Camp Assistant is Apple's built-in tool for managing Windows installations on Mac hardware. Open Finder, go to Applications, then open the Utilities folder. You'll find Boot Camp Assistant there.
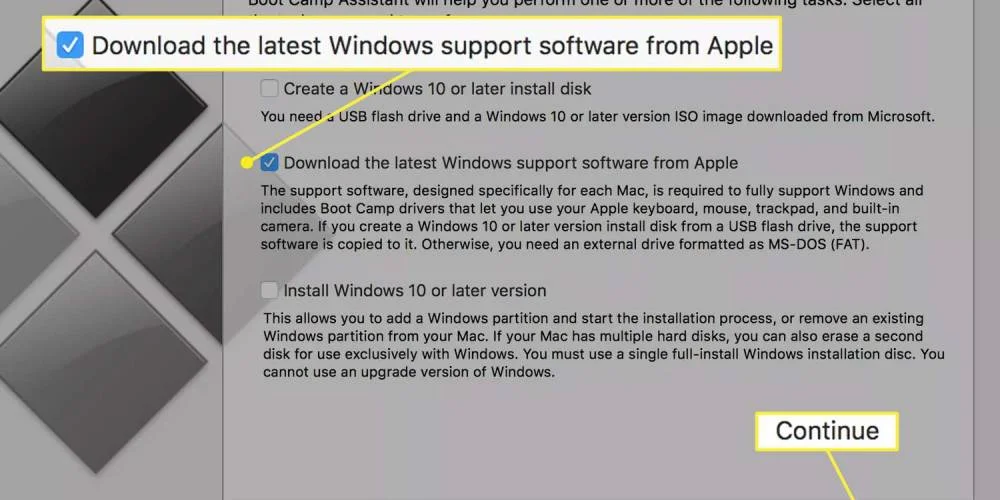
Once it opens, select "Create a Windows 10 installation disk" and follow the initial prompts.
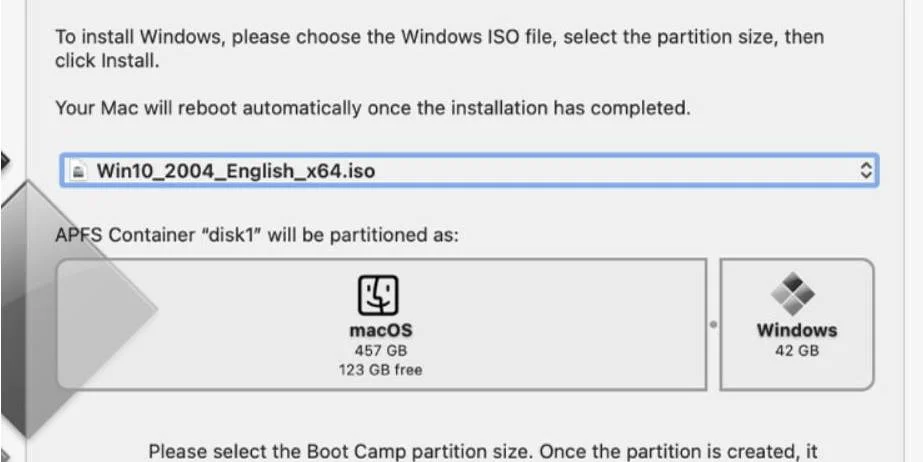
Stage Three: Partitioning Your Drive
Boot Camp Assistant will ask you to set aside space for your Windows partition. This divides your Mac's storage into two sections: one for macOS and one for Windows.
Give the Windows partition at least 150 GB. This sounds like a lot, but Windows itself takes up significant space, and Valorant plus future updates will eat into your storage quickly. Going too small leads to frustrating space problems down the road.
After setting your partition size, click "Install" to begin. Enter your administrator password when asked.
Stage Four: Installing Windows
After partitioning, your Mac restarts and boots into the Windows installation environment. You'll see the Windows setup interface instead of your macOS desktop.
Follow the on-screen instructions to finish the Windows installation. You'll select language preferences, enter product key information if you have one, and wait for everything to finish. The process takes a while depending on your Mac's hardware.
Once Windows finishes installing, your Mac boots into a fresh Windows desktop.
Stage Five: Installing Valorant
With Windows running on your Mac, you can install Valorant through the normal process.
Open a web browser in Windows and go to the official Valorant website. Click the "Play Free" button. Log in with your Riot Games account if you have one, or create a new account first.
After logging in, download the Valorant installer. Run the installation file once it finishes downloading and follow the prompts. The installer downloads additional game files, which can take a while depending on your internet speed.
When installation wraps up, restart your computer as prompted. After restarting, launch Valorant from your desktop or Start menu.
Performance Optimization
Running Valorant through Boot Camp on Mac hardware comes with performance limits. Expect framerates to cap around 60 FPS in most cases. This isn't as bad as it sounds though. Mac displays use LCD technology, which handles 60 FPS differently than older CRT monitors. The visual smoothness at 60 FPS on an LCD feels similar to what 120 Hz delivered on CRT technology, so the experience is more pleasant than the raw numbers suggest.
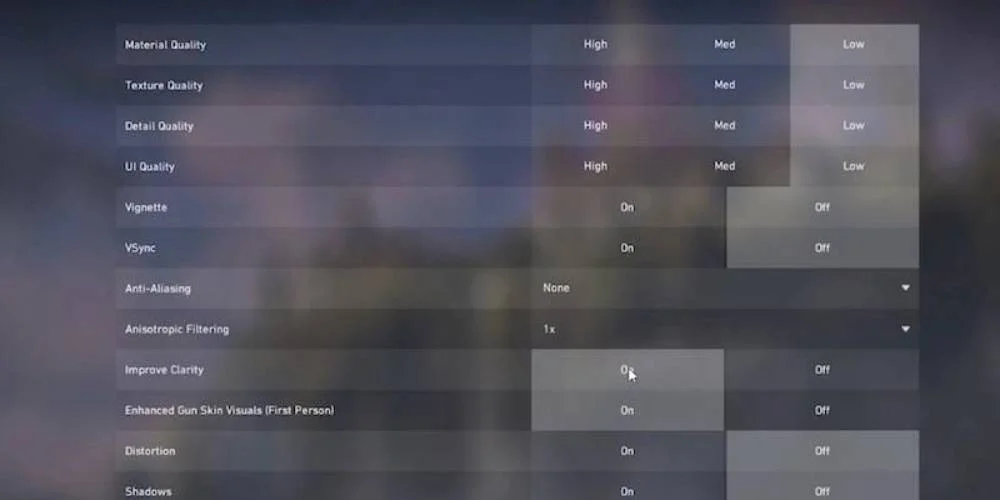
In-Game Settings
| Setting | Recommended Value | Reason |
|---|---|---|
| Display Mode | Full-Screen | Exclusive access to display resources |
| VSync | On | Stabilizes frame delivery and eliminates tearing |
| Resolution | 50% of Native | Better performance and stability |
| Graphics Quality | Low | Maximum performance on Mac hardware |
macOS System Tweaks
When using macOS outside of gaming, certain system features consume resources in the background. Before switching to Windows for a gaming session, consider these changes:
- Turn Off Notification Center and Dashboard - These macOS features use system resources constantly. Disabling them frees up processing power and memory.
- Stop Apps from Launching Automatically - Applications set to launch at startup eat into your resources the moment you boot up. Check your login items and disable anything that doesn't need to start on its own.
- Close Background Apps - Before you start gaming, quit any unnecessary applications running in your menu bar and dock. Every open app consumes RAM and potentially CPU cycles that could go toward game performance instead.
Network Tips for Online Play
Valorant is online-only, and connection quality directly affects how the game feels. If you're dealing with high latency or connection problems, a VPN might help by giving you better routing to game servers. This is especially useful in regions with restricted access or network paths that cause elevated ping.
Troubleshooting Common Issues
- Boot Camp provides native Windows installation
- Vanguard anti-cheat functions properly
- Game launches and runs without compatibility issues
- 60 FPS is achievable on most Intel Macs
- Not compatible with Apple Silicon Macs
- Requires significant disk space commitment
- Performance below dedicated gaming hardware
- Dual-boot system management overhead
Final Thoughts
Playing Valorant on a Mac through Boot Camp takes real preparation and means accepting some performance tradeoffs compared to dedicated gaming hardware. You need substantial disk space, time for installation and setup, and you'll be managing a dual-boot system going forward. For Mac users who want to play Valorant without buying separate gaming hardware though, Boot Camp gets the job done.
Your results will vary based on your specific Mac model, its age, and what hardware it has inside. Newer Macs with dedicated graphics cards will perform noticeably better than older models or those with integrated graphics.