
Week 3 of Season 3 Trials is live in ARC Raiders. This guide covers every challenge in detail, including what you're doing, where to go, and how to hit three stars without burning through your resources.
What Are Trials in ARC Raiders?
Trials are ARC Raiders' unofficial rank system, unlocked at player level 15. Every week you get five new challenges, and your job is to earn points by completing them and climb a leaderboard of 100 players at your rank.
Points, Stars, and Rewards
Each Trial tracks progress through a point threshold system with three milestones:
| Stars | Points Required | Reward |
|---|---|---|
| 1 Star | 1,000 points | First reward tier |
| 2 Stars | 2,500 points | Second reward tier |
| 3 Stars | 4,000 points | Third reward tier (maximum) |
Three stars is the ceiling per Trial, and that's where the best loot lives: blueprints, weapons, and gadgets. Three starring all five challenges gives you the best shot at finishing near the top of the leaderboard.
How the Leaderboard Works
Every week you're placed in a pool of 100 players at your current rank. Your combined point total across all five Trials sets your position. At the end of the week:
- Top 20 players: Promoted two ranks
- Positions 21-50: Promoted one rank
- Bottom 20 players: Demoted one rank
Three starring everything with decent points should put you comfortably in the top 20.
Week 3 Trials Overview
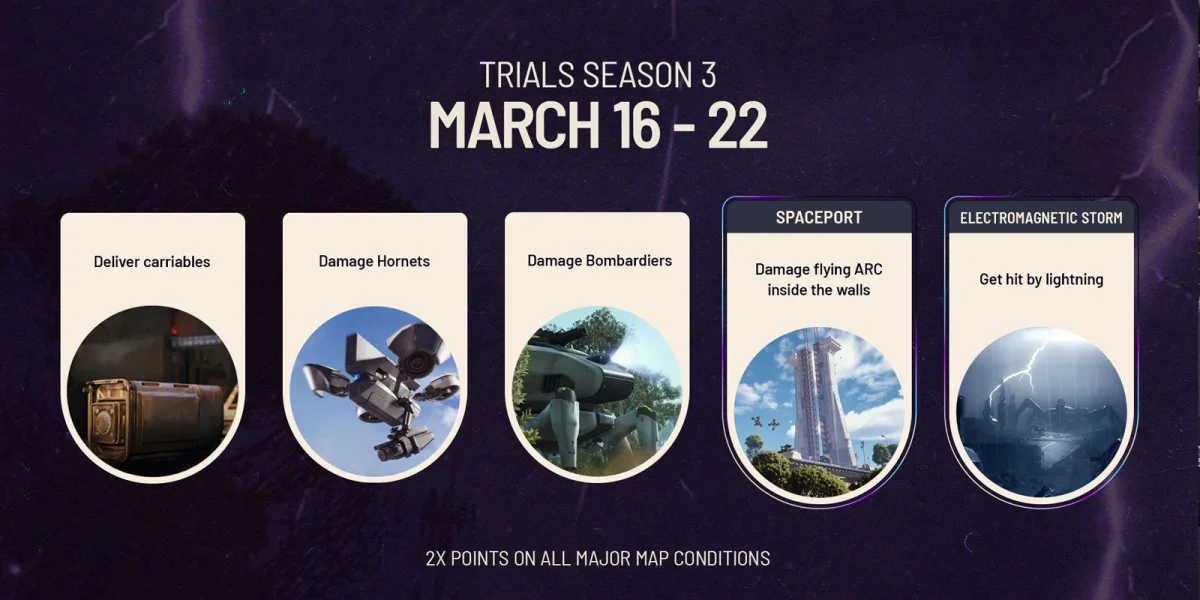
This week's five challenges are: Get Hit by Lightning, Damage Hornets, Damage Flying ARC Enemies Inside the Spaceport Walls, Damage Bombardiers, and Deliver Carriables. Get Hit by Lightning and Damage Flying ARC Inside the Spaceport Walls are both new this season. The other three carry over from previous weeks.
Get Hit by Lightning
Most Trials have you hunting ARC. This one flips that around. During an Electromagnetic Storm map condition, you need to position yourself in the path of lightning bolts and take the hits until you've stacked enough points for three stars.
How Much Each Strike Is Worth
Each bolt awards roughly 900 to 1,050 points depending on where you're standing within the lightning's radius. You'll need four to five strikes to reach 4,000 points.
Reading the Lightning
Lightning doesn't land randomly. A shimmering blue circle appears on the ground a moment before each bolt strikes, giving you a clear spot to walk into. Get inside the circle and stand still.
- Load into any map with Electromagnetic Storm active.
- Stay on the surface. Lightning only strikes above ground, so don't retreat underground.
- Watch for the blue ground circles and move into them.
- Stand still and take the hit.
- Heal up and repeat until you hit three stars.
- Extract safely.
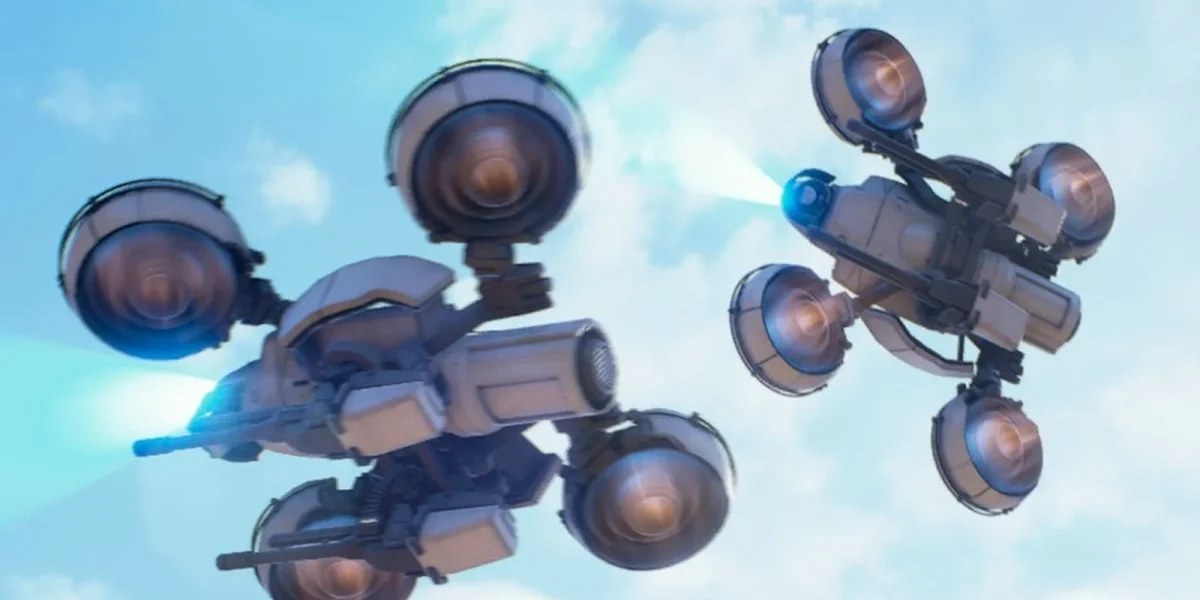
Damage Hornets
Hornets are small flying ARC units found on every map in the game. For this Trial, damage or destroy as many as possible until you reach 4,000 points.
Where to Find Them
Hornets show up on every map, so there's no specific location requirement. The best conditions for finding them in higher numbers are Night Raid, Electromagnetic Storm, and the Hidden Bunker event. They tend to patrol alongside Wasps, so look for both moving together.
Killing Hornets Quickly
Two accurate shots to the back propellers will drop a Hornet. If you can't get that angle, strip the armor plates on the front propellers first to open them up. Two tools make a real difference for faster clearing: Seeker Grenades are great for hitting multiple flying targets at once, and Hullcrackers are very effective against ARC units. With both available, clearing 10 to 15 Hornets per run is realistic, which could be enough to earn three stars on this Trial in a single raid.
- Load into a Night Raid, Electromagnetic Storm, or Hidden Bunker event for better Hornet density.
- Use Seeker Grenades and a Hullcracker if you have them.
- Look for Hornet and Wasp pairs and work through them systematically.
- Aim for the rear propellers to drop them fast.
- Keep going until you hit 4,000 points, then extract.
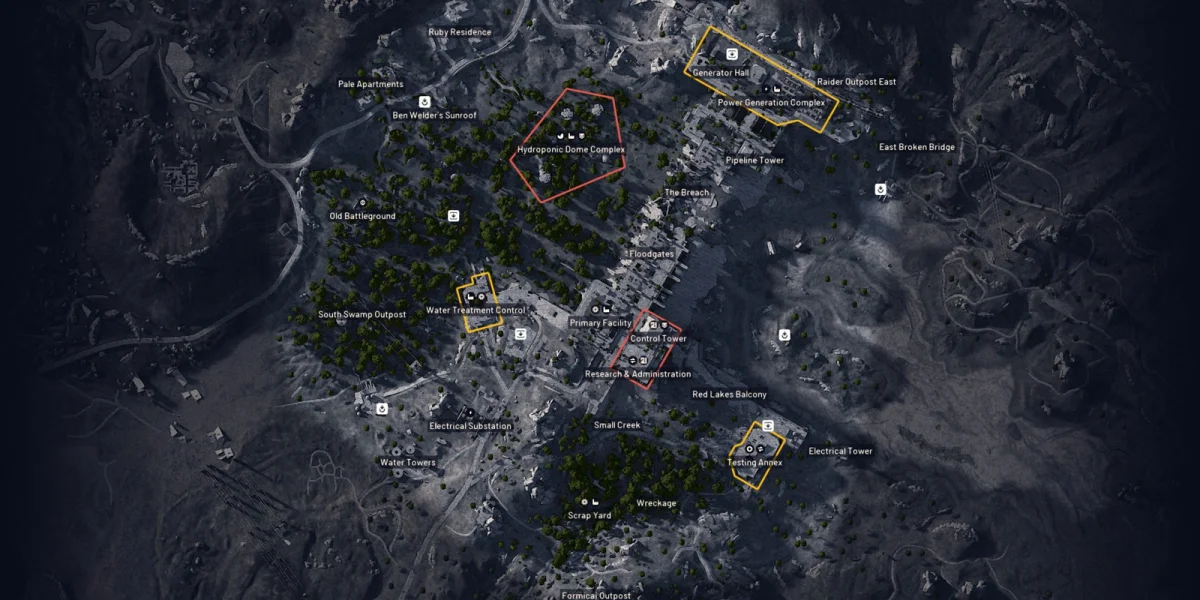
Damage Flying ARC Inside the Spaceport Walls
New to Season 3, this Trial requires you to damage flying ARC enemies specifically within the Spaceport wall boundaries. Damage dealt outside those walls doesn't count, so set up inside and stay there for the duration.
Which Enemies Count
All flying ARC types inside the walls contribute to your point total: Snitch, Spotter, Wasps, Hornets, Fireflys, and Rocketeers. Rocketeers give the most points per kill, and several spawn inside the walls, so target them first. Once they're cleared, fill out the rest of your count with Wasps and Hornets.
Where to Set Up
Height gives you the best coverage inside the walls. Your main options are the Arrival building roof (solid sightlines across the interior), the Departure building roof (comparable coverage, good fallback), the Launch Tower roof (excellent range, but very high player traffic), and the Control Tower roof (longer range, same PvP risk as the Launch Tower). The Arrival and Departure rooftops are the safer picks to avoid player confrontations. Both towers give you better range, but they attract a lot of attention from other players.
- Load into Spaceport, ideally during a Major Map Condition for double points.
- Get inside the wall boundaries and stay there throughout the raid.
- Take a position on the Arrival or Departure building roof.
- Go after Rocketeers first - they're worth the most points and several spawn within the walls.
- Follow up with Wasps and Hornets to fill out your point total.
- Extract once you've hit three stars.
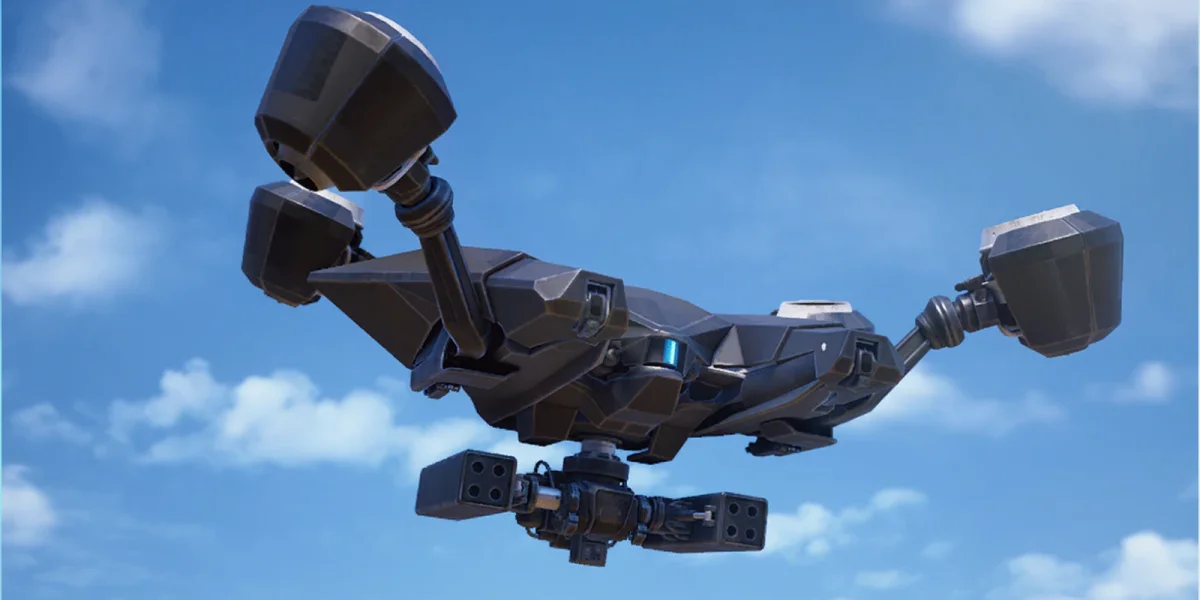
Damage Bombardiers
Bombardiers are among the tougher ARC enemies in the game. Completing this Trial requires you to engage them during a 2x Trials enabled map condition until you reach 4,000 points.
Where Bombardiers Spawn
Bombardiers don't appear on Stella Montis, so skip that map. Your two best options are Blue Gate (recommended) - near Raider's Refuge and the outer gates near Checkpoint - and Buried City, specifically Marano Park and the parking lot near the Hospital.
How Bombardiers Work
Understanding the attack pattern makes this fight far more manageable. Bombardiers send out Spotters first - smaller ARC units that track your location and relay data back to the Bombardier. Once Spotters have you pinged, the Bombardier's mortar strikes start landing accurately on your position. Take out the Spotters as they're deployed and the Bombardier loses its targeting. Its mortars become inaccurate, it fires less frequently, and the fight gets considerably easier.
- Load into Blue Gate or Buried City. Blue Gate is the better pick.
- Find the Bombardier at one of the spawn locations listed above.
- Destroy Spotters as they're deployed before focusing on the Bombardier itself.
- Get under overhead cover - mortars come from above, so a roof or solid overhang cuts your incoming damage significantly.
- Hit the Bombardier with Wolfpack Grenades or a Hullcracker.
- Run additional raids until three stars are done, then extract.
Deliver Carriables
Delivering Carriables is the most demanding Trial this week. You'll pick up field crates and deposit them at Field Depots, or carry batteries to substations, until you've made enough deliveries for three stars. Expect to need roughly 6 to 8 crates total.
Where to Find Carriables
Field crates are available on every map except Stella Montis. Batteries can be delivered there if you prefer that option. For crates, Dam Battlegrounds is the strongest pick. Crates are spread across the outskirts in decent numbers, and deliveries occasionally reward useful loot on top of your Trial points. Outside of Dam Battlegrounds, use the map you know best - knowing where your nearest Field Depots are matters more than chasing spawns somewhere unfamiliar.
What Carrying a Crate Does to You
Picking up a carriable slows your movement and makes you noticeably louder. That combination makes you an easy target for ARC patrols and other players alike. Plan your route to the deposit point before picking anything up, and avoid open ground while you're moving.
- Load into any map except Stella Montis (or Stella Montis for batteries). Dam Battlegrounds is the recommended pick.
- Load in during Night Raid for double points.
- Find a Field Crate or Battery.
- Plan your route to the nearest Field Depot or substation before picking it up.
- Pick it up and move directly to the deposit point, staying off open ground.
- Deposit it and find the next one immediately.
- Repeat until three stars, then extract.
Week 3 Trials at a Glance
| Trial | Best Location | Key Tip | Best Map Condition |
|---|---|---|---|
| Get Hit by Lightning | Any surface area | Stand in the blue circle; bring healing | Electromagnetic Storm (required) |
| Damage Hornets | Any map | Use Seeker Grenades + Hullcracker | Night Raid, EM Storm, or Hidden Bunker |
| Damage Flying ARC (Spaceport) | Arrival/Departure rooftops | Rocketeers first for most points | Any Major Map Condition |
| Damage Bombardiers | Blue Gate or Buried City | Clear Spotters first; stay under cover | 2x Trials enabled map condition |
| Deliver Carriables | Dam Battlegrounds | Night Raid for 2x; bring a squad | Night Raid strongly recommended |
Three starring all five puts you in good shape for a top 20 leaderboard finish and a double rank promotion at the weekly reset. The two new Trials this season are both straightforward once you know the mechanics, and neither one needs top tier gear to clear.