Getting to Mogu'shan Palace
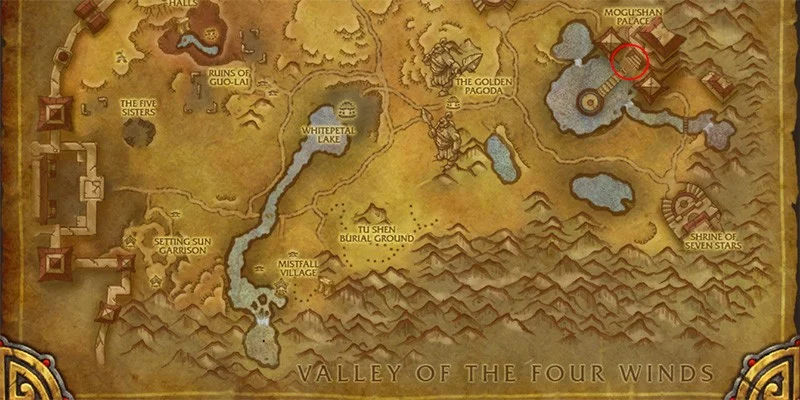
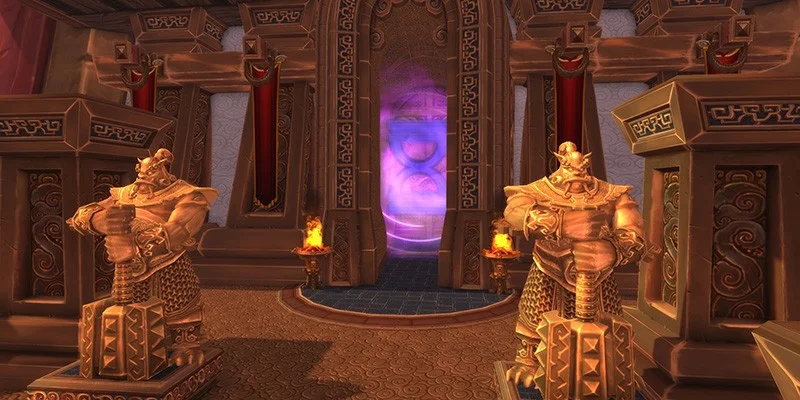
Mogu'shan Palace is located in the Vale of Eternal Blossoms. The entrance coordinates are /way 80.5 33.2, positioned at the top of a staircase. Both factions have convenient access to this dungeon: Horde players use the flight path from Shrine of Two Moons, while Alliance players use the flight path from Shrine of Seven Stars. These capital cities are positioned very close to the dungeon entrance, making them the most efficient travel options.

Challenge Mode Requirements
To complete Mogu'shan Palace Challenge Mode, you must defeat 20 total enemies (trash mobs), all three Trial of the King bosses (Kuai the Brute, Ming the Cunning, Haiyan the Unstoppable), Gekkan, and Xin the Weaponmaster.
Understanding Challenge Mode Mechanics
Item Level Normalization
Challenge Mode dungeons use the same layout and encounters as Heroic versions, but with critical differences in player power. All equipped gear scales down to item level 463. Any items above item level 463 are reduced to match the stats of item level 463 gear. This normalization creates consistent difficulty regardless of your actual gear.
Hit Percentage Exception
Hit percentage works differently than other stats. If you are hit capped before entering, you remain hit capped after scaling. The system adjusts your other secondary stats to compensate for this. This means hit-capped players maintain accuracy advantages.
Opening Trash Pull Strategy
Despite appearing to offer multiple paths, Mogu'shan Palace is effectively linear. Side rooms contain no required enemies, making the optimal route straightforward: follow the main path while avoiding or skipping unnecessary packs.
You have two options for the initial section leading to the first boss:
- Standard Approach: Pull the first two trash packs
- Advanced Approach: Pull the first three trash packs together
The three-pack pull is more difficult to execute but provides additional time buffer for the rest of the dungeon if done correctly. This strategy requires practice to master.

Enemy Abilities in Opening Section
The trash composition includes two mobs at the hallway entrance, four mobs in the middle of the hallway, and five mobs at the end of the hallway. Each group contains one Stormsinger (also referred to as Storm Caller in some contexts). Your group should either burst down the Stormsinger quickly or use crowd control to neutralize them.
Stormsingers/Storm Callers cast Lightning Storm (area damage effect that forces movement), Shock (banishes a player for 6 seconds, removing them from combat), and Lightning Bolt (long cast time, deals heavy damage if not interrupted). Iron Moss can stun your tank during combat setup, while Rib Crushers use Whirlwind ability that damages nearby players.
Trial of the King
Early Boss Activation
You can trigger the first boss encounter before clearing all trash, provided the remaining enemies are under control. The boss activation sequence works as follows: A player enters the center of the room, approximately 20-25 seconds of roleplay occurs, then the boss becomes attackable.
This 20-25 second window allows you to continue dealing with trash while the activation sequence plays out. To maximize efficiency, have someone trigger the boss while trash is nearly dead but still controlled. The first boss is non-threatening enough to safely initiate early. Pull Haiyan toward the stairs and through the spectators to save positioning time.
Kuai the Brute Mechanics
Mu'Shiba, Kuai's pet companion, casts Ravage which tackles a random player, dealing Physical damage every second for 10 seconds. The tackled player is pinned to the ground during Ravage. Defeating Mu'Shiba immediately ends the Ravage effect. Mu'Shiba stops fighting after Kuai is defeated.
Kuai's Shockwave is a frontal cone attack that launches players into the air. Players take Physical damage based on fall distance. The tank should face Kuai away from the group.
Ming the Cunning Mechanics
Whirling Dervish summons entities that move randomly around the arena, inflicting heavy Nature damage to players in their path and knocking back affected players. Ranged players must dodge these.
Magnetic Field causes Ming to spin rapidly, creating a pulling vortex. This pulls nearby creatures into the center and deals Nature damage every second while in the vortex. It affects players at close range but not at maximum range. Lightning Bolt deals heavy Nature damage to current tank target and hits hard enough that tanks should not remain at low health.
Haiyan the Unstoppable Mechanics
Conflagrate lights a random player on fire with a large flame effect, dealing Fire damage every second and disorienting the victim. When Conflagrate ends, flames jump to any nearby creature. Strategy: Spread out initially so the first Conflagrate doesn't chain to others.
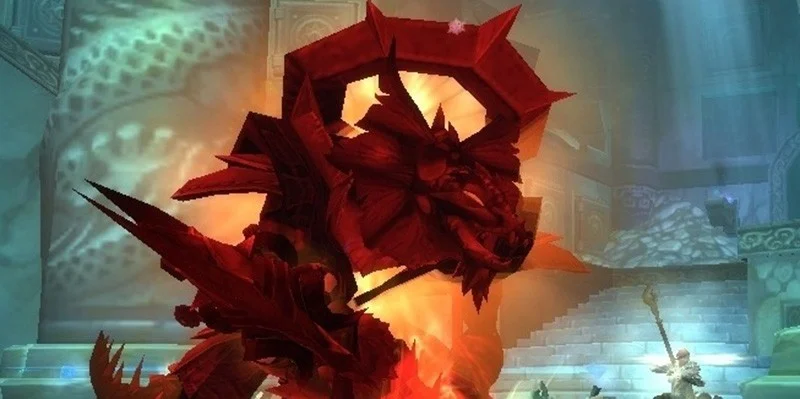
Meteor hurls a fiery boulder at a random player, dealing massive Fire damage in a 10-yard radius upon landing. Damage is split evenly among all players in the area. Strategy: Stack together when Meteor is cast to split the damage. Despite visual effects, the meteor does not leave persistent fire on the ground—you can continue standing in the impact location.
Traumatic Blow deals 200% weapon damage as Physical damage to the tank and reduces healing received by the victim by 50% for 5 seconds.
Glintrok Scout Section
After defeating the first boss, you will encounter a Glintrok Scout patrolling ahead. Triggering the Scout initiates extended combat that persists until specific actions are taken.
Optimal Scout Strategy
The Scout should be triggered as early as possible, causing it to move further along its path. However, aggro-ing the Scout locks you in combat, so use one of these approaches:
If no one in your group has combat reset abilities, one player aggros the Scout, that player intentionally dies to the pack at the bottom of the stairs, the group waits for the Scout to move on, and once out of combat, resurrect the dead player.
Basement and Invisibility Run
After falling through to the basement, wait at the designated drop point before proceeding. The healer should drink (restore mana) while the group prepares. A Mage will set up the invisibility run.
Invisibility Potion Run
This section requires Invisibility Potions for the entire group. The invisibility run allows you to skip a large trash section.
- Wait until all players are out of combat
- Move to just before the aggro range of the next pack
- Mark the aggro threshold during practice runs to learn the safe positioning
- One player uses Stampeding Roar (or similar speed boost) to initiate
- All players use Invisibility Potions simultaneously
With standard 18-second Invisibility Potions, you can barely reach the end of the hallway. Faster players should wait for the tank to jump over the railing first, then follow immediately after the tank clears the railing. Practice this jump before attempting timed runs—everyone must clear it on the first try.
Alternative: Rogue Shroud
If your group has a Rogue with Shroud of Concealment, you can skip multiple trash packs beyond what Invisibility Potions alone allow. Shroud provides area-of-effect stealth for the entire party. This is superior to Invisibility Potions when available. Mogu'shan Palace has multiple skip opportunities, making Shroud exceptionally valuable.
Gekkan Fight
Landing and Initial Setup
When you land in Gekkan's room after jumping the railing, all players take fall damage immediately, the tank lands directly on a pack of enemies, and the healer has no heal-over-time effects active on anyone.
Stacking behind a pillar forces all enemies to come to your group. This enables effective cleave and area-of-effect damage. However, this positioning prevents effective use of crowd control abilities. One player who doesn't position correctly may cause a mob to remain at range temporarily.

Priority Interrupts
Gekkan's encounter includes multiple caster enemies that must be interrupted consistently:
| Enemy | Priority | Key Ability | Effect |
|---|---|---|---|
| Glintrok Oracle | Highest | Cleansing Flame | Heals all allies within 60 yards for a large amount |
| Glintrok Hexxer | Medium | Hex of Lethargy | Heavy Shadow damage, reduces casting speed by 50% for 20 seconds |
| Glintrok Ironhide | High | Iron Protector | Reduces damage taken by all allies within 5 yards by 70% |
With three casters active, consistently interrupting everything is challenging. Use stun rotation abilities (Shock Wave, Remorseless Winter) to create interrupt windows. Employ Grounding Totem (Shaman) to absorb casts. Once the Ironhide dies, you have two interrupts available for the Oracle and Hexxer—much more manageable.
Gekkan's Mechanics
Reckless Inspiration: Gekkan casts this buff on one of his subordinates, increasing target's haste by 40%, making target immune to long-duration crowd control, and increasing damage taken by the target by 25%. This effect stacks.
Enrage Mechanic: When any subordinate dies, Gekkan casts Reckless Inspiration on himself. This stacks with each death. Inspiring Cry (Death Effect): When Gekkan dies, he grants Reckless Inspiration to all remaining subordinates. This is generally not relevant as you should kill all subordinates first.
Avoid putting significant damage into Gekkan while subordinates are still alive. His self-buff stacks make him increasingly dangerous with each subordinate death. He becomes much easier to damage once all subordinates are dead (taking amplified damage from multiple buff stacks). He also attacks much more quickly due to haste increases.
Elevator Sequence
Once Gekkan dies, move him toward the middle of the room and position closer to the elevator. This saves time reaching the elevator when it arrives. After defeating Gekkan, an elevator automatically activates on a fixed timer.
Patrol Check
A patrol walks around the circular balcony. Check for this patrol's position before Gekkan dies. In unlucky situations, the patrol can be directly between you and the elevator.
If Patrol Blocks Path: Run past the patrol, use any available crowd control (roots, hard CC), and get onto the elevator before it leaves. If Patrol is Clear: Use hard crowd control on the two static mobs near the elevator to keep you out of combat. The healer can drink while riding the elevator up.
Upper Trash Section and Patrol Timing
The section after the elevator contains some of the most significant random elements in any Challenge Mode dungeon.
Four-Mob Patrol (Major RNG Element)
A pack of four enemies patrols from near the entrance of the square hallway into a corner: Two Swiftblades and Two Flameseekers. This patrol can be in vastly different positions when you arrive:
- Best Case: The patrol is in the far corner when you enter. You can skip it entirely, saving approximately one minute.
- Worst Case: The patrol is directly in your path, requiring you to fight it.
They are not required for the enemy count (you only need 20 enemies total). However, there is no other convenient way to skip them unless you have Shroud of Concealment. If you have a Rogue with Shroud, you can skip this pack every time.
Flameseeker Abilities: Molten Barrage is a channeled ability that must be interrupted. If you have excess interrupt capacity, also interrupt their regular nuke casts to reduce group damage.
Partial Clear Strategy
You can kill only the two Flameseekers (who have the dangerous channeled cast) and drag the two Swiftblades along to the next packs. This is faster than killing all four. However, there is a second patrol consideration: another patrol walks across the hallway between the four-mob pack and the final boss area.
Final Trash Before Xin
Two High Guards in Hallway
Pick up the two static High Guards in the corridor. Ideally, you would still have two Swiftblades being dragged from the previous pack. Use Ring of Frost to slow the trailing mobs while the tank prepares for the next pull.
Four-Mob Pack in Final Room
The pack in the boss room contains one Flameseeker (priority target) and multiple other enemies. Tank gathers the four-mob pack from the room. This combines with the two hallway High Guards (and potentially Swiftblades). Total: 5-7 enemies simultaneously. Focus damage on the Flameseeker first while gathering the pack safely. Interrupt the Flameseeker consistently.
Stun Rotation for Safety
Once all enemies are gathered, use area-of-effect stuns in sequence (example: Shock Wave followed by Remorseless Winter). Tank timing: If your tank has a stun, they should use it at exactly the right moment for their survival. DPS should time their stuns to chain after the tank's stun.
The three High Guards apply a stacking armor debuff to the tank. The tank will need to kite more than normal until enemies start dying, rather than standing and tanking.
Four Guardian Final Pull
When the previous mobs are dead or nearly dead, pull the four Guardian enemies near the boss. These have a long-range pounce ability that they cast on random players. Unless the entire group is stacked together, the Guardians will jump around constantly, making efficient DPS impossible.
Xin the Weaponmaster
Pre-Fight Preparation
Ideal Timing: You should finish the final trash pack and engage Xin with approximately 1 minute 30 seconds remaining on the timer. If you have less time (example: 1 minute 10 seconds), you must execute a very clean Xin fight. The fight is chaotic enough that relying on perfection is risky. If possible, allow the healer to drink before pulling.

Xin's Ability Sequence
Xin uses the same mechanics as Heroic Mode but with increased lethality. His abilities always activate in the same sequence:
Xin's Phases
Phase 1: Whirlwinding Axes animate from his arsenal and deal heavy Physical damage to enemies within 6 yards while knocking players back. These activate immediately at fight start.
Phase 2: Blade Traps activate at 66% remaining health. Streams of blades cross the room and deal moderate Physical damage every 0.5 seconds to players caught in their path. Blade traps always appear in the same locations. Identify safe standing positions during practice attempts.
Phase 3: Death From Above activates at 33% remaining health. Mounted crossbows on walls activate and deal Physical damage to random players every 1 second. This is unavoidable damage that increases healing requirements.
Throughout Fight: Ground Slam is a frontal cone attack with heavy Physical damage that reduces armor by 25% for 20 seconds (stacks). Circle of Flame animates a staff that circles a random enemy in flame, detonates after completion, deals heavy Fire damage and knocks enemies into the air. Inciting Roar is a bellowing roar that activates arsenal weapons and deals damage to all enemies.
Secret Weapon Achievement Mechanic
This is from the Heroic achievement "What Does This Button Do?" but can be used in Challenge Mode. Below 33% Health, gems activate in the Northwest and Southeast corners of the room. If two players activate both gems within 3 seconds of each other, a laser light show triggers. The lasers deal 10% damage to Xin and also deal minor damage to all players in the room.
This is a small damage gain. It is probably not worth the risk for Challenge Mode gold times, but can be executed safely if done carefully.
Group Composition Recommendations
Essential: Rogue with Shroud of Concealment
Rogues are invaluable in this Challenge Mode due to Shroud of Concealment providing area-of-effect stealth for the party. Mogu'shan Palace has more than one area where skipping is necessary or highly beneficial, and Invisibility Potions alone are insufficient to skip everything.
Combat Reset Classes
Your group benefits significantly from having someone who can deal with the Glintrok Scout effectively: Rogue (Vanish, Distract), Hunter (Feign Death, Deterrence), Mage (invisibility mechanics), or Night Elf (Shadowmeld racial).
If your group has no combat reset options, one player must sacrifice themselves by dying to the Scout. This creates downtime for resurrection and is significantly less efficient than proper combat reset.
Bloodlust Effect Required
Bring one of the following: Shaman (Bloodlust / Heroism), Mage (Time Warp), or Beast Mastery Hunter (Primal Rage pet ability).
Class-Specific Tips and Optimizations
Mogu'shan Palace Challenge Mode demands precise execution from every class. Understanding your class-specific utilities can mean the difference between a comfortable gold run and a failed timer. The 12-minute timer is one of the tightest in the Challenge Mode roster, comparable only to Stormstout Brewery, so every optimization matters.
Death Knight
Gekkan Fight
Death Knights bring exceptional mob control to the most mechanically demanding encounter in the dungeon. Gorefiend's Grasp serves as a powerful grouping tool that stacks all mobs quickly during the encounter, making area-of-effect damage and interrupt rotations significantly easier to coordinate. Death Grip allows you to pull the dangerous Glintrok Oracles directly into the group, eliminating the need for melee to chase them down for interrupts.
Blood Death Knight - Opening Pull
The opening pull represents one of the most challenging moments in the entire dungeon. Blood Death Knights excel here with the Army of the Dead and Gorefiend's Grasp combination, which can pull all trash before the first boss together effectively. This aggressive start builds crucial time buffer for the rest of the run.
Hunter
Hunters represent one of the most valuable classes for Mogu'shan Palace Challenge Mode. Their utility toolkit addresses several critical mechanics throughout the dungeon.
Hunters excel at triggering the Glintrok Scout early without consequences. The Scout encounter requires careful handling, and Hunters can safely aggro the enemy then drop combat immediately. Deterrence provides a defensive cooldown for the initial Scout contact, while Feign Death allows the Hunter to drop combat after aggroing the Scout, enabling the group to position properly for the invisibility skip.
Paladin
Paladins contribute critical defensive utility during the Trial of the King encounter. Hand of Protection can be used on the player targeted by Mu'Shiba's Ravage during the Kuai fight. This external defensive prevents or significantly mitigates Ravage damage, which can otherwise threaten to kill players quickly.
Rogue
Rogues are virtually essential for optimal Mogu'shan Palace Challenge Mode runs. Their unique toolkit solves multiple routing challenges.
First Room
Distract can be used on the patrol if your group wants to avoid it, potentially saving significant time during the opening sequence.
Post-Elevator
Distract or Shroud of Concealment proves very useful if the patrolling pack is in an unfavorable position after the elevator. The patrol timing creates RNG elements that Rogues can mitigate effectively.
Gekkan Fight
Smoke Bomb forces casters to move to the group even without breaking line of sight, making interrupts dramatically easier. This single ability trivializes one of the most mechanically demanding aspects of the encounter.
Mage, Hunter, and Rogue
All three classes can pull the Glintrok Scout and reset combat with their respective abilities. Feign Death, Vanish, and invisibility each provide solutions to the Scout mechanic. This capability is very valuable for smooth progression, as it allows flexible positioning for the critical invisibility skip that follows.
All Pet Classes
Challenge Mode Rewards
Completing Mogu'shan Palace Challenge Mode with a Gold time grants significant rewards that extend beyond the immediate satisfaction of beating the timer.
- Achievement: Mogu'shan Palace: Gold
- Teleport Spell: Path of the Mogu King
The teleport spell allows on-demand teleportation to the dungeon with an 8-hour cooldown. This proves useful for world traversal and allows easy returns to the dungeon for time improvement attempts. Many players continue running Challenge Modes after obtaining gold medals simply to improve their personal bests and compete for realm records.
Strategy Summary for Time Management
Despite having one of the tightest timers at 12 minutes, this dungeon allows for a reasonable margin of error when executed properly. Understanding where to build time buffers and where to maintain aggressive pacing determines success or failure.
Time Buffer Strategies
- Master the three-pack opening pull for extra time buffer
- Execute aggressive trash pulls near the end after the elevator
- Learn to skip the four-mob patrol when RNG permits (saves approximately 1 minute)
Expected Time Losses
Things will go wrong during runs – this is normal and expected. The demonstrated strategy accounts for mistakes and still completes gold. Aim to reach Xin with 1:30 remaining for comfortable completion. With 1:10 remaining, completion is still possible but requires clean execution on the final boss.
Practice Priorities
Focus your practice time on these critical elements that most commonly cause run failures:
- Three-pack opening pull (difficult but valuable)
- Gekkan interrupt rotation (most mechanically demanding)
- Railing jump consistency (everyone must succeed first try)
- Final trash stun rotation (safety-critical)
- Xin positioning for blade traps (predictable but requires practice)
The three-pack opening pull represents the highest-risk, highest-reward element of the entire run. Groups that master this pull create enough time buffer to survive mistakes elsewhere. Conversely, groups that struggle with the opening often find themselves racing desperately against the clock for the remainder of the dungeon.
Gekkan's interrupt rotation demands the most coordination of any encounter in Challenge Mode. Five enemies cast dangerous abilities simultaneously, requiring perfect interrupt assignments and execution. This fight alone eliminates many groups from gold contention.
The railing jump occurs during the invisibility skip sequence. Every member must successfully jump the railing on their first attempt. A single failure breaks invisibility, aggros dangerous packs, and typically ends the run. Practice this jump repeatedly until it becomes muscle memory.
Final trash packs before Xin hit extremely hard. Coordinated stun rotations allow safe pulls that would otherwise threaten wipes. Groups must assign stuns carefully and execute the rotation precisely.
Xin's blade trap positioning follows predictable patterns, but groups must practice identifying safe zones quickly while maintaining damage uptime. The encounter punishes hesitation and rewards confident movement.

