
Introduction: Welcome to the 3v3 Gauntlet!
Picture this: it's match point. Round 5. The circle is closing in on Ecopoint: Antarctica. It's 1v1. Your palms are sweaty, your heart is pounding like Reinhardt charging a wall. Every cooldown matters, every shot counts. You land the final blow. VICTORY! That intense, focused pressure? That's the magic of 3v3 Competitive Elimination. Forget the sprawling chaos of a 5v5 push map for a moment. This isn't just smaller Overwatch; it's a different beast entirely. Down here in the Elimination arena, the rules change, the stakes feel higher, and the strategies that work in standard play often crumble faster than a Bronze player facing a Top 500 smurf.
Why the difference? Simple: with only three players per side, every single action is magnified. A brilliant play can single-handedly win a round, but one mistake – a missed sleep dart, a whiffed hook, getting caught out of position – can spell instant disaster for your team. There's no hiding. There's less room for error. Getting that first pick doesn't just create a numbers advantage; it shifts the odds dramatically from a 3v3 to a 3v2, a much more significant swing than the 5v4 in standard play.

Success in this gauntlet demands a specialized approach. You need unique tactics tailored to the small maps, the lack of health packs, and the mode's defining feature: the Hero Lockout. Forget running the same meta comp round after round. Here, adaptation, hero pool depth, and clever resource management are king. This guide is your playbook. We'll break down everything you need to know to climb the ranks and dominate the 3v3 Elimination ladder, from hero picks and team compositions to advanced mind games and clutch techniques. Ready to become a legend in the arena? Let's dive in.
Know the Rules of Engagement: Mode Mechanics
Before you can dominate, you need to understand the battlefield. 3v3 Lockout Elimination has a few core mechanics that fundamentally change how Overwatch is played.
Core Rules & Win Conditions:
- Two teams of three players each face off
- Eliminate all three members of the enemy team to win a round
- First team to secure three round wins takes the match victory
- No respawns during rounds - once eliminated, you're out until the next round
- Everyone starts each round with 0% ultimate charge
- After approximately 105 seconds, a tiebreaker mechanism activates (revealing enemy locations or shrinking the playable area)
The Lockout Rule: Your Greatest Strategic Challenge
This is the heart and soul of 3v3 strategy. Understand this, and you're halfway there.
How it Works: If your team wins a round, the three heroes your team used to achieve that victory become locked. Your team cannot select those specific heroes again for the rest of that match. The losing team does not have any heroes locked out.
Why it Matters: This rule is the ultimate meta-buster. It prevents teams from just spamming the same overpowered composition round after round (looking at you, launch Brig/Rein/Lucio or classic Hog/Ana/Soldier). It forces teams to be flexible, to dig deep into their hero pools, and to think several steps ahead. It rewards players and teams who are versatile and can adapt on the fly. Think of it less as a punishment for winning and more as a strategic constraint you need to manage.
Strategic Resource Management: Your available hero pool isn't just a menu; it's a finite resource that depletes with each round you win. Winning is obviously good – it gets you closer to winning the match – but it comes at the cost of 'spending' those heroes, making them unavailable later. This creates a constant tension: do you use your absolute best composition now to secure this round, knowing you might desperately need one of those heroes for a potential match-point round later? Or do you hold back a power pick, risking the current round for a stronger endgame? This calculation is central to high-level 3v3 play.
Intel for the Losers: Losing a round isn't all bad news. It provides crucial intelligence. You know exactly which three heroes the winning team cannot pick in the next round. This is invaluable information. Did they win with a heavy dive comp featuring Winston, Tracer, and Kiriko? Great, they can't run that specific dive next round. You can now potentially pick heroes who are vulnerable to that comp, or try to predict their next move (maybe they switch to brawl? Or poke?) and counter it preemptively. This information asymmetry gives the losing team a chance to adapt and counter-punch effectively.
Small Teams, Big Plays: Individual Impact
We've touched on it, but it bears repeating: in 3v3, you matter more. Your individual skill, your decision-making, your positioning – it's all under a much brighter spotlight than in 5v5. A single player popping off can absolutely carry a round, but equally, a single player getting picked early or making a critical error can lose it just as quickly. There's less chaos, fewer teammates to cover your mistakes, and a greater emphasis on individual dueling prowess and smart plays.

The No Health Pack Reality
This is a fundamental shift from most other Overwatch modes. On the standard 3v3 Elimination Arena maps (Ecopoint: Antarctica, Black Forest, Castillo, Necropolis, Ayutthaya), health packs are typically disabled by default. While some specific Arcade modes or custom games might enable them, you should generally assume they won't be available in Competitive 3v3 Elimination.
Always assume health packs are disabled in 3v3 Elimination. Prioritize heroes with self-sustain or ensure your support is well-protected and positioned to keep everyone topped off. Chip damage matters!
Hero Value Shift: The lack of readily available health packs drastically changes hero viability. Suddenly, heroes with self-healing capabilities become incredibly valuable. Roadhog's Take a Breather, Soldier: 76's Biotic Field, Mei's Cryo-Freeze, Reaper's passive, Moira's Biotic Grasp – these abilities allow heroes to sustain themselves without relying solely on a support.
Support Emphasis: This also places a greater burden and value on the Support heroes. Healing output needs to be consistent and impactful, as chip damage can't just be erased by ducking around a corner for a mega. Supports like Ana, Baptiste, Kiriko, and Moira, who can provide significant healing bursts or sustained output, often shine. Even Zenyatta's Harmony Orb becomes proportionally more impactful when it's healing one of only two teammates. Mercy's Resurrect is also incredibly powerful, as bringing back an eliminated teammate completely reverses the numbers disadvantage in a way that's far more impactful than in modes with quick respawns. Poke damage becomes more meaningful, as it forces cooldowns or chips away at health pools that are harder to replenish.
The 3v3 Meta: Hero Tier List & Analysis
Alright, let's talk heroes. Who should you be picking? Who should you be practicing? While general Overwatch tier lists give you a baseline, the unique pressures of 3v3 Lockout Elimination demand a specialized perspective.
Tier List Philosophy for 3v3:
This isn't your standard Competitive tier list. For 3v3, we're prioritizing factors that are magnified in this specific mode:
- Self-Sustain/Survivability: As mentioned, with no health packs, the ability to heal oneself or survive extended engagements is paramount. Heroes like Roadhog, Soldier: 76, and Mei get a significant bump here.
- Pick Potential/Burst Damage: Getting the first elimination is often the key to winning the round. Heroes who can reliably secure a quick kill, whether through a one-shot combo (Hog hook, Widow headshot) or high burst damage, are highly valued.
- Dueling Prowess: With smaller teams, 1v1 and 2v2 skirmishes are more common. Heroes who excel in these smaller engagements tend to perform better.
- Utility: Game-changing abilities that offer control, isolation, or crucial support shine brightly. Think Mei's Ice Wall splitting teams, Ana's Sleep Dart taking someone out of the fight, her Biotic Grenade negating healing, Roadhog's Hook securing a pick, Zarya's Bubbles saving teammates, or Lucio's Speed Boost enabling aggressive pushes.
- Ultimate Impact (Conditional): While ultimates are rarer due to the 0% start each round, those that can be charged reasonably fast in sustained fights or offer immense round-winning potential (like Mercy's Resurrect, Ana's Nano Boost, Zarya's Graviton Surge, Moira's Coalescence) retain significant value when they do come online. Don't build your entire strategy around ults, but recognize their potential impact.
It's crucial to remember that player skill can elevate any hero, and strong team synergy can make seemingly off-meta picks work wonders. However, this list reflects general power levels and consistency within the 3v3 format.
3v3 Elimination Hero Tier List
| Tier | Tank | Damage | Support | Brief Justification (3v3 Context) |
|---|---|---|---|---|
| S | Roadhog, Zarya | Sojourn, Soldier: 76, Mei | Ana, Kiriko | S: Highest impact via self-sustain, pick potential, crucial utility, or strong dueling. Heroes that define the mode. |
| A | Winston, Sigma, D.Va, Orisa | Ashe, Cassidy, Tracer, Pharah, Echo, Hanzo, Widowmaker | Baptiste, Lucio, Zenyatta, Mercy | A: Very strong picks, often core to specific strategies or powerful in most situations. May require slightly more team support or have specific counters. |
| B | Junker Queen, Ramattra, Wrecking Ball, Doomfist | Reaper, Genji, Junkrat, Torbjorn, Symmetra, Bastion | Moira, Brigitte | B: Solid situational picks, effective in certain comps or on specific maps, but might lack the raw power or versatility of higher tiers. |
| C | Reinhardt, Mauga | Sombra, Venture | Illari | C: Niche picks that can work with specific strategies or high player skill, but generally struggle against meta comps or lack key 3v3 strengths. |
| D | Lifeweaver | D: Generally considered weak in the 3v3 format due to lack of sustain, pick potential, or being easily countered. Avoid unless you have a master plan. |
Hero balance changes frequently in Overwatch. Always consider the current patch notes and meta trends. Tier placement reflects general 3v3 viability based on the factors discussed.
Hero Breakdowns (S/A/B Tiers):
S-Tier Heroes:
The Boogeyman of 3v3 for a long time. His Chain Hook offers unparalleled pick potential, instantly turning a 3v3 into a 3v2. His Take a Breather provides massive self-sustain, making him incredibly hard to kill without focused fire, especially with no health packs. He can function as a frontline tank, a flanker looking for hooks, and his own healer. While vulnerable to anti-heal (Ana's Biotic Grenade) and focused damage, his sheer presence and kill threat make him a top pick you must plan for. Lockout Consideration: Often a strong Round 1 pick, but so powerful you might consider saving him if you anticipate needing his pick potential to close out a tight match later.
High damage potential when charged, Projected Barrier is invaluable for saving teammates from hooks, sleep darts, or burst damage, and Particle Barrier allows her to gain energy while blocking damage. Graviton Surge, if charged, is a round-winning ultimate in the tight confines of arena maps. Needs coordination to maximize energy gain and bubble value. Can struggle against sustained long-range poke if she can't close the distance. Lockout Consideration: Flexible pick, good early or saved for specific matchups where bubbles provide critical saves.
High mobility with Power Slide allows for quick repositioning and escaping danger. Her Railgun offers devastating burst damage and pick potential, especially with headshots. Disruptor Shot can zone enemies or finish off low-health targets. Needs good mechanics to consistently land railgun shots. Lockout Consideration: Strong DPS option for any round, valuable for her burst potential.
Mr. Reliable. Consistent damage output at medium range, Helix Rockets for burst/splash damage, and crucially, Biotic Field for self and team healing. Sprint allows for good mobility and repositioning. Less flashy than other DPS, but his sustain and consistency are huge assets in 3v3. Lockout Consideration: Excellent well-rounded pick, great for Round 1 or as a reliable option when other DPS are locked.
An absolute menace in 3v3. Cryo-Freeze provides invulnerability and self-healing. Ice Wall is one of the most powerful abilities in the mode, capable of completely isolating an enemy for an easy 3v1 kill, blocking sightlines, or cutting off escapes. Her Endothermic Blaster can freeze targets for guaranteed kills up close or poke from range. Blizzard, if charged, controls huge areas. Lockout Consideration: So strong she's often a priority pick. Use her early to secure a win or save her wall utility for a crucial later round.
High single-target healing output keeps teammates alive. Biotic Grenade is game-changing, providing burst healing and denying enemy healing (devastating against self-healers like Hog or supports). Sleep Dart can instantly take an enemy out of the fight, setting up a kill or saving a teammate. Nano Boost can turn a teammate into a monster or save them from death. Requires good aim and positioning. Lockout Consideration: Extremely versatile and powerful support. Decide whether you need her anti-heal/sleep utility early or save it to counter specific threats (like Roadhog) later.
Incredible survivability with Swift Step and Wall Climb. Protection Suzu cleanses negative effects (like anti-nade or freeze) and provides brief immortality, potentially saving teammates from certain death. Healing Ofuda provides consistent healing, and her Kunai can deal surprising headshot damage, giving her pick potential. Kitsune Rush is a powerful ultimate if charged. Lockout Consideration: Her survivability and cleanse make her valuable in any round. Can be used early for safety or saved if Suzu is needed against specific enemy comps.
A-Tier Heroes:
Winston offers dive potential and bubble protection, great against snipers/squishies. Sigma provides shields, strong poke damage, and a powerful ultimate (Gravitic Flux). D.Va has high mobility, Defense Matrix to eat key abilities/ults, and good burst damage. Orisa is very durable with Fortify and Javelin Spin, offers CC with Energy Javelin, and Terra Surge can zone enemies or force position changes. These tanks are all strong but might be slightly more situational or require more specific team support than S-Tier tanks. Lockout Consideration: Good core tanks to build comps around, often used in Rounds 1 or 2.
Ashe/Cassidy/Widowmaker offer hitscan pressure and pick potential, crucial against flyers or for long-range maps. Tracer/Echo provide flanking, disruption, and high mobility. Pharah can dominate if the enemy lacks hitscan, especially paired with Mercy (Pharmercy). Hanzo offers high burst damage and scouting with Sonic Arrow. These heroes are powerful but often rely on specific map types or countering the enemy comp. Lockout Consideration: Often saved for specific counter-pick situations (hitscan vs Pharah) or used when their map strengths align. Having multiple strong DPS players with varied pools is key.
Baptiste offers strong AOE healing, Immortality Field for crucial saves, and good damage output. Lucio provides speed boost for engaging/disengaging (especially with brawl comps) and AOE healing, plus Sound Barrier for defense. Zenyatta's Discord Orb melts targets quickly when focused, and Transcendence can counter enemy ults, but he's fragile. Mercy enables key DPS (especially Pharah/Echo/Ashe) with damage boost and provides consistent healing and game-changing Resurrects. Lockout Consideration: Often chosen based on the team's primary strategy (Lucio for Brawl, Mercy for Pharah, Zen for anti-tank/burst). Resurrect might be saved for a critical later round.
B-Tier Heroes:
These heroes (like Reaper, Genji, Junkrat, Torb, Symm, Bastion, JQ, Ramattra, Ball, Doomfist, Moira, Brig) are generally more niche. Reaper excels in close-quarters brawls. Genji needs resources and careful engages. Junkrat/Torb/Bastion/Symm can be strong defensively or in specific "cheese" comps, often map-dependent. JQ/Ramattra/Ball/Doomfist offer different tanking styles but might lack the sustain or immediate pick potential of higher tiers in this mode. Moira/Brig provide strong healing/utility in brawl comps but might lack range or pick-enabling potential compared to Ana/Kiriko. Lockout Consideration: Often used to fill gaps when primary choices are locked, or for specific map/counter strategies. Torb/Bastion might be saved for a surprise defensive setup.
Building Winning Trios: Team Composition Strategy
Okay, you know the heroes, you know the rules. Now, how do you put it all together? Building effective team compositions round after round, while navigating the lockout, is where matches are truly won and lost.
Core Principles:
- Sustain is Non-Negotiable: We keep saying it because it's true. No health packs means you need a way to stay healthy. Either pick heroes with strong self-heal (Hog, Soldier, Mei, etc.) or ensure you have a reliable support hero who can keep the team topped off. Running triple DPS with no heals is usually a recipe for disaster unless you get incredibly fast picks.
- Prioritize Pick Potential: The fastest way to win a round is to make it a 3v2. Compositions should ideally include at least one hero capable of securing quick eliminations, whether through hooks, headshots, sleep darts, or coordinated burst damage.
- Synergy Over Star Power: Three individually strong heroes don't always make a strong team. Ensure abilities complement each other. Does your tank create space for your DPS? Does your support enable your tank?
- Think Counters (and Lockouts): Don't just pick your comp in a vacuum. Consider what the enemy might run. If Pharah is popular, having a hitscan option available is wise. More importantly, consider what they can't run due to lockouts.
- Map Matters: Tailor your comp to the environment. Brawl comps excel in tight corridors while poke or sniper comps might be better on maps with longer sightlines.
Round 1: Seizing Momentum
Goal: Win the first round. It sets the tone, gives you a point lead, and immediately puts the enemy under pressure by forcing them to adapt to your (now locked) composition.
Common Approaches: Since you have no information about the enemy's specific strategy or player strengths yet, and no heroes are locked, Round 1 often involves playing a generally strong, well-rounded, or "comfort" composition.
- The Classic: Roadhog / Soldier: 76 / Ana (or Zen). High sustain, good damage across ranges, and significant pick potential with Hook and Sleep/Discord. A very safe and effective opener.
- Pharmercy Pressure: Pharah / Mercy / Tank (often Hog, D.Va, or Winston). Can completely dominate if the enemy doesn't open with adequate counters (hitscan). High risk, high reward. Many high-level players favor this opener hoping to catch opponents off guard.
- Aggressive Brawl: Reaper / D.Va / Lucio or Reinhardt / Brigitte / Lucio (or Ana). Aims to overwhelm the enemy immediately with speed and close-range damage, especially effective on maps like Ecopoint or Black Forest. Can be a good surprise tactic.
Don't necessarily burn your absolute best possible comp in Round 1 unless you're extremely confident. Remember the lockout!
Round 2: The Counter-Punch
Goal: Adapt and exploit the information gained from Round 1. This is where the strategic depth of lockout truly begins.
Scenario A: You Won Round 1: Congratulations! But now your winning heroes are benched. You need a second viable composition from your remaining pool. Think about why your first comp won. Did the enemy struggle against it? They might try to counter that style of play now. Did they simply get outplayed mechanically? They might run their own comfort picks. You need a comp that can handle potential counters to your Round 1 strategy or is just generally strong on its own.
Scenario B: You Lost Round 1: Time to use that intel! You know the three heroes the enemy cannot use. Analyze their winning comp. Was it dive? Poke? Brawl? Did a specific hero carry them? Now is your chance to counter their next likely strategy or exploit the absence of their key locked heroes.
They won Round 1 with Roadhog / Soldier / Ana. They cannot use those three heroes. You might anticipate them switching to something like Dive (Winston/Tracer/Kiriko) or maybe Pharmercy if they still have it. You could prepare by picking Cassidy/Mei/Baptiste – hitscan for Pharah/Tracer, Mei to counter dive/brawl, Bap for strong heals and Lamp against burst. Alternatively, knowing they don't have Hog's hook or Ana's anti-nade could open up strategies that are normally vulnerable to those abilities.
Round 2 is often about calculated risks and trying to regain momentum or press your advantage based on the lockout information.
Round 3 & Beyond: The Endgame Gambit
Goal: Close out the match or force a deciding round. Hero pools are likely dwindling for both teams, making prediction and resource management critical.
Deploying Reserves: Did you strategically save a powerful hero or combo? Now is often the time. If the score is 2-1 or 2-2, expect both teams to bring out their strongest remaining options. If you saved your best Roadhog player for this moment, unleash them. If you held onto Ana specifically to counter an anticipated enemy Hog, now's the time.
Anticipating the Enemy: What key heroes do they likely still have? If they haven't used Pharmercy and the map allows it, you should probably expect it, especially if they're down 1-2. If their star Widow player hasn't appeared yet, assume they might show up now and pick accordingly (shields, dive).
Situational Picks & Cheese: If your primary strategies are locked out, you might need to get creative. Bastion/Orisa shield break comps, Torbjorn turret setups, or even Symmetra teleporter plays can work if the enemy lacks the specific counters or is caught off guard. These are often last-resort options but can steal rounds.
Running out of strong options in Round 4 or 5 is a common way teams lose close games. Later rounds test your adaptability and how well you've managed your hero resources throughout the match.
Example Comps & Counter-Strategies (Round-by-Round Flow)
| Round | Scenario / Goal | Potential Own Comp Example | Enemy Situation Example | Strategy / Notes | Key Counters to Consider (for Own Comp) |
|---|---|---|---|---|---|
| 1 | Seize Momentum | Roadhog / Soldier: 76 / Ana | Full Hero Pool Available | Strong, self-sufficient opener. Focus hooks, use Biotic Field/Nade for sustain. Aim for the first pick. | Coordinated dive, strong anti-heal. |
| 2 | (Lost R1 vs Pharah/Mercy/Hog) | Cassidy / D.Va / Baptiste | Locked: Pharah, Mercy, Roadhog | Enemy can't use Pharmercy or Hog. Use Hitscan (Cassidy) for potential Echo/flyers. D.Va contests high ground/dives. Bap provides strong heals & Lamp. | Brawl (Rein/Mei?), Double Sniper. |
| 2 | (Won R1 vs Enemy Brawl) | Sigma / Hanzo / Zenyatta | Lost R1, Full Pool Available | Own R1 Comp (e.g., Hog/Soldier/Ana) locked. Switch to Poke/Pick comp. Sigma provides shield/poke. Hanzo/Zen offer burst/Discord. Play range. | Dive (Winston/Tracer?), Mirror Poke. |
| 3+ | (Score 2-1, Need Final Win) | Mei / Reaper / Lucio | Likely has key heroes remaining | Enemy likely using strong remaining picks. Use saved Brawl/Control comp. Mei isolates, Reaper bursts, Lucio speeds in/out. | Strong Poke/Snipers, Pharmercy. |
| 3+ | (Score 1-2, Need Comeback) | Your Strongest Remaining Comp | Has won 2 rounds (limited pool) | Deploy your ace player or best remaining synergistic comp. Analyze their lockouts heavily – what are they forced to play? Exploit weaknesses. | Whatever counters your last resort! |
Don't just think about the current round. Always ask: "If we win with this comp, what does that leave us for the next round? What will the enemy likely run if they lose/win?"
Know Your Battleground: Map Analysis
Just like in standard Overwatch, knowing the map is crucial. The 3v3 Elimination maps, however, are unique arenas designed specifically for smaller skirmishes. Mastering their layouts, sightlines, and quirks is essential for success.
Map Pool Overview:
The standard rotation for 3v3 Competitive Elimination typically includes these five Arena maps:
- Ecopoint: Antarctica
- Black Forest
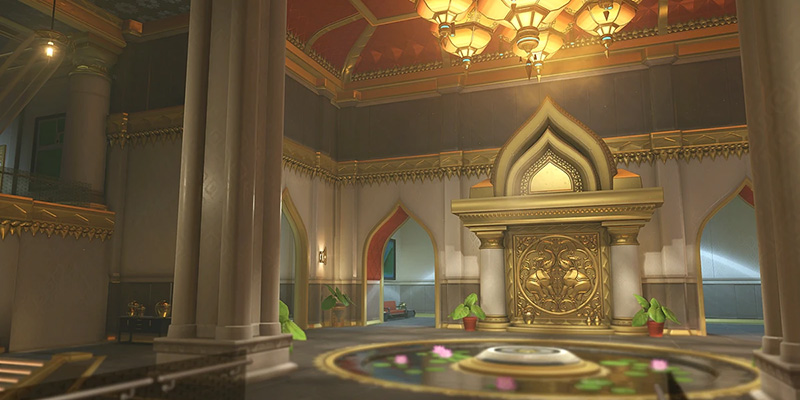
- Castillo
- Necropolis
- Ayutthaya
Keep in mind that occasionally maps might be temporarily disabled due to bugs, or might feature different time-of-day or weather variations (like the Necropolis sandstorm or sunny Ecopoint) which primarily affect visibility. While other Arena maps exist in Overwatch (used for modes like 1v1 or other Arcade variations), these five form the core competitive pool.
General Arena Map Tactics:
- Scale & Sightlines: These maps are significantly smaller than standard maps. This emphasizes close-to-mid-range combat, precise positioning, and smart use of cover. Duels are common.
- High Ground Advantage: Most arenas feature verticality. Controlling high ground typically offers better sightlines, safer positioning, and an advantage in engagements.
- Chokepoints & Control: Key areas like central structures, bridges, or narrow corridors often become focal points for fights. Controlling these can dictate the flow of the round.
- Cover is Life: With no health packs, natural cover is your best friend for avoiding damage, recovering cooldowns, or waiting for support. Playing out in the open is usually a death sentence. Positioning near your support is vital.
Detailed Map Breakdowns:
Ecopoint: Antarctica
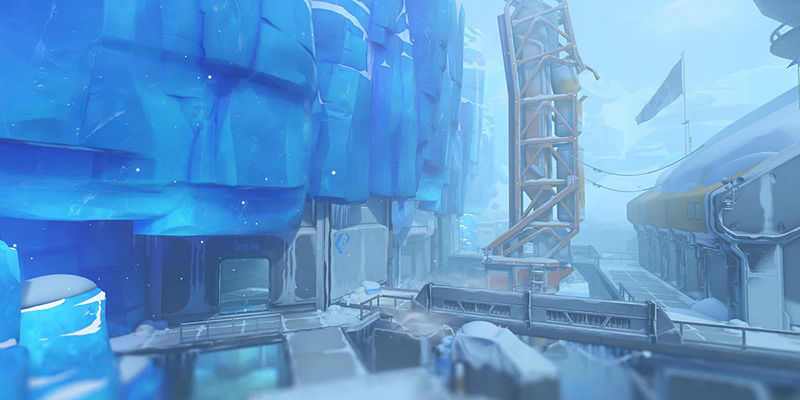
Features: Mei's old lab. Extremely compact with very tight corridors, a central multi-level building ("Lab" or "Main"), upper walkways overlooking the center, and a small exterior area. Known for its claustrophobic feel.
Strategies: This map heavily favors close-range heroes and brawl compositions. Reinhardt, Reaper, Mei, Brigitte, Junkrat, and Doomfist can thrive in the tight spaces. Mei's Ice Wall is exceptionally powerful here, easily splitting teams or blocking paths. Doomfist can utilize the pillars and walls for devastating combos. Snipers struggle due to limited long sightlines. Pharah is generally weak due to the enclosed nature. Sticking close together as a team is often the best approach. Controlling the central Lab building provides a strong defensive position and access to multiple routes. Watch out for flanks through the side doors connecting the exterior and interior. The lack of health packs is acutely felt on this tiny map.
Key Callouts (Examples): Lab, Top/Bridge, Outside, Cryo (room near spawn), Side Doors.
Black Forest
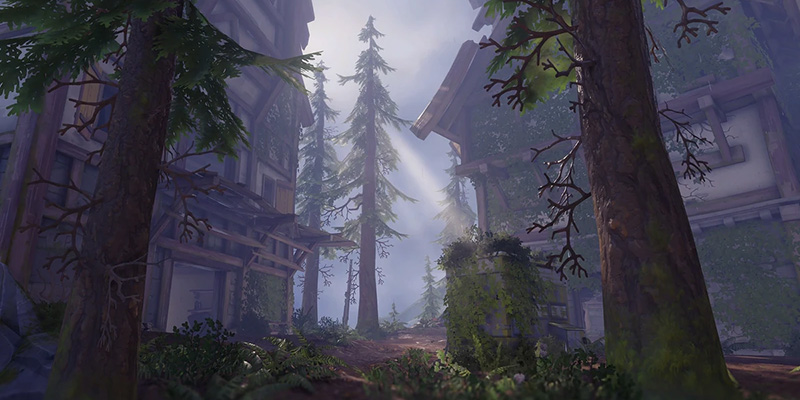
Features: A mix of environments set in German ruins. Includes indoor castle sections with tight corners, an outdoor forest path, a central bridge over a chasm, multiple levels within the ruins, and plenty of broken walls for cover.
Strategies: Requires versatile compositions that can handle both close-quarters fights (inside the ruins) and mid-range engagements (along the path and bridge). Rush comps using Lucio speed with Reaper or Hog can quickly overwhelm enemies indoors. Mei and Junkrat are also strong inside the ruins. Hanzo's Sonic Arrow provides valuable intel across the map. Controlling the central bridge or the high ground near the main ruined building offers significant advantages. Flanking through the side paths around the central structure is a common tactic.
Key Callouts (Examples): Bridge, Castle/Ruins, Path, High Ground, Mega (if health packs enabled in custom), Spawn Doors.
Castillo

Features: A Mexican fort setting. Dominated by a large central building ("Mega Room" or "Bell Tower") with multiple floors, stairs, and balconies. Features exterior walkways along the coast (offering boop potential), and tight, enclosed corridors underneath the main structure.
Strategies: Control of the central building, particularly the upper levels, is often the key to winning. Heroes with vertical mobility (Pharah, Echo, Genji, Hanzo, Winston, D.Va) excel at navigating the different floors and accessing high ground. Environmental kills ("boops") are a real threat near the coastal edges – Lucio, Pharah, Hog, Brigitte, and Orisa can capitalize on this. Orisa/Junkrat comps can be effective at locking down the central stairs or tower. Snipers like Widowmaker or Hanzo can sometimes get cheeky opening picks on enemies leaving spawn, especially towards the central building. Close-range heroes can fight for control of the lower corridors.
Key Callouts (Examples): Mega/Center, Stairs, Top Floor, Bridge, Coast/Edge, Tunnel/Low.
Necropolis

Features: An Egyptian ruin theme. Features a dangerous central pit (prime boop territory), surrounding upper platforms and walkways offering high ground, and lower tunnel/crypt areas for flanking or cover. Offers multiple medium-to-long sightlines across the map. Can sometimes have a sandstorm effect reducing visibility.
Strategies: High ground control is extremely powerful here. Snipers (Widowmaker, Hanzo, Ashe) and flyers (Pharah, Echo) often dominate if left unchecked. Dive tanks like Winston or D.Va are valuable for challenging these threats. Heroes with knockback abilities (Lucio, Pharah, Hog, Brig, Orisa) should always be looking for environmental kills into the central pit. Be mindful of flanks coming through the lower tunnels. A Widow/D.Va/Ana composition was cited as particularly effective for controlling space and dealing with Pharah/Mercy on this map.
Key Callouts (Examples): Pit, High Ground, Top Left/Right, Tunnel/Low, Bridge, Spawn Platform.
Ayutthaya
Features: Originally designed for Capture the Flag, this map is noticeably larger and more open than the other four arenas. It features a symmetrical layout with two distinct sides – ancient ruins and a modern temple structure – connected by a central platform/bridge area over water.
Strategies: The larger size might slightly favor heroes with better mobility or longer range compared to the extremely close-quarters maps like Ecopoint. Controlling the central bridge and the high ground on either side is important. Utilize the various structures for cover during engagements. Because of the longer distances from spawn to the center compared to other arenas, regrouping after a pick can take slightly longer, making early picks even more impactful. The map's CTF origins mean heroes traditionally strong in that mode due to area denial or mobility (like Torb, Symm, Lucio, Reaper) might find unique value here, though adapted for Elimination's goals. Playstyle needs to adjust to the increased space compared to other arenas.
Key Callouts (Examples): Bridge/Center, Temple Side, Ruins Side, High Ground (Left/Right), Spawn Path.
Understanding these map nuances allows for more informed hero selections and strategic approaches. A composition that dominates on Ecopoint might falter on Necropolis, and vice-versa. Tailoring your plan to the specific battlefield is a hallmark of skilled 3v3 play.
Outsmarting Your Opponent: Advanced Tactics
Winning consistently in 3v3 Elimination goes beyond just good mechanics and basic team comps. It requires out-thinking your opponent, managing resources cleverly, and executing under pressure. Let's delve into some advanced tactics.
Mastering the Lockout: Baiting, Saving, Predicting
The lockout rule isn't just about counter-picking the enemy's last comp; it's a multi-round chess match.
- Thinking Ahead: Don't just consider the current round. Think about the entire match as a potential best-of-five. Your hero pool is a finite resource that depletes with each win. Spending all your best heroes early might leave you vulnerable in crucial later rounds.
- Baiting: Sometimes, you might intentionally win a round with a less critical composition, even if it's slightly harder, specifically to save your power picks or hard counters for later rounds when you anticipate needing them more.
- Saving: This is the core of lockout strategy. Identify your team's strongest heroes, your individual best picks, and crucial counter-heroes. Consciously decide when to deploy these assets.
- Predicting: This ties everything together. Constantly analyze the enemy's lockouts. What heroes have they won with? What does that leave them with? Who on their team seemed to be performing well on certain roles? Use this information to anticipate their next composition.
Ultimate Economy: Building, Tracking, and Using Ults Wisely (or Not at All)
Ultimates in 3v3 are a different beast compared to standard play.
Rarity: Starting at 0% each round and with typically faster round times, ultimates are far less frequent. Don't expect to have your ult every fight, or even every round. Your primary tools are your basic abilities, aim, and positioning.
Building Ults: Longer, more drawn-out rounds, often involving tankier compositions that soak and deal sustained damage, are more likely to see ultimates come online. Heroes with naturally faster-charging ultimates (like Moira's Coalescence, Soldier's Tactical Visor) or those who can gain charge quickly through consistent healing/damage (Ana, Zarya, Mercy potentially through damage boost) might see their ults more often.
Tracking: Pay attention. If a round is dragging, especially against tanks or high-sustain comps, start mentally tracking potential enemy ultimates. Did their Ana just land a big Biotic Grenade? She might be close to Nano. Has their Zarya been high energy for a while? Be wary of Graviton Surge.
Effective Usage: Because ults are rare, using them effectively is critical.
- Don't Overkill: Using an ult when the fight is already clearly won (e.g., ulting in a 3v1) is generally a waste. Save it.
- Don't Waste on Lost Fights: Similarly, popping your ult when you're the last one alive against three healthy enemies is usually futile, unless it's a specific stalling tactic on the tiebreaker point.
- Maximize Value: The best time to use an ult is often in an even fight (3v3 or 2v2) where it can decisively tip the scales by securing a key pick or enabling a push.
- Use It or Lose It: Holding onto an ult for the "perfect" six-man shatter moment (which will never happen in 3v3) is often a mistake. If using your ult significantly increases your chance of winning the current round, it's often worth it, as you might not get another chance to build it.
- High-Impact 3v3 Ults: Mercy's Resurrect, Ana's Nano Boost, Zarya's Graviton Surge, Moira's Coalescence.
Clutch Potential: How to Win When Outnumbered (1v2, 1v3)
It's the stuff highlight reels are made of, but clutching requires more than just flashy mechanics. It's about patience, smarts, and exploiting enemy mistakes.
Mindset & Patience: Don't panic. Accept you're at a disadvantage. Your goal isn't to win a straight fight; it's to create opportunities and isolate opponents. Play cautiously, use cover, and wait for mistakes.
Isolate, Don't Engage: Never take a direct 1v2 or 1v3 if you can avoid it. Your objective is to turn the situation into a series of 1v1s. Use map geometry (corners, doorways, different levels) to break line of sight and force enemies to push you one at a time. Baiting overly aggressive enemies into chasing you around a corner into a trap is a classic clutch technique.
Cooldown Mastery: Your abilities are your lifeline. Use them precisely to secure a kill (e.g., Hog hook, Mei freeze, Cassidy grenade), to escape immediate danger (e.g., Tracer Recall, Moira Fade, Kiriko Swift Step), or to sustain yourself (e.g., Soldier Biotic Field, Hog Breather). Don't waste them.
Target Priority: Always focus the most immediate threat or the easiest kill. Eliminating one opponent quickly makes the situation far more manageable (1v1 or 1v2 is much better than 1v2 or 1v3). Focus low-health targets.
Map Knowledge is Power: Use high ground for vision and safety. Know escape routes. Use tight spaces to limit enemy angles. Look for environmental kill opportunities if applicable.
Hero Suitability: Some heroes are naturally better clutchers. High self-sustain (Hog, Mei, Soldier), high burst damage (Widow, Hanzo, Hog, Cassidy), or strong escape/reset abilities (Tracer, Sombra, Kiriko, Moira) give you more tools to work with.
Play the Clock/Objective: If the tiebreaker circle is shrinking, use it to your advantage. Force the remaining enemies to funnel towards you into a predictable location where you can set up an ambush.
Winning outnumbered is often about punishing the advantaged team's overconfidence or impatience. Stay calm, play smart, and wait for them to make a mistake.
Mind Games: Reading Opponents & Tilting Tactics
3v3 is a mental battleground, ripe for psychological warfare.
Pattern Recognition: Pay close attention to your opponents' habits across rounds. Does their Widow always peek the same angle first? Does their Rein always charge aggressively? Do they always try to flank left on Castillo? Identifying and exploiting these patterns is key. Tracking their lockout choices also reveals preferences and potential strategies.
Baiting & Conditioning: Lure enemies into traps or unfavorable fights. Condition them to expect one strategy, then switch it up. Make them waste important cooldowns by feinting an attack.
Momentum & Pressure: Winning early rounds puts immense psychological pressure on the enemy team. Maintaining that momentum can cause opponents to make mistakes or tilt. Introducing unexpected hero picks or strategies can also disrupt their mental game.
Tilt Control (Your Own): Recognize the signs of tilt in yourself – frustration after losses, blaming teammates excessively, making reckless plays. When you feel tilted, take a moment. Breathe. Refocus on the next play, not the last mistake. A tilted player makes poor decisions. Staying calm under pressure is a huge advantage. Avoid rage-swapping into heroes you aren't comfortable with just because you're frustrated.
Record your gameplay! Watching your own clutches (or failed attempts) and analyzing enemy patterns in replays is one of the best ways to improve your advanced tactics.
Talk the Talk: Communication & Teamwork
In the tight-knit chaos of 3v3, clear and efficient communication isn't just helpful – it's often the difference between a coordinated victory and a silent, messy defeat. With fewer players, every piece of information is more valuable, and synergy is paramount.
Why Comms Matter (Even More) in 3v3:
- Faster Information Flow: Things happen quickly. Calling out a low-health target, an enemy flank, or a used cooldown needs to be immediate and clear.
- Tighter Coordination: With only two teammates, executing focus fire, ability combos (like Halt-Hook or Sleep-Confirm), or coordinated pushes requires precise communication.
- Reduced Redundancy: In 5v5, multiple people might see the same flanker. In 3v3, you might be the only one who spots the threat – your callout is critical.
- Overcoming Disadvantages: Good communication can genuinely compensate for slight mechanical disadvantages or suboptimal compositions. A well-coordinated team playing B-tier heroes can often beat a silent team playing S-tier heroes.
Essential 3v3 Callouts & Shortcuts:
Keep it clear, concise, and actionable (The 3 Cs: Clear, Concise, Correct). Avoid unnecessary chatter, especially during fights.
- Target Focus: THE most important call. Get everyone shooting the same person.
- Format: "[Enemy Hero], [Location],"
- Examples: "Hog, middle, HALF!" "Focus Ana, back right, LOW!" "Mercy one!" (meaning one HP/shot)
- Zenyatta players: Call your Discord orb targets! "Discord Hog!"
- Enemy Positions/Threats: Alert your team to immediate dangers or key enemy locations.
- Format: "[Enemy Hero], [Location]"
- Examples: "Widow top left!" "Reaper flanking tunnel!" "Pharah above!"
- Use simple, agreed-upon map location names (e.g., Pit, Bridge, Castle, Mega, Stairs, High Ground).
- Cooldown Tracking (Yours & Theirs): Knowing key abilities are down creates opportunities.
- Examples: "Hog NO HOOK!" "Ana NO NADE!" "Mei NO BLOCK!" "Used Suzu!" "Used Lamp!"
- Supports: Call out when you're low on healing resources or need help! "Moira low heals, need peel!" "Ana reloading!"
Ultimate Status: Coordinate ult usage and be aware of enemy threats. Examples: "Have Nano." "Using Visor next fight." "Grav ready." "Careful, think they have Shatter."
Personal Status/Needs: Let your team know if you're in trouble or out of the fight. Format: "[Your Hero Name] needs healing!" (Use your hero name, not "I"). "Peel for Ana!" "[Hero] down!" (CRITICAL call).
Strategy/Direction: Simple calls to guide the team's approach. Examples: (Hero Select) "Let's go brawl." "Need hitscan." (Mid-round) "Push left side." "Play slow, wait for pick." "Back up, reset."
Solo Queue vs. Team Communication Strategies:
The communication landscape changes drastically depending on whether you're queuing alone or with friends.
Solo Queue:
Expect the unexpected. Communication levels can range from complete silence to non-stop chatter (not always helpful).
Your Role: Focus on making the most critical, concise callouts yourself (target focus, major threats like flanks or ults, your own status/needs). Don't try to shot-call complex strategies unless the team seems receptive.
Tools: Utilize the ping system effectively for locations, threats, and intentions. It's better than silence.
Mindset: Be adaptable. You likely won't execute perfect strategies. Focus on enabling your random teammates and making simple, impactful plays based on clear information.
Positivity: Avoid toxicity at all costs. Blaming teammates in solo queue rarely helps and often leads to tilt and throws. A positive attitude can sometimes salvage a rough start.
LFG/Grouping: Historically, 3v3 Comp sometimes required players to group up beforehand. Even if not strictly required now, using the LFG tool or finding teammates beforehand can significantly improve the experience and communication, potentially avoiding long solo queue times or unbalanced matches if the mode's population is low.
Solo queue success often boils down to strong individual play combined with making clear, simple calls that anyone can react to. You can't force coordination, but you can provide useful information.
Team Queue (3-Stack):
This is where 3v3 Elimination truly shines strategically.
Planning: You can coordinate compositions across multiple rounds, plan lockout strategies, and practice specific plays.
Synergy: Develop chemistry with your teammates. Learn their hero pools, playstyles, and communication habits.
Advanced Comms: Implement more complex callout structures, track enemy cooldowns more diligently, and execute coordinated dives or ability combos.
Practice: Regularly playing and practicing together as a trio is the fastest way to climb and master the mode's strategic depth.
Even if no one else is talking, make your essential callouts. You never know who might be listening and able to act on the information. Lead by example!
// Template: Quick Comms for Solo Queue:
"Focus [Hero]!"
"[Hero] low!"
"[Hero][Location]!" (e.g., "Widow top!")
"[Your Hero] need heals!"
"[Hero] down!"
"Careful, [Enemy Ult]!"
"Group up!"
// Template: Coordinated Team Callout Structure:
Pre-Round: "Okay, they locked X, Y, Z. Let's run [Our Comp]. Plan is to..."
Engage: "Pushing now!" "Diving Ana!" "Using Speed!"
Mid-Fight: "[Hero] Low!" "[Cooldown Call]!" "[Position Call]!"
Post-Pick/Shift: "Got the pick, push advantage!" or "Lost one, play slow/back up."
Disengage/Reset: "Back out, reset." "Play point."The Grind: Practice Makes Perfect
Knowing the strategies is one thing; executing them under pressure is another. Like any skill in Overwatch, mastering 3v3 Elimination requires dedicated practice. Here's a routine to systematically improve your game.
A Progressive Practice Routine
Don't try to learn everything at once. Build your skills layer by layer.
Before strategy matters, you need to be able to hit your shots and win individual fights.
- Aim Trainers: Use Workshop codes (like KAVE5, VAXTA) or external trainers to hone your raw aim. Focus on tracking, flick shots, and projectile aim depending on your hero pool.
- Deathmatch: Jump into FFA Deathmatch or Team Deathmatch. It's pure mechanics practice – constant duels, target switching, and movement. Tryhard FFA lobbies are excellent for simulating high-pressure duels.
- Hero-Specific Drills: Practice crucial abilities. Use Workshop codes for Ana Nade practice, Winston jump packs, Widow headshots, or simply spend time in the Practice Range working on combos (e.g., Hog Hook-Shoot-Melee).
- 1v1s: Find 1v1 Workshop modes or practice against friends. This isolates dueling skill and helps you learn matchups intimately.
Good mechanics are useless if you're constantly caught out of position.
- Focused Play: Queue into 3v3 Elimination (Comp or Custom Games) with the primary goal of focusing on your positioning. Ask yourself constantly: Am I near cover? Can my support see me? Where is the enemy likely to come from? Am I on valuable high ground?
- Map Exploration: Spend time in Custom Games just walking around the Arena maps. Learn the flank routes, cover spots, and sightlines.
- Replay Review (Positioning): Watch your VODs, specifically looking at where you were when you died. Were you exposed? Too far forward? Too far from your team?
Combine mechanics and positioning with smart decision-making.
- Active Thinking: Play more 3v3 Comp, but consciously think about the strategic layer. What comp are they running? What should we run next round based on lockouts? Who has ults? What's their likely win condition?
- Replay Review (Decisions): Analyze your VODs again, this time focusing on your choices. Did you use your ult correctly? Was that push the right call? Did you anticipate the enemy flank?
- Learn from the Best: If possible, watch streams or VODs of high-ranked players specifically playing 3v3 Elimination (though this content can be rare). Analyze their decisions and positioning.
Effective communication is a skill that needs practice.
- Just Do It: Start making callouts in your games, even if it feels awkward at first. Begin with simple, essential calls (target focus, threats) and gradually add more detail as you get comfortable.
- Team Drills: If you play with a regular team, practice your callout structure and specific plays in Custom Games or scrims.
Helpful Workshop Codes & Drills
| Training Type | Workshop Codes | Description |
|---|---|---|
| Aim Training | KAVE5, VAXTA, QTV, A5Q | General aim, movement, Aim Training Labs |
| Deathmatch/Duels | Custom Games Browser | Tryhard FFA, Widow HS Only lobbies, 1v1 Arenas |
| Hero Specific | Search Browser | Winston Primal Practice, Ana Nade/Sleep Practice |
| Movement | ZJA3 | Lucio Surf |
| Scrim/Competitive | 91X3S | Competitive Ruleset, search for "3v3 Elimination" or "3v3 Scrim" codes |
Learning from Replays
Elite Insights & Common Blunders
You've learned the basics, the strategies, and how to practice. Now, let's look at what separates the good 3v3 players from the great ones, and the common pitfalls that keep players stuck.
Techniques from Top 3v3 Players (Synthesized Insights)
While specific Top 500 3v3 gameplay footage might be scarce compared to standard modes, consistent high-level play in this format generally involves:
The best players aren't one-tricks. They can effectively play multiple heroes within their role(s), allowing them to adapt seamlessly to the demands of the lockout mechanic round after round. If their main gets locked, they have strong alternatives ready.
They possess exceptional skill on the heroes that consistently define the 3v3 meta – think pinpoint accuracy on hitscan, devastating hooks and self-management on Roadhog, game-changing sleeps and anti-nades on Ana, oppressive wall usage on Mei, etc.
They don't just react to lockouts; they proactively plan around them. This involves intricate prediction of enemy choices based on remaining pools, strategic saving of key heroes or counter-picks, and potentially baiting the enemy into locking out heroes that open up vulnerabilities later.
In high-level stacks, communication is minimal, precise, and instantly acted upon. Target calling leads to immediate focus fire, melting targets before they can react. Cooldowns and enemy positions are tracked and relayed efficiently.
They understand the critical sightlines, high ground positions, and flanking routes on each Arena map and actively work to control them, denying space and opportunities to the enemy.
Top players remain calm under pressure, even when outnumbered. They play patiently, utilize cooldowns perfectly, and exploit the smallest enemy mistakes to turn seemingly lost rounds around. They understand how to manipulate engagements to create favorable 1v1s.
Mistakes That Cost Rounds (and Matches): Common Blunders to Avoid
These are the errors that frequently sabotage teams in 3v3 Elimination:
- Trickling / Not Grouping: After losing a teammate, rushing in 1v3 or 2v3 instead of waiting to regroup is almost always a throw. Stay together!
- Wasting Key Cooldowns: Missing a crucial Roadhog hook, whiffing an Ana sleep dart on a diving target, using Immortality Field when no one is in danger, failing to cleanse an anti-nade with Suzu – these errors can directly lead to lost fights.
- Botching Ultimate Usage: Holding onto an ult for the entire match because the "perfect moment" never came, using a Graviton Surge when your team can't follow up, Nano-boosting someone who immediately dies, ulting into a fight that was already won or lost.
- Ignoring the Lockout: Stubbornly refusing to switch off a less effective hero because your main is locked. Failing to adapt your strategy based on which heroes the enemy cannot use.
- Lack of Focus Fire: Three players shooting three different targets often results in no one dying. Coordinate fire to eliminate threats quickly.
- Forgetting the Tiebreaker: Getting distracted by a flank duel far away from the point when the objective capture/reveal mechanic activates, leading to an easy loss.
- Tilting and Blaming: Letting frustration dictate your plays. Making reckless pushes out of anger. Excessively blaming teammates instead of focusing on your own play. Leaving matches prematurely (a huge issue in past iterations, hopefully less so with penalties).
- Fundamentally Flawed Comps: Drafting teams with zero self-sustain and no dedicated support, or compositions with absolutely no pick potential or synergy.
- Not Protecting Your Support: Supports are vital due to no health packs. Letting your Ana or Kiriko get easily picked off by flankers because no one peeled is a common path to defeat.
Conclusion: Claim Your Victory
And there you have it – your comprehensive field manual for conquering the intense arena of 3v3 Competitive Elimination. We've journeyed from the fundamental rules and the game-defining Lockout mechanic to the nuances of hero selection, round-by-round composition strategy, map mastery, advanced tactics, and the crucial elements of communication and practice.
Remember the core tenets:
- Master the Lockout: It's not a penalty; it's the central strategic puzzle. Think ahead, manage your hero pool like a resource, and exploit enemy lockouts.
- Prioritize Sustain & Picks: With no health packs, staying alive is key. Heroes with self-heal shine, supports are vital, and the ability to secure that first elimination quickly is paramount.
- Know the Arenas: Each map demands different approaches. Learn the layouts, control the high ground, and use cover wisely.
- Communicate Clearly: Even simple callouts make a huge difference. Coordinate focus fire, track key cooldowns, and work as a unit.
- Practice Deliberately: Improve your mechanics, positioning, game sense, and communication through focused practice and replay review.
3v3 Elimination is a demanding mode. It tests your mechanics, your game sense, your adaptability, and your mental fortitude. It strips away some of the chaos of 5v5, placing a brighter spotlight on individual skill and tight teamwork. It can be frustrating, yes, especially when facing dominant strategies or dealing with the limitations of the lockout. But it's also incredibly rewarding. The intensity of a close round, the satisfaction of outsmarting your opponents with a clever comp switch, the thrill of clutching a 1v2 – these moments are what make 3v3 special.
Apply the knowledge and strategies within this guide. Be patient with your progress, learn from your mistakes, and maybe, just maybe, find two reliable teammates to brave the queue with you. Now get out there, lock in your strategy, and claim your victory in the Elimination gauntlet! Good luck, hero. Try not to get hooked first round.
"It's not always about who has the best aim, but who makes the smartest plays."