Introduction to Brigitte
Brigitte Lindholm is a support hero who excels at front-line defense and close-range skirmishes. A Lindholm through and through, Brigitte is the daughter of weapons designer Torbjörn and was inspired by her godfather Reinhardt's tales of valor. As Reinhardt's squire, she became a warrior in her own right. After Overwatch's fall, Brigitte took up her hammer and shield to fight with the revived Overwatch team.
In Overwatch, Brigitte remains a "battle healer" – a hybrid support who provides armor, area healing, and crowd control rather than burst heals. Her kit is largely unchanged from Overwatch 1, though many numbers have been tweaked. In Season 15, new Perk options were added to augment her abilities, and she received buffs like a damage increase on her Rocket Flail.
Her weaknesses are playing at close range (she has no ranged primary fire), vulnerability to dive/flanking heroes (who can attack her from above or behind), and reliance on cooldowns. In the current Season 15 meta, Brigitte is still a niche pick; she shines in dive-heavy enemy compositions or against mass-damage comps (she can counter Zarya/Pharah combos, for example), but she is overshadowed at high levels by pure healers like Kiriko or Baptiste. Perks like Barrier Restoration (heals her shield on bash) and Morale Boost (extend Inspire on whip) have given her extra tools, and she remains a strong "anti-dive" and peel support in coordinated play.
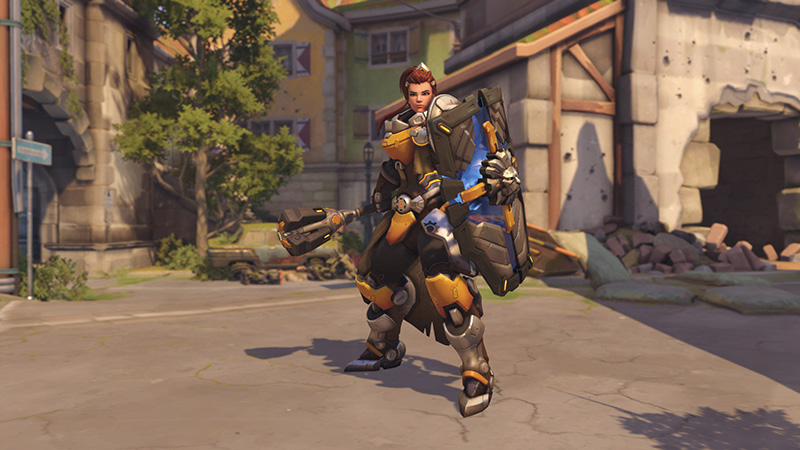
Full Ability Breakdown
Rocket Flail (Primary Fire)
Brigitte's main weapon is a melee flail with extended range. Each swing has a wide 60-degree cleave and hits any enemy in front of her up to about 6 meters. Flail swings occur every 0.6 seconds. As of Season 15, each swing deals 45 damage (up from 35 in earlier patches) and cannot headshot. Because of the cleave, one swipe can damage multiple clustered enemies. Each hit with the flail also triggers Brigitte's Inspire passive (healing nearby allies, see below), so actively swinging in combat is key. Use Rocket Flail to clear out close-range threats (like small flanking DPS) or to punish enemies who overextend toward your back line.
| Property | Value |
|---|---|
| Damage | 45 per hit (buffed from 35) |
| Fire Rate | 0.6 seconds per swing |
| Range | ~6 meters (melee radius) |
| Cleave | Hits enemies in a forward 60° arc |
| Usage | Primary source of Inspire healing, good for peeling enemies off allies |
Shield Bash (Secondary + Primary Attack)
When Brigitte's Barrier Shield is deployed, she gains a second attack: Shield Bash. Activating Shield Bash causes Brigitte to dash forward (about 12 meters) and knock back the first enemy she hits. Shield Bash deals 30 damage and has a 5-second cooldown. Normally, Shield Bash knocks enemies back and applies Inspire healing, but does not stun (the stun effect is only active during Rally). During her Rally ultimate, however, Shield Bash can hit multiple enemies in a cone and briefly stun them, making it a powerful area control tool.
Notably, with Season 15's Rally perk, activating Rally resets Shield Bash's cooldown, allowing an immediate bash at the start of the ultimate.
| Property | Value |
|---|---|
| Damage | 30 (single target) |
| Knockback | 12 meter dash into target (no normal stun) |
| Cooldown | 5 seconds (usable only while shield is up) |
| Perks | Barrier Restoration – hitting an enemy with Shield Bash restores 100 HP to Brigitte's shield |
| Usage | Interrupt enemy ultimates, follow up on flail swings to finish kills, or reposition. During Rally it stuns and hits multiple enemies, making it a strong engage tool. |
Whip Shot (Ability: Shift)
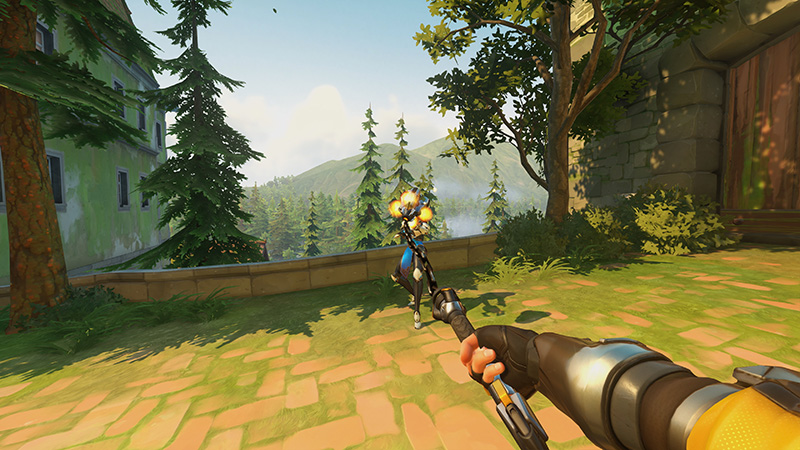
Whip Shot fires Brigitte's flail head forward in a projectile for up to 20 meters. It deals 70 damage to the first enemy hit and knocks them back a large distance (up to the full 20m). Using Whip Shot also slows Brigitte's own movement by 50% while the flail is extended (and for a brief moment as it returns). The cooldown is relatively long (8 seconds), so use it judiciously.
Whip Shot is useful for creating space or securing kills. For example, you can knock a low-HP enemy hero into a pit or away from cover to finish them off. Combined with the Whiplash perk (if chosen), whips that slam enemies into walls deal an extra 50 damage, enabling certain one-shot combos (e.g. knocking a vulnerable hero into a wall). Whip Shot also triggers Inspire, and with the Morale Boost perk, hitting an enemy with Whip Shot extends Inspire's duration by 3 seconds, substantially increasing sustained healing uptime.
| Property | Value |
|---|---|
| Damage | 70 to first enemy hit |
| Range | 20 meters (out-and-back travel) |
| Knockback | Massive displacement (can slam enemy into walls for +50 damage with Whiplash) |
| Cooldown | ~8 seconds (long cooldown) |
| Perks | Whiplash – knockback from Whip Shot into walls deals +50 damage; Morale Boost – Whip Shot extends Inspire by +3s |
| Usage | Use as a ranged poke, finisher, or to peel divers. A well-placed whip can isolate or eliminate backliners. Coordinate with Inspire benefits – a stray Whip can both damage an enemy and increase your team's healing window. |
Repair Pack (Ability: E)
Repair Pack heals a single ally. Brigitte can hold up to 3 Repair Packs (3 charges, each on ~5s cooldown after Season 15's update). When used, it instantly heals 25 HP to the target and then grants 50 HP/s over 2 seconds for a total of 125 HP healed (25 on impact + 100 over time). The pack also gives an armor barrier to the target, currently 50 armor (a reduced overheal from older values). Range is 25 meters, so Brigitte can heal teammates at mid-range with her throw.
Be careful not to let packs "waste" by throwing at full-health allies or throwing too many on one ally.
| Property | Value |
|---|---|
| Heals | 125 total (25 instantly + 50/sec for 2s) |
| Armor | Grants 50 armor (temporary HP) to target |
| Charges & Cooldown | 3 charges; each pack recharges ~5s after being used |
| Range | 25 meters |
| Perks | Quick Fix – instant heal +35 HP to critical-health allies |
| Usage | Throw Repair Packs to sustain your tank during an enemy push or to save a low-health teammate (especially if Quick Fix applies). Aim carefully – you can lob a pack over teammates if needed. |
Barrier Shield (Ability: RMB / Hold)
Brigitte's Barrier Shield is a frontal shield that absorbs damage. At base, the barrier has 300 HP (which regenerates at 85 HP/s after 5 seconds of no damage). While holding the shield, Brigitte's movement speed is reduced (-30%). The barrier is strong enough to absorb heavy bursts, and it synergizes with Rally by becoming much larger.
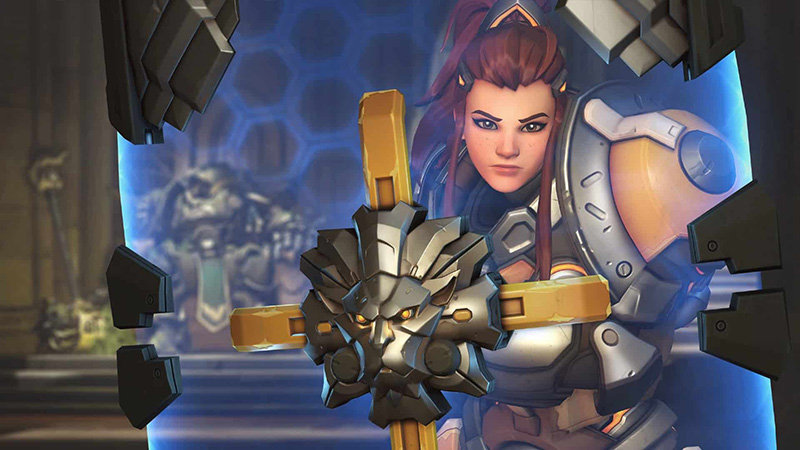
During Rally (Ultimate), Brigitte's shield is "upgraded" – it grows in size and gains 750 HP. The larger, stronger shield can absorb enormous damage, letting the team push through enemy fire. Outside of ult, the barrier is used to protect allies by blocking line-of-sight damage (peeking with the shield). After the barrier is broken or dropped, it will not recharge until 5 seconds of idle time, so good shield management is important (see below). Also note the Season 15 perk: Barrier Restoration – when Shield Bash hits an enemy, it restores 100 HP to Brigitte's barrier, effectively giving Brigitte extra survivability in melee fights.
| Property | Value |
|---|---|
| Health | 300 HP (base); 750 HP during Rally |
| Regen | 85 HP/s after 5s without taking damage |
| Movement Penalty | -30% speed while deployed |
| Perks | Barrier Restoration (minor perk) heals 100 HP to the shield on Shield Bash hit |
| Usage | Hold the shield to block incoming fire (especially ultimates or burst combos). Learn "shield dancing" (dropping and re-raising) to regen blocked health, and don't hold it unnecessarily when out of combat to allow faster regeneration. During Rally, the enlarged shield can press forward and draw enemy fire. |
Rally (Ultimate)
When Brigitte activates Rally, she and nearby allies gain temporary bonus health, and Brigitte's barrier is supercharged. Brigitte instantly gains 100 armor (temporary HP), and allies within 20 meters receive an armor buff (previously overheal) – roughly 75 temporary HP each in total, distributed over a few seconds. At the same time, Brigitte's Barrier Shield expands and its HP is set to 750 HP for the duration, making her exceptionally tanky. Rally lasts about 10 seconds. Any attacks Brigitte makes during Rally (Shield Bashes) also stagger and briefly stun enemies.
Note the Season 15 rally buff: activating Rally now resets Shield Bash cooldown, so you can immediately bash an enemy at Rally start.
| Property | Value |
|---|---|
| Armor to Brigitte | +100 armor instantly (restorable over time) |
| Barrier | Grows and has 750 HP |
| Allies | Receive temporary armor (~75 each) via an aura around Brigitte |
| Duration | ~10 seconds |
| Additional | Shield Bashes during Rally hit multiple enemies and briefly stun; Rally also triggers Inspire on activation (self-healing burst) |
| Usage | Time Rally to maximize team benefit (e.g. when pushing an objective or countering an enemy ult). The reset of Shield Bash on Rally allows immediate CC. |
Inspire (Passive)
Brigitte's passive Inspire automatically heals Brigitte and nearby allies whenever she deals damage. When Brigitte hits an enemy with Rocket Flail, Shield Bash, or Whip Shot, she and all teammates within 20 meters heal 15 HP per second, over 5 seconds (total ~75 HP to each ally and herself). This means actively engaging enemies keeps your team topped up. If Brigitte stops dealing damage, the healing ticks stop.
Inspire is crucial for countering sustain damage – as long as Brigitte is swinging her flail in melee range, allies continuously heal. Whip Shot plays a special role: thanks to the Morale Boost perk, using Whip Shot extends Inspire's duration by 3 seconds (making it 8 seconds total). Therefore, combo-ing Whip Shot into flail swings is an effective way to maximize healing. The Inspire heal is modest (15 HPS) but applies to the entire nearby team and to Brigitte herself.
| Property | Value |
|---|---|
| Heal Rate | 15 HP/s to Brigitte and allies |
| Duration | 5 seconds (base); 8 seconds if triggered by Whip Shot with Morale Boost |
| Range | 20 meters radius around Brigitte |
| Activation | Hitting an enemy with Flail, Bash, or Whip triggers it. Also triggers once on Rally activation. |
| Usage | Always try to swing your flail in fights to sustain your team. Whip Shot can be used proactively to lengthen healing. During ambushes or brawls, Inspire often outheals small enemy DPS bursts if maintained. |
Inspire Uptime Optimization
To maximize team healing, Brigitte must stay active in combat. Here are key tips to keep Inspire running:
- Swing at every opportunity: Even if an enemy is barely in range, swing your flail at 0.6s intervals. Don't holster your flail unless reloading your shield. Remember, each swing heals the team.
- Use Whip Shot wisely: Whip enemies not just to damage but to prolong Inspire. The Morale Boost perk adds +3s of healing when you activate Whip Shot. For example, if an ally can survive 5s of healing, extending it to 8s can top them off.
- Hit multiple targets: A single swing heals everyone in range, so try to cleave into multiple enemies or dash through a group with Shield Bash. Position such that even hitting one enemy keeps healing going for all.
- Maintain range: Allies beyond 20m won't be healed. Stay within range, especially the main tank or vulnerable DPS, so they benefit.
By rhythmically alternating flail swings, Shield Bashes, and Whip Shots, Brigitte can often have nearly 100% Inspire uptime in active fights. Coordinate with teammates to let you swing (e.g. they group up), and use high-ground or cover smartly to get hits without overexposing yourself. The Morale Boost perk makes it especially powerful to catch the edge of fights with one Whip Shot to lock in extra seconds of sustained healing.
Shield Management Guide
Brigitte's Barrier Shield is a valuable resource, but its 300 HP pool means it can be broken if held for too long under fire. Good shield management is crucial:
- When to deploy: Raise your shield when a heavy burst or enemy ultimate is incoming (e.g. D.Va bomb, Sigma Grav). Also use it to protect vulnerable teammates during pushes. Always be aware of enemy high-damage threats.
- When to drop: If your barrier is getting low and you've blocked a decent chunk of damage, drop it (press RMB again) to let it start regenerating (after 5s idle). This "shield dance" (raise to block burst, then drop to regen) can greatly extend your barrier uptime. Crouching behind partial cover while it regenerates helps.
- Recovery: If your barrier is broken, it fully resets to 300 HP after 5 seconds of not taking damage. Use that downtime to reposition or heal, then re-shield for the next engagement.
- Perk synergy: With the Barrier Restoration perk, every successful Shield Bash restores 100 shield HP. That means in melee fights, bash aggressively on cooldown to keep your shield healthy.
- Shield-hop: In some cases, jumping with your shield (shield-hopping) can help you clear gaps or avoid damage. For example, shielding while jumping on certain map geometry can let you peek and defend higher ground. Use this to position surprise attacks or escapes.
Managing your shield well means your team takes less damage overall. Communicate with teammates (e.g. "I'm dropping shield, I need a heal") and always monitor your shield's HP. Learn the timing of enemy firing patterns and abilities: drop the shield just before the enemy shoots a second volley if safe, so you can rinse/repeat blocking.
Whip Shot Mastery
Whip Shot is Brigitte's ranged poke/peel tool. Mastering it involves creative setups and peel usage:
- Kill setups: Look for opportunities to knock enemies into death. For example, on maps with cliffs (Lijiang Tower, Ilios, Eichenwalde), Whip Shot can send foes off the edge. Even without a drop, slamming a 25-HP target into a wall deals 120 total damage (70 base + 50 Whiplash bonus), enough to eliminate squishies. Use Whip on distracted or CC'ed enemies to secure kills.
- Peeling/Diving away: Whip Shot is excellent for peels. If an enemy flanker (like Genji or Tracer) targets your backline, whip them backward to break their engagement. Whipping a low-health diver also forces them back to safety. Since it travels 20m, you can displace enemies who even briefly near teammates.
- Inspire synergy: Every Whip Shot deals damage triggers Inspire, and with Morale Boost, healing lasts longer. Use Whip proactively at the start of skirmishes to boost sustained healing for your team.
- Prediction: Because Whip is a projectile, you can lead moving targets. If a flanker is chasing a teammate, anticipate their path and whip ahead of them. Also watch enemy positioning – for example, if a McCree is nearing cover, a well-timed whip can knock him farther and interrupt.
- Charge combos: A useful combo is Shield Bash + Whip + Flail. Dash to stun an enemy, immediately whip them back, and finish with flail swings. The animation cancel of Bash into Whip (while shield is up) can catch opponents off-guard.
- Map knowledge: Some spots have "whip-shot gaps" (like Humongous Bridge on King's Row) where a full whip will pull someone from spawn to point. Experiment on custom games to find these.
Repair Pack Strategy
Repair Packs are Brigitte's targeted healing tool. Effective use requires choosing targets and timing:
- Who to heal: In most scenarios, tanks or heavily-damaged allies should be prioritized. A Repair Pack can allow a tank (like Rein or Zarya) to survive one extra rocket or swing. If an ally drops below ~50%, Quick Fix grants +35HP on top of the pack, so hitting someone just below that threshold is best. However, if your main healer is busy, heal other supports (e.g. a solo Moira) or DPS about to die.
- Team comps: In double-support comps (e.g. Kiriko+Brig), you may save packs for flanking allies (they can't self-heal). In GOATS (triple tank), constantly spam packs into the main shield or into the Rein's face to build armor.
- Pack management: You have 3 charges; use them deliberately. Don't hoard all three – it's usually better to use them as needed since extra charges only wait at max. However, don't waste all at once on overhealed targets. If one ally is full, send to the next priority.
- Farming charges: During downtimes (no fight), proc Inspire by flicking at a wall or bot to regen packs faster. Also, Rally now instantly refreshes Shield Bash, which indirectly can help clear space so you can heal.
- Accuracy: Throws are projectiles that can be blocked by cover. Make sure your ally is in line-of-sight. You can also drop a pack on the ground near an ally, but it only heals one player (whoever picks it up first).
- Overheal management: The 50-HP armor is temporary. If an ally is about to take more damage after the pack, sometimes letting them absorb damage first can maximize the benefit of that armor.
Shield Bash Techniques
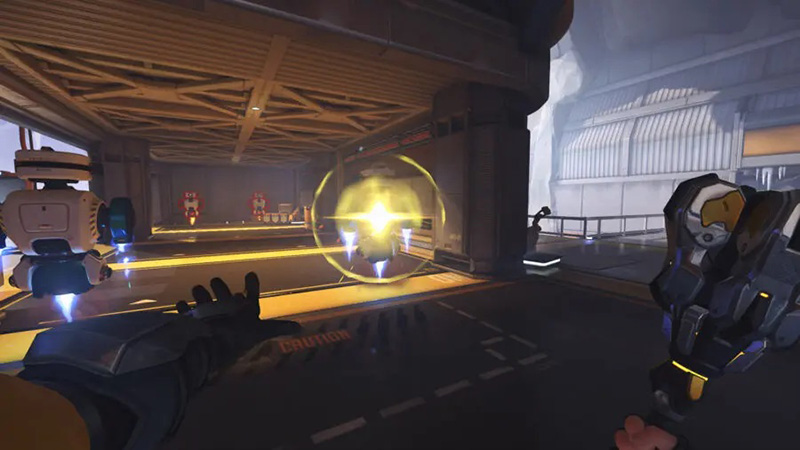
Shield Bash is Brigitte's versatile melee ability. Key techniques:
- Interrupts: Shield Bash can stop channeled or cast ultimates. E.g., bash a charging Reinhardt to interrupt Charge, hit a Lucio mid-Sound Barrier, or knock a Pharah out of Barrager. It works on Moira's ult, Doomfist mid-Meteor Strike, Orisa's Supercharger, and many others. Learn the telltale animations of enemy abilities so you can react with Bash.
- Burst combos: Use Bash as a burst initiation. For instance, dash into a lone squishy (say an Ana or Bastion) and hit them while allies follow up. With its forward dash of 12m, Brigitte can surprise flankers or assassinate low-HP enemies.
- Escape and mobility: Although not usually for escaping, you can dash off to get behind cover or displace an enemy (even using an ally as landing for momentum). For example, bashing past an enemy carries you with them; if two allies stand back-to-back, bashing one can teleport you to the other side.
- Animation cancel: You can start a flail swing and cancel it into Shield Bash to create a quick combo. The timing is tight but doing Flail → immediate Shield Bash can out-damage a shield-breaking Rein before he blocks the flail.
- Crowd-control: In close fights, chains of Shield Bash can change the tide. Two bashes in quick succession (if you pick up the cooldown quickly via Rally or find a health pack) can stun-lock and finish off a diver.
- Environment: If you bash someone while near a ledge, they can fly off the map (e.g., bash Pharah off cliffs). Practice bashing over or past edges for one-shot environmental kills.
Rally Ultimate Mastery
Rally is Brigitte's game-changing ability when used correctly:
- Engagement vs. Sustain: Rally can be used as an engage tool (dive into enemies with your 750HP shield, armor up, and stun) or as an AoE heal (drop armor on allies under fire). If your team is about to collide with the enemy or needs to capture an objective, activate Rally to push through. If instead your team is defending and low, Rally can bolster survival. Evaluate the fight before using it – wasted Rally on a minor skirmish can turn the tide to the enemy.
- Timing: Best moments include when the enemy team has committed big ultimates (so your armor negates it) or when you need to break a stalemate (force enemies into unfavorable positions). Also, if your Rein has an ult and both ults clash, waiting one second to pop Rally after Reinhardt shatters can ensure your team survives his follow-up strike.
- Shields up: Don't forget, your barrier is huge during Rally. Position yourself between key enemies (e.g. the enemy Winston) and shields your teammates. Charge forward under Rally to pressure foes into wasting cooldowns on you.
- Awareness: Rally's onset is visible with an audio cue, so enemies know you used it. Be ready for enemy counters like orisa Halt or Sombra EMP. Make your own counter plays accordingly (e.g. Vault out if EMP hits you).
- Cooldown resets: With Season 15's buff, Rally resets Shield Bash cooldown. Immediately look for a prime target after popping Rally – e.g. bash a diving flanker or swing into the enemy Rein when his shield is down.
- Countering Rally: If you're playing against Brig, know that great timing can shut her down. Coordinate focus fire to burn through her 750 HP shield quickly, or use knockbacks to collapse the armor pool (it stops regenerating after Rally ends). Melee stuns (like McCree Flashbang) can lockdown Brigitte during Rally.
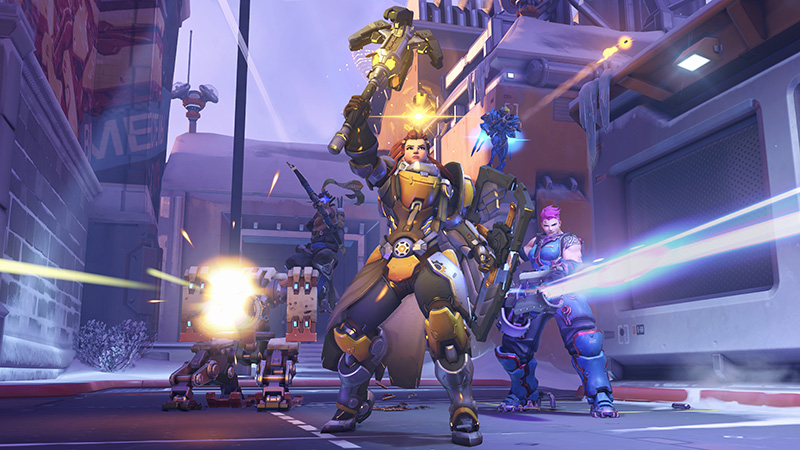
Synergies and Team Comps
Brigitte thrives when paired with the right teammates:
Reinhardt and Orisa are natural partners. Reinhardt's shield lets you safely swing and bash from behind, while your armor and heals let Reinhardt hold longer. Orisa's Halt! and Fortify combo well with your CC. D.Va also benefits from constant armor (Matrix blocks many things while she has HP boosted by Pack and Rally).
Winston and Zarya with a Brigitte can dive and sustain effectively: Winston can focus targets knowing Brigitte heals nearby; Zarya's bubble and high damage get even better when she has the extra armor from Repair Packs. The classic GOATS comp (3-tank/3-support) historically had Brigitte at its core because she kept everyone alive with Inspire healing.
Heroes like Echo or Doomfist like Brigitte behind them for protection. Conversely, aggressive DPS (Reaper, Cassidy) do well with Brig on defense, as she prevents them from being easily isolated.
Mercy and Brigitte can chain healing – Mercy can fly to whoever needs help while Brig dishes out armor. Moira pairs well too (Moira can splash heal multiple allies while Brig gives single-target sustain). Ana can Nano-Boost Brig for an ultra-tanky warrior.
Good synergy often comes from coordinated ult usage: for example, Reinhardt's Earthshatter into Brig's stun, or Zarya Grav followed by Brigitte Rally and Whip + Cassie shots, can wipe teams. In general, Brigitte fits best on teams that value sustain and close-range fighting.
Countering and Being Countered
Understanding who Brigitte is strong against and who she struggles versus is critical:
Brigitte is countered by:
- Pharah and long-range snipers (Widowmaker, Hanzo) can kill Brigitte from outside her range. She has no effective answer to sustained aerial or sniper fire.
- Sombra/Doomfist: Their mobility lets them get behind Brigitte and burst her or her team before she can react.
- CC and interrupts: Flashbangs (McCree), Sleep Dart (Ana), or any instant-cast disable can stop her healing chain. Brigitte has no invulnerability, so coordinating stuns on her nullifies her support.
- Overwhelming damage: A D.Va Self-Destruct or Junkrat ultimate can quickly burn through her barrier and even her Rally armor. If her barrier falls, she's relatively squishy (200 HP base, +100 armor during Rally, i.e. 300 effective).
- Counters: Certain heroes outright counter Brigitte's effect: for example, Mei's Ice Wall blocks your team's mobility; Sigma or Lúcio can outrange you with AoE if you can't get close.
Map-Specific Guides
Brigitte's playstyle can vary by map:
| Map Type | Strategy |
|---|---|
| Open maps (e.g. Ilios, Lijiang, Busan) |
With more sightlines, Brigitte must be wary of being picked off. Use the environment: on Illios, knock enemies off the well or on Lijiang, drop low ground after bashing. On wide payload maps (Dorado, Junkertown), Brigitte does well peeling flankers as they ambush from side lanes. |
| Close/indoor maps (e.g. King's Row, Eichenwalde, Temple of Anubis) |
Brig shines here. Tight corners and narrow chokes let her flail hit multiple foes easily, and she can hold choke points with barrier. For example, on King's Row second point, hugging the left statue corner with shield provides safety while bashing enemies coming through the gate. |
| Verticality (e.g. Ilios Well, Rialto, Castillo) |
Use Whip Shot creatively. On Ilios Well, you can knock players off the bridge or well with Whip + Whiplash. On Rialto, a well-aimed whip from high ground can send enemies into the canal. Always keep an eye on map edges. |
| Rally paths | Think ahead about where you'll run during Rally. Avoid clear sightlines – e.g. on Volskaya point B, you might Rally around the right side flank rather than straight through the choke. Use Rally from mid-height cover (like the castle on Blizzard World) to minimize headshots. |
| Object permanence | If escorting a payload, consider blocking high-angle hits (like Pharah bombs) with Rally's barrier. If defending payload on Nepal Sanctum, drop Rally behind the pillars for safety but still cover the payload pushers. |
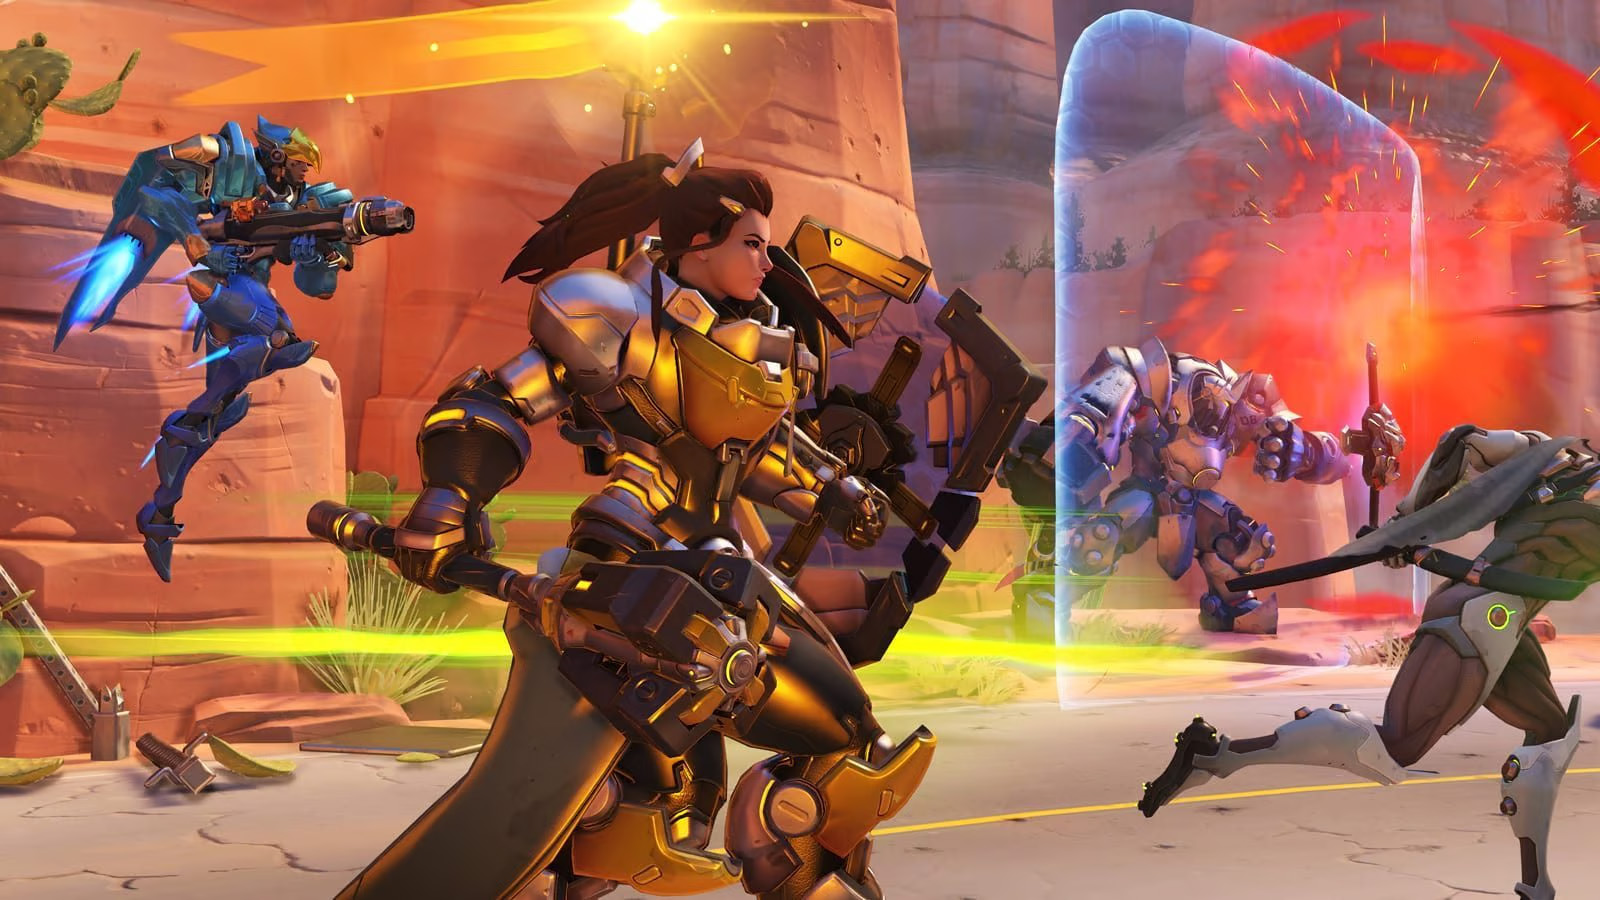
Rank-Specific Strategies
Brigitte play adapts with skill level:
| Rank Range | Strategic Focus |
|---|---|
| Bronze–Silver | Focus on basics. Stay with teammates; use your shield to block damage rather than always swinging flail. Prioritize healing low-health allies and blocking incoming fire. Don't dive too aggressively or you'll get focused. Practice when to drop shield to regen. Use Repair Packs liberally to help any wounded ally. |
| Gold–Platinum | Communication and game sense improve. Learn target priorities: peel for your own healers and destroy low-tier flankers. Use Shield Bash and Whip in coordinated ways (e.g. "I'll bash the Pharah" or "I've got the Winston"). Watch enemy ultimates – e.g. hide behind cover if a D.Va bomb is incoming. Try to position at chokepoints. |
| Diamond–Master | By now, mechanical skill matters. Work on animation cancels (flail → bash, or flail-swing canceling into whip). Track when Inspire is active and plan whips to maximize it. Master "shield dancing" – time dropping and raising the shield precisely between enemy shots. Adapt to the meta: if top players on your team are using Mercy/Lucio, double down on peeling. |
| Grandmaster–Top 500 | Tiny edges count. You'll use multi-shield-peeks, frame-perfect combos, and cheeky ledge bashes. You might bait with an empty swing then bash, or bait a flash and then flail multiple times. Your ult timing aligns with your team's ult economy. Reading scrims, you'll counter dive comps by peeling the Ana or Moira before they heal up. At these ranks, watching pro VODs and parrying enemy play is common. |
Advanced Tech and Mechanics
Top Brigitte players leverage subtle techniques:
- Shield Hop: Jumping with shield deployed briefly gives extra height. On some maps, this lets you leap onto low walls or evade ground-slowing effects. It's also a quick reposition trick: hop over small obstacles to chase or disengage.
- Animation Cancels: You can cancel Brigitte's flail swing windup by Shield Bashing immediately after a swing. Similarly, after Shield Bash, you can throw a Repair Pack or Whip mid-dash to chain actions. These frame-perfect moves squeeze extra DPS/utility into tight windows.
- Flail Jab (Roll Cancel): After two swings, Brigitte has a quick backhand stab (with short range) that you can use to catch foes close behind you. It's often overlooked but can finish off enemies who are almost upon you.
- Defense Drop Reset: If you drop your shield and quickly pull it up again (sometimes even while stunned or snared), it can trigger regen early. Some players exploit tiny delays between shield break and recast to heal some back before rushing again.
- Leveraging Perks: Barrier Restoration (minor perk) is a form of tech – e.g., if you predict a bash on an enemy, you might pre-drop shield and dash through, then recast the restored shield for an unexpected block of counter-damage. Know which Perk loadout suits the map and enemy comp.
- Mega-Heal Trick: If your own armor or health is full, Inspire overheal still occurs (though capped). Clever brigittes sometimes lead an ally just beyond range (to force self-heal ticks) then dash into group to maximize Inspire uptime.
// Example practice sequence for Animation Cancel
// In custom game:
1. Start swing animation (Left-click)
2. Immediately Shield Bash (RMB + LMB)
3. Whip Shot during Bash (Shift)
4. Flail again (LMB)

// Timing window is ~0.2s between inputsVOD Review Guidelines
Self-review is crucial to improve:
- Check key metrics: After a match, look at your healing numbers relative to damage taken and objective time. If you dealt a lot of damage but killed few, maybe you over-committed to offense and left your team. If you died often, examine positioning.
- Shield timeline: Note how long your shield was up vs. down. Were you dropping it too late, causing it to break too often? Did you hold it while undamaged? Aim for high shield uptime without burning it out.
- Ability usage: How many Whip Shots hit? How often did you bash vs melee? If you missed many bashes, practice timing. Check if your Rally usage was timely or wasted.
- Deaths and positioning: Watch your death cams. Were you caught out alone? Did you chase a kill too far? Note times when your barrier wasn't up during peak damage.
- Decision-making: Think about cooldown usage – e.g., did you out-of-placely waste shield bash or Repair Pack? Could you have saved a pack for an ult or bash to interrupt?
- Stand back vs forward: Analyze if you were too passive (not swinging flail enough) or too aggressive (died because you didn't have barrier). Brig requires a balance.
- Teamplay: See if you protected your healers or high-value targets effectively. Check if you were near team to benefit Inspire, or got separated.
- Correcting mistakes: Once you identify a recurring issue (e.g. "I drop shield too early"), practice specifically in quickplay or custom drills to fix it.
Pro Player Analysis
Watching top-tier Brigittes can illustrate optimal play. Notable examples include players like FunnyAstro (LA Gladiators support) or highlights from Overwatch League and Contenders. These pros often demonstrate:
- Intense peeling: Instantly responding to their tanks' safety with bashes and flails, and constantly swinging for Inspire.
- Ultimate synergy: Combining Rally with timed plays (e.g. slamming Sniper sightlines or saving teammates from burst ultimates).
- Adaptable play: Switching between healing, shielding, and aggression fluidly as needed.
The Art of Peeling
Peeling means protecting your own team, especially healers or snipers, from enemy threats. For Brigitte:
- Identify threats: Track which enemy is about to dive your backline (Genji, Tracer, Doomfist, Winston). Always keep an eye on them.
- Pressure diver: Use Shield Bash to halt or repel a diver. For example, if Genji leaps at your Ana, bash him backward. Even if your team kills nothing, the peel can save lives.
- Balance aggression: If a diver comes after you instead, you can turn and bash them instead of fleeing, using your superior close-range sustain. But do NOT chase a diver alone; if he disengages, he'll come back with cooldowns ready or to find the real healer.
- Threat assessment: Sometimes the biggest danger isn't the flanker but an enemy DPS on your healer (like a Widow on your Mercy). Deciding which threat to focus (the flanker or the sniper) is key. Usually, kill the highest-pressure threat: a Tracer on Ana is higher priority than a Junkrat on yourself. Communicate ("I'm peeking left!", "Focus our Zarya!").
- Callouts: As Brig, calling "Flash incoming!", "Pharah high!", "I'm stunned!" etc., helps your team survive while you do your job.
- Feinting and zoning: You can fake stepping forward to bait a Tracer, then walk backwards. Your mere presence can deter divers (they may expect you to bash them).
- Ult discipline: During Rally, peel intensively – any CC you apply to enemy DPS can change the fight, thanks to your team's extra armor.
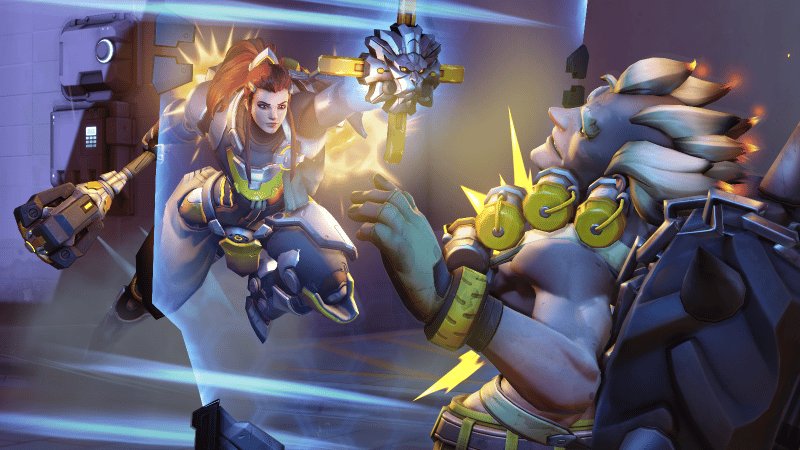
Practice Routines and Drills
Like any hero, Brigitte benefits from focused practice:
| Drill Type | Description |
|---|---|
| Custom games vs. bots | Set up a custom game with hitscan or flanking bots. Practice your Rocket Flail swings to ensure you hit them at max range. Practice Shield Bash timing on armored vs. fast bots. |
| Aim drills | Use aim trainer maps (or Workshop routines) to repeatedly throw Repair Packs to moving targets. Also try hitting bots with your whip to condition leading shots. |
| Shield drills | In Practice Range, get bots to throw volleys at your shield. Practice dropping and raising it at different health levels. Time yourself to see how quickly you can regen. |
| Inspire tracking | In an empty server, swing your flail steadily and watch your team's health go up and down. Ensure you always have at least one enemy hit to see continuous healing. Add a friend and test how you heal them across range. |
| Whip combos | In Custom Mode with two bots or a friend, practice the 3D combos: Flail → Bash → Flail → Whip, etc. Try the wall-bang Whip on various map ledges. |
| Rally timing | Scrimmage games or scrims can help; otherwise, in quickplay, consciously decide to save Rally for specific situations to train your game sense. Then review: did it help? |
| Workshop modes | Look for community workshop drills (there are Brigitte-specific ones). For example, drills that spawn multiple melee targets can help you maximize damage and healing efficiency. |
// Custom Game Settings for Brigitte Practice
Settings {
  Modes: Skirmish
  Heroes: Brigitte only (your team)
  All heroes (enemy team)
  Damage Dealt: 100%
  Damage Received: 100%
  Ultimate Generation: 200%
  Ability Cooldown: 50%
}

// Add bots: Ana, Tracer, Reinhardt for diverse threats
FAQ and Troubleshooting
Brigitte's Rocket Flail was buffed to 45 damage per swing in late 2023. This is 10 higher than in most of Overwatch.
Check that you're within 20m of allies when you hit an enemy. Inspire only heals if Brigitte lands a hit (flail, bash, or whip) on an enemy. Also, if you're healing multiple targets at once, the game divides the heal, so each ally sees 15 HPS max.
Brigitte now has 3 charges of Repair Pack. You can store up to 3 charges (each on 5s cooldown). The counter will only recharge after you drop below 3. If you see 0 charges, it's refilling.
Rally grants Brigitte 100 armor and temporarily upgrades her shield; it also provides an armor overheal (about 75 HP) to each nearby ally over the ult's duration. Think of it as 75 temporary HP for allies, but it cannot exceed each ally's max HP.
Perks are choices before each match. For Brigitte: e.g., Barrier Restoration (Minor) auto-heals your shield on bash; Morale Boost (Minor) lengthens Inspire when you use Whip; Quick Fix (Major) adds +35 heal to low-health Repair Packs; Whiplash (Major) adds +50 damage when Whip slams into a wall. Select them in the hero select screen.
Cassie's Flashbang is one of Brig's worst enemies. Try to bait it first – e.g. show your barrier or do a feint swing – before approaching. If you hear or see Flashbang cast, immediately walk sideways out of range.
Remember, Rally's armor to Brigitte is not invincible; it's like adding 100 HP on top of 200. Enemy ultimates or burst can still eat through it if unprepared. Always use your shield during Rally, and consider using Rally earlier or combined with ally CC (like a Rein charge).

