
1. Introduction to Cassidy
Character Lore and Background
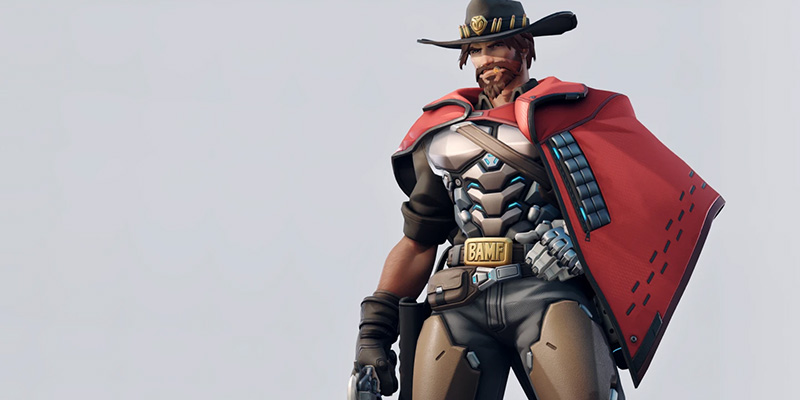
Cole Cassidy stands as a figure defined by a complex past and a drive for redemption. Once a notorious outlaw and founding member of the Deadlock Gang, his path took a sharp turn when he was captured by Overwatch. Offered a choice between prison and joining Blackwatch, Overwatch's covert operations division, he chose the latter. Under the command of Gabriel Reyes (later Reaper), Cassidy participated in clandestine missions, operating in the moral gray areas the main Overwatch body wouldn't touch. However, disillusioned with the internal corruption and infighting that led to Overwatch's downfall, Cassidy eventually walked away, becoming a gunslinger for hire, often finding himself fighting for justice on his own terms, seeking to atone for his past. His character embodies themes of seeking redemption, grappling with past mistakes, and dispensing justice with a measured, world-weary confidence.
Evolution from Overwatch 1 to Overwatch (including name change)
The transition from Overwatch 1 to Overwatch brought significant changes for the hero formerly known as Jesse McCree. The most prominent external change was his renaming to Cole Cassidy, a decision made by Blizzard Entertainment for real-world reasons unrelated to game lore. Within the game, the most impactful gameplay evolution was the replacement of his signature Flashbang stun grenade with the new Magnetic Grenade ability. This was a fundamental shift: Flashbang provided hard crowd control (CC), enabling Cassidy to easily confirm kills on stunned targets, particularly flankers. Magnetic Grenade, conversely, is a damage-focused ability with homing properties and a delayed explosion. This change altered Cassidy's playstyle significantly, moving him away from being a hard CC setup hero towards a damage dealer focused more on pressure, burst damage, and disruption, demanding greater mechanical skill for kill confirmation. Furthermore, the shift to a 5v5 format in Overwatch, featuring only one tank per team, means less readily available peel and protection. This places a greater emphasis on Cassidy's self-sufficiency, positioning, and dueling prowess.
Cassidy's Role in the DPS Lineup
Cassidy operates primarily as a mid-range hitscan Damage (DPS) hero. His core function is to provide consistent, high-impact damage, particularly effective at securing eliminations on vulnerable squishy targets (heroes with 250 HP or less) within his optimal range. He also serves as a potent anti-flanker, capable of deterring or eliminating threats to his team's backline. Compared to other hitscan heroes, Cassidy occupies a unique niche. He lacks the extreme range and mobility of heroes like Widowmaker or Ashe, and the sustained fire and self-healing of Soldier: 76. However, he boasts superior burst damage potential within his effective range, especially via headshots with his Peacekeeper revolver, and offers unique utility through his Magnetic Grenade and the zoning potential of his Deadeye ultimate.
In the DPS lineup, Cassidy fills the role of a mid-range hitscan specialist with strong anti-flanker capabilities. His Peacekeeper revolver delivers high-impact shots that reward precision, while his Combat Roll provides both mobility and instant reload. The Magnetic Grenade serves as his primary utility tool, applying pressure to mobile targets, while his Deadeye ultimate can zone entire areas or secure multiple eliminations when used correctly.
Overall Strengths and Weaknesses
Strengths:
- High Precision Damage: Peacekeeper headshots deal significant damage, allowing for quick eliminations on squishy targets within optimal range.
- Strong Dueling: Excels in 1v1 situations within his effective mid-range due to high damage output and Combat Roll for repositioning/reload.
- Anti-Flanker Capability: Magnetic Grenade provides a potent tool to pressure, damage, and deter flanking heroes like Tracer or Genji.
- Impactful Ultimate: Deadeye can secure multiple kills if used correctly, or act as a powerful zoning tool to control space and objectives.
- Burst Reload/Mobility: Combat Roll offers an instant reload and a short burst of movement with damage reduction, enhancing survivability and uptime.
Weaknesses:
- Damage Falloff: Peacekeeper damage drops significantly beyond 20-25 meters, limiting his effectiveness at longer ranges compared to other hitscan heroes.
- Reliance on Mechanical Skill: Maximizing Cassidy's potential heavily depends on the player's aiming ability, particularly landing critical headshots.
- Limited Mobility: Outside of Combat Roll, Cassidy has no vertical or sustained horizontal mobility, making him vulnerable to being caught out of position.
- Vulnerability During Deadeye: Cassidy moves slowly and is a prime target while channeling his ultimate, requiring careful positioning or team support.
- Magnetic Grenade Reliability: Unlike Flashbang's guaranteed stun, Magnetic Grenade requires a successful stick and doesn't always guarantee a kill, needing follow-up shots.
Current Meta Position and Viability Across Ranks
Cassidy's position in the competitive meta often fluctuates based on balance changes and prevailing strategies, but he generally remains a viable and often strong pick, particularly on maps that favor mid-range engagements. His value shifts across different skill tiers. In lower ranks (Bronze to Gold), players might struggle with the required aim consistency, but the relative ease of landing Magnetic Grenades can provide significant value, and Deadeye often finds more success against less coordinated teams. In mid-ranks (Platinum to Diamond), players begin to leverage his precision damage more effectively, but also face better counterplay. At higher ranks (Master to Grandmaster and Top 500), Cassidy's value is maximized through exceptional mechanical skill, smart positioning, effective cooldown management, and coordinated plays with teammates (especially Deadeye combinations). He is a demanding hero but offers high reward when mastered, making him a consistent, though not always dominant, presence in the DPS roster.
2. Ability Breakdown (Detailed Analysis)
Understanding the precise mechanics and numbers behind Cassidy's abilities is crucial for mastering the hero. Below is a detailed breakdown, including a summary table for quick reference.
| Ability | Type | Damage | Fire Rate / Cast Time | Cooldown | Range / Falloff | Key Notes |
|---|---|---|---|---|---|---|
| Peacekeeper (Primary) | Single-Shot Hitscan | 70 | 2 shots/sec (0.5s recovery) | N/A | 20m - 40m falloff | Max Damage: 140 (Headshot <20m). Min Damage: 21 (Body >40m). |
| Fan the Hammer (Secondary) | Rapid-Fire Hitscan | 50 per shot | ~0.67s (full cylinder) | N/A | Very short, high spread | Max Potential: 300 damage. No headshots. Highly inaccurate beyond point-blank. |
| Combat Roll | Mobility / Reload | N/A | Instant | 6s | ~6-7 meters | Instantly reloads Peacekeeper. Provides 50% Damage Reduction during 0.4s roll. |
| Magnetic Grenade | Thrown Projectile (Homing) | 131 Total (1+70+60) | ~0.2s cast | 10s | Homing seeks within ~1.5m | Sticks to targets/surfaces. 1s delay before 4m explosion. Hinders movement slightly. |
| Deadeye (Ultimate) | Channeled Hitscan | Ramps up: ~130/s (0-2s), ~260/s (2s+) | Up to 7s channel | N/A | Line of Sight | 70% slow, 40% DR. Blocked by barriers. Cancellable. |
| Role Passive (DPS) | Buff | N/A | On Elimination | N/A | N/A | +25% Reload Speed, +25% Movement Speed for 2.5s. Does not stack. |
Primary Fire (Peacekeeper)
The Peacekeeper is a six-shooter revolver firing single, powerful hitscan shots. Being hitscan means the bullet instantly connects with whatever is under the crosshair when fired. It deals a substantial 70 damage per body shot and 140 damage per headshot within its optimal range.
It fires at a rate of 2 shots per second, with a 0.5-second recovery time between each shot. The cylinder holds 6 rounds, and a standard reload takes 1.5 seconds. The first shot has pinpoint accuracy.
Damage begins to decrease starting at 20 meters and reaches its maximum reduction at 40 meters. At maximum falloff range (40m+), body shots deal only 21 damage, and headshots deal 42 damage.
The Peacekeeper's high damage per shot, especially headshots, rewards precision aim. However, the relatively slow fire rate makes missed shots punishing. The significant damage falloff dictates Cassidy's preferred engagement distance, forcing him to play within that crucial 20-meter effective range for maximum impact. Operating outside this band drastically reduces his threat level compared to hitscan heroes with less severe falloff. Mastering positioning to stay within this optimal mid-range zone is therefore fundamental to successful Cassidy play.
Fan the Hammer (FtH - Secondary Fire)
Fan the Hammer rapidly unloads all remaining bullets in the Peacekeeper's cylinder (~0.67 seconds for a full 6 shots). Each bullet deals 50 damage, with no headshot multiplier.
FtH has a very wide cone of spread, making it highly inaccurate beyond point-blank range (within a few meters). Its primary uses are:
- Breaking enemy barriers quickly due to the rapid damage output (up to 300 potential damage).
- Finishing off very low-health targets directly in front of Cassidy.
- Bursting down large targets like tanks at extremely close range, often after landing a Magnetic Grenade.
While tempting for its high potential burst, FtH is generally less effective than accurate primary fire shots due to its unreliability caused by spread. It should be reserved for specific close-quarters situations where accuracy is less critical than raw, fast damage output.
Combat Roll
Combat Roll is a quick directional dash covering approximately 6-7 meters. Its primary function is twofold: it instantly reloads all 6 rounds into the Peacekeeper, and it provides a brief moment of enhanced survivability.
The ability has a 6-second cooldown. Critically, during the 0.4-second roll animation, Cassidy gains 50% damage reduction.
Combat Roll is Cassidy's core utility ability, offering both offensive and defensive applications. The instant reload enables sustained pressure or burst combos (like firing, rolling, and firing again), while the mobility and damage reduction allow for dodging key abilities, escaping danger, or aggressively repositioning. The dual utility of this single ability creates a constant tactical choice: using it for reload means sacrificing the escape/dodge option for 6 seconds, and vice-versa. This interdependence makes careful cooldown management exceptionally important for Cassidy, as misuse can leave him highly exposed given his otherwise limited mobility and standard reload time.
Magnetic Grenade
Replacing the old Flashbang, Magnetic Grenade is a thrown projectile with unique properties. It travels in an arc and will actively seek out the nearest enemy within approximately 1.5 meters of its trajectory path. Upon hitting an enemy directly or sticking via its homing mechanism, it deals 1 impact damage and 70 stick damage. After a 1-second delay, it explodes, dealing an additional 60 damage in a 4-meter radius. The total potential damage from a stick is 131. It can also stick to surfaces.
The grenade has a 10-second cooldown. When stuck to an enemy, it applies a minor "hinder" effect, slightly slowing the target's movement, making follow-up shots easier. It does not stun or prevent the use of movement abilities. Cassidy can take self-damage from the explosion if too close.
Magnetic Grenade serves as a pressure tool, a finisher for low-health targets, and Cassidy's primary anti-flanker deterrent. The homing aspect aids in landing it on fast-moving targets, but its effectiveness relies on predicting movement or baiting out defensive abilities first. The total damage of 131 is intentionally set just below the health threshold of many flankers (like Tracer's 150 HP). This design choice shifts Cassidy's role from the instant kill setup provided by Flashbang to a more pressure-oriented approach that usually requires a follow-up Peacekeeper shot to confirm the elimination. This increases the skill expression required in duels, demanding accurate primary fire even after landing the grenade. The relatively long 10-second cooldown means each use must be impactful; wasting it significantly lowers Cassidy's threat potential.
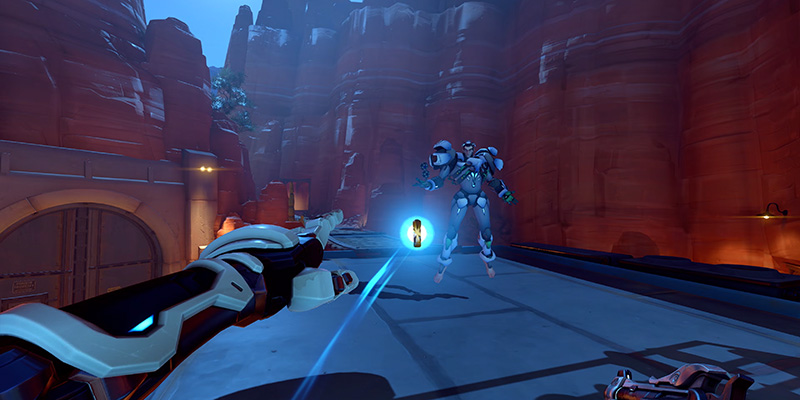
Deadeye (Ultimate)
Deadeye is a channeled ultimate ability where Cassidy slows down significantly (70% movement speed reduction) but gains 40% damage reduction. He automatically begins locking onto all enemies within his line of sight, indicated by accumulating skull icons. The ultimate can be channeled for up to 7 seconds.
The damage dealt to locked targets ramps up the longer the channel is held. For the first 2 seconds, damage accumulates at roughly 130 per second per target; after 2 seconds, this rate doubles to approximately 260 per second per target. A skull turning bright red indicates a lethal lock has been established. Pressing the primary fire button again fires instantly hitting all locked targets. The ultimate can be cancelled early by pressing the ultimate key again or using Combat Roll or Magnetic Grenade.
Deadeye requires clear line of sight, meaning it's blocked by barriers, walls, and other obstructions. Cassidy's slow movement and the bright glow make him extremely vulnerable during the channel. A loud, distinct audio cue ("It's High Noon...") alerts all enemies, giving them time to react by taking cover or focusing fire on Cassidy.
Deadeye is a high-risk, high-reward ultimate. Its primary uses are securing kills on vulnerable, low-health, or exposed targets, and zoning – forcing enemies to abandon key positions or objectives to avoid the potential damage. The significant damage reduction helps mitigate some risk, but the slow movement and clear telegraphing mean successful Deadeyes often rely on surprise (flank angles), timing (using it when enemy defenses are down), or strong team support (barriers, healing, enabling ultimates). Its effectiveness is often derived as much from the threat it poses, forcing enemy reactions, as from the actual kills secured. Because it's easily countered by aware and coordinated teams, its primary value often shifts towards zoning or securing one crucial pick rather than multi-kills in higher-level play.
DPS Role Passive
Like all Damage heroes, Cassidy benefits from the role passive. Upon securing an elimination, he gains a 2.5-second buff granting +25% reload speed and +25% movement speed. This effect triggers on final blows and does not stack if multiple eliminations occur quickly.
This passive rewards aggressive play and successful kill confirmations. The movement speed boost allows for faster repositioning after a pick, either to press an advantage or retreat safely. The reload speed increase synergizes excellently with Cassidy's kit, reducing downtime and allowing him to maintain pressure, especially potent when combined with Combat Roll's instant reload for potentially firing 12 shots very quickly after securing an initial kill. Leveraging this passive is key to maintaining tempo and momentum in team fights.
3. Aim Techniques and Optimization
Cassidy's effectiveness hinges almost entirely on the player's ability to consistently land shots with the Peacekeeper. His lower fire rate compared to other DPS heroes means each shot carries significant weight, making precision paramount.
Peacekeeper Accuracy Fundamentals
Due to the 0.5-second recovery between shots, every missed bullet represents a significant loss in potential damage output. Unlike heroes who can spray bullets, Cassidy players must make each shot count. This necessitates strong crosshair discipline – proactively keeping the crosshair positioned at head level where enemies are most likely to appear, especially when holding angles or rounding corners. Anticipation is key.
Flick Shooting vs. Tracking
Flick Shooting:
This technique involves a rapid, reflexive movement of the mouse (or stick) from its current position directly onto a target, followed by an immediate click. It relies heavily on muscle memory developed through practice. Flicking is often the preferred method for hitscan heroes like Cassidy, whose weapon fires single, high-impact shots. It's ideal for acquiring targets quickly, reacting to sudden enemy movements, and landing precise headshots.
Tracking:
This involves smoothly following a target's movement with the crosshair, maintaining consistent aim. While less critical for Cassidy's single-shot Peacekeeper than for automatic weapons (like Soldier: 76's rifle or Tracer's pistols), tracking is still useful for engaging predictably moving targets, such as tanks pushing forward or airborne heroes like Pharah or Echo, especially when firing multiple shots in succession.
Situational Use:
Effective Cassidy players blend both techniques. Flick shots are typically used for initial target acquisition or reacting to unexpected threats. Once a target is acquired, smoother micro-adjustments or tracking might be used for follow-up shots, especially if the target's movement is relatively predictable.
Crosshair Placement and Selection
Placement:
This is arguably more important than raw reaction speed. Good crosshair placement means minimizing the distance needed to flick or adjust onto a target. Always aim where an enemy is expected to be. Keep the crosshair at head height when moving through the map, check common angles, and pre-aim corners before peeking.
Selection:
Crosshair choice is largely personal preference, but certain types can aid precision. Small, distinct crosshairs like a single dot or a small cross are often favored for hitscan heroes, as they obscure less of the target and provide a precise aiming point for headshots. Color choice should prioritize visibility against various map backgrounds and enemy outlines (bright green, cyan, or magenta are common choices). Experiment to find what works best.
Rhythm Shooting for Maximum Accuracy
Avoid frantically clicking as fast as possible. The Peacekeeper has a fixed recovery time of 0.5 seconds between shots. Develop a consistent firing rhythm that matches this cadence. Clicking deliberately in time with the weapon's readiness allows for better recoil control (though minimal on Peacekeeper) and, more importantly, provides brief moments between shots to process information, track target movement, and adjust aim for the next shot. This deliberate pacing improves consistency and overall accuracy compared to spamming. This measured approach also creates crucial cognitive space between shots, allowing the player to reassess the tactical situation, track cooldowns (both friendly and enemy), and make micro-adjustments to positioning – vital for a hero with limited escape options beyond Combat Roll.
Critical Hit Prioritization
Landing headshots is the single most significant way to increase Cassidy's impact. A headshot doubles the Peacekeeper's damage from 70 to 140 within optimal range. This drastically reduces the time-to-kill (TTK) on most targets. Aiming for the head or upper chest area should be the default approach when engaging enemies within the effective 20-meter range. Understanding key breakpoints is vital: two headshots (<20m) kill any 250 HP hero, while one headshot and one body shot (<20m) eliminates any 200 HP hero. Prioritizing targets susceptible to these quick kills maximizes efficiency.
Sensitivity Optimization (Controller and Mouse)
Mouse:
Finding the correct sensitivity is crucial for precision aim. This is often expressed as eDPI (effective Dots Per Inch), calculated by multiplying mouse DPI by in-game sensitivity. There's no single "best" sensitivity; it's highly personal. Lower sensitivities generally allow for more precise micro-adjustments and smoother tracking, favored by many hitscan players, but require larger mouse movements (and thus a large mousepad). Higher sensitivities allow for faster turns and flicks but can make fine control more difficult. Experiment using methods like the PSA (Perfect Sensitivity Approximation) method or simply by adjusting incrementally in practice ranges or aim trainers until finding a comfortable balance between speed and precision.
Controller:
Controller aiming involves navigating settings like stick sensitivity (horizontal and vertical), aim assist strength, aim assist window size, aim smoothing, and aim ease-in. Techniques like Linear Ramp (raw input) or Dual Zone (different sensitivity zones on the stick) offer different response curves. Finding the right combination requires experimentation. Generally, players seek settings that allow for quick 180-degree turns while still enabling precise small adjustments for tracking and headshots. Utilizing aim assist effectively without overly relying on it is key.
Hardware Recommendations for Precision
While skill is paramount, appropriate hardware can facilitate better performance:
- Mouse: A lightweight gaming mouse with a reliable, high-quality sensor (like a PixArt 3360 or better) minimizes physical strain and ensures accurate tracking of movements.
- Mousepad: A large mousepad provides ample space for low-sensitivity aiming without lifting the mouse frequently.
- Monitor: A monitor with a high refresh rate (144Hz or higher) provides smoother motion clarity, making it easier to track targets and react quickly. Lower input lag is also beneficial.
- Stable Setup: A comfortable chair and desk setup ensuring proper posture can contribute to aiming consistency over long play sessions.
Cassidy's reliance on single, impactful shots makes aim technique disproportionately important compared to heroes with faster fire rates or forgiving spread patterns. Even small improvements in landing Peacekeeper shots, particularly headshots, translate directly into significantly higher overall effectiveness, measured in eliminations, damage accuracy, and fight impact. Investing time in dedicated aim practice offers substantial returns for aspiring Cassidy players.
4. Peacekeeper Mastery
Beyond fundamental aim techniques, mastering the Peacekeeper involves understanding its nuances in various situations, optimizing its usage, and knowing its precise capabilities against the diverse Overwatch roster.
Optimal Firing Rhythm for Maximum Accuracy
Reiterating the importance of rhythm: internalize the 0.5-second interval between shots. Practice this cadence until it becomes second nature. Focus on controlled pairs of shots ("double-taps") rather than single, hesitant shots or panicked spam. This deliberate pacing enhances accuracy and allows for constant micro-assessment of the battlefield between each pull of the trigger.
Damage Breakpoints for Different Heroes
Knowing exactly how many shots are needed to eliminate specific heroes is crucial for target prioritization and deciding when to commit to or disengage from a fight. Damage falloff significantly impacts these numbers beyond 20 meters.
| Target HP | Shots to Kill (<20m Body) | Shots to Kill (<20m Head) | Key Combo (<20m) | Notes |
|---|---|---|---|---|
| 150 (Tracer) | 3 | 2 (1 Head + 1 Body) | 1 Head + 1 Body | Mag Grenade (131) + 1 Body shot kills. |
| 175 (Kiriko) | 3 | 2 (1 Head + 1 Body) | 1 Head + 1 Body | Mag Grenade (131) + 1 Body shot kills. |
| 200 (Most DPS/Support) | 3 | 2 (1 Head + 1 Body) | 1 Head + 1 Body | Two headshots is overkill but faster if possible. Mag Grenade needs follow-up. |
| 225 (Mei, Reaper) | 4 | 2 | 2 Headshots / 1 Head + 2 Body | Mag Grenade (131) + 2 Body shots needed. |
| 250 (Cassidy, Brigitte) | 4 | 2 | 2 Headshots / 1 Head + 2 Body | Mag Grenade (131) + 2 Body shots needed. |
| 300+ (Tanks) | 5+ | 3+ | Focus headshots / Combine with Mag Grenade/FtH | Prioritize headshots to overcome large health/armor pools faster. |
Understanding these breakpoints fundamentally shapes target prioritization. It reveals that focusing a full-health squishy might sometimes be slower than finishing off a slightly damaged tank if headshots aren't guaranteed. This encourages a calculated assessment of risk versus reward based on current aiming confidence and target accessibility, moving beyond simplistic rules like "always shoot the supports first." The goal is efficient elimination, which depends heavily on reliable TTK informed by these breakpoints.
Shooting Through Enemy Barriers Techniques
While Cassidy can contribute decent shield break with his consistent 70 damage per shot, directly dueling a barrier alone is often inefficient. The preferred approach is usually:
- Coordinated Focus Fire: Communicate with teammates to concentrate fire on a specific barrier (e.g., Reinhardt's shield) to break it quickly.
- Off-Angle Pressure: Position yourself at an angle where you can shoot around the barrier and target enemies directly. This forces enemies to reposition or divide their attention, often being more effective than brute-forcing the shield.
Long-Range Tap Firing Techniques
Beyond 30-40 meters, the Peacekeeper's damage drops dramatically. Engaging at this range is generally disadvantageous against dedicated long-range heroes (Widowmaker, Ashe, Hanzo). However, Cassidy can still contribute:
- Focus on Headshots: Even with falloff, headshots deal 42 damage, which can help secure kills on already low-health enemies or apply pressure.
- Suppressive Fire: Use tap firing to discourage enemies from holding certain positions or peeking sightlines. Don't expect quick kills, but contribute chip damage and pressure.
- Target Prioritization: Focus on stationary or predictable targets, or those already engaged by teammates. Avoid prolonged duels with snipers.
Mid-Range Sustained Fire Approach
This is Cassidy's bread and butter (roughly 15-25 meters). Within this range, his damage is high and reliable.
- Consistent Pressure: Focus on landing consecutive body shots while actively seeking opportunities for headshots.
- Cover Usage: Utilize natural cover effectively. Employ "peek shooting" – quickly strafing out from cover, firing a shot or two, and immediately returning to safety – to minimize exposure.
Close-Range Hip-Fire Strategy
The Peacekeeper maintains good accuracy even when hip-firing (not aiming down sights). In close-quarters combat (within ~10 meters):
- Prioritize Primary Fire: Unless the target is point-blank and extremely low, or a large tank/barrier needing burst, primary fire headshots are generally superior to Fan the Hammer.
- Aim for the Head: Don't abandon headshot attempts just because the fight is close. The 140 damage potential remains crucial.
Reload Timing Optimization
Managing the Peacekeeper's 6-round cylinder and 1.5-second reload is vital for maintaining uptime.
- Reload Proactively: Reload during any downtime – while rotating between positions, behind cover between engagements, or while teammates are pushing. Don't wait until the cylinder is completely empty in the middle of a fight if avoidable.
- Combat Roll Reload: Use Combat Roll strategically as an instant reload during combat to maintain pressure or secure a kill, not just as a mobility tool. Track your ammo count to anticipate when a Roll-reload might be most effective.
- Leverage DPS Passive: After securing an elimination, capitalize on the 25% faster reload speed from the DPS passive to get back into the fight quicker.
The interplay between Cassidy's optimal engagement range, his reload mechanics, and the DPS role passive dictates his operational tempo. Effective Cassidy play involves cycles of: positioning within the optimal mid-range zone, securing an elimination quickly (leveraging breakpoints), using Combat Roll and/or the passive buff for an aggressive reload/reposition, and then re-engaging. Failing to secure kills efficiently within this optimal range stalls this tempo, forcing longer reloads and reducing overall impact due to damage falloff. Cassidy's effectiveness is thus highly dependent on maintaining this aggressive, efficient rhythm.
5. Fan the Hammer Techniques
Fan the Hammer (FtH) is often seen as Cassidy's "panic button" or shield-buster, but understanding its specific niche uses can add another layer to his toolkit. While primary fire is superior in most situations due to accuracy and headshot potential, FtH provides rapid, close-range burst.
When to Use Fan the Hammer vs. Primary Fire
The decision hinges almost entirely on range and target type:
Use Fan the Hammer When:
- At point-blank range (less than ~5 meters).
- Targeting large enemy barriers (Reinhardt, Sigma, Winston).
- Bursting down large-bodied tanks at extremely close range.
- Finishing a very low-health enemy directly in front of you where aiming a precise shot might be difficult or too slow.
- Immediately after landing a Magnetic Grenade on a nearby target for maximum burst.
Use Primary Fire When:
- At virtually all ranges beyond point-blank (5m+).
- Aiming for headshots is feasible.
- Accuracy is required.
- Engaging any squishy target where headshots offer significantly faster TTK.
Target Priority for Fan the Hammer
- Enemy Barriers: FtH is one of the fastest ways for Cassidy to dump damage into a shield. Emptying a full clip deals 300 damage very quickly.
- Tanks at Point-Blank: Large hitboxes make it easier to land most of the FtH shots. Particularly effective against diving tanks like Winston or D.Va who close the distance.
- Low HP Finishers (Close Range): If an enemy is one shot but juking erratically up close, FtH can sometimes secure the kill more reliably than a potentially missed primary shot.
Damage Calculation Against Different Health Pools
While the maximum potential damage is 300 (6 shots * 50 damage), the significant spread means landing all shots is rare, even on tanks, unless Cassidy is practically inside the enemy model. Against squishier targets, expect only 2-4 shots to connect reliably at optimal FtH range. The combo of Magnetic Grenade (131 damage) followed by FtH offers high burst potential (~431 max), but requires landing the grenade stick and being at very close range for the FtH follow-up.
Tank-Busting with Fan the Hammer
FtH can be a viable tool against tanks in specific scenarios:
- Post-Magnetic Grenade: Stick the tank, then immediately FtH for significant burst.
- Cornered Tanks: If a tank is low health and trapped in close quarters.
- Armor Stripping: The rapid succession of shots can help chew through armor faster than spaced primary fire shots (though primary headshots are still generally better if aim permits).
Animation Cancels with Fan the Hammer
While some minor animation cancels exist (like meleeing immediately after FtH starts), they offer negligible time savings compared to cancels involving primary fire or other abilities. Focus should remain on using FtH appropriately rather than optimizing micro-timings with it.
Combining Fan the Hammer with Other Abilities
- Magnetic Grenade -> FtH: The most common and intended combo. Land the grenade, close the (already close) distance if needed, and unload FtH as the grenade detonates or just after.
- Combat Roll -> FtH: Use Combat Roll to aggressively close the distance into point-blank range, often after emptying a primary fire clip, then immediately FtH a low target or barrier.
Counter-Dive Application
When dived by tanks like Winston or D.Va, or even aggressive flankers at point-blank, FtH provides immediate, high-burst damage onto their typically large or close hitboxes. Often combined with a pre-emptive or simultaneous Magnetic Grenade throw. While risky, it can be a powerful deterrent or finisher against dives if primary fire headshots aren't consistently possible under pressure.
Despite being statistically inferior to well-aimed primary fire in most engagements, Fan the Hammer's existence serves a purpose. Its high potential burst forces enemies to respect Cassidy's immediate personal space. It acts as a fallback option when precise aim falters under pressure or when raw speed of damage output (like against barriers) is the priority. This creates a "danger zone" around Cassidy, influencing how enemies approach him in close quarters, even if the primary threat remains his accurate Peacekeeper shots. The choice between attempting precise headshots or opting for the Magnetic Grenade + FtH combo against a close target often reflects a player's confidence in their mechanical skill versus the perceived reliability of the grenade's homing. FtH, in this sense, lowers the mechanical execution floor in specific high-pressure, close-range scenarios, albeit at the cost of the higher damage ceiling offered by primary fire headshots.
6. Combat Roll Advanced Techniques
Combat Roll is more than just a simple reload or dodge; mastering its advanced applications unlocks significant potential for outplay, survivability, and aggression. Its 6-second cooldown demands thoughtful usage.
Using Combat Roll for Engagement
While primarily seen as defensive, Combat Roll can initiate fights effectively:
- Closing to Optimal Range: Roll from cover into Cassidy's ideal 15-25 meter range to start an engagement with a full 6-round clip.
- Aggressive Repositioning: After landing initial shots or securing a kill (triggering the DPS passive speed boost), Roll forward or diagonally to pursue a retreating target or take an advantageous off-angle. This is risky but can confirm kills that might otherwise escape. The 50% damage reduction can help mitigate damage taken during the aggressive roll.
Combat Roll as Escape Tool
This is its most common defensive use:
- Retreating to Safety: Roll backwards or sideways towards cover, health packs, or teammates when taking focused fire or caught out of position.
- Mitigating Burst Damage: Time the roll to utilize the 50% damage reduction during its 0.4s duration to survive lethal burst damage (e.g., Junkrat combo, Pharah rocket).
Reload Timing through Combat Roll
Optimizing the instant reload is key to maximizing uptime:
- Predictive Reload: Don't wait until you fire the 6th shot. If a fight is ongoing and you have 1-2 shots left, using Roll preemptively ensures you have a full cylinder immediately available, minimizing downtime compared to a manual 1.5s reload.
- Sustained Fire Sequence: The "shoot (few shots) -> roll -> shoot (full clip)" sequence allows for continuous pressure.
- Burst Combo: "Shoot (clip) -> roll -> FtH" provides maximum close-range burst potential after closing distance or emptying the cylinder.
Ability Dodging with Precise Timing
The combination of quick movement and the 0.4 seconds of 50% damage reduction allows Combat Roll to negate or mitigate key enemy abilities if timed correctly. This requires prediction and fast reactions:
- Projectiles: Dodge linear skillshots like Ana's Sleep Dart, Hanzo's Storm Arrows, or Sigma's Accretion by rolling perpendicular to their path.
- Hitscan/AoE: The damage reduction can help survive hitscan bursts (like Soldier's Visor) or AoE damage (like Pharah's Barrage) if caught momentarily.
- Key Abilities: With precise timing, it's possible to dodge abilities like Roadhog's Hook (dodging the hook itself) or even Reinhardt's Earthshatter (if rolled just as it activates, though difficult).
Map-Specific Mobility Routes
While not a primary mobility tool like Blink or Dash, Combat Roll can navigate certain map geometries more efficiently than walking:
- Crossing Small Gaps: Roll across small chasms or between platforms that are slightly too far to jump normally.
- Quick Cover Transitions: Use Roll to move rapidly between nearby cover points, minimizing exposure time.
- Minor Elevation Changes: Roll up short ramps or stairs slightly faster.
Combined Combat Roll + Magnetic Grenade Sequences
Integrating Roll with Magnetic Grenade opens up tactical plays:
- Roll -> Grenade: Roll into optimal grenade range (often slightly closer than optimal Peacekeeper range) and immediately throw the grenade for a surprise stick, potentially catching flankers off-guard.
- Grenade -> Roll: Throw the grenade towards a target, then immediately Roll (offensively or defensively) while the grenade is in flight. This can help dodge return fire, close distance for follow-up shots/FtH, or create space after securing the stick.
Resource Management and Cooldown Tracking
Given its crucial dual utility (reload + mobility/DR) and 6-second cooldown, Combat Roll is a valuable resource that should not be wasted. Before using it aggressively or simply for a faster reload, always consider if it might be needed for escape within the next 6 seconds. Tracking key enemy cooldowns that Combat Roll can potentially dodge (Hook, Sleep Dart, etc.) allows for more effective defensive usage. The constant tension between using Roll for offense/reload versus saving it for defense/mobility is central to high-level Cassidy play. Mismanaging this cooldown frequently leads to unnecessary deaths due to Cassidy's lack of alternative escape options. Furthermore, the brief damage reduction subtly encourages calculated risks; rolling through predictable damage (like a spam-filled choke) rather than just away from it can sometimes enable reaching a superior position or surviving otherwise lethal damage thresholds, adding tactical depth beyond simple evasion.
7. Magnetic Grenade Strategy
Magnetic Grenade is Cassidy's primary utility cooldown, serving as an anti-flanker tool, a burst damage source, and a kill confirmation assistant. Its 10-second cooldown necessitates strategic usage.
Target Priority for Magnetic Grenade
Effective use requires prioritizing targets where the grenade's impact is maximized:
- High-Mobility Flankers: Tracer, Genji, Sombra, Lucio. Landing a grenade forces crucial defensive cooldowns (Recall, Deflect, Translocator, Amp It Up/Wallride) or deals significant damage (131), making them vulnerable to follow-up shots. The homing helps against their erratic movement.
- Low-Health Enemies: Use it as a finisher to secure kills on targets who have taken prior damage, especially those trying to escape around corners where the homing can assist.
- Key Supports: Isolated or diveable supports like Ana, Zenyatta, or Kiriko are prime targets. Sticking them often forces powerful cooldowns (Nade/Sleep, Discord repositioning, Suzu/Teleport) or leads to an elimination.
- Tanks (Situational): While not its primary function, sticking a tank adds burst damage during coordinated pushes or can pressure them significantly if they lack immediate mitigation. It does not interrupt most channeled abilities like Flashbang did.
Single-Target vs. Group Damage Optimization
Magnetic Grenade is fundamentally a single-target ability due to the stick mechanic. While the 4-meter explosion radius can damage nearby enemies, relying on this splash damage is inconsistent. The primary goal should always be to secure the stick on the highest priority target. Aiming for the stick maximizes the reliable 131 damage potential.
Using Magnetic Grenade Against Flankers
This is a core function, requiring prediction and mind games:
- Anticipatory Throws: Don't throw it directly at a blinking Tracer or dashing Genji; throw it where they will be an instant later. Predict their movement patterns out of Blinks, Dashes, or Translocator usage.
- Baiting Defensives: Flankers often hold defensive abilities specifically for threats like Magnetic Grenade. Try to pressure them with Peacekeeper shots first to force out Deflect, Recall, Wraith Form, etc., before committing the grenade.
- Peeling for Supports: Use the grenade defensively to stick flankers diving your backline. Call out the stuck target so your team can help secure the kill. The slight hinder effect aids in landing follow-up shots.
Combining with Team Abilities
Magnetic Grenade becomes significantly more effective when combined with team utility:
- Setup: Abilities that restrict movement make landing sticks trivial (e.g., Zarya's Graviton Surge, Sigma's Gravitic Flux, Mei's Blizzard/Slow, Junkrat's Trap).
- Follow-up: Since 131 damage doesn't kill most full-health targets, coordinate focus fire on the stuck enemy. A simple callout ("Ana stuck!") ensures the target is quickly eliminated.
Tracking Enemies with Magnetic Grenade
- Homing Assistance: The homing mechanic can help secure sticks on targets partially obscured by cover or moving unpredictably, provided the initial throw is reasonably accurate.
- Visual Information: A successfully stuck grenade provides a clear visual indicator on the target for 1 second before detonation, briefly revealing their location even if they move behind cover.
Anti-Barrier Applications
Magnetic Grenade is largely ineffective against barriers. It will stick to the barrier surface, but the subsequent explosion deals negligible damage to the shield itself. Prioritize using Peacekeeper primary fire or Fan the Hammer for shield break.
Grenade Trajectory Techniques
- Arc Practice: Familiarize yourself with the throwing arc in the practice range. It allows throwing the grenade over low cover or obstacles.
- Bounce Shots: Advanced technique involving bouncing the grenade off walls, floors, or ceilings to hit targets indirectly. Difficult and situational, but possible.
- Near-Miss Homing: Aiming slightly beside or near an enemy, rather than directly at them, can sometimes be more effective, allowing the homing to curve onto the target, especially against players actively trying to juke direct throws.
The shift from the instant, reactive stun of Overwatch 1's Flashbang to the delayed, damage-focused Magnetic Grenade fundamentally alters how Cassidy interacts with enemy defensive abilities. Flashbang could interrupt abilities on reaction. Magnetic Grenade, with its travel time, stick requirement, and 1-second fuse, gives opponents a window to react with abilities like Genji's Deflect, Tracer's Recall, Reaper's Wraith Form, or Kiriko's Suzu. This makes Cassidy more reliant on predicting enemy movement and cooldown usage, or successfully baiting out these defensive abilities before throwing the grenade. It changes the dynamic of duels from a straightforward "stun and kill" to a more nuanced exchange of "pressure, bait, punish." The significant 10-second cooldown further emphasizes the need for deliberate and impactful usage, as a missed or easily countered grenade represents a major loss of Cassidy's dueling and pressure potential for a considerable time.
8. Deadeye Ultimate Strategies
Deadeye, Cassidy's ultimate ability, is a powerful tool capable of swinging team fights through multi-kills or strategic zoning. However, its high vulnerability and clear telegraphing demand careful planning and execution.
Optimal Deadeye Usage Timing
Timing is everything for a successful Deadeye. Consider using it during these windows:
- Post-Fight Cleanup: After a team fight has largely concluded and key enemy defensive cooldowns (Immortality Field, Suzu, Deflect, Defense Matrix, Kinetic Grasp) have been expended. Remaining low-health enemies are easy targets.
- Ultimate Combinations: Coordinate with teammates using setup ultimates like Zarya's Graviton Surge, Reinhardt's Earthshatter, Mei's Blizzard, Sigma's Gravitic Flux, or Orisa's Terra Surge. These abilities group enemies or hold them in place, guaranteeing value. Sombra's EMP removing barriers and abilities is also a prime setup.
- Surprise Factor: Activate Deadeye from unexpected positions – high ground, deep flank angles – to catch the enemy team off guard before they can react effectively.
- Proactive Zoning: Use Deadeye not necessarily for kills, but to deny critical space. This can halt an enemy push onto an objective, force enemies off valuable high ground, or secure control of a choke point during crucial moments.
Positioning for Maximum Effectiveness
Where Cassidy uses Deadeye is as important as when. Optimal positions include:
- High Ground: Offers superior sightlines over the battlefield and often provides natural cover nearby. Makes it harder for enemies on the ground to quickly break line of sight.
- Off-Angles: Positioning away from the main axis of engagement forces enemies to divide their attention, making it harder for them to coordinate a response.
- Behind Team Resources: Utilizing friendly barriers (Rein, Sigma, Ramattra), Baptiste's Immortality Field, or staying within range of strong healing support significantly increases survival chances during the vulnerable channel. Avoid activating it while completely exposed in the enemy's direct line of fire.
Using Deadeye as Zoning Tool
Sometimes, the threat of Deadeye is more valuable than the kills themselves. Channeling it forces enemies within line of sight to immediately seek cover or risk elimination. This can be used strategically to:
- Clear Objectives: Force enemies off a control point or payload.
- Deny High Ground: Make key advantageous positions untenable for the enemy team.
- Halt Pushes: Stop an enemy advance through a choke point by forcing them to retreat or wait out the duration.
- Bait Cooldowns: Force enemies to use defensive ultimates (like Lucio's Sound Barrier or Zenyatta's Transcendence) prematurely. Remember Deadeye can be cancelled early, retaining up to 50% ultimate charge. If the zoning goal is achieved quickly, cancelling preserves charge and reduces risk.
Deadeye Damage Calculation
Understanding the damage ramp-up is key to securing kills:
- Initial Ramp (0-2 seconds): Damage accumulates relatively slowly (~130 per second). Quick shots fired immediately after activation deal minimal damage.
- Accelerated Ramp (2+ seconds): Damage accumulation doubles (~260 per second). Holding the lock for just over 2 seconds guarantees lethal damage (>500) on most squishy heroes.
- Lethal Lock Indicator: The skull icon turning bright red signifies that enough damage has accumulated to guarantee a kill on that specific target (assuming no damage reduction or healing).
Target Priority during Deadeye
Prioritize targets based on how quickly they can be eliminated and their strategic importance:
- Low-Health Enemies: Require the shortest lock-on time.
- Stationary or Slow Targets: Supports like Ana or Zenyatta, Bastion in Assault form, or enemies caught in CC are easier to maintain locks on.
- Exposed Squishies: DPS or Supports caught out of position without defensive cooldowns or immediate cover.
- Flying Heroes: Pharah, Echo, and Mercy are often exposed in the air with limited cover options.
- Tanks: Generally the lowest priority due to high health pools and defensive abilities, unless they are already critically low or the only targets available.
Countering Enemy Responses to Deadeye
Anticipate and react to common counters:
- Barriers: Deadeye does not penetrate barriers. Reposition to find an angle around the shield, wait for teammates to break it, or cancel the ultimate if line of sight is completely blocked.
- Absorption Abilities: D.Va's Defense Matrix, Sigma's Kinetic Grasp, Orisa's Javelin Spin will negate Deadeye shots. Wait for these abilities to expire before firing.
- Stuns/Interrupts: Ana's Sleep Dart, Sombra's Hack, Roadhog's Hook, Sigma's Accretion can interrupt Deadeye. Be aware of these threats and position defensively or rely on team protection (Kiriko's Suzu, Zarya's Bubble). Cancel Deadeye if targeted by an unavoidable interrupt.
- Taking Cover: The most common response. Anticipate where enemies will retreat and try to position initially where their cover options are limited. Sometimes firing early to confirm one key kill is better than holding for longer and getting no value as everyone hides.
Combining Deadeye with Team Abilities
Deadeye's effectiveness skyrockets when used in conjunction with teammate abilities:
- Setup Ultimates: Graviton Surge, Earthshatter, Blizzard, Gravitic Flux, EMP, Terra Surge are the prime combos.
- Damage Amplification: Baptiste's Amplification Matrix doubles Deadeye's damage ramp-up. Ana's Nano Boost increases Cassidy's survivability and damage output. Mercy's Damage Boost also speeds up locks.
- Protection: Kiriko's Protection Suzu makes Cassidy immune to interrupts and damage briefly. Zarya's Projected Barrier can absorb incoming fire. Lucio's Sound Barrier can help Cassidy survive focus fire during the channel.
Deadeye's significant drawbacks – the slow movement, vulnerability, and loud audio cue – mean its success rate is heavily influenced by the enemy team's awareness and coordination. Against organized opponents who react quickly, securing multi-kills often requires specific circumstances like a flank, a combo, or using it during the chaos of a won fight. Consequently, its role often shifts towards strategic zoning or confirming a single, vital elimination in higher-level play. The ability to cancel Deadeye is a crucial, often underused, aspect of its kit. Recognizing when the primary objective (forcing movement, securing one pick, baiting cooldowns) is achieved and canceling early allows Cassidy to retain significant ult charge and reposition safely, making the ultimate a more flexible and less punishing tool than an all-or-nothing gamble.
9. Optimal Positioning
For a hero like Cassidy with limited mobility and strict effective range requirements, positioning is not just important – it's paramount. Correct positioning maximizes damage output while minimizing risk.
Effective Range Positioning
Cassidy's damage potential peaks between approximately 15 and 25 meters. Consistently positioning within this band relative to key targets or anticipated enemy locations is crucial. This requires constant map awareness and micro-adjustments. Avoid holding extremely long sightlines where damage falloff becomes severe, and avoid unnecessary point-blank confrontations where heroes with better close-range tools might prevail (unless using FtH strategically).
High Ground Utilization Techniques
High ground offers numerous advantages:
- Superior Sightlines: Provides a clearer view of the battlefield, making it easier to spot targets and track movement.
- Natural Cover: Ledges and map geometry on high ground often provide excellent cover that can be quickly ducked behind.
- Aiming Advantage: Shooting down at targets makes landing headshots slightly easier (hitting the top of their character model).
- Grenade Trajectory: Easier to land Magnetic Grenades on targets below. Actively seek opportunities to take and control high ground positions relevant to the objective or team fight. Know the routes to access these positions quickly, sometimes utilizing Combat Roll for a slight speed boost.
Off-Angle Positioning
Positioning away from the main cluster of teammates creates a crossfire. This forces enemies to divide their attention and makes it difficult for them to use cover effectively against threats from multiple directions.
- Execution: Find angles that provide line of sight to the enemy team, but are perpendicular or diagonal to the main path of engagement.
- Caution: Playing off-angles requires good awareness. Ensure there's an escape route (using Combat Roll) back to cover or teammates, and be mindful of potential flankers targeting isolated players. Don't position so far off that receiving healing or support becomes impossible.
Combat Roll Escape Route Planning
Before engaging, always have a mental plan for disengagement. Identify nearby cover, health packs, or teammate positions that are within a single Combat Roll distance. Position yourself near corners or doorways that allow for a quick roll back into safety if pressured. Never stand in the open without a clear escape path.
Positioning Relative to Team Resources
Cassidy relies on his team for survival and enablement:
- Supports: Maintain line of sight with healers whenever possible. Understand their effective healing ranges and play within them.
- Tanks: Utilize the space created by tanks and the protection offered by their barriers. However, avoid stacking directly behind the tank; use adjacent angles to maximize sightlines and avoid splash damage. Play with the tank, not on the tank.
Sightline Control Fundamentals
Control key sightlines relevant to objectives or enemy approach routes.
- Holding Angles: Position to watch doorways, corridors, or choke points where enemies are likely to appear.
- Peek Shooting: Minimize exposure by quickly strafing out ("peeking") from cover, firing one or two shots, and immediately strafing back. This is essential for dueling and holding space safely.
Playing With and Around Barriers
- Friendly Barriers: Use them as mobile cover, allowing safer operation within optimal mid-range.
- Enemy Barriers: As mentioned, shooting around barriers via off-angles is generally more effective than trying to break them solo. Coordinate focus fire if shield break is the priority. Understand how barrier placement affects sightlines and reposition accordingly.
Cassidy's distinct lack of vertical mobility and significant damage falloff make proactive positioning far more critical for him compared to heroes who can quickly reposition (like Tracer, Genji) or engage effectively from longer ranges (like Ashe, Widowmaker). He cannot easily contest distant high ground or escape bad situations if caught far from cover. This means anticipating enemy rotations and securing strong mid-range positions before fights erupt is a core element of his gameplay. Getting caught out of position is significantly more punishing for Cassidy. Furthermore, optimal positioning constantly involves balancing the need for aggression (staying within the 15-25m effective range) with the need for safety (access to cover, support line-of-sight, having Combat Roll available for escape). Playing too passively wastes his damage potential, while overextending makes him an easy target. This balance point is dynamic, shifting based on team compositions, enemy threats, cooldown availability, and the current state of the team fight. High-level Cassidy play requires continuous game sense and awareness to make these micro-adjustments in positioning effectively.
10. Map-Specific Guides
Cassidy's effectiveness can vary significantly based on map geometry. Understanding how to leverage his strengths and mitigate his weaknesses on each map and map type is crucial.
Breakdown by Map Type
Control (King of the Hill):
- Focus: Controlling the high ground overlooking the point is usually key. Off-angles that cut off enemy rotations to the point are also strong.
- Engagements: Fights are often chaotic and occur around the central objective. Cassidy excels at punishing enemies crossing open spaces to reach the point.
- Deadeye: Use for retakes (clearing the point from high ground) or defending the point once captured, often zoning enemies away from entry chokes.
- Flanks: Be aware of common flank routes enemies use to access the backline or contest the point from unexpected angles. Position to intercept or avoid these.
Escort (Payload):
- Attack: Utilize high ground and off-angles alongside the payload's path. Pressure defenders holding key corners or elevated positions. Deadeye can break defensive setups at checkpoints.
- Defense: Set up in strong mid-range positions overlooking common attacker approach routes or chokepoints. Use high ground to gain vision and safety. Deadeye is powerful for halting payload progress, especially around corners or checkpoints. Fall back progressively, always seeking the next advantageous position.
Hybrid:
- Point A (Assault): Play similarly to Control point offense/defense. Focus on breaking through the initial choke, controlling high ground, and securing picks. Cassidy can pressure defenders holding static positions.
- Payload Phase: Transitions to Escort gameplay. Apply the same principles of controlling space around the payload, using off-angles, and leveraging Deadeye for pushes or holds.
Push:
- Focus: Fights constantly shift around the moving robot. Controlling forward positions and key high grounds overlooking the robot's path is vital.
- Positioning: Use off-angles aggressively to pressure the enemy team escorting the bot. Fall back defensively to set up ambushes or hold checkpoints when losing ground.
- Deadeye: Effective for clearing enemies off the robot, securing checkpoints, or zoning during crucial pushes.
Individual Map Analysis (Examples - Apply similar logic to all maps)
King's Row:
- Point A (Hybrid): Attack: Pressure defenders in the hotel (right side high ground) or statue area. Defense: Hold the hotel high ground or the archway choke. Off-angles through the alleyway (left side) are strong.
- Payload (Escort): Attack: Control high ground above the street phase choke. Use off-angles in the bookstore or side rooms. Defense: Hold corners tightly, utilize high ground near checkpoints. Final point defense offers many angles.
- Deadeye: Point A defense from hotel balcony. Street phase from high ground windows overlooking payload path. Final point from high ground platforms or back corners.
- Roll Tech: Can roll across the small gap on the Point A high ground walkway near the defender spawn side.
Eichenwalde:
- Point A (Hybrid): Attack: Pressure bridge and choke from main or side routes. High ground above choke is powerful if accessible. Defense: Hold choke from high ground castle positions or ground level cover.
- Payload (Escort): Attack: Control castle battlements. Push through choke points using payload as cover. Defense: Utilize high ground along the castle walls and interior pathways. Final point defense involves holding the Keep entrance.
- Deadeye: Point A defense from castle high ground. Payload phase from battlements overlooking the path. Final point from inside the Keep overlooking the objective.
- Flanks: Watch flank route under the bridge (Point A) and side passages during castle phase.
Lijiang Tower (Control):
- Garden: Control the central bridge and high ground platforms overlooking the point. Beware of flankers using side routes. Deadeye from bridge or high platforms.
- Night Market: Fight for control of the point and surrounding market stalls. Use doorways for peek shooting. High ground is limited but valuable. Deadeye can zone the entire point area.
- Control Center: Very close-quarters. Play carefully around point geometry. Side room control offers off-angles. High ground surrounding the point is critical. Deadeye often used from high ground or back corners during retakes.
General Map Considerations
- High Ground Access: Identify maps where Cassidy can easily access and hold high ground vs. maps where it's difficult or contested by more mobile heroes.
- Sightline Length: Recognize maps with predominantly long sightlines (e.g., Junkertown Point A/C, Dorado Point C) where Cassidy's falloff is a disadvantage, versus maps with more mid-range corridors and engagement zones (e.g., Midtown, King's Row, Oasis City Center) where he excels.
- Choke Points: Understand how Cassidy can hold or break chokes using positioning, Magnetic Grenade pressure, and Deadeye zoning.
Certain map layouts naturally play better into Cassidy's optimal engagement distance. Maps featuring distinct mid-range engagement zones, accessible high ground, and defined choke points (like King's Row, Midtown, Eichenwalde Points A/B) allow him to exert significant pressure consistently. Conversely, maps dominated by extremely long sightlines or very tight, enclosed spaces can sometimes limit his effectiveness compared to specialized heroes. This suggests that while Cassidy is broadly viable, his inherent advantage can fluctuate based on the map pool, making map knowledge crucial for maximizing performance. Furthermore, the most potent Deadeye locations often exploit map geometry, particularly verticality or angles covering common retreat paths after losing a fight. Using Deadeye from an unexpected high ground or a flanking position that minimizes enemy cover options dramatically increases its potential compared to activating it predictably from the frontline. Therefore, intimate map knowledge directly translates into more impactful ultimate usage.
Synergies and Team Compositions
Cassidy's potential is often unlocked or amplified by specific tank, support, and DPS pairings. Understanding these synergies helps in building effective team compositions and coordinating plays.
Best Tank Pairings
Cassidy generally pairs well with tanks who can either provide him with protection to operate in his optimal mid-range or help set up his abilities.
- Reinhardt: The classic pairing. Reinhardt's barrier provides a safe space for Cassidy to deal damage. Earthshatter provides an excellent setup for Deadeye or easy Peacekeeper shots. Cassidy, in turn, helps break enemy shields quickly.
- Sigma: Offers consistent barrier uptime and can protect Cassidy from key cooldowns or projectiles with Kinetic Grasp. Gravitic Flux lifts enemies, making them easy targets for Peacekeeper or Deadeye locks. Sigma's mid-range poke complements Cassidy's damage profile.
- Orisa: Provides frontline stability. Fortify and Javelin Spin offer peel against divers targeting Cassidy. Terra Surge can clump enemies for Magnetic Grenades or Deadeye opportunities. Her consistent damage adds pressure alongside Cassidy.
- Ramattra: Nemesis Form creates significant space and distraction. Annihilation combines well with Deadeye, creating overwhelming pressure zones. Void Barrier in Omnic form offers temporary protection.
- Less Direct Synergy (but viable): Dive tanks (Winston, D.Va, Doomfist, Wrecking Ball) create chaos and draw attention, which can open opportunities for Cassidy. However, he typically plays separately from the core dive, holding off-angles or protecting the backline rather than diving in himself. This requires more independent play and strong awareness from the Cassidy player.
Optimal Support Heroes to Pair With
Supports who enable Cassidy's damage output or enhance his survivability are ideal pairings.
- Ana: Nano Boost significantly increases Deadeye survivability and damage ramp-up, and also empowers regular engagements. Biotic Grenade enables aggressive plays by boosting healing received or denying enemy healing. Long-range healing suits Cassidy's preferred positioning. Sleep Dart provides crucial peel against threats.
- Baptiste: Immortality Field is invaluable for saving Cassidy during Deadeye or from lethal burst damage/dives. Amplification Matrix dramatically increases Peacekeeper and Deadeye damage potential. Regenerative Burst provides consistent AoE healing.
- Kiriko: Protection Suzu can cleanse negative effects (like anti-heal) and provides brief immortality, perfect for saving Cassidy during Deadeye or countering enemy Magnetic Grenades/stuns. Kitsune Rush accelerates Cassidy's fire rate, reload speed, cooldowns, and Deadeye charge rate, making him incredibly lethal. Swift Step allows Kiriko to quickly reposition to heal or peel.
- Mercy: Damage Boost lowers Peacekeeper shots-to-kill breakpoints, making Cassidy significantly more threatening. Consistent single-target healing keeps him topped off. Resurrection can undo a costly mistake or pick. Enables a "pocket" playstyle if Cassidy is performing well.
Full Composition Recommendations
Cassidy fits well into several archetypes:
- Poke/Spam Compositions: (e.g., Sigma/Orisa, Cassidy, Ashe/Hanzo/Soldier, Baptiste/Ana, Zenyatta/Kiriko). Cassidy holds mid-range angles, adding consistent hitscan pressure alongside other ranged damage dealers, focusing targets called by the team or those discorded by Zenyatta.
- Brawl/Rush Compositions (Rein-based): (e.g., Reinhardt, Cassidy, Mei/Reaper/Symmetra, Baptiste/Lucio, Moira/Kiriko). Cassidy stays close behind Reinhardt's shield, providing high mid-range damage as the team pushes forward, using Magnetic Grenade on frontline targets or enemy divers.
- Anti-Dive Compositions: (e.g., Orisa/Ramattra, Cassidy, Torbjorn/Mei/Brigitte, Baptiste/Moira). Cassidy acts as a primary deterrent against flankers and dive tanks, using Magnetic Grenade and high damage to protect the backline alongside other anti-dive heroes.
Ability Combinations with Other Heroes
- Deadeye Setups: Graviton Surge, Earthshatter, Blizzard, Gravitic Flux, EMP, Terra Surge, Kitsune Rush.
- Damage Amplification: Baptiste Window, Nano Boost, Mercy Boost, Zenyatta Discord Orb.
- Grenade Follow-up: Target enemies affected by slows, stuns, hacks, or Discord Orb for easier Magnetic Grenade sticks and kill confirmation.
- Focus Fire: Coordinate Peacekeeper shots with other DPS onto single targets, especially those Cassidy has damaged or stuck with his grenade.
Communication and Callout Guide for Coordinated Play
Clear communication enhances Cassidy's effectiveness:
- Grenade Status: "Tracer stuck!" "Used nade on Genji."
- Deadeye Intent/Status: "Looking for Deadeye top right." "Using High Noon, watch flanks!" "Deadeye active, take cover!"
- Flanker Locations: "Reaper backline!" "Tracer on Ana!"
- Resource Requests: "Need heals." "Bap, can I get lamp for Deadeye?" "Ana, Nano ready for combo?"
- Focus Targets: "Focus Pharah!" "Shoot the stuck Mercy!"
Playing Cassidy in Different Team Compositions
- In Poke: Prioritize holding advantageous off-angles, applying pressure to the enemy backline or exposed targets, and looking for opening picks. Play patiently and utilize cover.
- In Brawl: Stay closer to the core of the team, usually behind the tank. Provide consistent damage onto the enemy frontline. Use Magnetic Grenade defensively against divers or offensively on engaged targets. Combat Roll aggressively with the team's pushes.
- In Dive: Requires the most adaptation. Often plays independently, holding flanks or high ground to control space created by the dive tanks. Pressure key targets that the dive focuses. Act as the primary anti-flanker protecting supports from counter-dives. Demands strong self-sufficiency and map awareness.
Matchup Analysis (Comprehensive)
Knowing how to approach duels and engagements against every hero in the Overwatch roster is critical for consistent Cassidy performance. This requires understanding enemy abilities, cooldowns, and optimal engagement ranges relative to Cassidy's own strengths and weaknesses.
(Note: This section provides a general framework. Specific numerical interactions depend on ongoing balance patches.)
Detailed 1v1 Guide Against Every Hero (General Approach)
| Hero Type | Hero | Matchup Approach |
|---|---|---|
| Tanks | Reinhardt | Break shield with team. Keep distance to avoid Hammer/Charge. Headshots are key. FtH for shield break if close. Roll Charge. Mag Grenade adds pressure but won't stop Charge. |
| Winston | Optimal range duel. Pressure him during dive setup. Mag Grenade as he lands. Roll out of Tesla range or use FtH if bubble dancing close. Headshots break bubble faster. | |
| D.Va | Pressure baby D.Va. Shoot Matrix emitters or wait it out. Mag Grenade after Matrix drops. Headshots are crucial. Roll Boosters. FtH effective at point-blank. | |
| Orisa | Keep distance from Javelin Spin/Throw. Shoot through Fortify (headshots still deal bonus damage). Mag Grenade forces cooldowns. Roll Terra Surge pull. | |
| Roadhog | Stay outside Hook range (~20m). Bait Hook before using Roll/Grenade. Headshots essential. Roll away from Whole Hog. Mag Grenade useful after Hook or during Take a Breather. | |
| Sigma | Play around barrier. Shoot Grasp or wait it out. Roll Accretion. Mag Grenade after Grasp/Barrier deploy. Headshots vital. Deadeye vulnerable to Grasp/Barrier/Rock. | |
| Wrecking Ball | Shoot him in ball form to force cooldowns. Mag Grenade disrupts Pile Driver setup or grapple engage. Headshots when he's vulnerable. Roll Pile Driver/adaptive shields engage. | |
| Ramattra | Poke Omnic form. Respect Nemesis form range. Mag Grenade Nemesis form for pressure. Headshots crucial. Roll Annihilation pull/damage. Break barrier. | |
| Mauga | Play cover heavily. Avoid Cardiac Overdrive engage. Headshots essential to out-damage healing. Mag Grenade adds burst. Roll Overrun/Cage Fight engage. Focus fire needed. |
| Hero Type | Hero | Matchup Approach |
|---|---|---|
| Damage (DPS) | Ashe | Mid-range duel favors Cassidy if hitting shots. Close distance carefully. Roll Dynamite. Pressure her scope. Mag Grenade forces Coach Gun. |
| Bastion | Pressure Recon form. Use cover heavily against Assault form. Mag Grenade Assault form for burst. Headshots critical. Roll Grenade jump/Artillery. | |
| Cassidy (Mirror) | Pure aim duel. Whoever hits more headshots wins. Bait Roll/Grenade. Positioning and cover usage are key. | |
| Echo | Consistent Peacekeeper shots needed. Headshots vital. Mag Grenade tricky but high value if landed. Roll Sticky Bombs/Beam. Pressure her during Focusing Beam. | |
| Genji | Bait Deflect before Grenade/Deadeye. Track Dash movement. Mag Grenade is primary tool. Headshots crucial. Roll away from Dragonblade unless confident in duel. | |
| Hanzo | Avoid long sightlines. Close to mid-range. Use cover, peek shoot. Roll Storm Arrows. Mag Grenade forces Lunge. Headshots essential. Respect Sonic Arrow vision. | |
| Junkrat | Avoid chokes/spam. Keep distance. Shoot traps/mines. Roll away from combos/Rip-Tire. Mag Grenade good if he's close. Headshots secure kills quickly. | |
| Mei | Keep distance from freeze/primary fire. Break wall quickly. Mag Grenade forces Cryo-Freeze. Headshots vital. Roll out of Blizzard. | |
| Pharah | Hitscan advantage, but requires good aim. Lead shots slightly if needed at range. Headshots crucial. Mag Grenade difficult but possible. Use cover against Barrage. Roll Concussive Blast. | |
| Reaper | Stay outside effective shotgun range. Headshots critical. Mag Grenade forces Wraith Form. Roll Death Blossom. Punish predictable teleports. | |
| Sojourn | Aim duel. Use cover against Railgun charge. Roll Disruptor Shot. Mag Grenade forces Slide. Headshots essential. Respect Overclock. | |
| Soldier: 76 | Mid-range duel. Use cover against Helix/Visor. Roll Helix Rockets. Mag Grenade forces Biotic Field or Sprint repositioning. Headshots win the duel. | |
| Sombra | Spy-check common spots. React quickly to Hack. Mag Grenade forces Translocator. Headshots crucial. Track Translocator location if possible. Roll EMP engage if needed. | |
| Symmetra | Break turrets quickly. Keep distance from beam. Mag Grenade forces Teleporter escape. Headshots vital. Roll charged secondary fire. Focus fire on Teleporter/Wall. | |
| Torbjorn | Prioritize turret destruction. Duel Torb at mid-range. Headshots essential. Roll Overload engage. Mag Grenade forces Overload. Avoid Molten Core pools. | |
| Tracer | Aim duel requiring prediction. Mag Grenade forces Recall or is lethal after. Land headshots. Track Blink count/Recall usage. Roll Pulse Bomb. | |
| Widowmaker | Avoid long sightlines. Close distance using cover. Pressure her scope. Headshots critical if dueling. Mag Grenade unlikely to hit at range. Roll Grapple escape attempt if close. |
| Hero Type | Hero | Matchup Approach |
|---|---|---|
| Supports | Ana | Pressure her position. Bait Sleep/Nade. Mag Grenade forces cooldowns or secures kill. Headshots crucial. Roll Sleep Dart. Respect Nano Boost target. |
| Baptiste | Break Lamp quickly. Bait Lamp/Regen Burst. Mag Grenade forces cooldowns. Headshots essential. Roll away from Window sightline if possible. | |
| Brigitte | Stay outside Flail/Whip Shot range. Break shield. Mag Grenade forces Shield Bash escape/engage. Headshots vital. Roll Rally engage. | |
| Illari | Pressure her position. Destroy Healing Pylon. Dodge Outburst. Mag Grenade forces Outburst. Headshots crucial. Use cover against Captive Sun. | |
| Kiriko | Bait Suzu/Swift Step. Mag Grenade forces cooldowns. Headshots essential. Roll Kunai spam. Respect Kitsune Rush path. | |
| Lifeweaver | Pressure his large hitbox. Break platform quickly. Mag Grenade forces Petal Platform/Rejuvenating Dash. Headshots easy to land relatively. Roll Life Grip pull attempt if close. | |
| Lucio | Difficult target due to mobility. Mag Grenade helps secure damage. Headshots needed. Predict wall-riding paths. Roll Soundwave boop attempt. | |
| Mercy | Prioritize her if possible, especially if pocketing. Headshots crucial. Mag Grenade forces Guardian Angel escape. Shoot her during Resurrect. | |
| Moira | Hard to pin down. Mag Grenade forces Fade. Headshots needed. Track Fade cooldown. Roll Biotic Orb. Avoid Coalescence beam centerline. | |
| Zenyatta | Pressure his position (no mobility/survivability CDs). Headshots very effective. Mag Grenade often confirms kill or forces Transcendence. Roll Discord volley. Break line of sight during Transcendence. |
Anti-Flanker Techniques
Covered extensively in Section 15, but general approach involves:
- Positioning: Stand near supports or in positions overlooking common flank routes.
- Awareness: Listen for audio cues (Blinks, Steps, Hacks). Check flanks periodically.
- Magnetic Grenade: Use predictively to force cooldowns or secure damage.
- Dueling: Confident headshots are the best deterrent.
Tank Pressure Approaches
- Consistent Damage: Apply steady Peacekeeper fire to force cooldowns and build ultimate charge.
- Headshots: Prioritize headshots on tanks whenever possible to bypass armor more effectively and deal significant damage.
- Magnetic Grenade: Use to add burst during focus fire or punish cooldown usage.
- Fan the Hammer: Use only at point-blank, primarily after a Grenade stick or against barriers/low HP tanks.
Counter-Sniping Strategies
- Avoid Sightlines: Don't challenge Widowmaker or Hanzo at their optimal ranges.
- Close Distance: Use map cover to close the gap into Cassidy's optimal mid-range.
- Off-Angles: Attack snipers from unexpected angles to force them out of position.
- Team Coordination: Request dive tanks or flankers to pressure the sniper directly.
Hard Counters and How to Play Around Them
- Long-Range Snipers (Widowmaker, Hanzo): Play cover, close distance, use off-angles. Don't ego-challenge long sightlines.
- Pharah/Echo (especially with Mercy pocket): Requires strong mechanical skill. Focus fire with team. Pressure Mercy first if possible. Position near cover. Ask for hitscan/support help.
- Highly Mobile Heroes (if aim struggles): Tracer, Lucio, Genji can be difficult. Focus on landing Mag Grenades and body shots if headshots are inconsistent. Play closer to team for peel.
Soft Counters and Exploiting Weaknesses
- Heroes reliant on key cooldowns: Bait out abilities like Deflect, Recall, Wraith, Suzu, Immortality Field before committing Magnetic Grenade or Deadeye.
- Low Mobility Heroes (Zenyatta, Ana): Exploit their lack of escape options with aggressive positioning and focused fire.
- Large Hitbox Heroes (Tanks, Bastion): Easier to land consistent Peacekeeper shots and Magnetic Grenades.
Rank-Specific Strategies
Cassidy's optimal playstyle and focus areas evolve as players climb the competitive ladder. Adapting to the typical skill level, coordination, and game pace of different ranks is key to success.
Bronze to Gold Strategies
- Focus: Fundamentals. Aim consistency (body shots are fine, headshots are a bonus), basic positioning (staying near team/cover, using high ground), and using abilities on cooldown without wasting them.
- Aim: Work on tracking larger targets and landing consistent body shots. Don't stress perfect headshots yet.
- Abilities: Use Magnetic Grenade liberally on cooldown against flankers or any enemy in range; its value is high here. Use Combat Roll primarily for escape or reloading when empty. Deadeye can often secure multi-kills against less aware teams; use it from safe positions or flanks.
- Positioning: Stick with the tank or supports. Use obvious high ground. Avoid complex flanks.
- Carrying: Consistent damage output and shutting down enemy flankers diving supports often has the biggest impact. Simple Deadeyes can swing fights.
Platinum to Diamond Approach
- Focus: Improving mechanical skill (more headshots), better positioning (off-angles, proactive rotation), smarter ability usage, and basic ult tracking/coordination.
- Aim: Actively practice headshots. Understand breakpoints (e.g., 1 head + 1 body kills 200hp). Work on flick shots.
- Abilities: Time Magnetic Grenade more deliberately – bait cooldowns, prioritize key targets. Use Combat Roll more thoughtfully for dodging specific abilities or aggressive reloads, not just panic escapes. Start looking for Deadeye combos or zoning opportunities, not just raw kills.
- Positioning: Experiment with off-angles. Understand map control concepts. Rotate proactively based on objective/enemy positions. Manage effective range more actively.
- Carrying: Secure opening picks with improved aim. Consistently win duels. Use Deadeye more strategically (combos, zoning key areas). Better cooldown management leads to higher uptime and impact.
Master to Grandmaster Techniques
- Focus: Peak mechanical skill, advanced positioning and game sense, precise cooldown management, intricate team coordination, and exploiting subtle advantages.
- Aim: Highly consistent headshots are expected. Master flicking and micro-adjustments. Understand nuanced aiming techniques like rhythm shooting.
- Abilities: Maximize value from every cooldown. Use Magnetic Grenade predictively based on enemy patterns and cooldown tracking. Utilize Combat Roll for frame-perfect dodges and aggressive plays, leveraging the damage reduction. Deadeye is often used for zoning, forcing key cooldowns, or securing one critical pick in coordinated plays, rather than multi-kill attempts against highly reactive enemies.
- Positioning: Dynamic repositioning based on flow of battle. Master off-angles and high ground control. Understand sightline denial and space creation. Position relative to specific teammate cooldowns (e.g., Lamp, Suzu).
- Carrying: Out-dueling enemy DPS consistently. Enabling team through pressure and picks. Perfect ultimate timing and coordination. Minimal mistakes and optimal resource usage.
Differences in Cassidy Playstyle Across Ranks
- Lower Ranks: More forgiving, relies on raw damage output and easier ability value. Positioning is simpler (stay with team).
- Mid Ranks: Increased emphasis on mechanics and smarter decisions. Positioning becomes more nuanced (using angles). Ability usage requires more thought.
- Higher Ranks: Extremely demanding mechanically and mentally. Play is faster, requiring prediction and proactive plays. Positioning is dynamic and complex. Ability usage is precise and often coordinated. Deadeye value shifts towards utility/zoning.
How to Carry with Cassidy at Different Ranks
- Bronze/Gold: Land shots consistently, use abilities effectively, punish positional mistakes, get multi-kills with Deadeye.
- Plat/Diamond: Win duels, secure opening picks, use Deadeye strategically, manage cooldowns well, start controlling space with positioning.
- Master/GM: Flawless mechanics, superior game sense and positioning, perfect cooldown usage, coordinate effectively with team, make high-impact plays consistently.
Adapting to Team Communication Levels
- Low Communication (Lower Ranks): Rely on pings and game sense. Focus on individual performance and clear visual cues (like positioning near supports who need peel). Assume less coordination for combos.
- Moderate Communication (Mid Ranks): Make clear, concise callouts (flankers, low targets, Deadeye intent). Listen for teammate calls. Attempt basic combos.
- High Communication (Higher Ranks): Participate actively in detailed strategy, target calling, ult tracking, and combo planning. Coordinate ability usage precisely ("Using nade now," "Ready for Nano Deadeye").
Advanced Tech and Mechanics
Beyond the basics, several advanced techniques and mechanics can elevate Cassidy play, offering subtle advantages in timing, damage output, and survivability.
Animation Canceling Techniques
Animation canceling shortens the time spent locked in ability animations, allowing for faster follow-up actions.
- Melee Cancels:
- Shoot -> Melee: Immediately after firing a Peacekeeper shot, inputting a melee attack cancels the remaining recovery animation, allowing the melee damage (30) to come out slightly faster. Useful for finishing very low HP targets at close range (e.g., Shoot + Melee = 100 damage burst).
- FtH -> Melee: Similar concept, meleeing during or immediately after Fan the Hammer can add quick burst damage, though less impactful than the primary fire cancel.
- Ability Cancels:
- Deadeye Cancel: As mentioned, Deadeye can be cancelled early by pressing the ultimate key again, or by using Combat Roll or Magnetic Grenade. This is crucial for saving ult charge or repositioning if threatened.
- Reload Cancel (Minor): Meleeing just before the reload animation fully completes might slightly shorten it, but the effect is minimal and generally not worth focusing on compared to Roll reloads or passive reloads.
Frame-Perfect Ability Usage
This involves using abilities within extremely tight timing windows for maximum effect.
- Combat Roll Dodging: Using Roll at the precise moment an ability like Earthshatter or Hook activates to avoid its effect. Requires prediction and low latency.
- Magnetic Grenade Timing: Throwing the grenade to stick just as an enemy uses a movement ability, predicting their landing spot. Or timing it to detonate just as a defensive ability expires.
Quick-Melee Incorporation
Beyond the basic Shoot -> Melee cancel, quick melee (default V key on PC) can be woven into combos:
- Grenade -> Shoot -> Melee: If a target survives the grenade stick and a follow-up shot, a quick melee can secure the kill if within range. Total potential: 131 (Grenade) + 70 (Shot) + 30 (Melee) = 231 burst.
- FtH -> Melee: Useful if FtH leaves a close-range target barely alive.
Advanced Magnetic Grenade Placements
- Indirect Throws: Bouncing the grenade off walls or ceilings to hit targets behind cover or around corners. Requires understanding grenade physics and map geometry.
- Surface Sticks for Zoning: Intentionally sticking the grenade to a wall or doorway an enemy is likely to peek or push through can deter them or guarantee damage if they ignore it. The 4m explosion radius creates a temporary hazard zone.
Combat Roll Reset Optimization
While Combat Roll instantly reloads, optimizing when to use it maximizes ammo efficiency:
- Rolling with 1-2 Shots Left: Instead of rolling immediately after emptying the clip, firing 4-5 shots, then rolling, allows for near-continuous firing (4-5 shots -> instant reload -> 6 shots). This minimizes total downtime compared to firing 6, then rolling.
Audio Cue Utilization
Overwatch has rich audio design. Leverage it:
- Enemy Footsteps: Identify approaching flankers or enemies around corners. Different heroes have distinct footstep sounds.
- Ability Sounds: Recognize the activation sounds of key enemy cooldowns (e.g., Deflect, Wraith Form, Suzu) to know when to use Magnetic Grenade or Deadeye safely. Listen for Deadeye's audio cue to react defensively.
- Hit Confirmation Sounds: Distinct sounds confirm body shots vs. headshots vs. hitting armor. Use this feedback to adjust aim and confirm kills.
// Example Workshop Code for Practicing Cassidy Tech
// Import this code in the Workshop to practice animation cancels and combos

settings {
    heroes: Cassidy;
    respawn: Manual;
    cooldownTime: 25%;
}

variables {
    global:
        0: trainingBots
    player:
        0: comboCounter
        1: successRate
}

rule("Setup Training Environment") {
    event {
        Ongoing - Global;
    }
    actions {
        // Create moving bots on various paths
        // Track combo success rate
        // Configure optimal practice settings
    }
}
Anti-Flanker Role Mastery
One of Cassidy's primary responsibilities, especially in less mobile compositions, is protecting the backline from flankers like Tracer, Genji, Sombra, Reaper, and sometimes Doomfist or Wrecking Ball.
Tracking Flanker Patterns
Experienced flankers often use predictable routes and timing. Learn common flank paths on each map. Pay attention to individual player habits within a match – do they always flank left? Do they engage immediately after using a key cooldown? Anticipating their approach is the first step.
Predictive Magnetic Grenade Usage
Given flanker mobility, landing Magnetic Grenade often requires prediction:
- Anticipate Movement: Throw the grenade where Tracer will likely appear after a Blink, where Genji will land after a Dash, or near Sombra's suspected Translocator location.
- Force Cooldowns First: Pressure with Peacekeeper shots to bait out Deflect, Recall, Wraith Form, or Translocator before committing the grenade for a higher chance of sticking.
- Aim Near, Not At: Sometimes aiming slightly beside a rapidly moving target allows the homing to connect more reliably than trying to hit them directly.
Protecting Support Players
Flankers primarily target supports. Position yourself strategically to intercept these dives:
- Peel Positioning: Stand within line of sight and effective range of your supports, especially Ana, Zenyatta, or Lifeweaver who are more vulnerable.
- Body Blocking: Physically position yourself between a diving flanker and your support momentarily to absorb damage or block their path.
- Immediate Response: React instantly when a support calls for help or when you hear/see a flanker engage them. Your damage and Magnetic Grenade are crucial deterrents.
Positioning to Intercept Flankers
- Hold Key Angles: Position yourself overlooking common flank routes or entry points to the backline.
- Deny Space: Your presence and the threat of your damage/grenade can deter flankers from taking certain paths.
- Awareness: Constantly scan potential flank approaches, especially during downtime or rotations. Use audio cues.
Communication for Team Protection
- Call out Flanker Locations: "Tracer left flank!" "Genji diving Ana!" Clear, concise calls allow the team to react.
- Announce Grenade Usage: "Traded nade with Tracer Recall." "Genji stuck, focus him!"
- Request Assistance: If overwhelmed by multiple flankers, call for help from teammates (other DPS, tank peel).
Dueling Strategies Against Each Flanker Hero
- Tracer: Land one headshot or Mag Grenade + body shot. Predict Blinks. Bait Recall before Grenade. Track her cooldowns. Respect Pulse Bomb range.
- Genji: Bait Deflect is critical before Grenade/Deadeye. Track Dash resets. Headshots essential. Mag Grenade is key deterrent. Respect Dragonblade; Roll away or duel if confident/supported.
- Sombra: Spy check frequently. React fast to Hack audio/visuals. Mag Grenade forces Translocator. Punish predictable unstealth locations. Headshots crucial.
- Reaper: Maintain distance (>10m). Headshots vital to out-damage shotguns/lifesteal. Mag Grenade forces Wraith. Punish Teleport. Roll out of Death Blossom immediately.
- Doomfist (Dive): Punish him during charge-up of Rocket Punch or Seismic Slam landing. Mag Grenade disrupts his combos. Headshots essential. Roll away from Meteor Strike center.
- Wrecking Ball (Dive/Flank): Shoot ball form to deny grapple speed/Pile Driver setup. Mag Grenade disrupts engagements. Headshots when vulnerable. Roll Pile Driver.
Resource Management Guide
Effective Cassidy play involves carefully managing all available resources: cooldowns, ammunition, health, ultimate charge, and mobility usage. Wasting resources leads to downtime and reduced impact.
Cooldown Tracking and Usage
- Combat Roll (6s): High value, dual utility. Avoid using it solely for minor repositioning if an escape or crucial reload might be needed soon. Track key enemy abilities it can dodge.
- Magnetic Grenade (10s): Long cooldown, significant impact potential. Don't throw it randomly. Use it deliberately to secure kills, pressure key targets, or peel flankers. Track enemy defensive cooldowns it interacts with (Deflect, Suzu, Lamp, etc.).
- Deadeye: Build charge through consistent damage. Don't hold it indefinitely waiting for the "perfect" 6k. Use it strategically for zoning, combos, or securing 1-2 crucial picks. Track enemy ults/cooldowns that counter it. Remember cancel potential.
Ammunition Management
- Peacekeeper (6 shots): Track your ammo count mid-fight.
- Reload Timing: Reload proactively during downtime.
- Combat Roll Reload: Use Roll strategically for instant reloads when needed most, often rolling with 1-2 shots left for maximum uptime.
- DPS Passive Reload: Leverage the 25% speed boost after kills for faster subsequent reloads.
Health Resource Optimization
- Positioning: Use cover and high ground to minimize unnecessary damage taken.
- Support Awareness: Stay within line of sight and range of healers. Know where health packs are located.
- Combat Roll DR: Utilize the 50% damage reduction during Roll to mitigate burst damage when repositioning or caught out.
- Disengagement: Know when a fight is lost or unwinnable. Use Roll to disengage and preserve health rather than staggering death.
Ultimate Charge Acceleration
- Consistent Damage: Dealing damage is the primary way to build Deadeye charge. Focus on landing shots consistently.
- Headshots: Headshots grant more ultimate charge than body shots due to higher damage.
- Target Priority: Damaging tanks builds charge faster due to larger health pools, but securing eliminations on squishies is often more impactful for winning fights. Balance damage farming with securing picks.
Economy of Mobility Usage
- Combat Roll Value: Every Roll needs purpose. Is it for dodging, engaging, escaping, or reloading? Avoid rolling just to move slightly faster between points if cooldown might be needed.
- Walking vs. Rolling: Walk when rotating outside of combat to keep Roll available for the next engagement.
Ability Sequencing for Maximum Value
Consider the optimal order to use abilities in different scenarios:
- Anti-Flanker: Pressure with Peacekeeper -> Bait defensive CD -> Magnetic Grenade -> Follow-up shots/Melee.
- Aggressive Engage: Initial shots -> Roll forward (reload/reposition) -> Continue firing / Mag Grenade / FtH.
- Tank Burst: Mag Grenade -> FtH (point-blank) / Headshots (mid-range).
- Deadeye Combo: Wait for setup ult (Grav, Shatter) -> Activate Deadeye -> Secure kills.
VOD Review Guidelines
Reviewing recordings (VODs - Video On Demand) of personal gameplay is one of the most effective methods for identifying mistakes, understanding patterns, and accelerating improvement.
What to Look for in Your Cassidy Gameplay
Focus on key decision points and execution:
- Aim & Mechanics:
- Crosshair placement: Was it consistently at head level? Was it pre-aimed at common angles?
- Shot accuracy: What percentage of shots hit? How many were critical hits? Were misses due to poor tracking, flicking, or rhythm?
- Ability execution: Were Magnetic Grenades aimed well? Was Combat Roll timed effectively for dodges/reloads?
- Positioning:
- Were you consistently in the optimal range? Too close? Too far?
- Were you utilizing high ground and off-angles effectively?
- Did you have escape routes planned? Were you caught in the open?
- Were you positioned appropriately relative to your team (tanks/supports)?
- Ability Usage & Cooldown Management:
- Were cooldowns (Roll, Grenade) used with clear purpose? Or wasted?
- Was Combat Roll used effectively for both reload and mobility/DR?
- Was Magnetic Grenade used on high-priority targets? Was it baited out easily?
- Was Deadeye timed well? Was positioning optimal? Was it used effectively for zoning or kills? Was it cancelled appropriately?
- Decision Making & Game Sense:
- Target prioritization: Were you focusing the right enemies at the right times? (Consider breakpoints, enemy threats, support status).
- Engagement timing: Did you engage at opportune moments? Or take disadvantageous fights?
- Ultimate tracking (estimation): Did you play around key enemy cooldowns/ultimates?
- Awareness: Did you react appropriately to flankers or off-angle threats?
Common Mistakes at Each Rank
- Bronze-Gold: Poor crosshair placement, inconsistent aim (body shots focus), wasting cooldowns (Roll for minor movement, random Grenades), poor positioning (standing in open, not using high ground), predictable Deadeyes.
- Plat-Diamond: Better mechanics but still inconsistent headshots, suboptimal positioning (not fully utilizing off-angles), better but still imperfect cooldown management (using Roll too early/late), Deadeye timing/positioning could be improved.
- Master-GM: Mistakes are more subtle. Micro-errors in aim or timing, slightly suboptimal positioning leading to taking unnecessary damage, misreading enemy cooldowns, minor coordination errors with team.
Self-Improvement Checklist
During VOD review, ask:
- Why did I die here? (Positioning error? Lost duel? Cooldown misuse?)
- Could I have positioned better for that engagement?
- Did I use my cooldowns optimally in that fight?
- Was my target priority correct?
- Did I anticipate enemy actions correctly?
- How could I have played that situation differently for a better outcome?
Key Performance Indicators Beyond Stats
Stats like elims and damage are useful but don't tell the whole story. Look for:
- Opening Picks: How often are you securing the first kill in a team fight?
- Duel Win Rate: Are you consistently winning your 1v1s?
- Deaths Per 10 Minutes: Lower is generally better, indicating good positioning and survivability.
- Cooldown Efficiency: Were abilities used impactfully or wasted?
- Ultimate Impact: Did Deadeye consistently lead to kills, force key cooldowns, or achieve zoning goals?
- Peeling Success: How often did you successfully save a teammate from a flanker?
Decision-Making Framework
Analyze choices based on: Information Available -> Options Considered -> Choice Made -> Outcome -> Alternative Choices/Outcomes. Did you have the right information? Did you consider the best options?
Cooldown Usage Analysis
Pause before and after each ability use. Ask:
- Why did I use Roll/Grenade/Deadeye here?
- What was the intended outcome?
- Was it successful?
- Could I have saved it? Could I have used it earlier/later?
- What enemy cooldowns were relevant at that moment?
Pro Player Analysis
Observing how top-tier professional players utilize Cassidy provides invaluable insights into maximizing the hero's potential at the highest level of play.
How Top Players Utilize Cassidy
Pro players showcase exceptional mastery in several key areas:
- Flawless Mechanics: Near-perfect aim with extremely high headshot percentages. Crisp movement and ability usage.
- Dynamic Positioning: Constantly adjusting position based on the flow of the fight, enemy movements, and team needs. Expert use of high ground and off-angles.
- Precise Cooldown Management: Getting maximum value from every Roll and Grenade, often using them predictively or to enable aggressive plays.
- Strategic Deadeye Usage: Often prioritizing zoning, forcing major enemy cooldowns, or securing a single crucial pick over risky multi-kill attempts. Excellent timing and positioning for ultimates.
- Team Coordination: Seamless integration with team strategies, executing planned combos, focus firing targets, and providing effective peel.
Pro Match VOD Breakdown
When watching pro VODs (ideally from player perspectives):
- Observe Positioning: Why are they standing there? What angles does it give them? What escape routes do they have? How do they rotate?
- Analyze Aim Technique: Watch their crosshair movement – flicks, tracking, placement during downtime.
- Track Cooldown Usage: Note when and why they use Roll and Grenade. How do they react to specific enemy abilities?
- Deadeye Decisions: Analyze the setup, timing, positioning, and outcome of each Deadeye. Did they cancel it early? Why?
- Target Priority: Who are they shooting? Why? How does it change mid-fight?
Tournament Strategy Analysis
In organized tournament play, Cassidy might be picked for specific reasons:
- Map Pool: Favored on maps with strong mid-range sightlines and high ground.
- Counter-Pick: Selected to counter specific enemy compositions (e.g., needing hitscan against Pharah/Echo, or anti-flanker pressure).
- Synergy: Chosen to enable specific team compositions or ultimate combinations (e.g., Nano-Deadeye, Rein brawl support).
- Player Comfort: Sometimes teams rely on a star player's proficiency with the hero.
OWL/Contenders Player Techniques
Look for specific nuances:
- Advanced Mechanics: Subtle animation cancels, frame-perfect dodges.
- Predictive Plays: Grenades thrown at spots before enemies appear. Rolls used to anticipate enemy actions.
- Resource Trading: Understanding when trading cooldowns (e.g., Grenade for Recall) is favorable.
Regional Playstyle Differences
Different regions (e.g., North America, Europe, Korea) sometimes exhibit distinct meta trends or playstyle preferences, although globalization has lessened this. Some regions might favor more aggressive Cassidy play, while others use him more defensively or in specific compositions.
Comparison of Different Pro Playstyles
Even among pros, styles differ. Some are known for hyper-aggressive mechanics and dueling (e.g., Proper, Kevster historically). Others might be known for exceptional positioning and strategic Deadeyes (e.g., Lip, Happy). Analyze how different players prioritize different aspects of Cassidy's kit based on their strengths and team needs.
Practice Routines and Drills
Consistent, focused practice is essential for developing the mechanical skill and muscle memory required for high-level Cassidy play.
Custom Game Settings for Practice
Create custom games (lobby settings) to isolate specific skills:
- Headshots Only: Enable the "Headshots Only" modifier in a skirmish or vs. AI bots (like Ana bots who can't shoot back easily) to force focus on critical hits.
- High Cooldown Reduction: Set cooldowns to very low percentages (e.g., 25% or 0%) to practice ability combos (Grenade -> Shoot, Roll -> Shoot, Roll -> FtH) repeatedly.
- Specific Scenarios: Set up duels against specific heroes (controlled by friends or AI) to practice matchups.
Aim Training Workshops and Routines
Utilize the Overwatch Workshop or external aim trainers (like KovaaK's, Aim Lab) for structured practice:
- Workshop Codes: Search for popular aim training codes within Overwatch (e.g., KAVE5, VAXTA). These often feature modes for flick shooting, tracking, reaction time, and specific hero targets.
- External Trainers: Offer diverse scenarios focusing purely on mouse control. Useful for building raw aiming skill applicable across multiple games. Focus on scenarios involving clicking/flicking precision and target switching.
- Routine Structure: Dedicate specific time slots (e.g., 15-30 minutes before playing) to aim training. Include a mix of drills:
- Flick Training: Scenarios with targets appearing suddenly, requiring fast, precise flicks.
- Tracking Training: Scenarios with targets moving predictably or erratically, requiring smooth mouse control.
- Target Switching: Scenarios with multiple targets appearing, requiring quick transitions between them.
Flick Shot Practice Methods
- Static Dots: Practice flicking accurately between stationary targets of varying sizes and distances.
- Moving Targets: Practice flicking onto targets moving horizontally or vertically.
- In-Game Drills: Use the Practice Range bots. Stand still and practice flicking to heads from different angles. Then incorporate movement while flicking.
Combat Roll Reaction Drills
- Ability Dodge Practice: Have a friend play heroes with key abilities (Ana Sleep, Hog Hook, Rein Shatter) in a custom game and practice timing Combat Roll to dodge them.
- Reactive Reload: Practice firing until 1-2 shots remain, then quickly rolling and reacquiring the target.
Magnetic Grenade Accuracy Training
- Stationary Targets: Practice the throwing arc and homing mechanic on Practice Range bots.
- Moving Targets: Use Workshop modes with moving bots (Tracer, Genji, Lucio models) to practice leading shots and predicting movement for grenade sticks.
- Indirect Throws: Experiment with bouncing grenades off surfaces in custom games or empty maps.
Deadeye Timing Exercises
- Lock-on Speed: Practice activating Deadeye and quickly identifying/locking onto multiple targets, understanding the ramp-up time needed for lethal shots.
- Target Prioritization: Use custom games with various bots to practice quickly identifying and prioritizing low-health or key targets during the Deadeye channel.
- Cancel Practice: Practice cancelling Deadeye quickly after achieving a specific goal (e.g., forcing enemies behind cover).
// Custom Game settings for Cassidy practice

// Ana Bot Headshot Training
// Heroes: Player (Cassidy) vs. 6 Ana bots
// Damage Modifier: Headshots Only
// Ana Abilities: Sleep Dart Only
// Map: Any with good sightlines

// Magnetic Grenade Practice
// Heroes: Player (Cassidy) vs. 3-4 mobile heroes (Tracer, Genji, Lucio)
// Enemy Health: 200%
// Cassidy Cooldowns: 25%
// Map: Small to medium-sized

// Deadeye Practice
// Heroes: Player (Cassidy) vs. mixed team comp
// Cassidy Ultimate Generation: 500%
// Enemy Heroes: Normal abilities/ultimates
// Goal: Practice positioning and cancel timing
Advanced Combo Techniques
Mastering Cassidy involves seamlessly weaving his abilities and primary fire together into fluid, high-impact combos.
Grenade + Melee Combos
- Grenade (Stick) -> Melee: While the grenade itself deals 131 damage, if a target is already low (e.g., below 30 HP after the stick), an immediate melee can sometimes finish them faster than waiting for the explosion, though this is rare. Primarily, melee is used after the grenade + shot combo.
- Grenade (Stick) -> Shoot -> Melee: The standard kill combo on ~200-225 HP targets. 131 (Grenade) + 70 (Shot) + 30 (Melee) = 231 damage burst. Execute quickly: stick grenade, immediately line up follow-up shot, fire, then instantly melee cancel the shot recovery.
Combat Roll + Fan the Hammer Sequences
- Shoot (Empty Clip) -> Roll -> FtH: Useful for maximum close-range burst when already engaged. Empty primary fire, Roll towards/beside the target, immediately Fan the Hammer.
- Roll (Engage) -> FtH: Aggressively roll into point-blank range on a low target or barrier and immediately FtH.
Quick-Fire + Combat Roll Techniques
- Shoot -> Roll -> Shoot: The fundamental sustained fire combo. Fire 1-5 shots, Roll during the recovery of the last shot for an instant reload, then immediately fire again. Maximizes uptime.
- Shoot (Headshot) -> Roll (Aggressive) -> Shoot/Melee: Land a critical headshot, Roll forward aggressively using the speed/DR, and finish with another shot or melee.
Acoustic Aim Guidance (Sound-Based Aiming)
While primarily visual, sound plays a role:
- Hit Confirmation Sounds: Use the distinct audio feedback for headshots vs. body shots vs. armor hits to confirm target status and adjust follow-up actions without solely relying on visual cues, especially in chaotic fights.
- Directional Audio: Pinpoint enemy locations based on footstep or ability sounds, allowing for faster target acquisition or pre-aiming around corners.
Peek Shooting with Peacekeeper
Essential for survivability while maintaining pressure:
- Strafe Peeking: Quickly strafe out from behind cover, fire one shot, and immediately strafe back. Minimize exposure time.
- Rhythm Peeking: Combine peek shooting with the Peacekeeper's firing rhythm. Strafe out, shoot, strafe in during the 0.5s recovery, repeat.
Suppressive Fire Methodology
Even if not securing kills, Cassidy's shots can control space:
- Angle Denial: Fire shots towards common enemy positions or sightlines (even with falloff) to discourage enemies from peeking or holding that space.
- Covering Fire: Shoot towards enemies engaging a teammate to draw attention or force them into cover, providing relief for your ally.
Team Coordination Strategies
While Cassidy has strong individual potential, his effectiveness multiplies significantly within a coordinated team environment. Facilitating and participating in team strategies is crucial.
Target Callout System
- Clarity and Conciseness: Use clear, brief callouts. Hero name + Location + Status. (e.g., "Mercy back right, one shot!", "Genji top left, stuck!", "Reaper flanking behind!")
- Prioritization: Focus calls on the highest priority targets (supports, low HP enemies, key threats). Avoid cluttering comms with unnecessary information.
- Focus Fire: Designate a primary target for the team to focus down. Cassidy's consistent damage is excellent for contributing to focus fire. Call out when you are focusing someone ("Shooting Ana!").
Ultimate Combination Planning
- Communicate Intent: Announce when Deadeye is ready or nearing completion. State your intention ("Looking for Deadeye combo with Grav," "Can use Deadeye to zone point").
- Coordinate Timing: Sync Deadeye activation with setup ultimates (Grav, Shatter, EMP, etc.). Confirm timing with teammates ("Gravving now!" -> "Okay, using Deadeye!").
- Request Resources: Ask for enabling resources like Nano Boost, Damage Boost, Lamp, or Suzu specifically for Deadeye plays.
Support Protection Techniques (Team Perspective)
- Awareness: Team members should help call out flankers targeting supports.
- Peeling: Tanks and other DPS should assist Cassidy in peeling for supports when possible (e.g., D.Va Matrix, Winston bubble/cleave, Zarya bubble, Mei wall/slow).
- Positioning: Supports should position where peel is accessible, and Cassidy should position to provide that peel effectively.
Tank Synergy Maximization
- Space Utilization: Play around the space created by the tank. Use their barriers/presence for safety while taking advantageous angles.
- Target Synchronization: Focus fire targets the tank is engaging or applying pressure to.
- Combo Execution: Coordinate abilities (e.g., Mag Grenade on hooked target, Deadeye after Shatter).
DPS Duo Playstyles
- Complementary Roles: Pair Cassidy's mid-range strength with heroes covering other areas (e.g., a flanker like Genji/Tracer, a long-range sniper like Ashe/Widow, or a shield-break hero like Junkrat/Bastion).
- Coordinated Pressure: Focus fire targets together. Set up crossfires. Combine pressure (e.g., Cassidy pressures frontline while flanker dives backline).
- Peel Support: If paired with another vulnerable DPS, coordinate positioning to help each other against dives.
Resource Allocation within Team
- Healing Priority: Understand that supports need to allocate healing based on who is under most pressure or most critical to the fight. Don't demand heals constantly if others are critical.
- Damage Boost: Coordinate with Mercy on who receives damage boost based on position and potential impact.
- Enabling Cooldowns: Understand that resources like Nano Boost, Lamp, Suzu have long cooldowns and are prioritized for high-impact moments or saving critical teammates.
FAQ and Troubleshooting
Addressing common questions and issues faced by Cassidy players can help overcome hurdles and refine gameplay.
Common Questions from the Community
Primarily at point-blank range (<5m) against barriers or large tanks, or as a close-range finisher on very low HP targets. Primary fire headshots are almost always better otherwise due to accuracy and damage potential.
Different tools. Flashbang offered reliable stun setup. Magnetic Grenade offers higher potential damage, homing, and pressure, but requires follow-up and doesn't guarantee kills or interrupts like Flashbang did. It demands more mechanical skill to confirm kills after landing it.
Requires strong hitscan mechanics. Focus Mercy first if possible. Play near cover. Ask teammates for assistance (another hitscan, D.Va, Ana/Bap). Consistent pressure is key.
Focus on timing (post-fight, combos), positioning (high ground, off-angles, behind cover/team resources), and purpose (zoning or securing 1-2 key picks vs. greedy multi-kills). Track key enemy counters (Sleep, Hook, Matrix, Barriers). Consider cancelling early.
Highly personal. Experiment to find what works for you. Generally, lower sensitivity aids precision for hitscan. Small, visible crosshairs (dot, small cross) are popular. (See Section 3).
Solving Common Gameplay Issues
Adjustments to Recent Patches
- Stay updated on patch notes affecting Cassidy's damage numbers, falloff ranges, cooldowns, or ultimate.
- Be aware of changes to heroes Cassidy frequently interacts with (tanks, supports, flankers), as this can shift matchup dynamics or synergy potential. Adapt playstyle accordingly.
Hardware Optimization for Cassidy
- Ensure stable FPS (Frames Per Second) by adjusting graphics settings. Consistent performance aids aim.
- Use a mouse/controller you are comfortable with. Ensure mouse sensor is clean and mousepad provides smooth glide.
- Consider a high refresh rate monitor (144Hz+) for smoother visuals if possible.
Performance Improvement Tips
- Consistent Practice: Dedicate time to aim training and gameplay.
- VOD Review: Regularly analyze your own gameplay critically.
- Watch High-Level Players: Observe pro streams/VODs to learn positioning and decision-making.
- Focus on Fundamentals: Master aim, positioning, and cooldown management before worrying excessively about advanced tech.
- Stay Positive & Learn: Focus on improvement, not just winning/losing. Learn from mistakes.
Troubleshooting Specific Matchup Difficulties
- Identify the specific hero causing problems.
- Review VODs focusing solely on interactions with that hero. Why are you losing duels? Are you misusing cooldowns? Positioning poorly against them?
- Consult guides or high-level players specifically discussing that matchup.
- Practice the matchup in custom games if possible.
- Understand that sometimes a counter-pick is necessary if a specific enemy hero is consistently shutting you down despite your best efforts.
"It's high noon somewhere in the world."