
I. Introduction: The Duality of Moira - Healer and Harbinger
Welcome, aspiring Moira maestros! Prepare to delve into the fascinating world of one of Overwatch's most unique and potent support heroes. Moira O'Deorain is more than just a healer; she's a whirlwind of biotic energy, a scientific genius walking the tightrope between creation and destruction. She commands the powers of light and darkness, regeneration and decay, making her a formidable dual-threat capable of sustaining her team through overwhelming odds while simultaneously draining the life force of her enemies.
Mastering Moira isn't simply about learning her abilities; it's about embracing her inherent duality. She possesses immense healing output, capable of keeping multiple allies alive through intense firefights, yet she also harbors significant damage potential that is intrinsically linked to her ability to heal. This guide is designed as a comprehensive roadmap for players of all skill levels, aiming to elevate understanding beyond basic tips towards deep strategic insight and mechanical mastery. Forget the simplistic labels of "DPS Moira" or "Healbot Moira"; true mastery lies in the fluid, intelligent balance between her two natures.
This journey will cover everything: a meticulous breakdown of Moira's abilities and their practical applications, the critical art of resource management, advanced techniques like orb trajectory manipulation and Fade jumping, strategic positioning for her powerful ultimate, Coalescence, navigating team compositions and hero matchups, conquering every map, and tracking progress for continuous improvement. The approach is friendly and practical, designed to provide substantial tactical information in an engaging manner.
II. Decoding the Biotics: Moira's Ability Toolkit
Moira's kit appears straightforward at first glance, featuring Biotic Grasp for primary healing and damage, Biotic Orb for ranged effects, Fade for mobility and evasion, and Coalescence as her ultimate. However, beneath this apparent simplicity lies a depth that rewards careful study and practice.
A. Biotic Grasp (LMB - Heal / RMB - Damage)
Moira's hands are her instruments, channeling potent biotic energy.
Healing Mist (LMB)
Moira's left hand emits a conical spray of golden energy that heals allies.
Mechanics:
- Range of 15 meters with a conical spray pattern
- Delivers 70 health per second (HPS) to allies in the cone
- Applies a lingering Heal-over-Time (HoT) effect, restoring an additional 35 health over 3 seconds
- Spray pierces through allies, allowing Moira to heal multiple teammates simultaneously
- Cannot pass through enemy barriers like Reinhardt's shield
- Consumes Biotic Energy resource at a rate of 20 units per second
Practical Application:
Understanding the HoT is key to efficiency. For topping off allies who aren't under immediate, heavy fire, short "taps" or bursts of the spray are highly effective. This applies the HoT and conserves precious Biotic Energy. Let the lingering effect do its work. Sustained spraying is reserved for moments of intense incoming damage when allies need immediate, high HPS. Players should watch the visual mist connecting to allies to confirm application. This HoT allows Moira to maintain team health while minimizing resource drain, freeing up time and energy for damage or repositioning.
Damage Beam (RMB):
Moira's right hand projects a sinister purple beam that latches onto enemies.
Mechanics:
- Range of 20 meters
- Deals 60 damage per second (DPS)
- Simultaneously heals Moira for 24 HP/s, significantly boosting her survivability
- Functions similar to Zarya's beam but with a more forgiving hitbox and attachment angle
- Does not require ammo or reloading
- Primary function beyond damage is to replenish Moira's Biotic Energy for healing
- Cannot be deflected by Genji or absorbed by D.Va's Defense Matrix or Sigma's Kinetic Grasp
Practical Application:
The damage beam is essential for refilling the Biotic Energy meter. It provides crucial self-sustain, allowing Moira to win duels against many heroes, especially those with lower burst damage. It's effective for deterring flankers trying to close the distance and for securing kills on low-health enemies. Once the beam connects, its effective range increases slightly, helping to finish off retreating targets. The self-heal component effectively increases Moira's health pool during fights where she's applying damage, making her surprisingly resilient.
B. Biotic Orb (E)
Moira launches a bouncing sphere of energy, choosing between healing allies or damaging foes. Both orb types share an 8-second cooldown and last up to 7 seconds or until their healing/damage potential is depleted. It's worth noting that past experimental changes briefly separated these into abilities with different cooldowns (like the "Necrotic Orb" concept), but the current live version uses a shared cooldown.
Healing Orb (Yellow):
Mechanics:
- Emits a restorative aura, healing allies within its 5-meter radius for 65 HPS
- Total healing capacity of 300 health
- Bounces off walls and ceilings
- Travel speed increases when it isn't actively healing a target
Practical Application:
Healing Orb is invaluable for healing grouped allies simultaneously, reaching distant teammates (like flankers or snipers) outside of Biotic Grasp's range, providing burst healing in critical moments, especially when Biotic Energy is low or depleted, supplementing healing during Coalescence, or providing self-sustain during duels. Aiming the orb into enclosed spaces or using bounce angles maximizes its uptime near targets. Throwing it slightly before a team fight begins can provide initial sustain and build ultimate charge.
Damage Orb (Purple):
Mechanics:
- Tethers to nearby enemies within its 4-meter radius, dealing 50 DPS
- Maximum damage capacity of 200
- Bounces off surfaces and travels faster when not tethered
- Considered a projectile and thus can be deflected by Genji or absorbed by D.Va's Defense Matrix and Sigma's Kinetic Grasp
- Pierces through enemy players, potentially hitting multiple targets
- Does not damage deployable objects like Torbjörn's turret or Symmetra's turrets
Practical Application:
Damage Orb excels in narrow corridors and enclosed rooms where bounces keep it tethered to enemies for longer durations. It's useful for finishing off low-health targets beyond beam range, applying pressure to force enemies out of position, scouting tight corners or small rooms (as enemies hit will grant hit markers), and building ultimate charge, particularly during the pre-fight poke phase. There's ongoing discussion about orb priority; while traditionally Heal Orb was favored, some high-level playstyles emphasize Damage Orb usage for pressure and faster ult gain, especially if team healing needs are managed well with Grasp. However, Heal Orb remains the safer, more consistent choice for sustain, especially in duels or emergencies.
The physics of Biotic Orb offer a high skill ceiling. Understanding bounce angles (angle of incidence equals angle of reflection) and how tethering slows the orb allows for precise placement. Skilled Moiras can use geometry to hit targets around corners, control orb speed for timed arrivals (fast for urgent long-range heals, slow by staying near it for sustained effect), and maximize uptime in chaotic fights. This requires significant map knowledge. Furthermore, the constant micro-decision between Heal Orb and Damage Orb embodies Moira's core balancing act. The "correct" choice is highly contextual, depending on ally health, enemy positions, resource levels, and the immediate tactical goal.
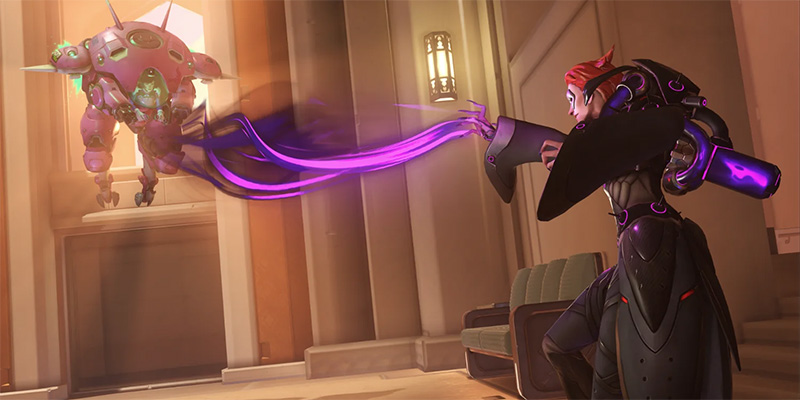
C. Fade (Shift/Secondary Ability)
Fade is Moira's signature mobility and survival tool.
Mechanics:
- Activating Fade renders Moira invisible, invulnerable, and grants a significant movement speed boost for its short duration (around 0.8 to 1 second)
- 6-second cooldown that begins after the effect ends
- Cleanses most negative status effects upon activation (Anti-heal, burns, poisons, slows, etc.)
- Moira cannot use other abilities while Fading, but she can still pick up health packs
- Allows Moira to activate Fade during Coalescence without canceling it (recent buff)
- Cannot escape persistent crowd control effects like Zarya's Graviton Surge or Sigma's Gravitic Flux, though she avoids damage while inside
- Can be timed correctly to escape the explosion from a stuck Tracer Pulse Bomb
Practical Application:
Fade is primarily used as an escape tool, allowing Moira to disengage from dangerous situations or dodge lethal abilities. It's also crucial for repositioning, whether defensively to find cover or reach allies, or aggressively to close distance or take an off-angle. Skilled players use Fade to bait out important enemy cooldowns (like stuns or anti-nade) and then cleanse them. The "Fade Jump" technique, achieved by jumping near the end of Fade often on slight inclines, grants additional height or distance, enabling access to high ground or faster map traversal. Using Fade during Coalescence adds immense flexibility for dodging threats or optimizing beam position. However, its cooldown is relatively short but crucial; wasting Fade unnecessarily leaves Moira vulnerable. It should be used purposefully.
Fade's versatility makes it one of the best defensive and repositioning tools among supports. Optimal use requires high situational awareness to know when and why to use it – whether for escape, cleanse, repositioning, dodging, or setting up a jump. The addition of Fade during Coalescence significantly buffs the ultimate's survivability and adaptability, allowing mid-beam adjustments that were previously impossible.
D. Coalescence (Q - Ultimate)
Moira unleashes her ultimate power, channeling a massive beam of raw biotic energy.
Mechanics:
- Projects a wide, long-range beam (30 meters) that simultaneously heals allies for 140 HPS and damages enemies for 70 DPS
- Beam pierces through all players, both allies and enemies, affecting multiple targets aligned in its path
- Blocked by barriers and shields (like Reinhardt's or Sigma's), though it bypasses Zarya's bubbles
- Lasts for 8 seconds
- Grants Moira a 40-50% movement speed buff and heals her for 50-55 HP/s, making her harder to kill
- Triples her passive Biotic Energy regeneration rate, often leaving her with full resources after the ultimate ends
- Can be interrupted prematurely by stuns or Sombra's Hack
- Fade can now be used during Coalescence
- Ultimate charge is gained from both healing and dealing damage
Practical Application:
Coalescence is a highly flexible ultimate. Its massive healing output makes it excellent for saving teammates during critical pushes, countering enemy ultimates, or stabilizing after a lost fight. Offensively, while the damage isn't overwhelming, it provides consistent pressure, capable of finishing off low-health targets, forcing supports to use cooldowns, or zoning enemies. Optimal positioning is typically behind the bulk of the team, allowing the beam to pass through allies towards the enemy line, maximizing both healing and damage potential. A crucial technique is to launch a Biotic Orb (Heal or Damage, depending on the immediate need) just before activating Coalescence; the orb provides additional output while the beam is active. Target prioritization is dynamic. The speed boost can be used to contest objectives or aggressively reposition. Players must be acutely aware of interrupt threats (stuns, hacks) and enemy shields when deciding when and where to use Coalescence.
Coalescence excels as a tempo ultimate. It may not have the instant fight-winning potential of some other ults, but its ability to provide sustained healing and damage simultaneously over 8 seconds can overwhelm the enemy's ability to manage both pressure and sustain. This sustained dual effect can swing the momentum of a team fight, enabling pushes or holds. The significant Biotic Energy regeneration during the ultimate is also a vital, often overlooked benefit, ensuring Moira can continue supporting her team immediately after Coalescence ends.

Ability Summary Table
| Ability | Key Input | Healing | Damage | Cooldown | Duration | Range | Resource Cost/Gain | Key Notes |
|---|---|---|---|---|---|---|---|---|
| Biotic Grasp (LMB) | LMB | 70 HPS + 35 HoT (3s) | N/A | N/A | Continuous | 15m cone | Costs 20 Energy/sec | Pierces allies, Blocked by barriers, Lingering HoT effect |
| Biotic Grasp (RMB) | RMB | 24 HP/s (Self) | 60 DPS | N/A | Continuous | 20m beam | Regenerates Energy | Ignores Deflect/Matrix/Grasp, Not a lock-on |
| Biotic Orb (Heal) | E | 65 HPS (Max 300 total) | N/A | 8s | 7s / Max Heal | 5m radius | N/A | Bounces, Projectile, Faster when untethered |
| Biotic Orb (Damage) | E | N/A | 50 DPS (Max 200 total) | 8s | 7s / Max Dmg | 4m radius | N/A | Bounces, Projectile, Can be Deflected/Eaten |
| Fade | Shift | N/A | N/A | 6s | ~0.8-1s | Short distance | N/A | Invulnerable, Speed Boost, Cleanses effects, Can use during Ult |
| Coalescence | Q (Ult) | 140 HPS (Allies), 55 HP/s (Self) | 70 DPS | N/A | 8s | 30m beam | Regenerates Energy (3x rate) | Pierces players, Blocked by barriers, Speed Boost, Interruptible |
III. Mastering the Flow: Biotic Energy Resource Management
If there is one skill that defines a truly proficient Moira, it is the mastery of her Biotic Energy resource. This finite pool fuels her healing spray, and running out at a critical moment can spell disaster for her team. Effective management isn't just about avoiding empty; it's about maintaining a healthy buffer to handle unexpected bursts of damage.
Visual Indicators and Regeneration/Consumption
Players must constantly monitor the Biotic Energy meter displayed prominently on the HUD. Audio cues also signal when the resource is running low. Understanding how energy is gained and lost is fundamental:
Regeneration:
- Damage Grasp (RMB): The primary and most efficient method. Dealing damage with the RMB beam actively replenishes Biotic Energy. While exact rates can vary with patches, it's significantly faster than passive regeneration. Some observations suggest tapping RMB might yield a faster percentage gain per second, though potentially at the cost of sustained DPS.
- Passive Regen: A slow, baseline regeneration occurs when Moira isn't actively using abilities. This is generally too slow to rely on during active combat.
- Coalescence: As noted, activating the ultimate provides a massive boost (3x) to energy regeneration, ensuring Moira typically finishes her ult with a full or near-full meter.
Consumption:
- Healing Mist (LMB): The sole direct consumer of Biotic Energy, draining it at 20 units per second during use.
Strategies for Balance
Maintaining equilibrium requires a proactive and efficient approach:
- Proactive Regeneration: The golden rule is to not wait until the meter is low. Constantly seek opportunities to weave in RMB damage, even brief taps on any available enemy target, to keep the energy level high. Think of it like topping off a fuel tank rather than running it dry. Avoid completely emptying the meter if possible, as needing even a small amount of healing unexpectedly can be crucial.
- Efficient Healing: Leverage the Healing Mist's HoT effect. Use short taps (LMB) for topping off allies or dealing with moderate poke damage. This conserves energy significantly compared to holding the spray down continuously. Reserve sustained spray for high-priority healing on focused targets. Prioritize based on who needs healing most urgently versus who can benefit from the HoT.
- Strategic Orb Usage: Biotic Orb choices indirectly impact resource management. Using Heal Orb allows healing output even when Biotic Energy is depleted, acting as a crucial backup. Opting for Damage Orb means potentially less time spent needing to use RMB purely for regeneration, assuming the orb applies sufficient pressure or secures kills, but it offers no direct resource gain.
- Calculated Positioning: Ideal positioning allows Moira to maintain line of sight (LoS) to both allies needing heals and enemies providing regeneration opportunities. Often, this means playing slightly behind the frontline or utilizing off-angles that provide visibility into both backlines.
Common Mistakes
Players often stumble with resource management by:
- Holding LMB Constantly: The "Healbot" approach drains the meter rapidly, leaving Moira unable to heal during critical moments.
- Ignoring Regeneration: Focusing too much on damage ("DPS Moira") without consciously using RMB to replenish energy until it's too late.
- Panic Fading: Using Fade to escape when low on health, instead of potentially using RMB's self-heal and resource generation if the situation allows for a brief duel.
- Reactive Management: Only thinking about the meter when it's already low or empty, rather than proactively keeping it topped off.
A Moira who proactively manages resources can sustain healing through extended fights, effectively dictating the team's tempo. Conversely, poor management leads to critical downtime where allies perish due to lack of heals. The interplay is complex; for instance, if resources are critically low but an ally needs immediate saving, deploying a Heal Orb is often far superior to desperately trying (and potentially failing) to regenerate energy with RMB while the ally dies.
Resource Management Cheat Sheet
| Situation | Recommended Action | Why? |
|---|---|---|
| Topping off non-critical allies | Tap LMB | Conserves energy, utilizes HoT |
| Ally under heavy fire | Hold LMB (if energy allows) | Provides maximum immediate HPS |
| Meter below ~40% | Seek safe RMB opportunities | Proactive regeneration prevents running empty |
| Ally critical, meter low | Use Heal Orb | Immediate, resource-free healing burst |
| Team stable, enemies present | Weave RMB between healing needs | Maintain high energy level, apply pressure |
| Dueling a flanker | Use RMB + Heal Orb (if needed) | Maximize self-sustain (RMB heal + Orb heal) and damage |
| During Coalescence | (Energy regenerates rapidly) | Focus on beam positioning/targets |
IV. Advanced Techniques: Elevating Your Moira Play
Beyond basic ability usage and resource management lies a layer of advanced techniques that truly separate skilled Moiras. Mastering Orb trajectories, Fade jumps, and Coalescence optimization unlocks Moira's full potential.
A. Orb Wizardry: Mastering Bounce Angles & Map Trajectories
Biotic Orb's bouncing mechanic transforms it from a simple projectile into a versatile tool for indirect impact, but requires understanding its physics and map geometry.
Physics Basics:
The fundamental principle is familiar from billiards or basic physics: the angle at which the orb hits a surface (angle of incidence) equals the angle at which it bounces off (angle of reflection). Orb speed also plays a role; it moves faster when not tethered to a target, affecting how far it travels between bounces and how quickly it reaches distant areas. Tethering slows it down, increasing its local effect duration but reducing its travel speed.
Strategic Bouncing:
- Containment: The most common advanced technique involves using geometry to keep the orb active in a desired area for longer. Bouncing orbs off walls in tight corridors, small rooms, low ceilings, or even aiming directly at one's feet within an enclosed space maximizes the orb's uptime near allies (for healing) or enemies (for damage).
- Reach: Skilled bounces allow Moira to affect areas outside her direct line of sight. Sending an orb around a corner to heal a teammate taking cover or damage an enemy hiding there requires predicting the bounce path.
- Area Denial/Control: Damage Orbs bounced predictably through chokepoints or common flanking routes can deter enemy advances, force repositioning, or finish off retreating low-health targets.
- Setup Plays: Proactively bouncing an orb into an area where a fight is anticipated (e.g., onto the objective just before the enemy arrives) provides initial value as the engagement begins.
Map-Specific Examples:
True mastery requires learning specific bounce spots on each map. While visual diagrams are ideal, consider these textual examples:
- King's Row (Point A Choke - Attack): Instead of a straight orb through the choke, bounce it off the inside wall of the hotel entrance (left side). A low bounce keeps a Heal Orb near an advancing tank; a Damage Orb pressures defenders behind the statue.
- Lijang Tower (Control Center): The central pillar and surrounding walls are perfect for ricocheting orbs during point fights, maximizing contact time.
- Oasis (University): The small rooms surrounding the point, and the pit area itself, offer numerous surfaces for controlled orb bounces to maximize healing or damage during chaotic fights.
Mastering orb geometry requires significant map knowledge and practice. It elevates the ability beyond "fire and forget" to a calculated tool for indirect influence, area control, and enabling plays. The interaction between speed and bouncing also allows for timed plays, predicting enemy/ally movement and bouncing an orb to arrive precisely when needed.
B. Fade Jumps: Reaching New Heights
Fade isn't just for horizontal movement or escaping; a specific technique allows Moira to gain significant vertical height and distance.
The Technique Explained:
The core idea is to press the jump key near the very end of the Fade animation, often while moving over a slight incline, ramp, or specific piece of map geometry. This interaction converts Fade's momentum into vertical or extended horizontal movement. Timing is absolutely critical and requires practice to master.
Inputs:
The typical sequence is: Move towards the desired geometry, press the Fade key (e.g., Shift), continue moving forward, and press the Jump key (e.g., Spacebar) just as the Fade effect is about to end or as Moira passes over the key geometric feature. Slight variations exist for different jumps.
Use Cases:
- High Ground Access: This is the primary benefit. Fade jumps allow Moira to reach ledges, platforms, and sniper perches otherwise inaccessible, providing safer positioning, better sightlines for healing or Coalescence, or enabling surprise attacks/orb placements.
- Escape Routes: Traverse gaps or reach unexpected safe spots to evade pursuers more effectively than a standard Fade.
- Aggressive Repositioning: Quickly take high ground or off-angles to support diving teammates or initiate flanks.
- Map Traversal: Move between points or areas of the map more rapidly.
Map-Specific Examples:
Like orb bounces, Fade jumps are map-specific. Visual guides are highly recommended. Textual examples include:
- Watchpoint: Gibraltar (First Point Defense): Fading off the edge of the high-ground platform (near mega) towards the payload path below, jumping at the ramp's apex launches Moira across the gap for a quick escape or reposition.
- Eichenwalde (Point A Defense): Using the debris pile near the choke point allows a Fade jump onto the adjacent high ground/bridge area.
- Lijang Tower (Control Center): A well-known jump uses the small stairs near the mega health pack to reach the bridge high ground.
Practice Drills:
The best way to learn is through repetition. Use the Practice Range or Custom Games with cooldowns reduced (or off) to practice specific jumps repeatedly. Watching video guides demonstrating the timing and locations is invaluable.
Fade jumps fundamentally change Moira's interaction with map verticality, adding a significant layer to her skill ceiling and strategic options.
C. Coalescence Positioning & Target Priority
Maximizing the value of Coalescence involves more than just pressing Q; strategic positioning and dynamic targeting are crucial.
Optimal Positioning:
- Standard: Generally, position slightly behind the main body of the team. This allows the beam to pass through multiple allies for healing before reaching enemy targets.
- Off-Angles: Sometimes, positioning slightly to the side provides better angles on the enemy backline (supports, snipers) while still clipping key allies with the beam's edge.
- Dynamic Movement: Standing still is often a mistake. Utilize the movement speed buff and the ability to Fade during Coalescence to constantly adjust position. Move to maintain optimal beam alignment as the fight shifts, dodge threats, or pursue key targets.
- Safety First: Always be aware of enemy sightlines, especially snipers and heroes with interrupts (stuns, Hack). Use natural cover where possible, even while beaming. Avoid activating Coalescence in wide-open areas if threats are present.
Target Prioritization (Highly Dynamic):
- Defensive Focus: When allies are critical, especially the tank or someone focused by the enemy, prioritize keeping them alive with the beam's high healing. Countering enemy ultimates often requires this defensive focus.
- Offensive Focus: If the team is relatively stable, prioritize finishing off low-health enemies (squishies first, like supports or damaged DPS). Applying sustained pressure to enemy supports can force crucial cooldowns or secure eliminations. Coalescence is also effective when comboed with crowd-control ultimates like Graviton Surge or Earthshatter.
- Hybrid Focus (The Ideal): The most efficient use involves aligning the beam to simultaneously heal important allies and damage high-priority enemy targets. This requires constant scanning and micro-adjustments in positioning.
Using with Fade:
The ability to Fade mid-Coalescence is transformative. Use it to: dodge an incoming stun or sleep dart; quickly reposition to a safer angle if focused; close the distance to confirm a kill on a fleeing enemy; or adjust the beam's path to hit more valuable targets as the fight evolves.
Maximum Coalescence value comes from actively reading the battlefield during its 8-second duration, identifying the most critical need (saving vs. killing), and using movement and Fade to align the beam accordingly. Furthermore, success depends heavily on enemy composition and cooldowns.
V. Synergy and Strategy: Playing Moira Within a Team
Moira doesn't operate in a vacuum. Her effectiveness is significantly influenced by her team's composition and overall strategy. Understanding synergies helps maximize her contribution.
Moira's Ideal Environment
Moira generally excels in team compositions that prefer to fight in relatively close proximity. Her AoE healing from Biotic Grasp spray and Biotic Orbs gains maximum value when allies are grouped together. This makes her a natural fit for "Brawl" compositions that want to close the distance and engage in sustained fights. Maps with clear objectives that encourage grouping, like Escort (payload maps) or many Control points, often play to her strengths. Compositions that spread out significantly across the map, like full Dive or long-range Poke, can stretch Moira's resources thin and limit the effectiveness of her spray healing, forcing heavier reliance on orb management and Fade for repositioning.
Tank Synergies
Reinhardt: A classic pairing. Rein's shield provides a safe space for Moira to operate close to the front, enabling easy healing and resource generation. Coalescence combos powerfully with Earthshatter. Moira's high sustain keeps Rein swinging in brawls.
Zarya: Excellent synergy. Projected Bubble protects Moira from dives. Graviton Surge creates devastating Coalescence opportunities. Zarya thrives on the consistent healing Moira provides when at high energy.
Junker Queen: Fits well in brawl styles. Queen operates at close range, benefiting from Moira's AoE heals. Moira can sustain Queen through Rampage and heal allies grouped by Shout.
Ramattra: Strong synergy, particularly during his Annihilation ultimate. Moira can pump massive healing into Ramattra and clustered allies, while Coalescence adds significant pressure.
Orisa: Pairs reasonably well. Moira can sustain Orisa through her cooldown cycles and heal effectively during Terra Surge setup.
Sigma: Can work, but Sigma often prefers slightly longer ranges than Moira's optimal healing spray distance. Coalescence bypasses his shield, which is useful. Moira must be wary of his Accretion stun.
Winston / D.Va / Doomfist / Wrecking Ball (Dive Tanks): Moira struggles to keep pace with their high mobility and heal targets spread across the map. Heal Orb becomes the primary tool for supporting dives, and Fade management is critical for Moira's own survival and repositioning.
DPS Synergies
Reaper: Excellent pairing. Both thrive at close range. Moira's high healing output enables Reaper's aggressive plays and sustains him during Death Blossom. Fade allows Moira to safely support Reaper's flanks.
Mei / Symmetra: Fit well into the close-range brawl style Moira enables. Mei's control and Sym's damage output benefit greatly from Moira's sustained healing.
Genji: Requires coordination. Heal Orb is key for supporting Dragonblade or dives. Damage Orb can help confirm kills Genji sets up. Moira must be mindful of Genji potentially deflecting her Damage Orb.
Soldier: 76 / Cassidy: Can work, but Moira offers less direct synergy (like damage boost) compared to other supports. Heal Orb is needed for ranged support.
Sojourn / Ashe / Widowmaker / Hanzo (Ranged/Poke): Less direct synergy. Moira primarily supports them with Heal Orbs from a distance. Moira herself must be extremely cautious of enemy snipers when playing with ranged DPS, as she becomes a prime target.
Pharah / Echo: Moira struggles to directly heal flying heroes consistently. Heal Orb aimed well is the main option. Coalescence can be used to pressure them or finish them off if they are low.
Support Synergies
Lucio: The classic Brawl support duo. Lucio's Speed Boost enables the close-range engagements where Moira shines. Their combined AoE healing is immense, but the pair lacks significant utility (no cleanse, anti-nade, sleep, rez, damage boost).
Kiriko: A strong, versatile pairing. Kiriko's Protection Suzu provides the cleanse utility Moira lacks. Kitsune Rush combos well with Coalescence for overwhelming offensive pushes. Kiriko can also help deter flankers.
Baptiste: Very high healing output potential. Immortality Field adds crucial life-saving utility. Amplification Matrix can potentially boost Coalescence damage. Can sometimes feel like too much raw healing, potentially lacking offensive utility depending on the overall team comp.
Ana: Brings valuable utility (Sleep Dart, Biotic Grenade) that Moira lacks. Nano Boost combos well with tanks Moira frequently supports. However, both supports can be vulnerable to dives, requiring good positioning and peel.
Mercy: Can work, but often results in high sustained healing with limited utility. Mercy's Damage Boost is valuable, but Moira doesn't set up boost targets as directly as hitscan-focused supports might.
Zenyatta: Offers powerful Discord Orb utility, but the pairing is extremely vulnerable to dives due to Zen's low mobility and Moira's lack of peel tools. Requires exceptional positioning and team support.
Lifeweaver: High combined healing. Life Grip provides unique peel/repositioning utility. Tree of Life adds AoE healing. Can sometimes feel like a passive backline, potentially lacking proactive playmaking tools depending on the situation.
General Strategy: The Eternal Balance - Healing vs. Damage
The core of Moira's gameplay is the constant balancing act between healing output and damage dealing. Healing is the primary responsibility of a support, but dealing damage is mechanically necessary for Moira to regenerate healing resources, ensure her own survival via self-heal, apply pressure, and secure crucial eliminations.
Focus Healing When:
- Teammates are critically low
- Allies are under heavy focus fire
- Countering enemy ultimates
- Enabling a tank's aggressive push or space-taking
Focus Damage When:
- The team is relatively healthy
- An enemy target is low and needs finishing
- Pressuring key enemy targets (supports, snipers) to force cooldowns or repositioning
- Building ultimate charge during poke phases
- Needing to regenerate Biotic Energy
- Dueling an immediate threat (e.g., a flanker)
Avoiding the Traps:
- The "DPS Moira" Trap: Neglecting healing duties to chase eliminations is detrimental. Damage should be purposeful – enabling the team (pressure, kills), sustaining oneself, or generating resources – not just padding statistics. While proactive damage is valuable, especially at higher levels, it must be calculated aggression integrated with healing responsibilities.
- The "Healbot" Trap: Being purely reactive and only using Healing Mist until the meter runs dry is also inefficient. This neglects resource generation, misses opportunities for crucial damage pressure or securing kills, and ultimately makes Moira less impactful.
Moira's effectiveness stems from her ability to fluidly switch between these roles based on the immediate needs of the fight. This decision-making process should also consider the team's win condition – sometimes, pouring heals into a brawling tank is key; other times, aggressively using Coalescence to eliminate a problematic enemy support or DPS might be the play that wins the fight.
Synergy Quick Reference
| Ally Hero Type | Synergy Level | Key Interactions | How to Play Together |
|---|---|---|---|
| Brawl Tanks (Rein, Zarya, Queen, Ram) | Strong | Close-range fights, Ult combos (Shatter, Grav) | Stay close, provide high sustain, use Coalescence during engages/ult combos |
| Dive Tanks (Winston, D.Va, Doom, Ball) | Less Ideal | High mobility, spread targets | Use Heal Orbs for distant support, manage Fade for repositioning, requires coordination |
| Close-Range DPS (Reaper, Mei, Sym) | Strong | Shared optimal range, high sustain needs | Stay near them, provide consistent healing, enable aggressive plays |
| Flanking DPS (Genji, Tracer) | Workable | Need targeted healing (Orb), can peel for Moira | Use Heal Orbs proactively for dives, use Fade defensively, coordinate engages |
| Ranged DPS (Hitscan, Snipers) | Less Ideal | Need healing at range, less direct synergy | Use Heal Orbs for support, maintain safe positioning from enemy snipers |
| AoE/Brawl Support (Lucio) | Strong | High AoE healing, Speed Boost enables brawl | Coordinate healing focus, leverage speed for positioning, lacks utility |
| Utility Support (Ana, Kiriko, Bap) | Strong/Workable | Provides utility Moira lacks (Cleanse, Nade, Lamp) | Coordinate cooldown usage, cover each other's weaknesses, high potential |
| Sustain Support (Mercy, LW, Zen) | Workable/Less Ideal | Overlap in healing, potential vulnerability (Zen) | Focus on maximizing combined strengths (e.g., Damage Boost, Discord) or utility (Grip) |
VI. Know Your Enemy: Moira Matchups
Understanding how Moira interacts with every hero in Overwatch is crucial for survival and maximizing impact. Her strengths lie in survivability (Fade cleanse, self-heal) and dueling potential against low-burst heroes. Her weaknesses are susceptibility to high burst damage, crowd control (stuns, hacks), and limited effective range beyond her beam and orbs.
Tank Matchups
| Tank | Threat Level | Key Considerations |
|---|---|---|
| Reinhardt | Low | Stay outside hammer range. Beam/Orb ignore shield. Coalescence effective during/after Shatter. |
| Zarya | Moderate (High Energy) | Fade can negate some Graviton Surge damage if timed well (but not escape the pull). Damage Orb feeds her charge quickly. Coalescence strong against Grav targets (if Moira isn't caught). |
| D.Va | Low-Moderate | Biotic Grasp ignores Defense Matrix. Fade Boosters impact. Defense Matrix can eat Biotic Orbs and potentially block Coalescence if aimed directly at her matrix. |
| Winston | Moderate (Dive) | Fade out of his bubble or away from his jump pack landing. Use RMB self-heal during Tesla Cannon damage. Damage Orb effective inside his bubble. |
| Roadhog | High (Hook) | Hook is a primary counter, especially during Coalescence. Bait/Fade the Hook. RMB self-heal helps mitigate shotgun damage. Heal Orb essential if hooked. |
| Sigma | Moderate | Biotic Grasp ignores Kinetic Grasp, but Kinetic Grasp eats Biotic Orbs. Fade Gravitic Flux damage (not the lift). Coalescence bypasses his shield. Beware Accretion rock stun. |
| Orisa | Low-Moderate | Fade Javelin Spin and Terra Surge impact. Biotic Grasp ignores Fortify damage reduction and Javelin Spin defense. Coalescence effective pressure. |
| Ramattra | Moderate (Nemesis Form) | Fade punches and Annihilation pull. Maintain distance during Nemesis. Coalescence useful during Annihilation for healing allies/damaging enemies caught within. |
| Doomfist | Moderate (Dive/CC) | Fade Seismic Slam and Rocket Punch. Use RMB self-heal. Difficult target due to mobility; focus on dodging and surviving. |
| Junker Queen | Low-Moderate | Fade Rampage effect and Jagged Blade pull. Keep distance from Carnage axe swing. |
| Mauga | High (Close Range Burst) | Maintain maximum possible distance. Utilize cover heavily. Heal Orb essential for self/ally sustain if caught in Cage Fight or Cardiac Overdrive. Coalescence good for healing team through his sustained damage. |
DPS Matchups
| DPS | Threat Level | Key Considerations |
|---|---|---|
| Genji | Skill Matchup | RMB tracks him well. Fade Shurikens/Dash. Damage Orb can be deflected back at Moira or her team. Use Heal Orb for self-sustain in duels. Generally favors Genji at higher ranks due to burst potential. |
| Tracer | Skill Matchup | RMB tracks well. Fade Pulse Bomb (requires good timing). Orb difficult to land reliably. Bait Recall before committing damage. |
| Reaper | Low-Moderate (Close Range) | Fade Death Blossom. Use RMB self-heal. Can duel effectively by maintaining range just outside his optimal shotgun falloff. |
| Sombra | High (Hack/EMP) | Hack interrupts Coalescence and prevents Fade use, making Moira extremely vulnerable. Requires excellent awareness and positioning to avoid hacks. Use RMB/Orbs for spy-checking. |
| Pharah / Echo | Moderate (Verticality/Burst) | RMB has range but tracking flyers is difficult. Damage Orb can pressure them in the air. Coalescence useful for zoning or finishing low-health flyers. Utilize cover against rockets/beam. |
| Widowmaker / Hanzo / Ashe | High (One-Shot Potential) | Play near cover constantly. Use Fade unpredictably for repositioning. Damage Orb can pressure sniper perches. Coalescence is risky if they have clear LoS. Fade cleanses Dynamite burn. |
| Cassidy / Soldier: 76 | Moderate | Fade Deadeye / Tactical Visor. Use RMB self-heal during duels. Can win duels, especially if they miss shots. Soldier generally considered a decent pick against Moira due to sustained damage and healing station. Fade can cleanse Magnetic Grenade's hinder effect. |
| Junkrat | Moderate | Fade Steel Trap / Concussion Mine / RIP-Tire. Be cautious of spam damage in chokes. Orbs effective in enclosed spaces he controls. |
| Mei | Moderate | Fade Blizzard and the slowing effect from her primary fire. Maintain distance to avoid being frozen. |
| Symmetra / Torbjorn | Low-Moderate | Damage Orb does not target turrets. RMB effective against turrets and Symmetra herself. Be wary of high charge Sym beam or Torb Overload. |
| Bastion | High (Assault Form Burst) | Utilize cover extensively. Fade to reposition when Bastion transforms. Coalescence can pressure him but is very risky due to his high damage output. |
| Sojourn | High (Railgun Burst) | Play near cover. Fade Disruptor Shot field and Overclock. Difficult to duel due to her burst potential. |
Support Matchups
| Support | Threat Level | Key Considerations |
|---|---|---|
| Ana | Moderate | Fade Sleep Dart and Biotic Grenade effect. Pressure her with RMB/Damage Orb to force cooldowns. Coalescence effective for countering Nano Boosted targets or healing through anti-nade. |
| Baptiste | Moderate | Apply pressure to force Immortality Field / Regenerative Burst. Coalescence ignores Amplification Matrix benefits for enemies. Damage Orb useful for targets inside Lamp. |
| Brigitte | Low | Stay outside her Whip Shot / Flail range. Fade Shield Bash / Rally engagement. RMB significantly outranges her. |
| Kiriko | Low | Pressure her to force Protection Suzu / Swift Step. Coalescence can be effective during Kitsune Rush if targets align. |
| Lucio | Low | RMB tracks his erratic movement well. Fade Sound Barrier engagement. Difficult to hit reliably with Orbs. |
| Mercy | Low | Easy target for RMB and Damage Orb. Fade away if she uses Valkyrie offensively. Coalescence can secure kills on her easily. |
| Moira | Mirror Matchup | Prioritize Heal Orb for self-sustain in 1v1s. Superior resource management and Fade usage dictates the winner. Utilize melee cancels for slight edge. |
| Zenyatta | Moderate (Discord Orb) | Utilize cover to break LoS for Discord. Pressure him to force Transcendence. Fade charged volleys. Easy target if caught out of position. |
| Lifeweaver | Low | Generally an easy target for RMB. Damage Orb can pressure Tree of Life placements. Fade Petal Platform escapes. |
Hero Matchup Quick Guide
| Enemy Hero | Threat Level | Key Abilities to Track | Moira's Counterplay/Strategy |
|---|---|---|---|
| Reinhardt | Low | Charge, Earthshatter | Stay at range, beam/orb bypass shield, Coalescence post-Shatter |
| Zarya | Medium | Bubble cooldowns, Graviton Surge | Avoid feeding charge with orb, Fade Grav damage (not pull) |
| D.Va | Low-Medium | Defense Matrix, Boosters | Beam ignores Matrix, Fade Boosters, Orbs can be eaten |
| Winston | Medium | Jump Pack, Bubble | Fade jump/bubble, RMB self-heal, Damage Orb inside bubble |
| Roadhog | High | Hook cooldown | Bait/Fade Hook, Heal Orb if hooked, Coalescence vulnerable |
| Sigma | Medium | Accretion, Kinetic Grasp, Flux | Beam ignores Grasp, Orbs eaten, Fade Flux damage |
| Orisa | Low-Medium | Javelin Spin, Terra Surge | Fade Spin/Surge, Beam ignores Fortify/Spin |
| Ramattra | Medium | Nemesis Form, Annihilation | Keep distance in Nemesis, Fade pull, Coalescence during Annihilation |
| Doomfist | Medium | Punch, Slam cooldowns | Fade CC, RMB self-heal, focus on survival |
| Junker Queen | Low-Medium | Jagged Blade, Rampage | Fade pull/Rampage, keep distance from Carnage |
| Mauga | High | Cardiac Overdrive, Cage Fight | Max range, use cover, Heal Orb essential if caught |
| Genji | Skill | Deflect, Dash | RMB tracking, Fade engage, Heal Orb in duel, Orb deflectable |
| Tracer | Skill | Recall, Pulse Bomb | RMB tracking, Fade Pulse Bomb, bait Recall |
| Reaper | Low-Medium | Wraith Form, Death Blossom | Fade Blossom, RMB self-heal, maintain slight distance |
| Sombra | High | Hack cooldown, EMP | Awareness, spycheck, Hack interrupts Ult/Fade |
| Pharah/Echo | Medium | Flight cooldowns, Barrage/Duplicate | Use cover, pressure with Orb/Coalescence, RMB tracking difficult |
| Widow/Hanzo/Ashe | High | Sightlines, key cooldowns (Hook, Mine) | Use cover, unpredictable Fade, Orb pressure, Fade burn |
| Cassidy/Soldier | Medium | Key cooldowns (Grenade, Visor) | Fade Ults, RMB self-heal, can duel, Fade hinder |
| Junkrat | Medium | Trap placement, RIP-Tire | Fade Trap/Tire, awareness of spam, Orbs good in his areas |
| Mei | Medium | Blizzard, Wall cooldown | Fade slow/Blizzard, keep distance |
| Sym/Torb | Low-Medium | Turret placement, Overload/Forge | RMB turrets, Damage Orb doesn't target turrets |
| Bastion | High | Assault Form cooldown | Use cover, Fade reposition during Assault, Coalescence risky |
| Sojourn | High | Railgun charge, Overclock | Use cover, Fade Disruptor/Ult, difficult duel |
| Ana | Medium | Sleep Dart, Biotic Grenade | Fade Sleep/Nade, pressure her |
| Baptiste | Medium | Immortality Field cooldown | Pressure Lamp, Damage Orb in Lamp, Coalescence ignores Window |
| Brigitte | Low | Shield Bash, Rally | Outrange her, Fade engage |
| Kiriko | Low | Suzu, Swift Step cooldowns | Pressure cooldowns, Coalescence during Kitsune |
| Lucio | Low | Sound Barrier | RMB tracking, Fade engage |
| Mercy | Low | Guardian Angel cooldown | Easy RMB/Orb target, Fade Valkyrie aggression |
| Moira | Mirror | Orb/Fade usage, Resource Mgmt | Heal Orb in duel, manage resources better |
| Zenyatta | Medium | Discord Orb | Use cover for Discord, pressure him, Fade volleys |
| Lifeweaver | Low | Petal Platform, Life Grip | Easy RMB target, pressure Tree, Fade Platform escape |
VII. Map Mastery: Moira's Playground
Every map in Overwatch presents unique challenges and opportunities. For Moira, understanding how map geometry interacts with her abilities is key to maximizing her potential.
General Principles
- Verticality: Maps with significant high ground offer both advantages and challenges. Fade Jumps become crucial tools for accessing advantageous positions, escaping threats, or quickly traversing levels. Playing on high ground provides safer positioning and better sightlines for heals and Coalescence. However, if the team spreads out vertically and Moira cannot utilize jumps effectively, healing can become difficult.
- Long Sightlines: Open areas with long sightlines are generally dangerous for Moira due to her vulnerability to snipers and long-range burst damage. Careful positioning using natural cover and judicious Fade usage for crossing open spaces are essential. Coalescence can be powerful down long, straight paths but exposes Moira significantly.
- Chokepoints: These are natural locations for strategic orb usage. Damage Orbs bounced into chokes apply pressure and deter pushes. Heal Orbs pre-placed can sustain an initiating push. Coalescence is highly effective for either breaking through a defended choke or holding one against an enemy advance.
Map Archetypes & Strategies
(e.g., Lijiang Tower, Oasis, Ilios): Often feature enclosed point capture areas ideal for orb bounces and brawl compositions where Moira excels. Fade jumps are vital for retaking points, accessing high ground overlooks, or escaping chaotic fights. Resource management is key due to potentially prolonged, continuous engagements on the point.
(e.g., Route 66, Dorado, Watchpoint: Gibraltar): The payload itself provides moving cover and naturally groups the team, playing to Moira's AoE healing strengths. High ground defense and attack phases require effective Fade Jump usage or careful pathing. Sustaining pushes over long distances demands excellent resource management.
(e.g., King's Row, Eichenwalde, Numbani): These maps transition between different types of environments (chokes, open areas, enclosed points). Moira players must adapt their strategy accordingly, utilizing tight spaces for orbs during point fights and careful positioning/Fade usage in more open areas. Fade jumps can be particularly useful for navigating transitions between sections.
(e.g., Colosseo, Esperança, New Queen Street): Characterized by constant brawling around the central robot, which favors Moira's high sustain. However, the maps often feature open areas and flanking routes requiring smart Fade usage for survival and repositioning. Continuous fighting makes resource management absolutely critical.
(e.g., Suravasa, New Junk City): These large maps with multiple, spread-out objectives can challenge Moira if the team doesn't coordinate and group effectively. Efficient rotations using Fade (and jumps where applicable) and long-range Heal Orbs are necessary. Resource management is vital due to potentially long travel times between fights and resource opportunities.
Specific Map Tips
Learning specific orb bounces and Fade jumps for each map significantly boosts Moira's impact. While visual guides are best, here are conceptual examples:
- Hollywood (Point A Defense): The small security room adjacent to the point is an excellent place to bounce Heal Orbs for defenders holding the objective. A Fade jump can be performed off the staircase near the attacker's spawn onto the cafe roof for flanking or escape.
- Busan (Downtown): The train platform area offers many walls for orb bounces. Fade jumps can be used from the lower levels onto the point platform near the walls.
- Circuit Royal (First Checkpoint Attack): Bouncing orbs off the tunnel walls leading to the checkpoint maximizes value. Fade jumps can be used on the stairs leading up to the high ground overlooking the checkpoint.
Moira's map effectiveness is less about inherent map advantage and more about identifying and exploiting favorable geometric features – tight corridors, low ceilings, jump spots – wherever they exist. Map mastery involves recognizing these features and using orbs proactively not just for healing/damage, but also for scouting, area denial, and enabling teammate positioning.
Tracking Your Progress: Stats for Self-Improvement
Improvement requires feedback, and while game sense is hard to quantify, statistics offer objective data points to track progress and identify areas needing work. Utilizing in-game stats and resources like Overbuff can be valuable tools.
Why Track Stats?
Stats provide a mirror to performance, highlighting trends and potential weaknesses that might be missed in the heat of battle. They help move beyond subjective feelings ("I felt like I healed a lot") to objective measures, guiding practice efforts more effectively.
Key Stats to Monitor
- Healing Done (Total & Per 10 min): A fundamental metric for any support. However, high healing alone isn't always indicative of impact. Context is crucial; healing meaningless poke damage is less valuable than clutch healing that saves lives. Compare this stat to damage dealt.
- Damage Done (Total & Per 10 min): Essential for Moira due to resource generation and her offensive potential. A healthy damage output suggests good resource management and pressure application. Some high-level benchmarks suggest aiming for damage numbers close to or even slightly exceeding healing numbers in certain metas, indicating proactive play.
- Eliminations / Final Blows: Shows contribution to securing kills. High damage with low eliminations/final blows might indicate focusing damage on tanks instead of squishies or failing to confirm kills.
- Deaths (Total & Per 10 min): Arguably one of the most important stats for supports. Low deaths indicate good positioning, awareness, and Fade usage. High deaths suggest fundamental flaws that need addressing. Aim to keep deaths per 10 minutes consistently low (e.g., below 5-6 is a good starting goal).
- Biotic Orb Kills: Directly measures the effectiveness of Damage Orb usage in securing eliminations.
- Coalescence Healing / Damage / Kills: Reflects ultimate impact. Overbuff tracks "Ally Coalescence Efficiency" and "Enemy Coalescence Efficiency". Low numbers here might point to poor timing, positioning, or target prioritization during the ultimate.
- Self-Healing: Indicates how much damage Moira personally sustained and recovered from using RMB Grasp or Heal Orb. Very high self-healing could mean taking unnecessary damage due to poor positioning, or potentially prioritizing self-sustain over team healing in some cases. Context is vital.
- Resource Management (Indirect): While not a direct stat, consistently low deaths combined with balanced healing and damage numbers strongly suggests effective resource management. Frequent deaths or periods of zero healing output often correlate with running out of Biotic Energy.
The Power of Replays
Stats tell what happened, but replays show how and why. Watching match replays (especially losses or close games) is invaluable for identifying specific mistakes and areas for improvement:
- Monitor the Biotic Energy meter during crucial fights. Was it managed proactively?
- Analyze every Fade usage. Was it necessary? Did it achieve a clear goal (escape, dodge, reposition, jump)? Was it wasted?
- Evaluate Biotic Orb choices. Was it the right orb for the situation? Did it connect effectively with targets, or fly off uselessly?
- Scrutinize Coalescence usage. Was the timing optimal? Was positioning safe and effective? Was target priority correct?
- Identify positioning errors that led to deaths or forced Fade usage.
- Look for missed opportunities – moments where damage could have secured a kill or faster healing could have saved an ally.
Context is King
Avoid looking at stats in isolation. High damage might be necessary against certain comps, or it could signify neglecting critical healing duties. Low healing might occur in games with passive teammates or another high-output healer. Always analyze stats within the context of the specific match, team compositions, enemy strategy, and overall game flow. The most valuable metrics are often relational (Healing vs. Damage ratio, Elims relative to Damage) and contextual (Deaths relative to fight outcomes).
Replay review offers deeper understanding by revealing the decision-making process behind the numbers. Questioning choices made during the game ("Why did I Fade then?", "Should I have used Heal Orb?") is crucial for refining game sense – arguably Moira's most important attribute.
| Stat Name | Why Track It | Potential Target/Benchmark | How to Improve |
|---|---|---|---|
| Deaths per 10 min | Measures survivability, positioning, awareness | Aim for < 6 (lower is better) | Fade usage, Matchups, Maps |
| Healing per 10 min | Core support output | Varies greatly (e.g., 8k-12k+) | Grasp, Orb, Resource Management |
| Damage per 10 min | Resource gen, pressure, kill potential | Aim for similar range to Healing | Grasp, Orb, Resource Management |
| Healing : Damage Ratio | Reflects balance & resource management style | Aim near 1:1 or slightly favoring Damage | Resource Management, Strategy |
| Eliminations per 10 min | Contribution to securing kills | Contextual, compare to Damage | Grasp, Orb, Matchups |
| Coalescence Efficiency | Ultimate impact (healing/damage/kills per ult) | Maximize uptime on valuable targets | Coalescence, Positioning |
| Biotic Orb Kills per 10 min | Effectiveness of Damage Orb usage | Consistent low numbers suggest review usage | Orb, Orb Wizardry |
Training Regimen: From Adept to Ascended
Mastering Moira is a progressive journey. Building a strong foundation in mechanics and resource flow before layering on advanced techniques and strategic depth is the most effective path to improvement.
Goal: Develop consistent control over Biotic Grasp, understand ability ranges, and internalize the core resource management loop.
Drills:
- Practice Range Focus: Spend time smoothly tracking moving bots with RMB Grasp. Practice precise LMB spray control – learn the feel of tapping versus holding for different healing needs. Visually confirm the 15m heal and 20m damage ranges. Constantly glance at the Biotic Energy meter.
- Custom Game vs. Bots: Set up a custom game with allied and enemy bots. Focus solely on the rhythm: Heal allies (LMB), immediately seek an enemy bot to replenish resources (RMB), use Orbs situationally (Heal Orb for burst, Damage Orb for pressure/finish). Aim to keep the resource meter above 50% consistently. Practice basic Fade usage purely for escaping bot "threats".
Goal: Master intentional orb bounces and consistent Fade jump execution.
Drills:
- Orb Geometry Practice (Empty Maps): Load empty custom maps. Explore common fighting areas (chokes, points, corridors). Identify surfaces for bouncing orbs. Practice specific bounces repeatedly – aim to send orbs around corners or keep them contained in small rooms.
- Fade Jump Practice (Workshop/Empty Maps): Find maps or workshop codes dedicated to Fade jumps, or simply use empty maps. Identify known jump spots from guides or experimentation. Practice the timing (jump near end of Fade on geometry) until consistent. Focus on a few key jumps per map initially.
- Quick Play Application: Consciously attempt specific orb bounces and Fade jumps during live Quick Play matches. Don't fixate on perfection; the goal is to start integrating these techniques into real gameplay scenarios.
Goal: Improve survivability through better positioning and make more impactful decisions regarding ability usage and focus (heal vs. damage).
Drills:
- Targeted Replay Review: Watch replays specifically focusing on:
- Positioning before/during fights and Coalescence. Where could a safer or more advantageous position have been taken?
- Moments leading to death. What mistake(s) occurred? (Poor Fade, bad position, resource mismanagement?)
- Orb and Fade choices. Was the ability necessary? Was it the right choice for that moment?
- Live Game Focus (QP/Comp): Set a conscious goal for each game, e.g., "Minimize deaths below X," or "Always position with LoS to my tank and at least one enemy." Practice deliberately choosing between healing and damage based on the flow of the fight, not just habit. Focus on Coalescence timing and target selection.
Goal: Adapt playstyle effectively based on team/enemy compositions, master matchups, and implement higher-level strategies.
Drills:
- Competitive Play Analysis: Before matches, assess team compositions. How does Moira fit? Who are the key allies to enable? Who are the key enemy threats? Adjust playstyle accordingly (more aggressive, more defensive, focus on specific synergies). Actively track key enemy cooldowns (Hook, Sleep, Nade, Deflect, Matrix, etc.).
- High-Rank VOD Review: Watch gameplay from top Moira players. Don't just watch passively; analyze their positioning, resource management, cooldown usage, orb placements, Fade jumps, and decision-making in complex situations. Ask why they made specific choices.
- Resource Mismanagement: Extreme Healbotting (empty meter) or mindless DPSing (neglecting heals/regen)
- Wasted Fades: Using Fade frivolously, leaving it unavailable for crucial escapes or cleanses
- Inefficient Orbs: Throwing orbs into open space, using the wrong orb type for the situation
- Poor Coalescence Usage: Bad timing (into counters), unsafe positioning, poor target focus
- Tunnel Vision: Focusing solely on healing numbers or damage dealt, ignoring the broader tactical situation
- Neglecting Self-Improvement: Not reviewing stats or replays, leading to stagnation
- Panic Fading Off Map: A surprisingly common mistake under pressure
Moira mastery requires developing distinct skills progressively: mechanics, resource discipline, strategic awareness, and map knowledge. Consistent self-review through stats and replays is non-negotiable for identifying flaws and breaking through plateaus.
Conclusion: Embodying the Ascended Moira
The path to mastering Moira O'Deorain is one of balance, precision, and sharp intellect. It demands more than just mechanical skill; it requires embodying her duality – the life-giving healer and the life-draining force, seamlessly shifting between roles as the situation demands.
We've journeyed through the intricacies of her kit, from the fundamental rhythm of Biotic Grasp and the crucial art of resource management, to the advanced techniques of Orb Wizardry and Fade Jumping that unlock her true potential. We've explored strategic positioning for Coalescence, navigated the complex web of team synergies and hero matchups, and learned how to leverage map geometry and track progress for continuous improvement.
An exceptional Moira exhibits masterful resource flow, seemingly always having healing available when needed most. Their Fade usage is precise and impactful – cleansing key debuffs, dodging lethal abilities, accessing unexpected positions. Their Biotic Orbs are calculated tools, maximizing value through clever bounces and timely choices. Their Coalescences swing the tempo of fights, deployed with optimal timing and positioning to sustain allies while dismantling enemies. They possess excellent survivability not just through mechanics, but through superior game sense and adaptability, consistently enabling their team while minimizing their own vulnerabilities.
Mastering Moira is a rewarding endeavor. Be patient with the process. Utilize the drills and insights provided in this guide to practice deliberately. Analyze gameplay, learn from mistakes, and celebrate progress. Stay curious, watch high-level players, and keep abreast of balance changes that inevitably shape the meta.