
1. Introduction: Embracing the Shadows
Reaper's Identity: The Close-Quarters Nightmare
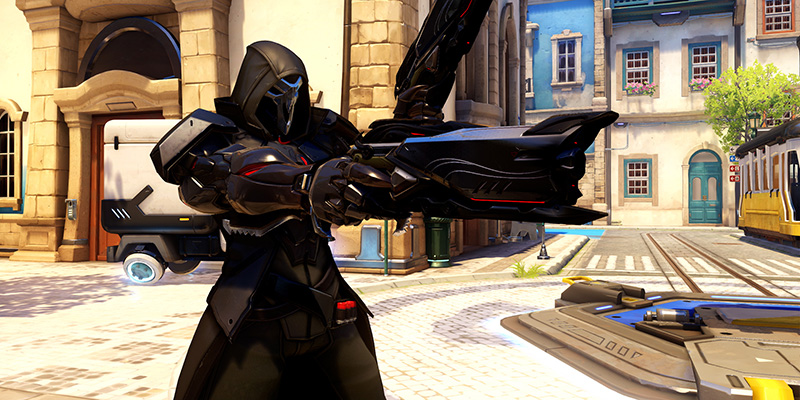
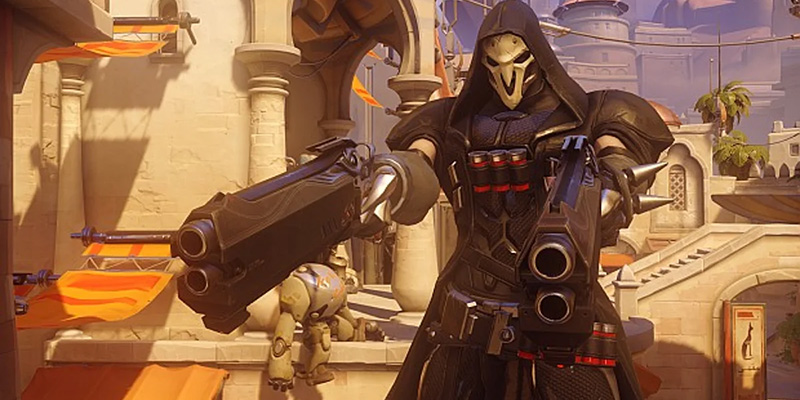
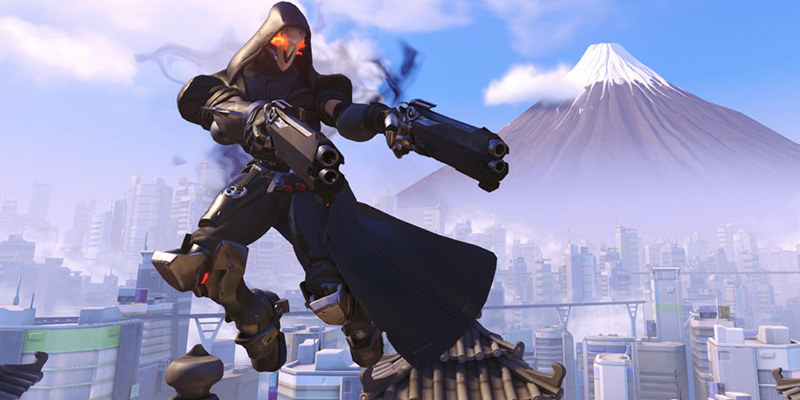
Welcome, aspiring assassins, to the definitive guide for mastering Reaper in Overwatch. Reaper stands as one of the game's most iconic and potent close-range Damage heroes, a specter of death defined by his devastating twin Hellfire Shotguns and remarkable self-sustain. He is the embodiment of close-quarters lethality, capable of turning tightly contested objectives and narrow corridors into killing fields.
Historically, Reaper carried the mantle of "tank buster," a title earned through his high burst damage potential against large health pools. However, the landscape of Overwatch, with its 5v5 format, adjusted hero health pools, balance changes to Reaper's damage and spread, and the prevalence of armor, crowd control (CC), and high support sustain, has subtly reshaped his role. While still capable of pressuring tanks, particularly those lacking armor or mitigation, his effectiveness often shines brighter when played as a flanker, an assassin targeting vulnerable backlines, or a potent duelist against less mobile heroes. The raw tank-shredding potential is tempered by factors like armor significantly reducing his per-pellet damage and lifesteal, and the coordinated focus fire possible in higher-level play.
Despite this evolution, Reaper's core strength remains immutable: he dominates enclosed spaces and thrives in the chaos of close-range combat where many other heroes falter. Understanding how to leverage this strength, adapt his playstyle, and master his toolkit is the key to unlocking his true potential.
Why Master Reaper?
Mastering Reaper offers a unique and rewarding experience. His Hellfire Shotguns possess some of the highest close-range burst damage in the game, allowing skilled players to secure critical eliminations on supports and damage dealers with terrifying speed. This potential to instantly delete key targets can swing team fights decisively.
Furthermore, Reaper boasts remarkable self-sufficiency thanks to his passive ability, The Reaping, which heals him for a percentage of the damage he inflicts. This allows him to sustain himself during engagements, take aggressive duels, and operate effectively on flanks with less direct support reliance compared to other Damage heroes.
While Reaper has a relatively accessible skill floor, making him easy for newcomers to pick up, his skill ceiling is deceptively high. True mastery lies not just in aiming, but in impeccable positioning, precise timing of ability usage (especially the crucial Wraith Form and Shadow Step), effective cooldown management, and deep map knowledge. His viability can fluctuate across different skill ranks, often dominating lower tiers where positioning and awareness are less refined, while facing greater challenges against coordinated, high-skill opponents who can exploit his weaknesses.
Guide Overview: Your Path to Mastery
This guide is designed to be your comprehensive companion on the journey from a novice shadow to a Grandmaster-level assassin. We will dissect every facet of Reaper's gameplay, starting with his Core Mechanics, delving deep into each Ability, exploring Advanced Combat Strategies, mastering Map Usage and flanking routes, analyzing critical Hero Matchups, understanding Team Synergy, drawing Insights from the Pros, and concluding with a progressive Training Regimen. Prepare to step out of the shadows and become the nightmare your enemies fear.
2. Core Mechanics: The Tools of the Trade
Understanding Reaper's fundamental mechanics is the bedrock upon which skillful play is built. His shotguns and passive healing define his engagement style and limitations.
Hellfire Shotguns: Unleashing Chaos
Reaper wields two powerful Hellfire Shotguns, firing them in an alternating sequence with each trigger pull. These are the primary instruments of his destructive potential.
Raw Power, Damage Stats & Fire Rate
Each shot unleashes 20 pellets. The damage per pellet varies with range, typically cited between 1.8 and 6 damage, with current balance often placing the maximum around 5.4 damage per pellet. This translates to a maximum potential damage of 108 per shot for bodyshots and 216 for headshots, assuming all pellets connect. Reaper fires two shots per second (0.5 seconds per shot), carries 8 rounds of ammunition, and requires 1.5 seconds to reload.
| Stat | Value | Notes |
|---|---|---|
| Damage per Pellet | 1.8 - 5.4 (Max) | Varies with range |
| Pellets per Shot | 20 | |
| Max Bodyshot Damage | 108 | Assuming all pellets hit at optimal range |
| Max Headshot Damage | 216 | Assuming all pellets hit headshots at optimal range |
| Fire Rate (shots/sec) | 2 | 0.5 seconds per shot |
| Ammo Capacity | 8 | |
| Reload Time | 1.5 seconds |
Optimal Range & Damage Falloff
The critical takeaway for Hellfire Shotguns is their extreme reliance on close proximity. Damage falloff begins sharply at 10 meters and reaches its minimum effectiveness at 20 meters. Within this range, pellet damage drops significantly, from the maximum (e.g., 5.4) down to a minimum (e.g., 1.62). The practical "effective range" for consistently securing kills on 200-250 HP heroes (requiring 2-3 well-aimed shots) is generally considered to be within approximately 5-6 meters, potentially extending slightly to 7-9 meters due to spread adjustments. Achieving the maximum theoretical damage (216 headshot) requires being practically point-blank, within about 1 meter. Beyond 15 meters, the shotguns deal negligible damage, often described as mere "confetti".
| Distance (m) | Max Potential Bodyshot Damage | Max Potential Headshot Damage | Notes |
|---|---|---|---|
| < 1m | 108 | 216 | Maximum possible damage |
| 5m | ~108 | ~216 | Still within optimal range |
| 10m (Falloff Start) | < 108 | < 216 | Damage begins decreasing |
| 15m | Significantly Reduced | Significantly Reduced | Damage becomes unreliable |
| 20m+ (Falloff Max) | 32.4 (Min Damage) | 64.8 (Min Damage) | Minimum damage per shot |
This extreme falloff mandates a high-risk, high-reward playstyle. Unlike hitscan heroes who can deal consistent damage from safer distances, Reaper must close the gap and enter dangerous territory to be effective. Success, therefore, hinges less on pure pinpoint aim and more on mastering positioning, map knowledge for flanking (Section 5), strategic ability usage (Section 3), and impeccable timing (Section 4).
Understanding Spread Patterns
Reaper's shotgun spread is no longer random; it follows a fixed pattern, though the pattern's rotation randomizes with each shot. This pattern is consistently described as consisting of 20 pellets distributed across three concentric rings: an inner ring/cluster, a middle ring, and an outer ring. The overall spread angle is 6°.
Conceptual Diagram: Imagine a central dot (1 pellet), surrounded by a small inner ring (5 pellets), a larger middle ring (7 pellets), and a wide outer ring (7 pellets), totaling 20 pellets.
Aiming Strategy: Because of this fixed, ring-based structure, aiming directly at an enemy's head, especially beyond point-blank range (5m+), may not yield maximum damage. Many pellets, particularly those in the wider outer ring, might miss smaller head hitboxes entirely. A more effective strategy often involves aiming at the neck or upper torso area. This approach maximizes the chance of the dense central pellet cluster hitting the head/upper chest for critical damage, while ensuring the wider middle and outer rings connect with the larger body mass, resulting in more total pellets hitting the target and thus higher overall damage compared to aiming purely for the head.
The fixed pattern aimed for consistency, but its specific structure means perfect aim doesn't guarantee maximum damage on all targets or ranges. Some pellets will inevitably miss smaller targets due to the inherent spread, especially in the outer rings. This reinforces the non-intuitive aiming strategy (neck/upper torso) to leverage the entire spread pattern effectively.
Dealing with Armor
Armor presents a significant challenge to Reaper. Armor reduces the damage taken from each individual hit, but cannot reduce a single hit's damage by more than 50% or below a certain threshold. For Reaper's pellets, each dealing around 5.4-6 damage, armor effectively halves their damage to approximately 2.7-3 per pellet. Consequently, Reaper's maximum damage per shot against an armored target is roughly halved (approx. 54-60 bodyshot, 108-120 headshot). This reduction severely impacts his burst potential and, crucially, the amount of health he regenerates via The Reaping. This makes him less effective against heavily armored targets like Reinhardt or a Fortified Orisa and requires players to either focus fire to break the armor quickly or prioritize non-armored health pools.
The Reaping (Passive): Sustaining the Hunt
Reaper's passive ability, The Reaping, is integral to his survivability and aggressive playstyle.
Lifesteal Mechanics
Reaper heals himself for 35% of the damage dealt by his Hellfire Shotguns and Quick Melee attacks. Note: Ensure using the current 35% value, as older sources might cite 20% or 30%.
Maximizing Self-Sustain
This healing is most effective when engaging large targets like tanks, as their bigger hitboxes allow more pellets to connect per shot, thus generating more damage and subsequent healing. Conversely, its effectiveness is halved against armor due to the reduced damage output. It's important to note that self-healing from The Reaping does not contribute to ultimate charge generation. This passive is a cornerstone of Reaper's ability to win close-range duels and sustain through brawls.
Conditional Sustain
The Reaping encourages Reaper to stay aggressive and continuously deal damage. It creates a feedback loop where dealing damage allows him to stay in the fight longer, enabling him to deal even more damage. However, this loop is fragile. Abilities that mitigate his damage (Armor, D.Va's Defense Matrix, Zarya's Bubbles, Orisa's Fortify) directly reduce his healing output, leaving him vulnerable. Furthermore, high burst damage from enemies can eliminate Reaper before he can generate significant healing. His sustain is therefore conditional on consistently landing shots and the target lacking the means to negate his damage or burst him down first.
3. Ability Deep Dive: Mastering Movement and Mayhem
Beyond his shotguns, Reaper's abilities define his mobility, survivability, and ultimate impact. Mastering their nuances, both defensively and offensively, separates novice Reapers from true assassins.
Wraith Form: The Art of Evasion (and Aggression?)
Wraith Form is arguably Reaper's most crucial ability for survival and repositioning.
Stats & Functionality
Activating Wraith Form transforms Reaper into an invulnerable, faster-moving shadow for up to 3 seconds. It grants a +50% movement speed boost and makes him immune to all damage and crowd control effects. A key benefit is its cleanse effect, instantly removing most negative status effects like Ana's Biotic Grenade, Zenyatta's Discord Orb, Ashe's Dynamite burn, or Mei's slowing freeze. Additionally, Wraith Form automatically reloads the Hellfire Shotguns. The ability has an 8-second cooldown and can be cancelled early by pressing the ability key again or attempting to fire. While active, Reaper cannot shoot or use other abilities, but he can collect health packs. He also does not contest objectives while in Wraith Form.
| Parameter | Value/Effect |
|---|---|
| Duration | Up to 3 seconds |
| Cooldown | 8 seconds |
| Movement Speed Bonus | +50% |
| Invulnerability | Immune to Damage & CC |
| Cleanse Effect | Removes most negative status effects (Anti-Nade, Discord, Burn, Slow etc.) |
| Auto-Reload | Yes, instantly reloads Hellfire Shotguns |
| Ability Lockout | Cannot shoot or use other abilities |
| Objective Contesting | No |
| Early Cancellation | Yes |
| Health Pack Interaction | Can collect health packs |
Defensive Mastery: The Primary Purpose
The overwhelming consensus among experienced players and guides is that Wraith Form's primary and most valuable function is defensive.
- Escape Tool: Use it to disengage from unfavorable fights, retreat from overwhelming numbers, or reach the safety of cover, health packs, or teammates when low on health.
- Cooldown Dodging: This is where Wraith Form shines. It requires prediction and quick reactions, but successfully dodging key enemy cooldowns like Ana's Sleep Dart, Roadhog's Hook, Sigma's Accretion, Reinhardt's Earthshatter, or even ultimates like D.Va's Self-Destruct or Tracer's Pulse Bomb is critical for survival and winning duels. Holding down the Wraith Form button while stunned can allow for a frame-perfect activation the moment the stun wears off.
- Cleansing Debuffs: Removing debilitating effects is vital. Cleansing Ana's Biotic Grenade restores Reaper's self-healing capability via The Reaping. Removing Discord Orb significantly increases survivability. Escaping Mei's freeze or Ashe's burn prevents death or forces enemy cooldowns.
Offensive Applications: High Risk, Situational Reward
While possible, using Wraith Form offensively is generally discouraged due to the high risk involved.
- Closing Gaps: It can be used to quickly cover distance to finish off a fleeing low-health target.
- Aggressive Repositioning/Flanking: Some sources mention using it to pass through enemy lines to reach the backline. However, this is exceptionally dangerous.
- The Critical Flaw: Using Wraith Form to engage a fight is a cardinal sin for aspiring Reapers, especially in higher-level play. Wraith Form prevents shooting and has a significant 8-second cooldown. Engaging with it means arriving at the enemy unable to immediately deal damage and, more importantly, without an escape or dodge tool available. Enemies can simply wait out the 3-second duration and focus fire the vulnerable Reaper the moment he reappears. The defensive value of having Wraith Form available to react to threats far outweighs its niche offensive uses. Saving it for escape or dodging critical abilities is paramount for consistent survival and impact.
The Reload Advantage
The instant reload provided by Wraith Form is a powerful synergy. A common sequence involves firing all 8 shots, then activating Wraith Form to reposition, dodge an ability, or close a small gap, emerging fully reloaded and ready to continue firing. This is particularly useful for maintaining pressure when chasing down targets or during extended duels.
Shadow Step: The Unseen (and Risky) Approach
Shadow Step is Reaper's tool for long-range repositioning and accessing advantageous positions, but it comes with significant risks.
Stats & Functionality
Shadow Step allows Reaper to teleport to a targeted location up to 35 meters away. It has a 10-second cooldown. The cast time is a critical factor, often cited as 1.5 seconds or 2 seconds (verify current value, likely 1.5s or 2s). During this cast time, and for a brief moment upon arrival, Reaper is completely stationary and vulnerable to attack. The ability is heavily telegraphed: it produces a loud, distinct voice line and sound effect, and creates obvious smoke/shadow visual effects at both the starting point and the destination. Shadow Step can be used while mid-air and is essential for reaching high ground or ledges inaccessible by normal movement. Like Wraith Form, it can cleanse certain negative effects upon completion and provides a brief window of invulnerability during the teleport animation itself. A Stadium Mode power, "Silent As The Grave," can significantly quiet the ability's cues.
| Parameter | Value/Effect |
|---|---|
| Max Range | 35 meters |
| Cooldown | 10 seconds |
| Cast Time | 1.5 - 2.0 seconds (Verify Current) |
| Vulnerability Window | During cast animation and briefly upon arrival |
| Audio Cue | Loud voice line and sound effect |
| Visual Cue | Smoke/Shadow effects at start and destination |
| Mid-Air Use | Yes |
| High Ground Access | Yes |
| Cleanse Effect | Yes (upon completion) |
| Invulnerability Window | Briefly during teleport animation (~1 second) |
Strategic Teleportation: Flanking and High Ground
The primary intended use of Shadow Step is strategic repositioning before a fight begins. This involves:
- Accessing high ground for better sightlines or surprise attacks.
- Bypassing enemy defenses or chokepoints.
- Setting up flanks behind or to the side of the enemy team.
- Positioning for a Death Blossom.
Execution: Always initiate Shadow Step from a safe location, out of enemy line of sight. Target locations that are also concealed or offer immediate cover upon arrival. The destination should be close enough to the intended target or fight area to allow quick engagement after the teleport completes.
Risks vs. Rewards: Managing Vulnerability
Shadow Step is inherently risky due to its long, vulnerable cast time and loud telegraphs. Using it mid-combat or within enemy sightlines is practically a death sentence against aware opponents. Enemies will hear the distinct sound cue, see the smoke, and have ample time to aim at the predictable arrival point. Therefore, Shadow Step should almost exclusively be used as a proactive positioning tool between fights or during lulls in the action, not as a reactive escape or mid-combat maneuver. Its value comes from enabling surprise and advantageous positioning, which requires careful planning, map knowledge, and proactive usage from safety. This contrasts sharply with Wraith Form's role as a reactive defensive tool.
Advanced Tech: Pushing the Limits
Beyond basic repositioning, Shadow Step offers advanced techniques for skilled players:
- Shadow Step Jumps / Airborne Use: The ability to cast Shadow Step while airborne opens up possibilities. Combined with specific map geometry, this allows "Reaper Jumps" – teleports to unconventional locations, potentially bypassing obstacles or reaching high ground more efficiently than standard ground-based teleports. These require precise timing and map knowledge.
- Invulnerability Frames / "Fake Shadow Step": Shadow Step grants approximately 1 second of invulnerability during the teleport animation. This can be exploited with the "Fake Shadow Step" technique: aiming the teleport directly at Reaper's feet triggers the animation and the invulnerability period, but results in no actual movement. If timed perfectly, this allows Reaper to dodge high-impact abilities like D.Va's Self-Destruct, Junkrat's Rip-Tire, or Doomfist's Meteor Strike, essentially acting as a high-skill secondary defensive cooldown when Wraith Form is unavailable. It can also be used to cleanse negative effects like Anti-Nade or Discord if Wraith is down.
Mastering these advanced techniques significantly elevates Reaper's survivability and unpredictability. The Fake Shadow Step, in particular, transforms a positioning tool into a clutch defensive play, rewarding precise timing and game sense. Airborne Shadow Steps allow for more creative flanking and map traversal.
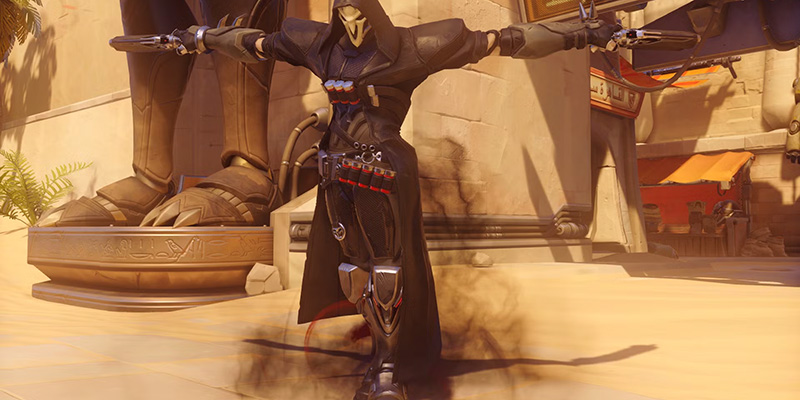
Death Blossom: The Whirlwind of Destruction
Reaper's ultimate ability, Death Blossom, unleashes a devastating barrage of shotgun fire in all directions.
Stats & Functionality
Death Blossom deals 170 damage per second to all enemies within an 8-meter radius, lasting for 3 seconds. This equates to a maximum potential of 510 damage per target caught for the full duration. During the ultimate, Reaper benefits from The Reaping, healing for 35% of all damage dealt, potentially up to 59.5 health per second for each enemy hit. However, Reaper's movement speed is significantly reduced while channeling, making him an easy target. The ability automatically reloads his Hellfire Shotguns upon completion. Death Blossom can be activated mid-air, often used when dropping from high ground. The damage radiates outwards from Reaper's position.
| Parameter | Value/Effect |
|---|---|
| Damage per Second (per target) | 170 |
| Duration | 3 seconds |
| Radius | 8 meters |
| Total Potential Damage (per target) | 510 |
| Self-Healing (per target/sec) | 59.5 (35% of 170 damage) |
| Movement Penalty | Significantly slowed |
| Auto-Reload | Yes (after completion) |
| Mid-Air Activation | Yes |
Timing is Everything: Seizing the Moment
Successful Death Blossoms rely heavily on timing.
- Optimal Window: The ideal time to use Death Blossom is mid-fight, after crucial enemy cooldowns that can counter it have been used or baited. This includes stuns (Cassidy Hinder, Rein Charge, Sigma Rock, Brig Bash), sleeps (Ana Dart), anti-heals (Ana Nade), damage immunity/cleanses (Kiriko Suzu, Bap Lamp), damage absorption (D.Va Matrix, Sigma Grasp, Zarya Bubbles), and defensive ultimates (Zenyatta Transcendence, Lucio Sound Barrier).
- Avoid Initiation: Using Death Blossom to start a fight is generally a poor strategy, as enemies will have all their cooldowns ready to shut it down. Use it when the enemy team is already engaged and distracted.
- Target Priority: While hitting multiple targets maximizes self-healing, prioritize securing kills on vulnerable supports and damage dealers first, as tanks may survive the full duration, especially with healing. Ulting multiple tanks can, however, provide immense self-sustain.
Positioning for Maximum Impact: The Element of Surprise
Because Death Blossom leaves Reaper vulnerable and is easily countered, surprise is paramount.
- Surprise Attacks: The most effective Blossoms come from unexpected angles. Use Shadow Step proactively to reach hidden positions – typically high ground directly above the enemy team, or flanking routes behind them – before initiating the ultimate. Avoid using Wraith Form to engage for an ult, as it telegraphs intent and leaves the escape tool on cooldown.
- Dropping Down: A classic and highly effective technique is activating Death Blossom mid-air while dropping onto an unsuspecting group of enemies below. Firing a single shotgun blast just before pressing the ultimate key can add extra burst damage to help secure a quick kill on a key target (like Ana or Lucio) before they can react with a counter.
- Avoid Open Spaces: Due to the movement penalty and vulnerability, using Death Blossom in wide-open areas is risky. Utilize nearby cover or enclosed spaces where possible to limit exposure.
The effectiveness of Death Blossom is intrinsically linked to the mastery of Shadow Step for positioning and the game sense required to track enemy cooldowns. A predictable ult is a failed ult.
Team Setups & Synergies: Amplifying the Carnage
Coordinating Death Blossom with allied abilities drastically increases its potential:
- Ana (Nano Boost): Provides 50% damage reduction and 50% increased damage, making Reaper significantly tankier and more lethal during Blossom.
- Zarya (Graviton Surge): Pulls enemies into a tight cluster, guaranteeing maximum targets within the 8m radius. Projected Barrier can also protect Reaper during the channel.
- Sombra (EMP): Disables enemy shields, defensive abilities (Matrix, Grasp, Suzu, Lamp), and escape tools, leaving them vulnerable to the full damage.
- Kiriko (Kitsune Rush): Increases movement speed (allowing some repositioning during ult) and attack speed (needs verification if this affects Blossom's damage rate), while also boosting cooldown reduction for the team.
- Lucio (Speed Boost / Sound Barrier): Speed Boost helps Reaper get into position quickly. Sound Barrier provides overhealth to help survive focus fire during the ult.
Recognizing and Baiting Counters
Awareness of enemy abilities is crucial. Key threats include: D.Va (Defense Matrix), Sigma (Kinetic Grasp, Accretion), Orisa (Javelin Spin, Fortify, Javelin Spear), Roadhog (Chain Hook), Ana (Sleep Dart, Biotic Grenade), Kiriko (Protection Suzu), Zenyatta (Transcendence), Lucio (Sound Barrier, Soundwave), Brigitte (Shield Bash, Whip Shot), and Cassidy (Magnetic Grenade). Actively track these cooldowns and try to initiate Blossom only when they are unavailable. Forcing out a key defensive ability like Suzu or Matrix, even without securing kills, can still create significant value for the team.
Ultimate Philosophy
Don't be afraid to use Death Blossom for a high-value solo or duo kill, especially against problematic enemy heroes or to secure a critical objective. Holding onto the ultimate indefinitely waiting for the perfect 5-man Play of the Game often results in less overall impact than using it more frequently for smaller, guaranteed advantages.
4. Advanced Combat Strategies
Beyond understanding individual abilities, mastering Reaper involves integrating them with intelligent positioning and movement to consistently outplay opponents.
Positioning: Frontline Brawler vs. Elusive Flanker
Reaper possesses the flexibility to adopt two primary positioning styles depending on the game state, map, and team compositions.
Reading the Game
- Frontline Brawler: This style involves sticking close to the team's tank, particularly in Brawl compositions featuring heroes like Reinhardt, Ramattra, Junker Queen, or Mauga. The goal is to apply constant pressure to the enemy frontline, shredding shields and punishing tanks who overextend. Reaper utilizes natural cover, corners, and soft off-angles (positions slightly adjacent to the main team axis) to create crossfires while benefiting from team resources like Lucio's speed boost or Kiriko's healing.
- Flanker/Assassin: This style leverages Reaper's Shadow Step for proactive positioning and Wraith Form for escape. Reaper teleports to advantageous positions (often high ground or behind enemy lines) before a fight breaks out, waits for the teams to engage, and then ambushes isolated supports or vulnerable damage dealers. This requires excellent timing, map knowledge, and patience.
Adopt Brawl Style When:
- The enemy team composition is also geared towards close-range combat (e.g., Reinhardt mirror, Junker Queen).
- Your team composition features strong Brawl enablers (Lucio for speed, Kiriko/Bap/Moira for AoE heals, Reinhardt/Ramattra for frontline presence).
- The map features short sightlines, tight corridors, and enclosed objective areas (e.g., King's Row streets/final point, Lijiang Tower Control Center/Night Market, Nepal Sanctum/Village).
- The objective is to overwhelm the enemy frontline through coordinated aggression.
Adopt Flank Style When:
- The enemy team composition relies on long-range poke or snipers (e.g., Sigma, Orisa, Widowmaker, Ashe, Hanzo) that Reaper cannot contest directly.
- Your team is playing a Dive composition (e.g., Winston, Wrecking Ball, D.Va) where the frontline is mobile and disruptive rather than static.
- The map features long sightlines, significant high ground advantages, or multiple flanking routes (e.g., Circuit Royale, Watchpoint: Gibraltar, Numbani, Dorado).
- Enemy supports are immobile and vulnerable to dives (e.g., Ana, Zenyatta).
- The objective is to disrupt the enemy backline, create distractions, and secure key eliminations to destabilize their formation.
Effective Reaper play demands adaptability. Sticking rigidly to one style when the situation calls for the other leads to inefficiency. Often, the best approach involves fluidity – perhaps starting a fight on the frontline to apply initial pressure, then transitioning to a flank mid-fight once cooldowns are used or an opportunity arises. Recognizing these moments and adjusting positioning accordingly is a hallmark of skilled Reaper play.
Off-Angles and Map Control
Even when playing a frontline style, utilizing "soft" off-angles is crucial. Positioning slightly to the side of the main tank forces enemies to divide their attention, creating crossfires and making it harder for them to focus down a single target. When flanking, the goal isn't always an immediate kill; simply forcing an enemy support or sniper to reposition or dedicate resources to dealing with the flank creates valuable space and pressure for the rest of the team.
Positioning based on Team Composition
- With Brawl (Rein, JQ, Ram, Mauga + Lucio, Kiriko, Bap, Moira): Stay within effective range of the primary engagement, typically near the tank. Use corners for cover between shots and abilities. Push forward aggressively with Lucio's speed amp, focusing fire on the enemy tank or exposed frontline targets.
- With Dive (Winston, Ball, D.Va + Tracer, Genji, Sombra + Ana, Kiriko, Brig, Zen): Requires coordination. Either use Shadow Step to follow the tank's dive initiation, focusing the same target, or take an independent flanking route to pressure the backline simultaneously as the tank engages the front. Timing is critical to avoid being isolated.
- With Poke (Sigma, Orisa + Ashe, Widow, Hanzo, Sojourn + Bap, Ana, Zen, Mercy): This is Reaper's most challenging environment. The team plays at ranges where Reaper is ineffective. Success relies almost entirely on executing successful flanks to assassinate key backline targets or disrupt the enemy setup. If flanking isn't viable due to map layout or enemy awareness, swapping heroes might be necessary. On defense, holding very close, tight angles can sometimes work.
Movement Techniques Beyond Abilities
While Wraith Form and Shadow Step are primary movement tools, effective Reaper play also incorporates fundamental FPS movement mechanics:
- Cover Usage: Constant use of natural cover (walls, corners, objects, payload) is non-negotiable. Given Reaper's need to operate at close, dangerous ranges, minimizing time spent in the open is vital for survival. Think of walls as infinitely regenerating shields. Peek, shoot, return to cover.
- AD Strafing: Basic side-to-side strafing (A/D keys on PC, left stick on console) while shooting makes Reaper a harder target to hit in duels. Avoid standing still while firing.
- Crouch Spamming: Rapidly crouching and uncrouching, especially during Death Blossom, can make the head hitbox significantly harder for enemies to track consistently. It can also be used while approaching corners or setting up flanks to potentially reduce footstep noise and present a smaller profile momentarily.
- Jumping: Incorporating jumps can make movement less predictable, particularly when emerging from Wraith Form to dodge anticipated shots or during Death Blossom to add vertical unpredictability to the crouch spam.
5. Map Mastery: Reaper's Hunting Grounds
Reaper's effectiveness is heavily tied to the environment. Maps with ample cover, close quarters, high ground access, and viable flanking routes are his preferred battlegrounds.
General Flanking Principles
Successful flanking as Reaper requires more than just teleporting behind the enemy. Key principles include:
- Covered Approach: Utilize map geometry to stay hidden during the approach phase. Never teleport directly into enemy line of sight if avoidable.
- High Ground Advantage: Use Shadow Step to reach elevated positions. This provides better visibility, allows for surprise drop-downs (especially for Death Blossom), and forces enemies to look up, potentially distracting them.
- Timing is Key: Initiate the flank attack after the main team fight has begun. Attacking too early results in being focused down; attacking too late might mean the fight is already decided. Wait for the distraction.
- Resource Awareness: Know the locations of nearby health packs, especially near common flank routes or teleport destinations, for sustain after engaging or escaping.
- Stealth: Minimize sound cues. Crouch walking can help when nearing an ambush position. Be aware that Shadow Step itself is loud and visually obvious. The "Silent As The Grave" Stadium Power highlights the importance of reducing these cues.
Detailed Flanking Routes & Shadow Step Spots (Annotated Examples)
Mastering specific map routes is crucial. While visual diagrams are ideal, the following descriptions highlight key concepts for several maps:
- Attack Point A: The choke is notoriously difficult. Use Shadow Step to bypass it by teleporting into the hotel balcony on the right, or through the window above the choke point on the left. An advanced, risky TP existed under the map (likely patched).
- Defense Point A: Hold high ground positions overlooking the choke (e.g., statue area, hotel window) or use the side alleys/hotel for flanking opportunities against attackers pushing through.
- Street Phase: The narrow streets and side rooms (pub, bookstore) offer excellent close-quarters combat and flanking opportunities. Use Shadow Step to access upper floors for drop-down Death Blossoms.
- Final Point: The tight corridors around the final checkpoint are ideal for Reaper's brawling style and surprise attacks.
Generally strong for Reaper due to close-quarters points.
- Control Center: Use the side rooms and stairs to flank. Shadow Step onto the high platforms overlooking the central point for ambushes or Blossom setups. A good map for Brawl Reaper.
- Night Market: Utilize the market stalls and buildings for cover. Flank through the side alleys or use Shadow Step to reach the upper windows/balconies overlooking the point.
- Garden: The bridges and surrounding buildings provide cover and flanking paths. Shadow Step can be used to cross gaps or reach the balconies overlooking the central point.
A classic Reaper map due to tight chokes and flanking options.
- Attack Point A: Bypass the main choke by flanking through the left room (contains mega health pack) or using Shadow Step to reach the high ground platform on the right side. Teleporting onto the central archway is also possible.
- Defense Point A: Utilize the high ground platforms and side rooms for defensive positions and counter-flanks.
- Attack Point B: Flank through the corridors on the left or right. Use Shadow Step to reach the platforms surrounding the point or teleport directly behind the defenders.
Offers numerous flanking opportunities.
- Attack Point A: The left flank requires crossing a water gap; Shadow Step allows Reaper to teleport across this gap to attack from behind. The right side building also offers high ground access.
- Defense Point A: Hold the choke or use the high ground platforms for defense.
- Attack Point B: Use Shadow Step to reach the staircase on the right side of the point, or use the moving platforms to access the high ground on the left side for flanks or Blossom setups.
Other Maps (Brief Principles)
- Samoa: Features distinct points (Beach, Downtown, Volcano) with various flanking routes and vantage points accessible via Shadow Step.
- Circuit Royale / Havana: Very challenging due to extreme range and openness. Flanks must be deep and well-timed, often targeting isolated snipers or supports. Forcing fights in specific close-quarters areas (like buildings near checkpoints) is key. Spawn camping on Attack 1st can be viable with coordination.
- Eichenwalde: Attack Point A choke is tough; flank through the small side building or use high ground drops. The castle interior offers excellent close-quarters combat for the later phases.
- Nepal: All three sub-maps (Sanctum, Village, Shrine) offer strong flanking potential due to abundant cover and multiple pathways.
- Oasis: University offers good flanking through corridors and underground passages. City Center and Gardens require different approaches, utilizing buildings and cover around the point.
- Esperança (Push): Flank around the central tower during the initial Robot contest. The map's symmetry offers mirrored flanking opportunities.
Map knowledge is the cornerstone of effective Reaper play. Knowing safe teleport locations, common enemy setups, high-ground access points, and covered pathways allows Reaper to mitigate the inherent risks of his close-range kit and Shadow Step ability, enabling the surprise attacks and advantageous positioning necessary for success.
Map-Specific Death Blossom Strategies
Beyond general timing and surprise, consider map layout for Death Blossom:
- Chokepoint Carnage: Identify narrow passages or doorways where teams often funnel (e.g., Anubis A choke, King's Row first corner, Eichenwalde bridge). A well-timed Blossom from a hidden angle (often above or just around the corner) can devastate teams pushing through.
- Objective Clears: Points on Control maps (Lijiang, Nepal, Oasis, Busan) are natural congregation spots. Dropping a Blossom from high ground onto a contested point is a high-impact play.
- Payload Pushes: Use corners and high ground along the payload route. Blossom can halt pushes or clear defenders off the payload, especially around tight turns or checkpoints (e.g., King's Row street phase corners, Route 66 gas station).
- High Ground Hotspots: Identify key platforms or ledges frequently used for Blossom setups (e.g., balconies on King's Row, platforms above Volskaya B, ledges around Nepal points). Practice teleporting to these spots reliably.
6. Hero Matchups: Know Your Prey, Know Your Predators
Success as Reaper hinges not only on personal skill but also on understanding how to approach every other hero in the game. Matchups are dynamic, influenced by range, cooldown usage, team support, and individual player skill. Reaper's strength lies in close-quarters burst, while his weakness is range and vulnerability when cooldowns are down. Baiting crucial enemy abilities before fully committing is often the key to victory.
| Hero | Role | Difficulty | Key Strategy/Notes |
|---|---|---|---|
| Tanks | |||
| D.Va | Tank | Neutral/Unfav. | Bait/wait out Matrix, burst during reload/no Matrix. Dodge bomb. Vulnerable out of mech. |
| Doomfist | Tank | Favorable | Dodge abilities with Wraith, burst down close range. Avoid ult. |
| Junker Queen | Tank | Neutral/Fav. | Dodge Knife/Axe, burst close range. Cleanse ult. |
| Mauga | Tank | Neutral/Fav. | Large target for lifesteal, careful of Cardiac Overdrive. Brawl matchup. |
| Orisa | Tank | Unfavorable | Attack only when Fortify/Spin are down. Avoid direct confrontation. |
| Ramattra | Tank | Neutral | Poke form outranges. Brawl Nemesis form carefully, avoid Vortex. Wraith out of ult. |
| Reinhardt | Tank | Favorable (Alone) | Walk through shield, shred armor. Avoid Charge/Fire Strike. Vulnerable with team support. |
| Roadhog | Tank | Skill/Unfav. | Bait/dodge Hook. Burst him down if hook misses. High lifesteal target. |
| Sigma | Tank | Unfavorable | Flank carefully, bait Grasp/Rock. Attack when cooldowns down. Avoid range. |
| Winston | Tank | Favorable | Easy lifesteal target, low damage output. Ignore bubble dance, just shoot him. |
| Wrecking Ball | Tank | Neutral/Fav. | Punish dives if he stays close. Hard to pin down. Ignore him or focus backline. |
| Zarya | Tank | Unfavorable | Attack only when bubbles are down. Avoid high charge. Beam ignores Wraith. |
| Damage | |||
| Ashe | Damage | Unfavorable | Must flank/surprise. Dodge Dynamite, avoid Coach Gun distance. |
| Bastion | Damage | Skill (Form Dep.) | Shreds Recon form. Avoid Turret form entirely, use cover/flank. |
| Cassidy | Damage | Skill (Range Dep.) | Reaper wins close, Cass wins mid. Bait/dodge Hinder Grenade. |
| Echo | Damage | Unfavorable | Hard to hit in air. High burst potential. Needs team focus or catch grounded. |
| Genji | Damage | Neutral/Skill | Bait Deflect. Track mobile target. High burst if shots land. |
| Hanzo | Damage | Unfavorable | Must flank/surprise. Avoid sightlines, Storm Arrows. |
| Junkrat | Damage | Skill | High close burst potential (combo). Avoid trap. Dodge mines/ult. |
| Mei | Damage | Neutral/Skill | Wraith before freeze completes. Bait Cryo/Wall. Burst her down. |
| Pharah | Damage | Very Unfavorable | Cannot reliably hit. Requires hitscan teammates. |
| Reaper | Damage | Skill | Aim, positioning, cooldown management duel. |
| Sojourn | Damage | Unfavorable | High mobility/burst. Must flank/surprise. |
| Soldier: 76 | Damage | Skill (Range Dep.) | Reaper wins close, Soldier wins mid/long. Dodge rockets, flank him. |
| Sombra | Damage | Neutral/Skill | Hack disables Wraith. Spread can reveal. Can duel if hack dodged. |
| Symmetra | Damage | Neutral/Skill | Destroy turrets quickly. Avoid fully charged beam. Burst her down close. |
| Torbjörn | Damage | Neutral/Unfav. | Destroy turret. Bait Overload. Careful duel up close. |
| Tracer | Damage | Neutral/Skill | Hard to hit. Potential one/two-shot kill close. Bait Blinks/Recall. |
| Venture | Damage | Neutral/Skill | Avoid Drill Dash burst. Wraith out of ult. Burst her down. |
| Widowmaker | Damage | Very Unfavorable | Cannot contest range. Must flank/surprise deep. |
| Supports | |||
| Ana | Support | Skill/Slight Unfav. | Bait Sleep/Nade. Flank target. Wraith cleanses Nade. |
| Baptiste | Support | Unfavorable | Destroy Lamp first or bait cooldowns. Avoid burst damage. |
| Brigitte | Support | Unfavorable | Keep distance, break shield. Bait Bash/Whip. Hard to duel. |
| Illari | Support | Neutral/Skill | Destroy Pylon. Dodge Outburst. Flank target. |
| Juno | Support | Neutral/Unfav. | (Needs more data) Mobility/sustain potentially problematic. |
| Kiriko | Support | Skill/Slight Unfav. | Bait Suzu before commit/ult. Hard to pin down. Flank target. |
| Lifeweaver | Support | Favorable | Easy flank target if cooldowns managed. Break Tree quickly. |
| Lúcio | Support | Unfavorable | Bait Boop/Amp. Hard to kill due to mobility/heal/ult. |
| Mercy | Support | Favorable | Easy flank target if GA down or isolated. Prioritize kill. |
| Moira | Support | Neutral/Skill | Bait Fade. Can duel, but securing kill is hard. |
| Zenyatta | Support | Favorable (Target) | Easy flank target. Kill quickly. Wraith cleanses Discord. Avoid ult. |
Detailed Analysis vs. Tanks
Reaper's reputation as a "tank buster" is conditional. He excels against certain tanks but struggles significantly against others.
- D.Va: A challenging matchup. Her Defense Matrix completely negates Reaper's damage and lifesteal, including Death Blossom. Boosters allow her to escape or knock Reaper back. The strategy is to bait out Matrix or attack during its cooldown/when she's reloading. Reaper can win the duel if D.Va is de-meched. Wraith Form or a well-timed "Fake Shadow Step" can dodge her Self-Destruct. Good D.Va players actively deny Reaper value.
- Doomfist: Generally favorable. Reaper's close-range damage shreds Doomfist quickly. Wraith Form can be used to dodge Seismic Slam or Rocket Punch. Doomfist's ultimate, Meteor Strike, can be avoided with Wraith Form or Shadow Step (including the fake step tech).
- Junker Queen: Leans favorable but requires caution. Her smaller hitbox can make landing full shotgun blasts inconsistent. Commanding Shout provides temporary health and speed, making her harder to burst down. Jagged Blade (thrown knife) can pull Reaper out of position or force Wraith Form. Carnage (axe swing) applies a wound that reduces healing received (including lifesteal). Wraith Form or Shadow Step can cleanse the Rampage ultimate's anti-heal effect. Focus on bursting her down quickly and dodging her key abilities.
- Mauga: A newer matchup, likely neutral to favorable. Mauga's Cardiac Overdrive grants lifesteal and damage reduction, making him and nearby allies harder to burst. He can deal significant damage at mid-range. However, his large hitbox makes him an excellent target for Reaper's lifesteal. Reaper synergizes well with an allied Mauga due to their shared desire for close-range brawls.
- Ramattra: Neutral. Ramattra's Omnic form has poke damage that outranges Reaper. His Nemesis form is a close-range brawl; Reaper can potentially win this duel through lifesteal if Ramattra misses punches, but Ramattra has significant armor and a block ability in this form. Ravenous Vortex slows Reaper and pulls him downwards, preventing Shadow Step or jumping. Wraith Form is needed to escape his ultimate, Annihilation.
- Reinhardt: Favorable if Reinhardt is isolated, but neutral or unfavorable if he has team support. Reaper can walk directly through Barrier Field to damage Reinhardt. His shotguns shred the barrier quickly. However, Reinhardt's Charge can instantly kill Reaper if pinned, and the Hammer + Fire Strike combo deals significant burst. Armor reduces Reaper's damage. Avoid fighting him head-on if he has support; flank him or attack when his shield is down or he's separated from his team.
- Roadhog: A skill-dependent matchup, often leaning unfavorable for Reaper. The primary threat is Chain Hook. If landed, the Hook + Shotgun + Melee combo can instantly kill Reaper. Baiting the hook with Wraith Form is crucial. Roadhog's large hitbox makes him a prime target for generating lifesteal via The Reaping, but his Take A Breather provides damage reduction and significant self-healing. If the hook is missed, Reaper can often win the duel. Reaper often functions as ultimate charge for Roadhog.
- Sigma: Unfavorable. Sigma operates at ranges Reaper cannot effectively contest. Kinetic Grasp absorbs all incoming shotgun pellets and Death Blossom damage, converting it into shields. Accretion (rock throw) stuns Reaper, interrupts Death Blossom, and forces Wraith Form. His Experimental Barrier can block Reaper's approach or angles. Engaging Sigma requires careful flanking, baiting his cooldowns (especially Grasp and Rock), and attacking during windows of vulnerability.
- Winston: Highly favorable matchup; Reaper is a primary Winston counter. Winston's Tesla Cannon deals low damage that is easily out-healed by The Reaping. Winston's large, circular hitbox makes it easy for Reaper to land most pellets, maximizing damage and lifesteal. While Winston can use his Barrier Projector to "bubble dance" and mitigate some damage, Reaper typically wins the close-range duel comfortably. Wraith Form can be used to avoid the knockback from Primal Rage. Reaper should actively pressure and punish enemy Winstons.
- Wrecking Ball: Neutral to favorable. Wrecking Ball focuses on disruption and mobility rather than direct duels. Reaper can punish Ball's dives if he lingers too close after slamming or rolling through. Adaptive Shields grant Ball significant temporary health, making him difficult to burst down quickly. Wraith Form can avoid Pile Driver damage and Minefield explosions. Ball's high mobility makes him hard to pin down, but often Reaper is better off ignoring Ball and focusing on the enemy backline that Ball is trying to disrupt.
- Zarya: Unfavorable, especially at high energy. Particle Barrier (self-bubble) and Projected Barrier (ally bubble) completely negate Reaper's damage and lifesteal, while simultaneously increasing Zarya's damage output (charge). A high-charge Zarya's beam melts Reaper very quickly. Her beam damage is consistent and harder to mitigate than projectile damage. The strategy is to attack Zarya only when her bubbles are on cooldown or focus other targets entirely. Graviton Surge, however, provides an excellent setup for Death Blossom if Zarya is an ally.
The pattern against tanks is clear: Reaper dominates those with large hitboxes and low burst/mitigation (Winston) but struggles immensely against armor (Rein), damage negation (D.Va, Sigma, Orisa), strong CC (Hog, Orisa, Sigma), and high sustained damage (high-charge Zarya). Effective tank engagement requires careful target selection and cooldown tracking.
Detailed Analysis vs. Damage
Reaper's duels against other Damage heroes are heavily range and cooldown dependent.
- Ashe: Unfavorable. Ashe excels at mid-to-long range where Reaper is ineffective. Dynamite applies a burn DoT that forces Wraith Form or deals significant damage. Coach Gun creates distance and knocks Reaper back. B.O.B. acts as a powerful distraction or secondary threat. Reaper must rely on surprise flanks to close the distance and secure a kill before Ashe can react or escape.
- Bastion: Favorable up close (Recon form), Unfavorable vs. Turret. Reaper can easily duel Bastion in his mobile Recon form. However, Configuration: Assault (Turret form) outputs overwhelming damage that melts Reaper instantly; this requires using cover, flanking, or waiting for the transformation to end. A-36 Tactical Grenade provides burst damage and rocket jump mobility. Wraith Form or "Fake Shadow Step" can dodge Configuration: Artillery strikes.
- Cassidy: A skill matchup heavily dependent on range. Cassidy wins at mid-range due to his accurate Peacekeeper. Reaper has the advantage at point-blank range if he lands his shots. Magnetic Grenade hinders movement and deals significant burst damage, often forcing Wraith Form. Combat Roll creates space and reloads. Deadeye is slow and leaves Cassidy vulnerable to flanks. Strategy involves baiting the grenade, closing distance rapidly, and out-damaging him before he can create space.
- Echo: Unfavorable. Her flight makes her extremely difficult for Reaper's shotguns to hit reliably. Sticky Bombs followed by Focusing Beam provide lethal burst damage, especially on targets below half health. Duplicate allows her to copy Reaper or a counter. Requires team focus fire or catching Echo while she is grounded or low on flight fuel.
- Genji: Neutral/Skill Matchup. Deflect can reflect shotgun pellets back at Reaper. Swift Strike provides high mobility for engagement and escape. Dragonblade forces Reaper to use Wraith Form or maintain distance. Reaper's spread can make hitting the agile Genji challenging. However, Reaper's high burst damage can quickly eliminate Genji if shots connect. Baiting Deflect is key before committing to damage.
- Hanzo: Unfavorable. Possesses one-shot headshot potential at ranges Reaper cannot contest. Storm Arrows provide significant burst damage. Lunge creates distance. Sonic Arrow can reveal Reaper's flanking attempts. Requires deep flanks and the element of surprise to get within lethal range before Hanzo can react.
- Junkrat: Skill Matchup. Junkrat has extremely high burst potential at close range with his Grenade + Concussion Mine combo. Steel Trap can immobilize Reaper, setting up an easy kill. Concussion Mine also provides Junkrat with excellent mobility for escape or repositioning. Rip-Tire can be dodged with Wraith Form or "Fake Shadow Step". Reaper can win if he gets close, avoids the trap and combo, and lands his shots first.
- Mei: Neutral/Skill Matchup. Mei's primary fire slows and eventually freezes, forcing Wraith Form. Ice Wall can block Reaper's path, escape route, or Death Blossom. Cryo-Freeze provides invulnerability, cleanse, and healing, stalling fights. Her secondary fire (Icicle) has lethal headshot potential. Reaper's burst damage can pressure Mei effectively, especially if she's caught off guard. Use Wraith Form preemptively to avoid being frozen. Breaking Ice Wall pillars quickly (takes about 4 shots) can be important. Baiting her cooldowns (Cryo, Wall) is crucial for securing kills.
- Reaper (Mirror): Pure skill matchup. Victory depends on superior aim, positioning, timing, and Wraith Form baiting. Often, the player who lands the first clean shot has a significant advantage.
- Sojourn: Unfavorable. Power Slide provides high horizontal and vertical mobility, making her difficult to pin down. Her primary fire deals consistent damage, and a charged Railgun shot provides lethal burst damage at any range. Disruptor Shot zones areas and deals damage over time. Reaper must rely on flanking and surprise attacks to get close enough for a kill.
- Soldier: 76: Skill matchup, heavily range-dependent. Soldier wins comfortably at mid-to-long range. Reaper has the advantage in very close quarters. Helix Rockets provide burst damage. Sprint allows Soldier to maintain distance or escape. Biotic Field provides self and team healing, making him harder to burst down. Reaper needs to close the distance effectively via flanks or using cover.
- Sombra: Neutral/Skill Matchup. Hack is the primary threat, disabling Reaper's abilities, most importantly Wraith Form. Virus deals damage over time. Translocator provides an instant escape. EMP disables abilities and can set up kills or counter Death Blossom. Reaper's shotgun spread can be effective at spy-checking and revealing Sombra. If Hack is dodged or baited, Reaper can often win the duel due to higher burst damage and health pool. Wraith Form cleanses Virus.
- Widowmaker: Very Unfavorable. Widowmaker's Widow's Kiss (sniper rifle) provides lethal one-shot potential from ranges Reaper cannot contest. Grappling Hook allows escape. Venom Mine can alert her to flanks. Requires deep, unexpected flanks to get close enough for a kill, often needing team distraction.
Reaper's success against other Damage heroes relies heavily on his ability to force engagements within his optimal range (<10m) while avoiding or mitigating the enemy's strengths (range, CC, burst). Flanking, surprise, and cooldown management are paramount.
Detailed Analysis vs. Supports
Supports are often Reaper's primary targets due to their lower health pools and high impact on team fights. However, many possess tools to counter him.
- Ana: Skill Matchup, leaning slightly unfavorable for Reaper. Sleep Dart is a hard counter, cancelling Death Blossom or setting up an easy kill. Biotic Grenade blocks Reaper's lifesteal (The Reaping) and simultaneously heals Ana/her allies. Nano Boost can save a target or counter Blossom. Ana prefers range, but is vulnerable up close if her cooldowns are down. Baiting Sleep and Nade is essential before committing to a kill. Wraith Form cleanses Nade and dodges Sleep. Ana is a high-priority flank target.
- Baptiste: Unfavorable. Immortality Field is a major obstacle, preventing kills and negating Death Blossom value unless the lamp is destroyed first. Regenerative Burst provides significant self and AoE healing. Exo Boots allow him to reach high ground easily, escaping Reaper's effective range. Baptiste also has high burst damage potential with his rifle. Destroying the Lamp or baiting cooldowns is necessary.
- Brigitte: Unfavorable. Whip Shot knocks Reaper back, creating distance and denying damage/lifesteal. Shield Bash stuns (interrupting Death Blossom) and provides mobility. Inspire provides passive AoE healing. Repair Pack offers burst healing and armor. Rally grants overhealth and speed. Brigitte is surprisingly durable with her shield and armor, and her CC makes close-range duels dangerous for Reaper. Breaking her shield or attacking when cooldowns are down is the best approach, but often requires assistance.
- Kiriko: Skill Matchup, leaning slightly unfavorable. Protection Suzu is a powerful counter, providing brief invulnerability and cleansing effects, completely negating Death Blossom damage or saving a target from Reaper's burst. Swift Step allows her to instantly teleport to an ally, escaping danger. Kunai deal very high headshot damage. Wall Climb aids escape. Baiting Suzu is absolutely critical before using Death Blossom or committing to a kill on her or her protected ally. Good Kirikos are elusive flank targets. She also synergizes well with Reaper.
- Lifeweaver: Favorable. Petal Platform provides vertical escape, but Reaper can potentially follow with Shadow Step. Life Grip is his main defensive tool, pulling an ally (potentially Reaper's target) to safety, negating a flank or Blossom kill. His Thorn Volley damage is relatively low. Tree of Life provides significant AoE healing but can be destroyed. He is generally an easy flank target if his cooldowns are managed.
- Lúcio: Unfavorable. Crossfade (Speed Boost) allows him and his allies to easily escape Reaper's effective range. Wall Ride makes him highly evasive. Soundwave ("Boop") is a major nuisance, constantly knocking Reaper back, denying damage and lifesteal, and potentially interrupting Death Blossom. Sound Barrier provides substantial overhealth, directly countering Death Blossom. He is very difficult to kill. Baiting Boop and Amp it Up is necessary before engaging. Lucio synergizes extremely well with Reaper in Brawl comps.
- Mercy: Favorable. Guardian Angel provides high mobility escape, but requires an ally within range and line of sight. Valkyrie enhances her mobility and healing/boosting. Her damage output is low. She is a prime flank target, especially if caught isolated, using GA on cooldown, or during Resurrect. Prioritize killing her quickly to prevent heals and revives.
- Moira: Neutral/Skill Matchup. Fade is an excellent escape tool, providing temporary invulnerability and cleanse, making her hard to pin down. Biotic Orb (damage) adds pressure, while the healing orb provides sustain. Coalescence offers ranged damage and healing. Reaper can duel Moira, but securing the kill before she Fades requires good burst damage or baiting the cooldown.
- Zenyatta: Favorable target, but dangerous. Discord Orb significantly increases the damage Reaper takes, making him melt quickly. Transcendence provides AoE invulnerability, completely countering Death Blossom. However, Zenyatta has no mobility and a relatively large, circular hitbox, making him an extremely easy target for flanks. Wraith Form cleanses Discord Orb. The strategy is to flank and eliminate him very quickly before he or his team can react.
Supports with mobility, CC, or denial abilities are Reaper's biggest hurdles. Immobile supports are prime targets, but their specific abilities (Sleep, Nade, Discord, Suzu, Lamp) must be respected and ideally baited before committing to an attack.